Category Archives: Windows Secrets

How to Undelete a File – even if you’ve permanently deleted it.

Even if you have never heard of it, Windows System Recovery works silently in the background as you use your computer. It’s a small but very powerful tool that you can use to rescue a file that you have accidentally deleted, even if you have permanently deleted it. Here’s how it works:

1. Windows System Recovery is turned on by default when you install Windows. Unless you have specifically turned it off, it’s running now. Check this by clicking Start then right clicking Computer and choosing Properties. Click on System Protection and you will very likely see that System Restore is on.

2. Next, you must know the exact name of the file that you deleted. It doesn’t matter what kind of file it is, Windows can recover it. However, you must know the exact name of the file, including what kind of file it was. The last three letters, whether they be .txt or .avi or .jpg, etc.,  are important here.

3. The file can’t be something that you just saved and then deleted. There has to be a restore point in between the time you created the file and the time that you deleted it. Go back to Computer and check how often Windows creates a restore point. Restore points can be created manually but won’t be any good after you have accidentally deleted a file.

4. Here’s the fun part. Windows Notepad can save a file as anything, it doesn’t have to save something as a .txt file. What we’re going to do is create a phony file then ask Windows to find an older version of that file.

5. Go to the folder where the file was when you deleted it. In this example, we will use a file that was accidentally deleted from our desktop.

6. Open Notepad and type a couple of letters in the window that opens up. Next, click up on the top left to bring down the Save As menu:
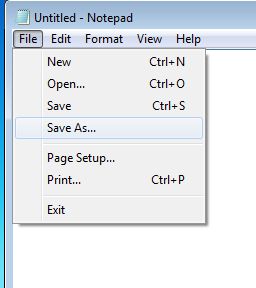
Photo of Windows Restore   menu
Click on Save As.


7. Once the next menu comes up, click on the line at the bottom to get to ‘All files’. Like this:
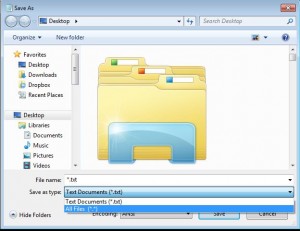
Photo of Windows Restore  Menu 2
Make sure that All Files is highlighted.


8. We don’t want to save the file we just created as a text file, unless it was a text file that you accidentally deleted, right? Let’s make this file a Word document. We will type in the name and the file type, separated by a period, in the slot. This is what you want to see:
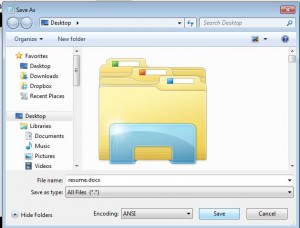
Photo of Windows Restore  Menu 3
We used ‘resume.docx’ for this example.


9. We saved that file to our desktop as a .docx file, even though it is really a simple .txt file. Here’s how it looks on our desktop, complete with the Word icon:

Photo of Windows Restore  Menu 4
Although the file is a text file, Windows thinks it is a Word document.


10. The file that you create doesn’t have to be a word or text based file. With Notepad, you can create any type of file that you want. Of course, the file you create isn’t a real version of that file type, it’s just identified or named as that. In other words, if you create a video or photo file, let’s say an ‘.avi’ file, Windows will think it is an .avi file but it won’t be able to open it. We made an .avi file, just to show you that it can be done:
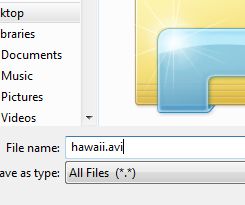
Photo of Windows Restore  Menu 5
We told Windows that this is an an .avi video file, even though it isn’t.

Here is how this phony .avi file looks on our desktop:

Photo of Windows Restore  6
We use the VLC player for our videos, hence the icon.


11. Now for the trick. If we had deleted that hawaii.avi file, all we have to do to get it back again is right click it and choose ‘Restore previous versions’. Right click the file and you’ll see this:
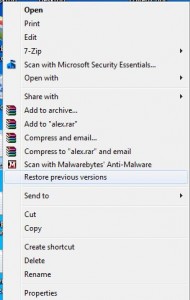
Photo of Windows Restore  Menue 7
We just want one old version but Windows might have a few available.

Depending on how old the file is and how often Windows has created a restore point, you may have a few version of the same file available for restoration. No problem. You can copy any file in the vault to any place on your computer. Once you click ‘Restore previous version’, this menu pops up:
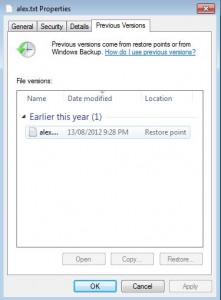
Photo of Windows Restore  Menu 8
There is only one version of this particular file available.

In this case, the file hasn’t been changed since August 13, 2012. If it had been changed, there would be several other versions of the same file available. All you’d have to do is to copy the one with the correct date and paste it into any folder on your computer. If you aren’t sure of what the correct date is, copy each file and put each one in a different folder. Remember that you can’t have two files with the same name in the same folder.


12. Highlight the file you want. You can open it to see if it’s the right one, copy it to another folder or ‘Restore’ it to the folder where we created the phony file.  In this example, we would choose “Restore’ and Windows would then replace the file we created with the version of that file which was stored in its System Recovery folder.


TIP: This procedure will work for files or folders. If you have deleted just about anything, and you have a restore point between the date the file was created and the date you deleted the file, you can get it back…even if you permanently deleted that file.


This exercise is relatively simple but it’s worth trying out before you get stuck. Sometimes if you accidentally delete something, you panic. If you’ve run through this demo step by step, there will be no need to panic when things go bad. We hope this helps you someday. Questions and comments are welcome.

Thanks for reading!


Windows 8 – The latest but maybe not the greatest


Windows 8 is due out in a few days. We’ve tried the evaluation version a couple of times but didn’t get very far with it. After loading it twice, we decided that it wasn’t worth the effort to get to know it. The change was a bit too much from the Windows 7 that we’ve been using. Sure, we love to try new things but, because this was an evaluation copy, we didn’t feel comfortable changing everything around just to see what it felt like.

If we buy a new laptop or desktop, we might be forced into learning the new OS from Microsoft but, for now anyway, Windows 7 works just fine. Did you know that many businesses are still using Windows XP? XP was the last version of Windows that allowed you to run it on several different systems. For that reason alone, we’ve stopped buying anything from Microsoft.

If a Microsoft OS comes with a computer, we’re fine with that but we won’t go out and purchase anything that Microsoft puts out otherwise. Why? Because the pricing of any Windows version is far beyond what we consider a reasonable expense. Apple, for instance, offers their OS X software at surprisingly low prices, even offering a family package that allows the purchaser to load the OS on several different computers.

Yes, Apple sells hardware and their prices for that hardware are atrocious but their lovely operating system doesn’t break the bank. Windows, on the other hand, has to get all of their money from their various bits of software, mainly Windows. Additionally, Microsoft is heavily into Digital Rights Management, something that we feel goes against creativity and the development of new products and ideas. Part of the reason that the U.S. is heavily into a recession now can be traced back to initiative-killing DRM.

Photo of Windows 8
Lots of versions, no native DVD support…many reasons to ignore Windows 8


Something that we’ve played with before, and loved, is Linux. We’re in the process of moving towards a version of Ubuntu on one of our laptops, just to see what’s changed since the last type we tried. We’ll post our success or failures as we proceed. For now, tell us what you think of  Windows 8. Have you used it? Did you like it? Let us know what your experience has been like.

Thanks for reading!
How to Recover Taskbar Icons


Every now and then, we’re not sure why, we lose some or all of our taskbar icons. We use Windows computers here and it seems to be a fairly common problem. Here’s how to get them back….without rebooting (restarting) your computer.

1. Press these three keys at the same time: Ctrl Alt and Del   (Control Alternate Delete). This trick is sometimes called ‘The Three Finger Salute” by frustrated Windows users. Once you hit those three keys, the Task Manager screen will come up. It looks like this:

Photo of Task Manager Screen
Ctl/Alt/Del brings up this screen. Click on Start Task Manager.

See Start Task Manager down at the bottom? Click that.


2. Task Manager looks like this when it opens. Depending on how many programs or processes you have running, the list on your menu may vary from ours.

Photo of Task Manager
Task Manager opens with this screen.


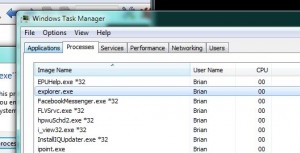
3. Scroll down using your mouse wheel or grab the slider on the right side of the menu box until you find the words ‘explorer.exe’. Like this:

Photo of Task Manager
You’re looking for explorer.exe.

When you find it, click ONCE on it.


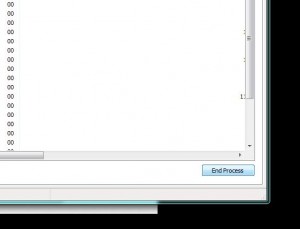
4. What you want to do is STOP explorer.exe from running. In other words, you want to ‘End Process’. See the button on the lower right? Once you have explorer.exe highlighted, click on the ‘End Process’ button. Here’s the button, just to make sure:

Photo of End Process Button
That’s it, down on the lower right. Click it.


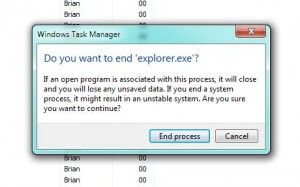
5. Windows will warn you that it thinks this might be a bad idea. Ignore this warning:

Photo of Windows warning menu.
Windows is just making sure that you know the risks (there aren’t any). Click End Process.


6. Once you click End Process, you will not have any icons across the bottom of your taskbar, assuming that your taskbar is at the bottom of your screen. It could be on any of the four sides of your monitor, right? Same thing, different spot. So far, we’ve been on the Processes menu tab. What we want next is the Applications tab. Click Applications now:

Photo of Processes Tab
Click on the tab to the left, Applications.


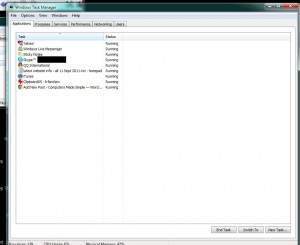
7. This is your Applications tab. What you are looking for now is the button that says ‘New Task’. Lower right, like this :

Photo of Applications Menu
Lower right, look for New Task.


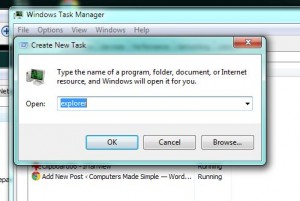
8. After you click on the button “New Task”, this menu will pop up. If it doesn’t already have the words ‘explorer.exe’ in it, type them in, all small case and don’t forget the period between explorer and exe.

Photo of Small Menu
explorer.exe should be there already. If it’s not, type it in.


Wait for a second or two and voila! Your icons will be back on your taskbar. Run over this a couple of times to get it down pat and then you can use it yourself or teach others how to do it. You’ll be an expert in their eyes. Yay for you!

Thanks for reading! Check out our Facebook page. Like it and we’ll like you!   https://www.facebook.com/ComputersMadeSimple?ref=hl


Zip Folders – How to make them


What’s a zip folder? Before we make one, we should explain what it is. Let’s say you have 100 photos of your last trip and you want to send them to your Mom. You could send them one by one but that would take a long time and many emails. If you put them inside of a zip folder, you’d be able to send that folder attached to an email. It would be a bit smaller than the total size of the photos themselves. Zip folders compress data and package it in one unit. Consider them a suitcase. You could take your shirts and blouses on hangers or you could stuff them all into a suitcase, close the lid tight and carry one suitcase instead of dozens of pieces of clothings. Oh, the files don’t get wrinkled in a zip file.

OK, here we go. We’ll create a zip folder and then add photos to it. This will all take place on your desktop but you can do any of these steps inside any other folder on your computer. You can even create a zip folder on a flash drive, if you want.

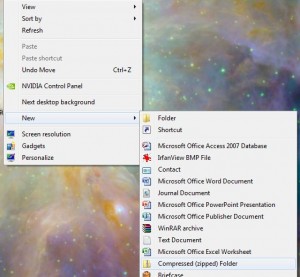
1. Right click your desktop. A menu will pop up. Scroll down to the word ‘New’ and let your cursor hover there until the second menu pops out. This is what you’ll see:

Photo of how to make a zip file 1
You won’t have all the same choices on the second menu but you will have Compressed (zipped) Folder.


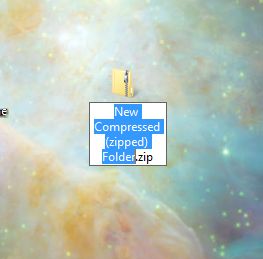
2. Click on the words ‘Compressed (zipped) Folder. A little icon of a folder with a zipper on it and the first words highlighted in blue will pop up. Like this:

Photo of How to make a zip file 2
The blue highlight means that you can change the name to something else. Just type ‘Desktop Stuff’ or whatever you want.


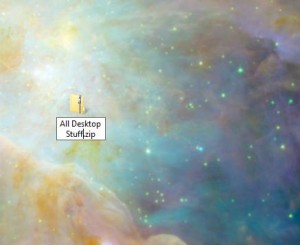
4. You can put anything you want into a zip folder. Every now and then we create one to hold all of the tiny bits of stuff, photos etc., on your desktop. We changed the name of that folder to ‘All Desktop Stuff’, like this:

Photo of How to make a zip file 3
Now you just have to drag and drop items into the zip file you just made.


The zip folder you created is empty. It’s nothing right now, zero bytes. You can drag and drop files into it or copy and paste, it’s the same thing. There are no size limits to a zip folder, so you can add anything you want to it. If you are planning to email the folder to someone, check with your email provider to find out what its size limitations are. With Hotmail, the size limit is 10 megabytes but with Gmail, it’s more. Do your homework and you’ll be fine.

Thanks for reading!

Slow Computer? Here are some tips.


If your computer is slow, slower than normal, there are several things you can do to try and fix it. Let’s see what we can do to speed up your computer:

1. Every time you add a program to your computer, it wants to run every time your computer starts. It wants to start when your computer starts and continue to be ready for action, even though it slows down your computer. Software companies think that you won’t notice the difference in speed and you might not, if you install just one or two programs. However, most of us install more than a few programs. If each of those programs runs all the time the computer is on, then the computer itself will start to run slower and slower. If you want to make your computer run faster, let’s get rid of some of them.

Tip: Preventing a program from starting when Windows starts does not mean that the program won’t work. You just have to start it from a shortcut on your desktop or from the Start menu. 

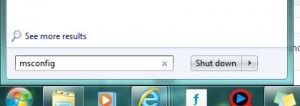
2. Go to your start button or the Microsoft Globe down on the bottom left, click it and type msconfig in the white space there. Like this:

Photo of msconfig
type msconfig in the space and hit enter


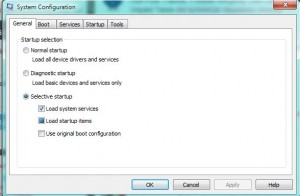
2. Hit Enter and the following menu will pop up after a second or two:

Photo of msconfig menu
This is the first thing you see when you start the msconfig program.


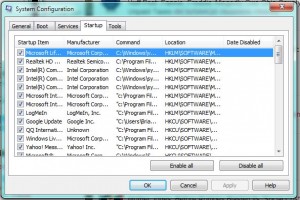
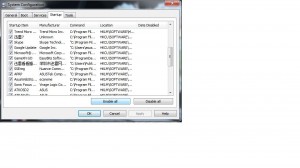
3. Look up at the top and you will see ‘Startup’. Click on it to see what programs are starting when you start Windows. Here is what we see on one of our computers:

Photo of startup menu
This is what you see, all the programs that are checked start when Windows starts.


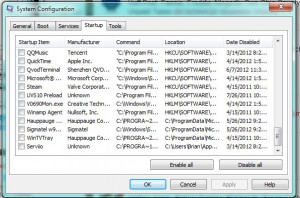
4. As you can see, there are quite a few programs that want to start. Here is a shot of ones that we have disabled:

Photo of disabled startup programs.
We have disabled all of these programs from starting when Windows starts.


5. How do you know which ones that need to run, as opposed to those that want run? Check with Google. You don’t need your CD/DVD burning software to run all the time, right? Some programs, Skype for example, use a lot of resources. So does MSN Messenger. If you’re not going to chat every time you use your computer, turn those off.

If you don’t know what a program is, check it out on Google.  Some are simply marked ‘unknown’. If the program is unknown to Windows, you can be sure that you don’t need it. Here is an example of an unknown program mentioned on a friend’s startup menu:

Photo of unknown program in startup menu

6. You can disable everything in the start menu if you want. Windows will argue sometimes but it will still run. All of the programs it needs, it makes sure to start. Anything in the startup menu can be disabled. Your scanner might not work or your sound system will be silent but your computer will run faster. You can add some back, one by one, to see what is slowing your computer down or causing conflicts. Whatever you want to do, this is one of the places to do it. Try it out.

Thanks for reading!

Here is a link to our Facebook page. Click ‘like’ and you’ll be able to follow us there, too:

https://www.facebook.com/ComputersMadeSimple?ref=hl