
In our last post we described how to use DVD Flick to ‘author’ a DVD video. When you author a DVD, you’re creating a set of files that you can burn to a normal DVD which will then be able to play on a standalone DVD player. It will play on your computer too, of course.
Today, we’re going to take those files which we created with DVD Flick, and burn them to a DVD. Here are the steps:
1. Pop a blank writable DVD into your DVD burner.
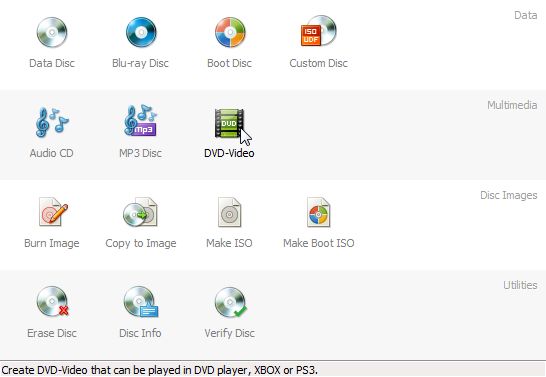
2. Open Burnaware, download it here: http://www.burnaware.com/ , and choose DVD Video on the main menu:
3. Burnaware then opens another menu, shown here:
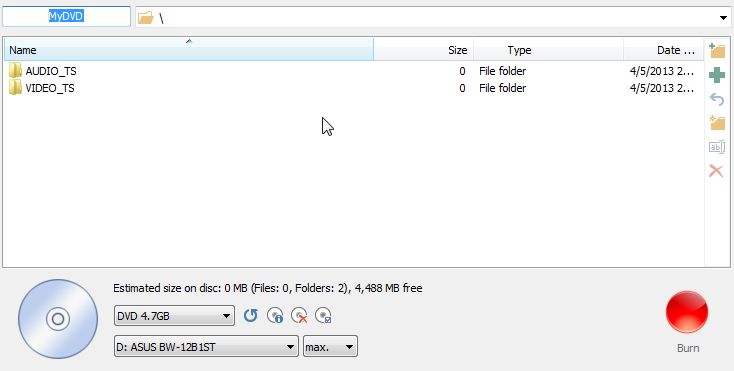
Burnaware knows that it needs to replace its current AUDIO_TS and VIDEO_TS folders (which are empty) with the AUDIO_TS and VIDEO_TS folders that we created using DVD Flick. Click on the green arrow up on the top right. This will open Window’s file menu. Search for the DVD folder in My Documents.

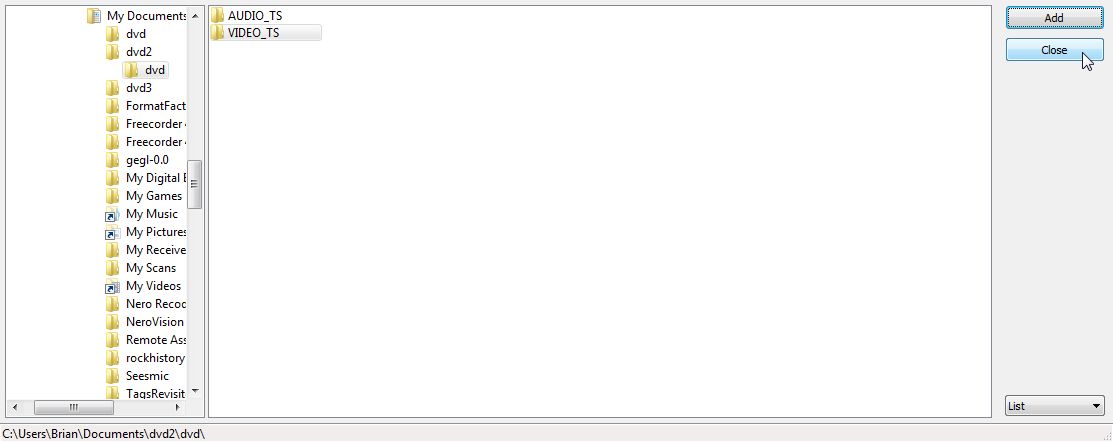
DVD Flick has already made the folders you need, you just have to find them. Click on the VIDEO_TS folder and choose Add. (You only need to choose the VIDEO_TS folder. Since we made the video from an AVI file, sound and video are all in the VIDEO_TS folder. This is the way it will be for virtually every DVD you create this way.)
Remember when we said Burnaware had already placed two empty folders in its menu? When you try to add your own Video and Audio folders, this error menu comes up. That’s normal. Simply click ‘Replace’ and your full VIDEO_TS and AUDIO_TS folders will be replace the empty ones. Once you’ve added the folders, click Close:
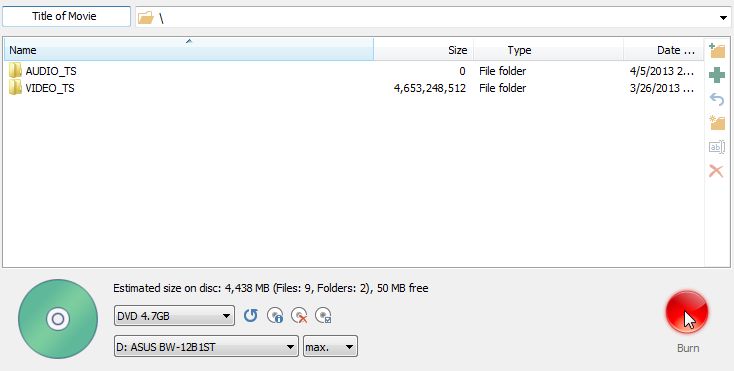
4. Back to the main menu again. This time, you’ll see that the VIDEO_TS file is full and the red burn button is lit. Don’t forget to make a title for the DVD. See the highlighted MYDVD in this photo?
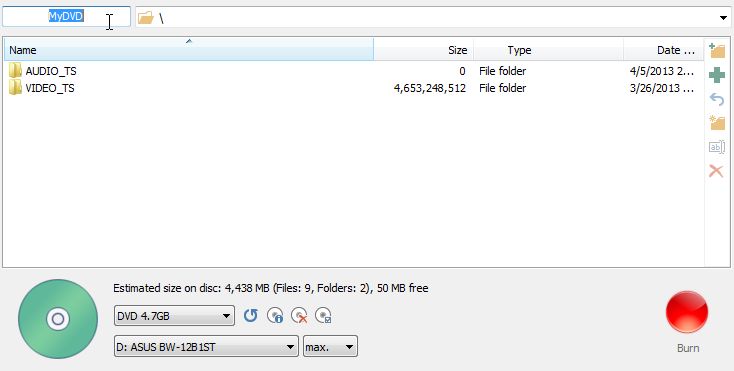
5. Name your movie by typing in that slot and then click the red Burn button:
The speed of the burning process depends on your computer’s speed, of course. Try to limit your computer use during the burning unless you have the latest and greatest computer out there. The burn takes a big chunk of your computer’s resources and you don’t want to make a ‘coaster’, right? Coaster is the old term for a ruined DVD.
That’s it! You’ve created a DVD that you can play anywhere, on your computer or on a standalone DVD player. Pat yourself on the back.
Thanks for reading! Questions and comments are welcome. Follow us on Facebook: Computers Made Simple
The first DVD-Audio players were released in Japan by Pioneer in late 1999, but they did not play copy-protected discs. Matsushita (under the Panasonic and Technics labels) first released full-fledged players in July 2000 for $700 to $1,200. —
Bye
This was spam but we removed the link and posted it. If this is true, it’s interesting that DVDs have only been around for 13 years. You can buy BluRay players now for $35.00. Things change!