Tag Archives: windows dvd maker

DVD Covers – Create your own for free

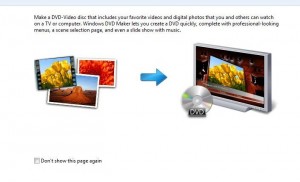
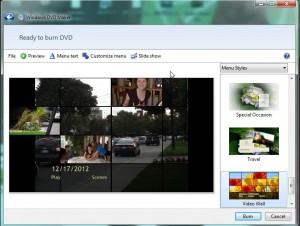
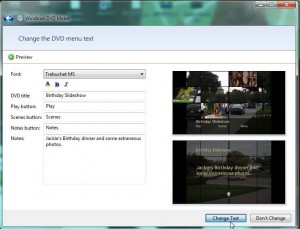
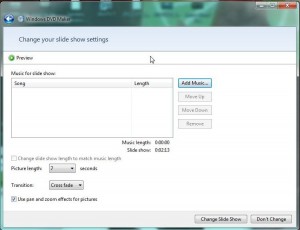
We’ve shown you how to create DVD movies and DVD slideshows in our last two posts. Since many of the DVDs that you create will be gifts, why not dress them up with an attractive cover?

DVD cases, at least the basic plastic ones, are about five inches by five inches. This refers to the size of the image that you’d want to create. For the front cover, a combination of words and images would work well and for the back cover, perhaps some notes or a dedication would be better. Either way, the covers are easy to create.

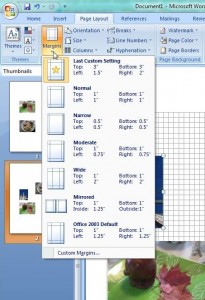
Here’s how we prepared a cover in Word. Setting the margins to leave a five by five square in the middle of the page works best. We used a top and bottom margin of three inches and one and a half inch on the left margin, two inches on the right. Then we chose to show a grid so we would know what our actual working space was. Here’s how it looked in Word:

DVD Cover
Use the Custom Margin setting.


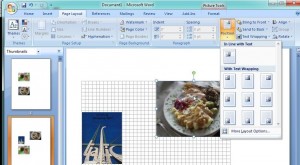
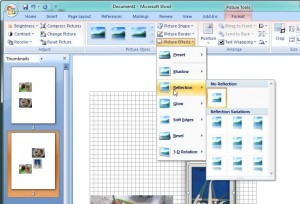
Arrange the photos in the square and dress them up a bit using the menus in Word. Here are a couple of the settings that you can use:

cover 3

DVD Cover  2
Choose the borders and other effects in this menu.


DVD Cover  3
Place each image with this menu.


There are almost an infinite set of choices for your covers in Word. We’ve given you some ideas about the basics but you’re on your own as far as finalizing everything else. Once you have the photos set up, type in the words and print it up. Remember to leave a bit of wiggle room around the edge for cropping after you print. Keep your words away from the edge as much as you can. Our five by five dimensions are approximate, right?

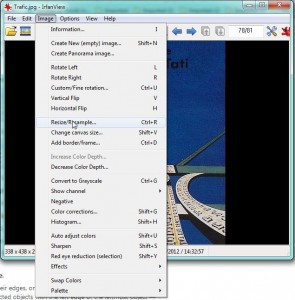
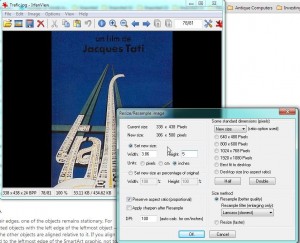
If you’ve created a DVD movie or copied a movie that you own, you can download cover art from the IMDB site, for example. Original movie posters abound on the Internet. Save the image to your computer, open it in Irfanview and adjust the size until one of the dimensions is about five inches. Since photos aren’t ever square, use your discretion as to which dimension you set to five inches. In our experience, setting the height to five inches is usually best, leaving the width to be settled according to the height you choose. You must preserve the aspect ratio in order for the image to look normal. Here are the menus you need when you’re editing a photo in Irfanview:

DVD Covers 4
You want to resize the image.


DVD Covers 5
Set the new height (usually) to 5 inches and make sure you select Preserve Aspect Ratio (Proportional) in order for the width to look appropriate. If you set the height, the width is set automatically.

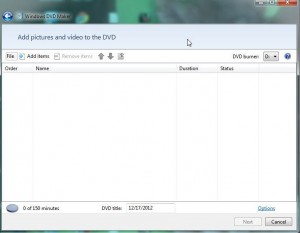
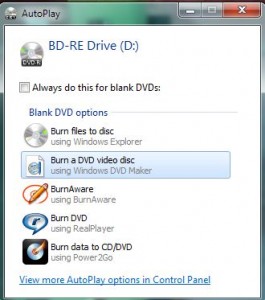
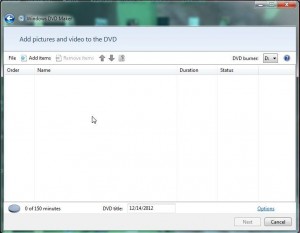
That’s about it, folks. Create the DVD using Windows DVD Maker, then use Word and/or Irfanview to create the cover. If you take your time, you’ll be able to come up with very professional results. If you have the program already, use Photoshop or GIMP to do the same thing. Most people have Word already, that’s why we chose it.

Thanks for reading! We love to hear your comments so don’t be shy, say something down below.

Free Slideshow Software

Slideshow 01
The splash screen for Windows DVD Maker.

We’ve all seen those magical slideshows before, right? Ken Burns has done whole movies using them. Baseball and the American Civil War came to life by using a relatively simple slideshow technique. Now, if you’re using Windows 7, you can release your inner Ken Burns by creating your own slideshow, complete with music accompaniment. Here’s how:

1. Most versions of Windows 7 and one version of Windows Vista, come with Windows DVD Maker. We mentioned this software in our last post, describing how to create DVD movies using AVI files. Here is that post: Making Movies using Windows DVD Maker  . The same software will also create a cool slideshow. You can either insert a blank writeable DVD or go to All Programs and run the program from there. Here is the first menu you see:

Slideshow 1
This time we are going to add photos (pictures) to the DVD menu.


2. You can  drag and drop photos into the blank space or use the standard Window’s browse menu. We dragged a series of photos from a folder into the open space in the window. Here’s what we ended up with:

Slideshow
Select the photos one by one holding the CTRL key down, then drag them all to the window.


3. Once the photos are in place inside the software, they are in a folder that Windows uses to create the DVD slideshow. Double click on the folder on the menu, the one that reads Slide show (? photos), and you will be able to rearrange them in the order that you want. If you do this beforehand, it’s probably easier but feel free to experiment. Drag the first photo to the first space and continue on through your photos. There is room on the DVD for a lot of photos, probably 140 or more, so if you want a specific order for them, it will take time. Here’s what the menu arrangement menu looks like:

Slideshow 02
Drag the photos up or down the line to arrange them.


4. Once the photos are arranged, click next and continue to design your slideshow. On the main menu, look to the right side and experiment with the different menu styles by clicking on any that look interesting. This sets up the menu or splash screen that you’ll see when the DVD first opens. There are lots of good ones so scroll through them all. Here’s what you’ll see:

Slideshow 03
Menu styles are on the right.


5. There are other parameters that you can set for the slideshow. On the top of the menu above, you’ll note where to change the Menu text, customize the menu or adjust the slideshow itself. The following photos show some of these settings:

Slideshow 06
Add a title, change the names of the buttons and add notes.


Slideshow 07
Add music, change the interval between slides and use different transitions.


The tools in the menu above are quite powerful for such a simple program. You can add music to fit the length of the slideshow, change the length of time each photo is on the screen; you can even change the way slides are presented in sequence. Once you’ve got some settings arranged, press the preview button and you’ll be able to run through the slideshow in test mode to see if everything works the way you want it to. If not, go back and change things again.

If you aren’t ready to burn the slideshow now, make sure you save the project for another time. If you are ready to record it to a DVD, simply press the burn button on the main screen.

TIP: Besides making video DVDs and slideshow DVDs, Windows DVD Maker will let you make multimedia DVDs as well. Add photos and slides to the same project and WDM will sort it all out and come up with an amazing DVD that will amaze your audience. You can record a narration track and add it to the slideshow, too. Use your own creativity to explore this free software.

Thanks for reading! We hope you enjoyed our last two posts. We also hope you will create wonderful DVDs for your friends and families, just in time for the holidays.


Avi to DVD

We had some AVI files that we’d recorded over the last few months. While they play well on a computer, we wanted to share them with family members during the upcoming holiday season. As is the case in most families, not all of our relatives are experienced computer users. What we needed was a way to convert those AVI files into a format that would allow them to be played on a standalone DVD player.

We searched the Internet for different options, with free being the key word. In the past we had used PowerDVD but none of our current computers came with that bit of software. Sure, there are several professional solutions but we were looking for something that didn’t cost money. We finally found that solution. As it turns out, it was right under our nose. Here’s how to make a DVD from an avi file.

Tip: This process works with Windows 7. You may be able to download the software from Microsoft but, at this point, Windows DVD Maker is only available in some versions of Windows 7.

1. Get your AVI files together. Total time for a DVD is about 150 minutes so you can make chapters with several different AVI files as long as the total time doesn’t exceed 150 minutes.

2. Insert a blank writeable DVD into your CD/DVD burner. The following menu should pop up:

Photo of DVD Menu
Choose ‘Burn a DVD video disk’.

A DVD video disc is one that will play on a DVD player or on a computer. It is different from a data DVD, one that may contain AVI files plus documents, etc. , because it is presented in the same style as a DVD that you rent or buy from a video store. There will be a splash screen when the DVD opens,  the same as what you see when you play a Hollywood or Bollywood blockbuster video disc.

2. Here’s the next screen that you will see:

Photo of DVD menu 2
Drag and drop your AVI files into this window.

You can either add items using the ‘Add items’ button or drag and drop files into this window. Take note of the little icon on the bottom left, the grey pie with ‘0 of 150 minutes’ beside it. As you add AVIs, this icon will show how many minutes are left out of the initial 150 minutes. If you go over the limit, a section of the pie will be in red.

Also, see where it says ‘DVD title’ with the date? Click in that area to make a name for your DVD. You can do it later but it’s easier to do it now.

3. Once you’ve added the AVI files, click Next. This menu pops up:

Photo of DVD  menu 4
The AVI icon shows as a strip of film. Cool huh?

We’re using a 32 second film just to show you how this is done but you will see the timing of every AVI file you add to the previous menu. There is a status indicator and the pie chart shows a whole lot of open space. Your menu will be different. Note where we have typed ‘Family Movie’ . Click Next and this menu pops up:

Photo of DVD 5
Here is where you choose the look of your splash screen.


Click on the menu styles on the right and choose which one looks good to you. There are other choices here, too. You can preview how things will look or customize the menu or create a slide show. We’ll deal with the last choice in another post.

Make sure you have changed the title. If you forgot, click on ‘Menu text’ and this menu will allow you to change the title and a few other things:


You can change the title here, add notes, change the names of the buttons, etc.


4. Once you’re ready to go, click on the Burn button and Windows DVD Maker will go to work and, depending on the speed of your computer, will shoot out a completed DVD in a matter of minutes. For us, on a relatively fast computer, the process took anywhere from 5 to 20 minutes. The time seemed dependent on the source material. We made DVDs from different types of files, not just AVIs. You can experiment with which files work and which don’t. We had an OGV file that stalled the program but there aren’t many OGV files around these days.


We love free! Here is a very cool bit of software that’s tucked inside of some versions of Windows 7 and we were lucky enough to find it. We were amazed at how easy and intuitive the whole process was and we were just as amazed at how good the final product looks. With this free app, you can create very professional results in just a few minutes.

Thanks for reading! If you have questions or comments, feel free to fill out the form below and we’ll respond as soon as we can.