
We had some AVI files that we’d recorded over the last few months. While they play well on a computer, we wanted to share them with family members during the upcoming holiday season. As is the case in most families, not all of our relatives are experienced computer users. What we needed was a way to convert those AVI files into a format that would allow them to be played on a standalone DVD player.
We searched the Internet for different options, with free being the key word. In the past we had used PowerDVD but none of our current computers came with that bit of software. Sure, there are several professional solutions but we were looking for something that didn’t cost money. We finally found that solution. As it turns out, it was right under our nose. Here’s how to make a DVD from an avi file.
Tip: This process works with Windows 7. You may be able to download the software from Microsoft but, at this point, Windows DVD Maker is only available in some versions of Windows 7.
1. Get your AVI files together. Total time for a DVD is about 150 minutes so you can make chapters with several different AVI files as long as the total time doesn’t exceed 150 minutes.
2. Insert a blank writeable DVD into your CD/DVD burner. The following menu should pop up:
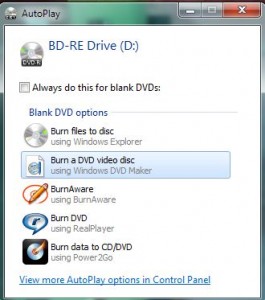
A DVD video disc is one that will play on a DVD player or on a computer. It is different from a data DVD, one that may contain AVI files plus documents, etc. , because it is presented in the same style as a DVD that you rent or buy from a video store. There will be a splash screen when the DVD opens, the same as what you see when you play a Hollywood or Bollywood blockbuster video disc.
2. Here’s the next screen that you will see:
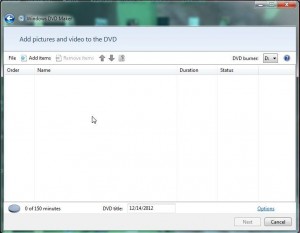
You can either add items using the ‘Add items’ button or drag and drop files into this window. Take note of the little icon on the bottom left, the grey pie with ‘0 of 150 minutes’ beside it. As you add AVIs, this icon will show how many minutes are left out of the initial 150 minutes. If you go over the limit, a section of the pie will be in red.
Also, see where it says ‘DVD title’ with the date? Click in that area to make a name for your DVD. You can do it later but it’s easier to do it now.
3. Once you’ve added the AVI files, click Next. This menu pops up:

We’re using a 32 second film just to show you how this is done but you will see the timing of every AVI file you add to the previous menu. There is a status indicator and the pie chart shows a whole lot of open space. Your menu will be different. Note where we have typed ‘Family Movie’ . Click Next and this menu pops up:

Click on the menu styles on the right and choose which one looks good to you. There are other choices here, too. You can preview how things will look or customize the menu or create a slide show. We’ll deal with the last choice in another post.
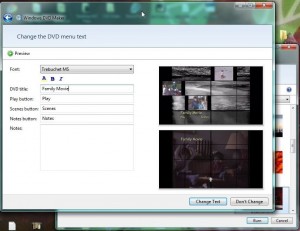
Make sure you have changed the title. If you forgot, click on ‘Menu text’ and this menu will allow you to change the title and a few other things:
4. Once you’re ready to go, click on the Burn button and Windows DVD Maker will go to work and, depending on the speed of your computer, will shoot out a completed DVD in a matter of minutes. For us, on a relatively fast computer, the process took anywhere from 5 to 20 minutes. The time seemed dependent on the source material. We made DVDs from different types of files, not just AVIs. You can experiment with which files work and which don’t. We had an OGV file that stalled the program but there aren’t many OGV files around these days.
We love free! Here is a very cool bit of software that’s tucked inside of some versions of Windows 7 and we were lucky enough to find it. We were amazed at how easy and intuitive the whole process was and we were just as amazed at how good the final product looks. With this free app, you can create very professional results in just a few minutes.
Thanks for reading! If you have questions or comments, feel free to fill out the form below and we’ll respond as soon as we can.