Protect Your WordPress Site

Here’s a quick and dirty way to keep your WordPress site safer from hackers. While you may never be able to fully protect your site, take our advice and perform these steps now. Hackers are very good at what they do but the harder it is to break into your site, the safer you are.

Everyone knows that the default user for every WordPress site has the username admin. With the username and the proper password, anyone can gain access to any WordPress site. Do you see the shortcomings of using the default name for the primary WordPress user? If you leave that name in place, hackers already have 50% of what they need to control your site. Here’s how to protect yourself:

1. Open your WordPress site by logging in with the current admin username and password. When you install WordPress, you are assigned a fairly decent password. We’d suggest making that password a bit tougher but the standard one is not too bad. Whatever you do, change your admin password on a regular basis.

2. Once you’re in, look for the word ‘Users’ on the left pane:
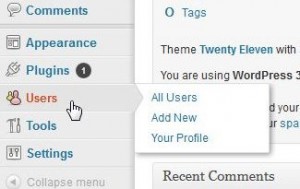
Photo of WordPress Security   1
Users, click on All.


3. On the default menu, there is only the ‘admin’ user. That user has full admin privileges. That’s not what we want. We want to remove the admin user or take away their roles. In the following menu, there are two users:
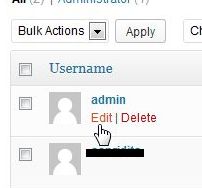
Photo of WordPress Security  2
Hover over the word ‘admin’ and select Edit.


4. Once we click Edit, we can change the role of the admin. In the previous photo, you can see that you can also Delete that user but, remember this, you can only do that if you have another user that you have assigned the role of admin to. Makes sense, right? You can’t administer a WordPress site with an admin to do it. For now, this photo shows what we want to do. Later on we will delete this ‘admin’ user, after we have assigned the role to another user.
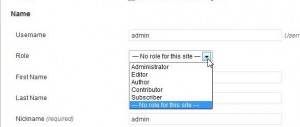
Photo of WordPress Security  3
We want to choose ‘No role for this site’ for the user named admin.


5. Once you set that menu to ‘No role for this site’, make sure you scroll down to the bottom and click ‘Update User’:
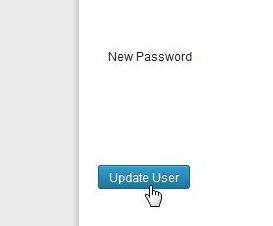
Photo of WordPress Security  5
Update user or your work is for nothing.


TIP: For extra security, don’t assign usernames that are actually the names of the users. If, for instance, you assign the admin role to a person whose real name is Bronwyn, don’t use Bronwyn’s real name. Choose something like Lana or Ralph or a set of numbers. Whatever you do, don’t allow hackers to guess the username. Why? As we said before, if they know the username, they are halfway there to getting access to your site. No matter how much time they spend trying to figure out your password, they’ll spend the same or more time figuring out the admin’s username. Please keep that in mind when you’re setting up or changing your WordPress site.

6. We figure that you’ll know how to add another user and assign them the admin role so no need to confuse the issue. Once you set another user as admin, you are free to delete the original ‘admin’. For your own security, WordPress will not let you delete the default admin unless you have assigned that role to another user. Don’t worry, they think of just about everything.

That’s it for today. Hackers are actively targeting WordPress sites. Keep yours as secure as you can.

Thanks for reading!

Facebook – Use Your Head!

Mothers used to say, “Use your head” whenever we did something stupid. Today we’re saying the same thing to you. Use your head when clicking and sharing things on Facebook. Here’s an example:

Photo of Bill Gates
Don’t even think of clicking anywhere on this photo or link when you see it on Facebook.


This one came up this morning but it’s quite old from what we know. We’ve left the sharer’s name on this because this particular person has started dozens of these idiotic shares. It’s very obvious that the paper has been photoshopped but, more than that. how could anyone possibly send you money for sharing a photo on Facebook? Why would anyone have their Paypal account linked to their Facebook account? Use your head! Unless you are a cretin or drunk, you should be able to see through these things.

Here’s another:

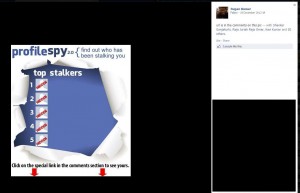
Photo of Facebook scam
There is no way anyone can find out who has looked at their profile.


This is actually a malicious link. If you happen to click on it, you’ll be taken out of the comparative safety of Facebook to a site that, very likely, will ask for your Facebook sign-in information. You know what happens then, right? Your precious Facebook account will be hijacked. Again, we have left the person’s name on this photo because of the vast number of these malicious/misleading/ridiculous posts that he or she has created and shared.

Yet another:

Photo of Lucky Coin
How can clicking on a photo bring you luck? How can anything bring you luck?


Does this remind you of anything? Maybe a chain letter? Did you know that forwarding a chain letter is illegal in most countries? Think about it. This is no different. If you share or click like on something such as this, you’re simply adding to the noise that’s on Facebook every day.

Edit: Here is another photo that you should not interact with:

Photo of cow and snake.
Looks like there are 81,000 sick people and almost a million stupid ones. There is no magic, none at all.

Don’t reward these idiots by clicking or by typing in a word (that won’t work anyway) on these posts.

Lastly, don’t help Facebook use you to tune their demographics. More and more, Facebook shares unwanted ads and posts with you. Whatever you do, don’t share these ad and/or posts with your friends. Facebook is using you as bait to fish for information on your friends. Be smart. Facebook isn’t paying you so don’t let them use you to make money.

Thanks for reading!

Basic Computer Care – uninstalling unwanted software

Revo Unistaller (available here: Revo  – just make sure you download the FREE version), helps you get rid of unwanted/unneeded software. We ran into a situation this week which led us to Revo. Here’s what happened.

As you know, some software wants to install other bits and pieces of stuff, things that they make a few pennies on for each time it’s download with the main file. These include toolbars, download ‘helpers’ and any number of anti-virus apps. By the way, when we recommend free software we try to steer clear of this kind of unwanted crap. Sometimes it’s not the software itself but the site you download that software from. If we recommend a site, it’s because that site doesn’t add on bits and pieces of what is essentially malware with its downloads.

One of the programs we installed recently added a number of toolbars. We tried to uninstall these toolbars but, it seemed, we didn’t get everything. One of our browsers had become very slow and unreliable. Uninstalling a program manually is difficult since it involves changing system files and, worse yet, Windows Registry. If you are unfamiliar with the Windows Registry, believe us when we say that it’s not something you want to play with.

After we downloaded and installed Revo Uninstaller, we fired it up. Here’s what we saw:

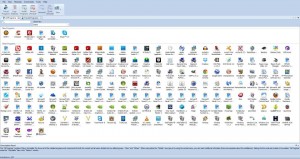
Photo of Revo  1
Using icons instead of a list of names, Revo looks pretty much like Windows own uninstaller.


Everything that is installed on your computer is on this screen. Listed alphabetically from left to right, find the program that you want to get rid of. Click on the icon and choose ‘Uninstall’ at the top. If you aren’t sure which icon is which, hover over any icon with your mouse and the full name will pop up.

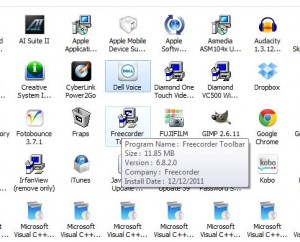
Photo of Revo 2
Hover over an icon to get more information on it.


Once you choose to uninstall a program, Revo runs through the normal process, just the same as Windows does. Over the next few screen captures, we’ll show you why Revo is your best choice for uninstalling software.

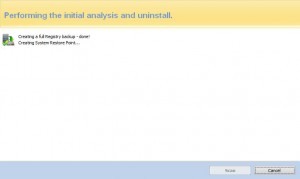
Photo of Revo  3
Pick the program to delete, click Uninstall and Revo starts its work.


Revo makes a backup of your registry, very important, and creates a Restore Point, just in case something screws up.

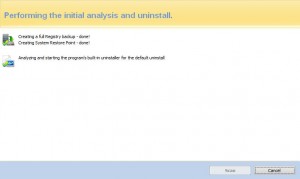
Photo of Revo  4
Revo analyzes the situation and run’s the program’s own uninstaller.


So far, so good. Maybe you’re saying, “Heck, Windows could do this. ” Heck no! Let’s run the scanning mode to see what’s left, the stuff that Windows would have missed.

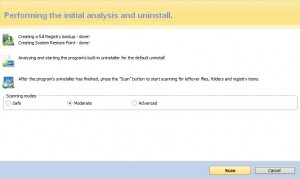
Photo of Revo  5
Choose your level of scanning and click Scan.

Each scanning level searches for leftovers, things that the programs uninstaller missed or, more likely, purposely left behind. Moderate scanning should be fine but if you’re worried, go for the advanced setting. Let’s see what was missed:

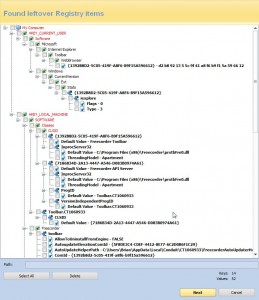
Photo of Revo  6
Zoot alors! (That’s French for OMG) Look what’s left over!


The particular program that we uninstalled left debris all over the registry. What you see here is a small portion of it, see the slider over on the right? No wonder our browser had slowed to a crawl! But wait, there’s more:

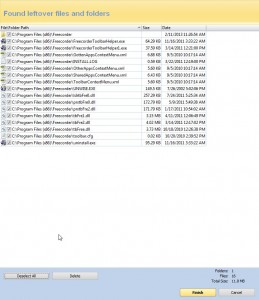
Photo of Revo  7
The final bits and pieces of things to uninstall.


Check all of these by selecting ‘Select All’ then click Finish. Finally, you’re free of that pesky program. You might want to restart your computer now but you don’t have to.

TIP: Not all software performs this way. Freecorder, a program that we actually recommended a while ago, is much worse now than it was when we reviewed it. For this report, we also uninstalled a bit of software that linked itself up with Twitter. After the first uninstallation, Revo didn’t find anything left over except the program’s folders which would have been deleted on a restart. You don’t have to use Revo all the time but there’s no reason not to. It’s that good, believe us.

Revo is not an anti-virus or anti-malware program. It doesn’t find these things for you. But if you do get some malware, Revo will take care of it. To use it, you have to know what you want to install. Once you know that, it handles the job perfectly. You can depend on it.

Thanks for reading! If you have questions or comments or tips, let us know. We love comments!

Like us on Facebook: Computers Made Simple on Facebook

Most Recent Post Not Showing on WordPress Blog

If you run a blog on WordPress, it’s common for the latest post to show at the top of the page. Our last post, the one about burning DVDs with Burnaware, wasn’t doing that. Here’s how we solved our particular problem. Remember that WordPress is a fairly complicated blog engine and, as they say, your mileage may vary. What worked for us may not work for you.

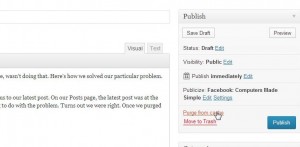
The clue to the solution lay on our Posts page, the WordPress page that lists all posts in chronological order. The current cover post was the one previous to our latest post. On our Posts page, the latest post was at the top. For some reason, that post had a ‘Purge from Cache’ notice on it. It was the only post that had this notice on it so we figured that this had something to do with the problem. Turns out we were right. Once we purged that post from our WordPress cache, it became the cover post on our main page. Here are some screenshots that will help you solve this problem:

Photo of WordPress Latest Post  1
This is the Posts page. The ‘Purge from Cache’ notice is missing but this is where you’d see it.


If you hover your mouse just below the post’s title, this menu comes up. You can purge the post from here or later on after you are editing it.

Photo of WordPress Latest Post  2
You can purge the page from here or after you click Edit.


Photo of WordPress Latest Post  3
Click Edit and this will allow you to purge the post another way.


Once you get to the Edit page, look on the right to see this:

Photo of WordPress Latest Post  4
Another place to purge the page from the WordPress cache.


We feel that this problem is sometimes linked to the theme you are using but even that may be related to the page cache. WordPress suggests to install the same theme again or to install a different theme. We think that doing so clears the page cache and the problem is solved that way, too. We’d suggest purging your cache first. There’s less chance of an error, in our opinion, and it’s a whole lot simpler.

Thanks for reading!
 

Burn a Video DVD – April 5th, 2013

In our last post we described how to use DVD Flick to ‘author’ a DVD video. When you author a DVD, you’re creating a set of files that you can burn to a normal DVD which will then be able to play on a standalone DVD player. It will play on your computer too, of course.

Today, we’re going to take those files which we created with DVD Flick,  and burn them to a DVD. Here are the steps:

1. Pop a blank writable DVD into your DVD burner.

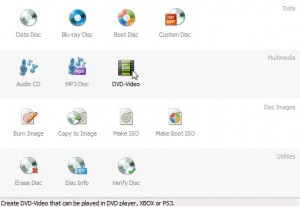
2. Open Burnaware, download it here: http://www.burnaware.com/ , and choose DVD Video on the main menu:

Photo of Burn DVD With Burnaware1
Click the DVD Video button.


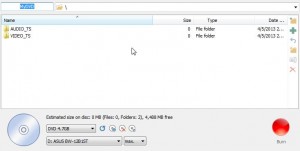
3. Burnaware then opens another menu, shown here:

Photo of Burn DVD With Burnaware2
Ignore the Audio_TS and VIdeo_TS folders that seem to be there now.

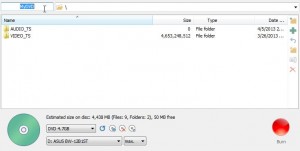
Burnaware knows that it needs to replace its current AUDIO_TS and VIDEO_TS folders (which are empty) with the AUDIO_TS and VIDEO_TS folders that we created using DVD Flick. Click on the green arrow up on the top right. This will open Window’s file menu. Search for the DVD folder in My Documents.


Photo of Burn DVD With Burnaware3
DVD Flick created the dvd folder when it authored the movie. That folder is on the left, you want the VIDEO_TS folder inside it.

DVD Flick has already made the folders you need, you just have to find them. Click on the VIDEO_TS folder and choose Add. (You only need to choose the VIDEO_TS folder. Since we made the video from an AVI file, sound and video are all in the VIDEO_TS folder. This is the way it will be for virtually every DVD you create this way.)

Remember when we said Burnaware had already placed two empty folders in its menu? When you try to add your own Video and Audio folders, this error menu comes up. That’s normal. Simply click ‘Replace’ and your full VIDEO_TS and AUDIO_TS folders will be replace the empty ones. Once you’ve added the folders, click Close:

Photo of Burn DVD With Burnaware 5
Close this menu.


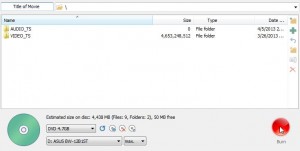
4. Back to the main menu again. This time, you’ll see that the VIDEO_TS file is full and the red burn button is lit. Don’t forget to make a title for the DVD. See the highlighted MYDVD in this photo?

Photo of Burn DVD With Burnaware 6
Look for the blue MyDVD words.

5. Name your movie by typing in that slot and then click the red Burn button:

Photo of Burn DVD With Burnaware 7
Name the DVD and then burn it. You’re done!

The speed of the burning process depends on your computer’s speed, of course. Try to limit your computer use during the burning unless you have the latest and greatest computer out there. The burn takes a big chunk of your computer’s resources and you don’t want to make a ‘coaster’, right? Coaster is the old term for a ruined DVD.

That’s it! You’ve created a DVD that you can play anywhere, on your computer or on a standalone DVD player. Pat yourself on the back.

Thanks for reading! Questions and comments are welcome. Follow us on Facebook: Computers Made Simple
a little bit of hi-tech, a little bit of common sense and a lot of fun