How to Create Your Dot Com Dream – Part 4

By now you are familiar with terms such as domain names, hosting, servers and CPanel. It’s time to actually create some content for your site. At this point, you’ve got two paths to follow. We’re here to help you figure out which path to take.

WordPress or HTML? 

These days, millions upon millions of people and companies depend on WordPress to sculpt their websites, including Computers Made Simple. On the other hand, millions of other sites use HTML for theirs. What’s the difference between the two? We’ll outline some of the details of each, giving you some pros and cons which might help you make your decision.

HTML? What’s that? 

HTML is Hyper Text Markup Language, the basis of pretty much everything on the Internet. WordPress itself uses HTML but in a more user-friendly format. Remember the placeholder that you made for your new site? If you read our post on how to actually create that document, you may have noticed that it was made up of two things. The first was the thing you actually wanted to say, the second was the various brackets and shortforms that encode the content. When you click on a link on a webpage, there is a particular format for that link, one that resembles ‘code’. That code is HTML.

Think of it this way. In any document created with a word processor, let’s use Word as an example, everything you type is formatted by Word to reflect the look that you want. There are headlines, indents, underlines, different colors for text, spacing and so on. How does Word accomplish all this? Well, Word uses codes that change plain text into a nicely crafted document. Those codes are carried around with the file wherever it goes. When you open a Word document, Word decodes these formatting marks and shows you the content, just as the original creator wanted it to look. Do you see the codes? No, but you could by choosing the View option,  ‘show formatting’. This is what it looks like in Word:
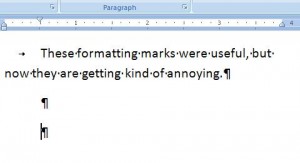
Photo of Word Codes
Quite a mess isn’t it?


HTML is much the same. Every web page, including this one, has a completely different look when you see the stuff behind the scenes. In order to create a website using HTML, you would have to code everything yourself in a text editor such as Notepad or Notepad + or, better yet, use an HTML editor. The HTML editor would look and feel much like Word. You type everything in, tell the editor how you want it to look and your webpage comes out looking wonderful, more or less. If you know what you’re doing, things look OK. If not, things look pretty bad.

Here are the pros and cons of HTML

Pros: Pages load very quickly. There is no strain on the server, no databases are running in the background, etc. Done well, you can creatre beautiful websites using relatively simple tools. Notepad and Notepad + are free and there are a few decent HTML editors that are free, as well.

Cons: HTML has a steep learning curve. Coding is totally different from anything else you’ve ever done, unless you are a computer programmer, of course. Coding is not intuitive. Things don’t make sense sometimes, they are quite arbitrary and/or obscure. Bad HTML is very obvious, far worse than a bad WordPress site, if there is such a thing. All HTML is written on your computer then uploaded to your site using FTP. For us, this is a huge problem. More on that when we discuss WordPress.

Here’s an example of relatively simple HTML coding:
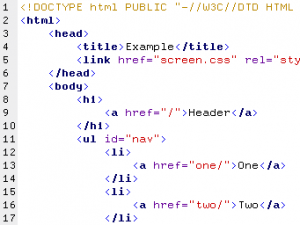
Photo of HTML coding
If you think you can learn coding like this then maybe HTML is for you.


WordPress

It’s hard to describe what WordPress actually does but we’ll give it a shot. As we’re writing this, for example, we are working inside our WordPress installation, typing content just as we would compose an email. We add photos, change the way words look, add highlights, etc. Everything we do is can be described as WYSIWYG (what you see is what you get). Once we have everything looking the way we want it to, we hit the Publish button and our wonderful words and photos are added to the site, quick as a wink…sort of. If we want to change something, we simply edit a post.

Yes, WordPress uses HTML but it’s all behind the scenes. Once you get used to using it, there are some things that you can manipulate using HTML but even that is done inside WordPress. We can edit pages from anywhere in the world on any computer that has Internet access, all we need is the logon credentials. There’s nothing to install on any computer, you just need a browser and a connection to the Internet. How’s that for portability?

We’ve written many posts on WordPress; how to install it, how to change things in it, etc. Besides our site, there are thousands of other sites full of WordPress tips and tricks. You’ll never be lost when you need help with something. Here are the pros and cons as we see them.

Photo of WordPress Logo
You can’t go wrong by basing your site on WordPress.

Pros: 

WordPress is free, that’s a good place to start. Editing is all done via the Internet. Aside from the initial install, there is nothing to upload. Updates are all handled from the WordPress dashboard. Virtually everything about WordPress can be adjusted, changed, made to look different or streamlined. In many cases, you may not even know that you are on a WordPress site. For each installation, different users can supply content. Each user can be given a different role, not everyone has to be an administrator. With thousands of plugins, WordPress can be tuned and refined in an almost infinite variety of ways. With just as many themes, WordPress sites don’t have to be clones of one another, each can have its own distinctive look and feel. WordPress is very secure. With an installation base numbering in the millions, WordPress isn’t going anywhere soon. It will be with us for the long run.

Cons: 

The initial installation may seem tricky or confusing but, with help, just about anyone can manage. We’ve written all about the process so don’t think you’re alone with this. WordPress can and does slow down your site. While HTML is much faster, at least as far as loading times go, content creation takes much longer. Some parts of WordPress are difficult to change. Until you get used to navigating your way around the dashboard, you will probably feel very frustrated but, remember this, all it takes is time. There are many helper sites that will make your learning curve a bit less steep.

Conclusion: 

We don’t think that there’s much of an argument here. WordPress is our choice, hands down. If you’ve got lots of time to learn a new skill, sure, go for HTML. You’ll always have the feeling that you’ve created your site from scratch, that it’s very unique, that it’s your work of art. If you want to get a site up and running quickly, with scads of support and documentation, all for free, then we would strongly suggest WordPress.

Thanks for reading! If we’ve missed something or if you just want to ask a question or suggest something, use the comment form below. We never reveal your email address, by the way. For quicker access, why not Like us on Facebook? Here is the link: Computers Made Simple on Facebook 


How to Create Your Dot Com Dream – Part 3

So far we’ve got your domain name and an account with a hosting company. The domain is yours for as long as you keep up the payments on it, about ten to twenty bucks a year. Hosting can cost about eighty dollars or less, based on the shared hosting example we told you about last time. Initial cost for hosting, at least for the first year,  is sometimes as low as fifteen dollars. Didn’t we tell you that creating your own website would be cheap?

Today we’re going to fill you in on what happens next. From this point on it’s going to get a bit more complicated. This isn’t anything an average computer user would find difficult, believe us. The problem is that the process isn’t quite like anything else you would do on a daily basis. Although it makes sense when you examine the details, let’s just say that it’s not intuitive.

I’ve got a hosting account. Now what? 

When you set up your hosting account, you made up a username and a password. Once you are ready to go farther, you have to upload at least one file to the space that you’re renting from your host. That space is simply a folder on a hard drive on a server (computer), it’s easier if you think of it this way. Uploading a file is nothing different than putting a photo or photo album on Facebook, although it’s not as simple. When you put up a pic on Facebook, the photo data is sent from your computer to Facebook’s servers. Once you do this, that photo is in two places, right? It’s still on your computer and it’s also on the Facebook computer. For this reason, you should have a folder on your desktop that is a mirror image of your folder on the hosting computer.

Create a new folder and name it suzylovesflowers. When you create something that you want to put up on your site, make sure that it’s in this folder. Now, let’s get a file up to your hosting account.

FTP? What the heck is that? 

Moving files from your computer to your host folder is accomplished using a File Transfer Protocol client. All that means is that you download a bit of software, install it, give it some details of your account (username and password)  then tell it what files to upload.

We use FileZilla for FTP. It’s free, fast and relatively simple to use. Here’s a link to it: FileZilla The free FTP solution   We’ve written about FileZilla before. Check out our post here:

FileZilla FTP – how to use it

Photo of FileZilla
FileZilla is the best FTP software out there, that’s why we use it.

This software remembers where your files are as well as  your login details, from one session to another. That’s why putting a folder on your desktop is important. Later on, we’ll discuss other ways to sort all of this out.

Putting up a placeholder. 

If you’re all excited about your new domain name and want to tell your friends about it, it’s probably better to have something up on your site to greet them there. No, you don’t have a full site yet but you should have at least a bit of information there, something that says ‘come back later when we’ve got something here’. That ‘something’ is called a placeholder. It’s pretty simple really, just a small .html file that you can create in Notepad and FTP up to your account. Here’s where we describe how to do it:

Basic HTML Placeholder

Once you get more material on your site, the placeholder is changed and visitors will be able to see the real site. This placeholder is a bit like hanging a sign that reads “Out for lunch” or “Gone fishing”, basically that you’re not there now but you will be soon.

Where does the placeholder go? 

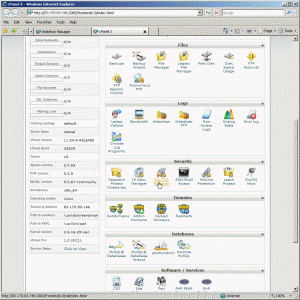
On your desktop, you’ve got a folder named suzy. You need a matching folder on your host server. If you have one domain name, you need a folder on the server that feeds data to anyone who access that domain. If you have more than one domain name, you need a folder on the server for each one. For now, you would head to your host account and be totally confused by this menu (we’re joking, it’s not that complicated):

Photo of C Panel Menu
Lots of icons but you’ll only ever use a few of them.


The photo above is the CPanel menu. This is what you see after you log in to your hosting account. Why are we showing you this? Because there are actually two ways to get files from your computer to your site. FTP is the quickest and easiest but, right at the start anyway, you can use the File Manager that is part of the software on your server’s computer. What you want to do it to create a folder that will hold everything related to your site. That folder is technically called a ‘directory’ and any other folders inside it are really called ‘sub-directories’ but ‘folder’ is what you’re used to calling them in Windows.

If you’re confused about CPanel, think of it as the software that controls your website, just as Windows controls your computer. It takes all of the inner workings, the things that go on behind the scenes, and arranges them into a GUI, something that is essentially point and click. Every version of CPanel has videos that show you exactly what to do so don’t run away screaming, “This is too complicated!” It’s not. Watch the videos and you’ll see what we mean. For now, search through the videos to find the one that tells you how to create a new directory.

Tip: What if your host doesn’t use CPanel? There are other control panels that you might encounter, depending on which host you choose. No worries folks, they are all essentially the same. All have icons that you click on to bring up menus which allow you to interact with the server. All have videos to help you through every step of the process.

How do I get my domain name and my hosting account linked up? 

Good question! That’s why we asked it. If you have your domain with one company and your hosting with another, as we suggested at the start, you have to point the domain to that folder you created on the hosting server. Remember the directory we made? You have to give your domain company the route or map to that folder. It’s easy, don’t worry. We described it in another post so check that out :

Nameservers – How to set them

Once that’s done, typing  suzylovesflowers.com into your browser will magically bring up your placeholder file. You have to wait a bit after you’ve set the nameservers but in a relatively short period of time, your site will be up and running. Sure, there won’t be much on it but it’s there and it’s yours. Pat yourself on the back! Believe us when we say that there is a huge surge of satisfaction that runs through you when that placeholder page appears. You’ll get an even better feeling when people start to read the words that you write. It never gets old, that’s for sure.

Questions, suggestions, comments on anything we’ve written about are most welcome. Fill in the form below or, better yet, ask us on our Facebook page. Here is the link:
Computers Made Simple on Facebook 

Thanks for reading!


How to Create Your Dot Com Dream – Part 2

We explained one half of the ‘dot com’ process in our last post, that being domain names and how to get your own. Today we’ll tell you about hosting, the second half of the process.

What is hosting?
Every site you visit on the Internet, from Facebook to this one, is fed to you by a computer called a server, somewhere in the world. In our last post we discussed domain names, the things that identify a site. When you type ‘facebook.com’ into your browser, you’re telling it to find the various files related to the Facebook domain, somewhere on a computer or on many computers (servers) wherever that may be. You don’t have to know how this is done, simply that the domain relates to a group of files that actually make up a website. Those files are hosted by Facebook themselves, in some cases, or by gigantic hosting companies such as Amazon. Our site is hosted by a much smaller company than Amazon. There are dozens of hosting companies in every country all over the world.

GoDaddy, as we mentioned in our last post, is a domain registrar that also hosts sites. We suggested that you keep your domains with one company, ours are with GoDaddy, and use another company to host your site. By doing this you are not putting all of your eggs in one basket. You don’t have to take our advice on this. It’s just a suggestion.

Photo of Graphic of Shared Hosting
One server, lots of connections…that’s shared hosting.

What types of hosting are there? 

Quite a few, actually. If you’re just starting out, we’d suggest looking at shared web hosting. This is what we use on our site, simply because it very cost efficient (read: CHEAP!). Sure, the site is a bit slow sometimes but the yearly costs are very minimal. Shared hosting means that many sites are served out by the same computer. In other words, this site plus who knows how many others sit on one server/computer at our hosting company, sharing that computer’s resources. Because the resources are split between a number of sites, the loading times can be affected, depending on how busy each site is.

An alternative to shared hosting is free web hosting, something we wouldn’t suggest, which is supported by ads. You get the free hosting, the hosting company gets the money from the ads that show up on your pages.

Once your site gets bigger and busier and, hopefully, starts making money, you might look at dedicated hosting. This means that one server is dedicated to your site, no others. While you don’t own the server itself, you are the only customer who uses it. Expect to pay much more for this service.

Lastly, and we’ve seen this work quite well, you can host your own site from your home or office. You’d need certain technical skills to do this but it can be done. There used to be an interesting site out there that was hosted on a very old MacIntosh computer, possibly a Mac Plus. If you are interested in starting a hobby site, one that doesn’t necessarily have to be up 24/7, do-it-yourself hosting just might be the ticket for you.

Here’s what a file hosting server looks like:

Photo of Hosting Server
Racks of servers, each hosting one or more websites.


How do I decide what hosting company is best for me? 

Price is probably the thing you want to check first. After that, reliability of the hosting is next. You can either do searches for reliable and cheap hosting yourself or get a Twitter account and search for hosting suggestions there. Do a search to see if any of your candidates have accounts. Once you narrow that down, search through their tweets to see what others are saying about them. Don’t let the fact that you’ve never heard of a company’s name deter you. Unless you’re involved in websites now, most or all of the hosting companies will be strangers anyway.

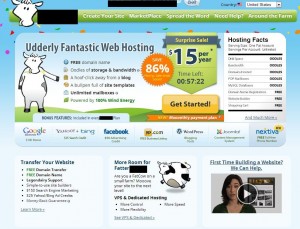
Here’s a sample ad from our hosting company. We’ve removed the name since we’re 50/50 on whether you should use them or not. Plus, they’re not paying us anything for the plug!

Photo of Hosting Ad
Lots of information here. Messy but full of enticing offers.


All of the hosting companies are similar to this, good prices for the first year, then a sizeable jump to their regular prices in subsequent years. This company is offering shared hosting with unlimited disk space, bandwidth, names hosted, etc. In addition to all of this, they have free tools to help you set up your site. While we haven’t found the free tools that important, you might be able to make use of them.

Tip: Choose wisely, folks. It’s a royal pain to move a site from one host to another, specially if it’s a WordPress based site. If you’re going to jump in and create your online dream, do your prep work beforehand.

Thanks for reading! Tips, comments, questions and suggestions are always welcome. Like us on our Facebook page to get a direct help line: Computers Made Simple on Facebook 

How to Create Your Dot Com Dream – Part 1

If you were to believe all the ads from GoDaddy, you’d think that owning your own website is pretty darn easy. Well, guess what? It is! For the remainder of this week, we’re going to show you just how easy it is. Stick around and follow along with us as we show you how to take your idea from a .com dream to reality.

The Basics: 

A website is made up of two main parts. The first is the domain name, which we’ll deal with today. The second part is called the host or hosting. A domain name is simple, brianmahoney.ca is ours, while hosting can be a bit more complicated. Don’t worry, the whole thing is easy enough and very cheap. We’ll take things step by step, just to show you how easy and cheap it is. So, domain name and hosting. Off we go!

Dot Com, dot Org, what’s best?

A domain name is made up of two things, too. The first is the actual name of the site, facebook, for example. The second part is everything after the ‘.’ , .com for example. You can choose .com, .net, .org, .info,  but you have to make a name that pops to mind when someone is looking for your site. (Yes, we know that brianmahoney.ca isn’t easy to remember at all but you can learn from our mistake, right? )

A commercial site would use a .com name, while a charity site might use .org. Work on the first part of the name first, suzysellsflowers for example, then decide on what type of domain you want. Suzysellsflowers.com makes sense, since selling things makes it a commercial site. Suzylovesdogs could be a .org or .info site.

Lastly, if you’re going to use a string of words, think of how the words run together. Will people know that the s at the end of the first word isn’t attached to the second word? Here are some examples of domain naming gone horribly wrong:

Funny Domain Names: The Most Inappropriate URLs On The Web

Once you get a feeling for the kind of name you want, you need to find out if that name is available. We would suggest doing that when you’re actually ready to buy the domain. What is ‘buy the domain’? That’s when you cough up the money to take possession of the name of your future site. Once you actually get it, you have to renew the name every year in order to keep it. Let’s say that Facebook.com forgets to renew its name. Theoretically, anyone could snap the name up and claim it as their own. Watch out for that, OK?

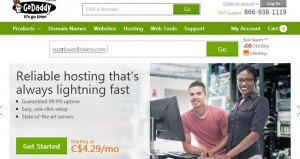
Let’s use GoDaddy as an example. We are not recommending GoDaddy but we use it to be our domain name service. We’ll get into that later but let’s see if our domain name is available. Head over to godaddy.com:

Photo of GoDaddy 1
Type in a name then check to see if it’s available.


Once you get there, type in the name that you’ve come up with. We’re using ‘suzylovesflowers’ . Click on Go and see what comes up:

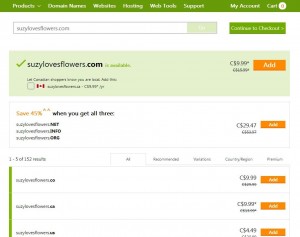
Photo of GoDaddy 11
Well, guess what? Suzylovesflowers is available!


We were lucky this time, weren’t we? Our domain name is available. Better yet, it’s cheap, only $9.99 a year. Below the main section, you’ll see that other variations of that name are also available. If you’re going to buy a domain with the hopes of making it into a popular site, you might want to think about buying up all the other variations of it at the same time. Why? Well, if suzylovesflowers.com becomes famous, anyone could start a site named suzylovesflowers.org or .net and siphon away some of your hits. If you think facebook.com is the only domain name that facebook owns, type facebook.org into your search bar and see where it leads. Try any other variation and you’ll see that Facebook has covered their bases quite well.

If your name is available, snap it up. Create an account on a site such as GoDaddy and pay for one or two years (or more since it’s cheaper at the start to buy a number of years than it is to renew it after one or two). GoDaddy will offer you all kinds of extras as you go, things that will add privacy and security but, you know what? We only take the name, nothing else. The price of the additional ‘stuff’ really adds up so we don’t bother with it. All of our domains are with GoDaddy, mainly because it’s a big company and probably won’t go out of business any time soon.

At this point, you’ve spent ten bucks on your domain name. Didn’t we tell you it would be cheap? You can’t get much for ten bucks these days but you can get a domain name and armed with that, you can head out and make a website. Well, almost. You’ve got half of what you need. Next time we’ll talk about hosting the site, the second part of creating something on the web. Yes, GoDaddy hosts sites but we found them to be quite expensive for this so we headed off and got a much cheaper setup with someone else.

TIP: Just as there are two parts of a web site, there can be two different companies involved with holding it. GoDaddy is our domain name server, nothing else. They keep our domains safe and renew them periodically but they do not host our sites. We strongly suggest that you keep your domains with one company and your sites with someone else. A domain name server simply routes Internet traffic that is looking for a domain it holds to the computer that hosts that site. When you come to our site, you go through the GoDaddy computers first. They point your browser to the hosting company’s computers which then bring up the content that you see here. That part is complicated but you don’t have to worry about it. Let one company hold your domain name and let another company host your content.

What’s in a name? 

Hindsight is 20/20 they say and, if we could do this site over again, we’d use a name that is better suited to its content. Keep that in mind. When we first started out, we used a real name, not a generic product or service name. While brianmahoney.ca has worked quite well for us, we suggest that you choose a name that matches what your site’s main thrust is going to be. Anyone can own a domain name, that’s the easy and cheap part. It’s what comes later that makes the difference overall but the name is where you start. Make it good the first time

Thanks for reading!


Cell Phone Terms Explained

This weekend we were in search of a new mobile plan and, probably, a new phone. In our search, we realized that there is a whole set of terms which our readers might find confusing. We’ve written about cell phones twice before, Of Apps and Android and Buying a New Cell Phone but this time we wanted to get into some of the relatively obscure terms that you might not know the meaning of. Let’s get going.

Sim Card – Basically the key that turns a device into a phone. We just purchased a Nexus 4 from Google and without a sim card, it is simply a computer, not a phone. Once we put a sim card into it, we had a computer that was a phone. Each mobile company has its own sims that allow a phone to use its network. These sims may come with a phone or, if you bring your own unlocked device, they may be purchased separately. Which brings us to:

Unlocked Phone – When a company sells a phone to a customer, that phone is usually ‘locked’ to the company that sells it. You cannot use this kind of phone on another network. If you unlock a phone, you remove this restriction. The Nexus 4 we purchased was unlocked, meaning that we could choose any provider, only  needing a sim card from whoever we were going to use. These days, companies sell phones and/or sims. Some companies, such as the one we chose to use, minimize their selection of devices which allows them to offer excellent rates on their services. Other companies make most of their money from the devices they sell.

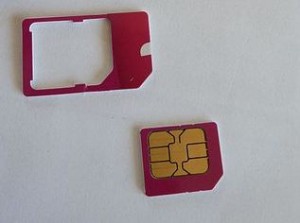
Sim Card Sizes – You’ll most likely run into two sizes of sims although there are about five types. Older phones use a full-size sim while the newer phones, the smart ones, use a mini-sim. Here is a photo which shows you the size difference:

Photo of Micro and Full-Size Sim
The micro is on the bottom, the holder at the top is the same size as a full-size sim.


Only one sim can be used for any one phone number. If you had previously been using a phone that used a full-size sim, and you subsequently buy a device that uses a mini sim, you have to either use a different phone number on the new one, or port your number over to the new sim. As soon as you do this, your old full-size sim can’t be used until you get a new number for it. You can, however, use any sim that fits in any other phone, as long as they are from the same company or they are unlocked.

Porting a Number – Each sim comes with a phone number attached to it. The sim has an access code that is locked to a phone number. Your supplier can change that number if they want, using the sim’s access code. Let’s say you have had the same phone number for years, it could be a cell number or your landline number, it usually doesn’t matter. When you port that number, you transfer it to a new sim. The process is free but it has some restrictions. The number you are porting must be in use, whether by your current provider or some other company, as long as it’s a current, active number. Whoever is doing the porting needs the phone number you want to use, the access code of the sim you want to port the number over to, your account details with your current provider (password or login code), etc. Once you provide this information, the process can be completed quickly. The details of this are usually found in the FAQ section of your provider’s support site.

Unlocking a Phone – In order to remove the restrictions on a phone, it must be unlocked. This requires a code that you can sometimes get from your service provider or from one of the many companies on the Internet. We say sometimes because not all companies offer this service. The unlock code for each phone is linked to its IMEI number. Once you get the unlock code, you perform several steps, nothing too complicated, to unlock the device. After that, you can use that phone with any company, not just the one you bought it from.

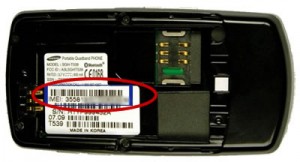
IMEI Number – This is a unique number that identifies a mobile phone. Where is it? You can usually find it under the battery, printed on a white ticket. Alternatively, it’s often written on the box that the device comes in. If you are considering unlocking your phone, make sure you find the IMEI number first. Here is where it is located:

Photo of IMEI Location
Take the back off your device, take out the battery and the IMEI number is there. 


Tip: On a phone such as our new Nexus 4, there is no battery compartment. It is a sealed unit. The IMEI number is printed on a sticker on the back of the phone as well as on the box it came in. The first thing we did was to scan the back of the device, since that sticker can be scuffed through use and the IMEI number might become hard or impossible to read.

Jailbreak – This is vaguely similar to unlocking a phone. Depending on the OS (operating system), each mobile device has restrictions on what it can and can’t do. When you jailbreak a phone, you remove those restrictions. We want to remove the limits on one of our Samsung phones and have tried several times to jailbreak it, with no success. Once we are able to do it, the phone will become more usable. Look at jailbreaking this way. Say you drive a car and its top speed has been limited to 100 KM an hour (roughly 60 mph). If you were to jailbreak this car, you would be able to go any speed, at least as fast as the car could go, not the speed it was limited to. Needless to say, jailbreaking will void any warranty that is left on your phone. There are many sites and videos that explain how to do this, depending on which phone you have.

Data – This refers to anything that is sent over your phone that is not voice or text (SMS). Some phones, usually the older ones, cannot access the Internet. A smart phone, is just that. It can surf the net, accept and make phone calls, send text messages and use things that are called apps. Apps are many and varied, everything from Instagram to WeChat to Netflix. If you are outside the range of your WiFi signal, and you use the Internet, then you are using data.

Tip: Data usage can be very expensive, specially when you go over your limit. Each mobile device is different but some of them will allow you to set limits on your usage. That way, if you get close to your monthly limit, you phone will either warn you or stop using data by itself. This is one thing that you should make sure you clarify with your provider. Also, learn as much as you can about your phone. The more you know, the less likely you are to get a huge bill in the mail.

That’s it for today. If you have questions on this or any other topic, let us know. Make a comment, ask a question or suggest something. Use the form below or ‘like’ us on Facebook. Here is the link: Computers Made Simple on Facebook 
Thanks for reading!


a little bit of hi-tech, a little bit of common sense and a lot of fun