Category Archives: Keep Safe Online

Avoid Phishing Website Tricks

We had a curious experience this week that made us realize how easy it is to be tricked by an unscrupulous website. Here’s how it happened and here’s what you can do about it:

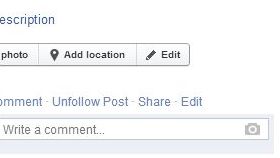
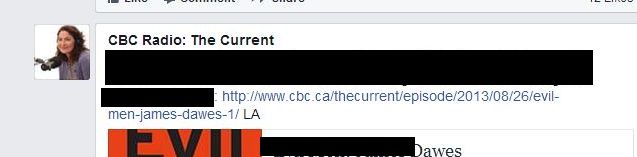
1. When you are on a Facebook page, you’re usually quite safe, right? It’s when you click on a link in a comment or beside a photo that you might get into trouble. Here’s an example of what we’re talking about:

Photo of Phishing Tricks  1
The photo itself isn’t the link, the blue line is.

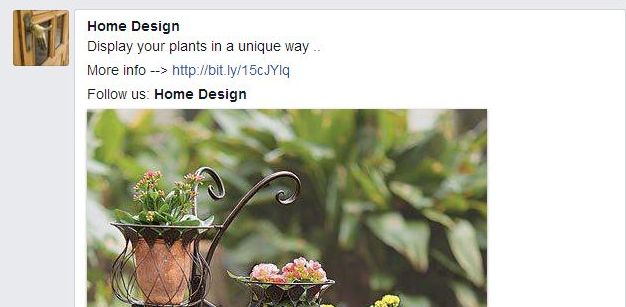
In this case, you can click on the photo to enlarge it or you can click directly on the link. Where does the link lead? We don’t know, do we. The link has been shortened. When a link looks like this, you have to ask yourself, “Is this safe to click on?” In spite of the fact that we know and trust ‘Home Design’, how do we know their account hasn’t been compromised (hacked)? We don’t. Is it worth clicking the link? Better not.

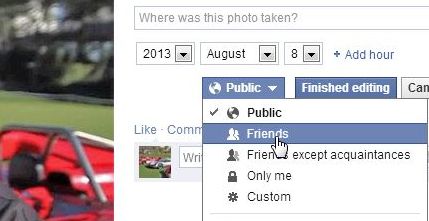
2. Here’s an example of a safer link:

Photo of CBC Url.
The CBC uses full links, not shortened ones. It’s obvious where this link leads.

Just for extra security, hover your mouse over any link on a page then look down at the bottom of your browser window. The real url of that link will be shown there. Like this:

Photo of Phishing Tricks 3
Here is the real URL of the link, in this case it’s the same as the link in the CBC post.

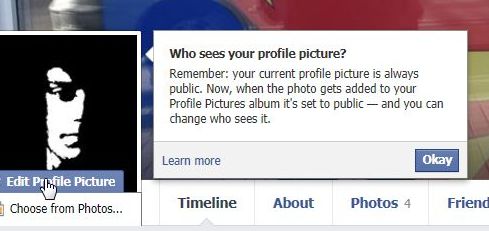
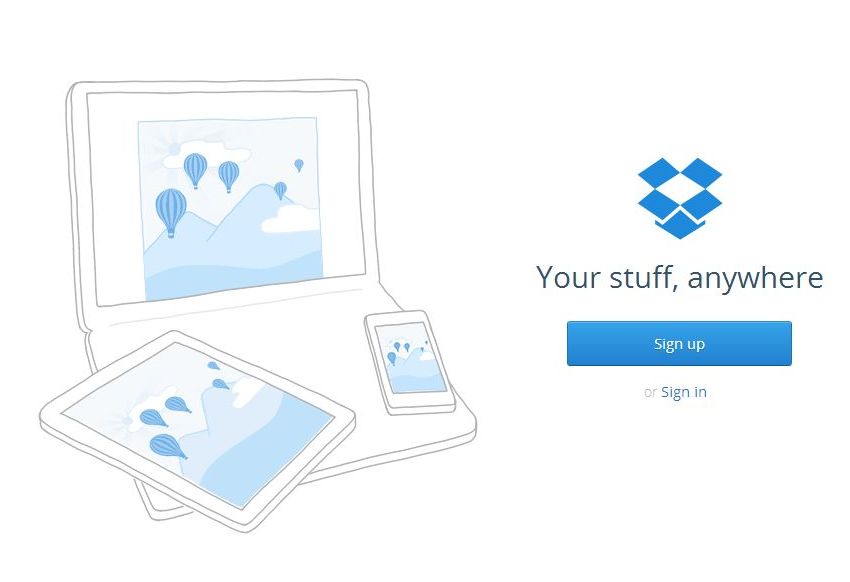
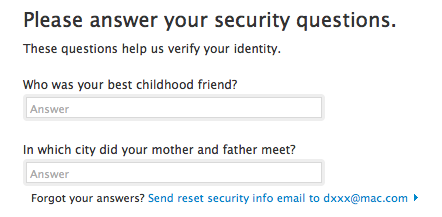
3. Next, the phishing attempt. You’re already on Facebook. You know that. When you click on a link and the page that comes up happens to look like a Facebook page and asks for your password, wouldn’t that set off your warning alarms? Facebook knows your password, you are still logged into it. Why would they be asking for that password again? They’re not. The link from Facebook led to a page that only looks like it belongs to Facebook. Look up at the top of your browser window. This is what you should see if you are still on a Facebook page:

Photo of Phishing Tricks 5
Make sure the url reads: https://www.facebook.com

4. The above information is for Facebook but this also applies to your email, Twitter, Instagram and other accounts that you must sign in to use.

TIP: When you find yourself on a page that asks for your password, close your browser, reopen it and type in the URL yourself. If you happen to click on a link in an email and a page opens that asks for a password, close the tap, open another one and type the address that you want at the top.

We hope we’ve given you some useful tips about how to guard your identity online. There are many different ways that unscrupulous people can get access to your different social networking accounts. If you have questions or tips about this yourself, let us know.

Thanks for reading.


Facebook Privacy Settings – Part 3 Profle Photo Trick

Facebook week continues here on Computers Made Simple. In our last two posts we’ve shown you the ins and outs of posting something and setting the privacy limits for it, then we described the various photo albums and their limitations. Today we’re describing how to adjust privacy for your profile photo.

Profile Photo Trick – As we told you here: Facebook Photos and Albums  , some Facebook albums have different privacy settings than others. One album that we are concerned about is the Profile Pictures album. Your profile photo is made up of two parts, the thumbnail and the main photo. Everyone can see the thumbnail, remember that. You choose who can see the full photo.  Here’s how to have a profile pic that doesn’t reveal too much.

1. Before we begin, remember that when you upload a new profile photo, it is set to ‘Public’ by default. You have to change that setting to ‘Friends Only’. The thumbnail will remain public but the photo itself can be made private. We’ll show you how.

Photo of Facebook Profile Photo Privacy Trick    1
The first time you change your profile photo, Facebook tells you that the photo is Public…but you can change that.

2. Click on your profile photo up on the top left of any Facebook page. This brings up your Timeline. Next, hover your mouse on the photo and choose ‘Edit profile picture’.

Photo of Facebook Profile Photo Privacy Trick    2
Hover and choose Edit Profile Picture.


3. We strongly suggest that you choose ‘Upload Photo’ or ‘Take Photo’ (you can only use this if you have a webcam attached to your computer.) The reason we want you to use a new photo is that you can edit the thumbnail much better with a new pic. If you use one of your old profile photos, this trick doesn’t work quite the same way.

Photo of Facebook Profile Photo Privacy Trick    3
Upload Photo or Take photo, both will work for this.

4. Choose the photo you want to use. This is the one we chose for this post:

Photo of Facebook Profile Photo Privacy Trick    4
An ex-sports star with his fleet of cars. Note that you can see his face in this full profile pic.

5. Facebook uploads the photo. Initially, this is what we saw when we uploaded this photo:

Photo of Facebook Profile Photo Privacy Trick    5
His face is still visible. We’ll fix that.

6. Hover over the photo again and choose ‘Edit thumbnail’:

Photo of Facebook Profile Photo Privacy Trick    6
We want to Edit thumbnail.

7. When the Edit Thumbnail dialogue comes up, drag the photo around until you can’t see or can’t recognize the person (you) in the photo:


Photo of Facebook Profile Photo Privacy Trick    7
Drag the small image around until you can’t be seen. Do NOT choose Scale to Fit.

TIP: If you choose ‘Scale to Fit’, Facebook simply makes a very tiny copy of the full photo and uses that as the thumbnail. In some cases this might be fine but make sure the thumbnail doesn’t reveal too much.

8. OK, we’re almost done. The new photo is set to Public, right? We want to change that. Click on the thumbnail and the full photo comes up. On the right, there are two Edit buttons. Both do the same thing so it doesn’t matter which one you click.

Photo of Facebook Profile Photo Privacy Trick    8
Two edit buttons, choose either one.

9. We prefer to choose Friends for the privacy setting. That’s up to you but we don’t advise you to leave it set to Public.

Photo of Facebook Profile Photo Privacy Trick    9
Friends, right? Better than Public unless you’re trying to attract strangers.


Yes, there are quite a few steps to this but we think it’s worth it. If you’ve got kids who are on Facebook, share this trick with them. Unless they are desperately seeking friends who are complete strangers, maybe it’s better to hide their face. Are we taking this search for privacy a bit too far? We don’t think so. If you had any idea of what some people reveal to strangers, you’d probably agree with us. Click on some Facepiles and see what turns up. You’d be shocked.

Thanks for reading! Questions, comments and problems are always welcome. Use the comment form below or Like us on Facebook:   Computers Made Simple on Facebook


Encrypting Your Stuff – Create a TrueCrypt container for DropBox Part Two

This is the last post on encryption for a while. Today we’re going to show you how to lock up your DropBox storage folder, both online and on your computer.

(In case you don’t know about DropBox, you should really check it out. We’ve written several posts on this free and very cool service so search our site or head over here and sign up for your free 2 gigs of space. Here’s how DropBox works:  Post 1  Post 2   We’ve also written about how Dropbox can ‘save your bacon’. It really can! Here’s  a link to that post: How DropBox can Save Your Bacon)

Photo of Dropbox
DropBox – Make sure you encrypt your stuff.

In spite of what DropBox says about its encryption and the safety of your files in its Cloud, don’t believe it. At the drop of a hat, DropBox will open up your private files to anyone who asks. Anyone with a badge that is. What’s the problem with that? We’re all for law and order but we don’t think anyone should be able to go through your personal files without you knowing about it. Even if no one in authority has an interest in your stuff, the employees of DropBox can and do sift through your files on a regular basis. Microsoft does this too, this kind of thing is not limited to DropBox. Let’s just say that everyone does the same thing.

Once you’re clear on that, here’s how to keep your information private. You made an encrypted container right? We showed you how to do that in our last post. Here’s the link in case you missed it: Encrypting Your Stuff – Create a TrueCrypt container for DropBox. You should make more than one container. Instead of putting everything in one locked volume, consider making several. Let’s say you make one for passwords, one for personal photos, one for videos, one for financial information, etc. That way, you don’t have to upload a massive folder every time you do some work on the things in that folder. We’ll explain that next.

DropBox keeps your stuff online AND on your computer(s). The beauty of DropBox is that you can access your material from any computer anywhere in the world. Sometimes you will access your online folder using a browser. Other times, when you’re on one of your own computers, you will access your stuff in the folder that is on your hard drive. DropBox automatically syncs that folder every time you go online. If you access your folder in a browser, DropBox syncs any changes that you made with the folder that’s on all or any of your computers the next time you go online. You don’t have to worry about any of this, it’s all done automatically.

All you have to do is make sure that your encrypted containers/volumes/folders are in the DropBox folder on your computer. As soon as you put the encrypted volumes there, DropBox syncs everything automatically, any time there are changes. It really is that simple.

Knowing all of this, you’ll probably agree that this is the best way to hide your personal information online and on your own computer(s). If your house is broken into or if you lose your laptop, anyone can access that information if it’s not encrypted. Don’t wait for that to happen, do it now! Don’t keep the TrueCrypt password on your computers, that’s kind of obvious but we thought we’d mention it.

Photo of Encryption poster
Not just your email. Encrypt everything!

TIP: Use several small containers instead of one large one. That makes syncing much faster. As mentioned above, encrypt a few 10 MB containers and label them accordingly. If you do need a larger container for a video, for example, you probably won’t change it too much so syncing time won’t be an issue.

That’s it for now. If you have questions, comments, suggestions, please let us know.

Thanks for reading! Why not Like us on Facebook? Here’s the link: Computers Made Simple on Facebook 


Encrypting Your Stuff – Zip or Container?

Warning: Lots of discussion in this post but we think it’s worth the time it takes to read it. These are the basics of encryption, things you should know. (But dull, unfortunately!)

Encryption week continues, this time with a discussion of a containers versus zip files and encryption in general. Here are some definitions with explanations:

1. If you use a password to log on to your computer, you can’t say that your computer is encrypted. Yes, it is locked but it’s not necessarily encrypted.

2. You can lock your computer with a password and encrypt the hard drive. That’s not difficult to do, Windows can do this by itself, but you run the risk of losing ALL your data if something screws up. With Windows, that is a distinct possibility.

3. If you encrypt something, you have to use a password. That may seem obvious but this site is for beginners, right? Go back and read number one then read this one again. Passwords don’t automatically mean something is encrypted but everything that is encrypted requires a password.

4. You can have a zip file that is not encrypted. Almost all zip files don’t require a password. If you’re confused about what a zip file is, think of a suitcase. You can pile socks, T-shirts,hats, gloves, etc.,  into that suitcase, packed as tightly as possible. The suitcase goes on the plane/train/car with you. When you get to your destination, you usually unpack that suitcase. The things that were in it can then be put into drawers, on to hangers, and so on. A zip file is a suitcase. It’s smaller than the original file but everything is still there, nothing has been removed. To use the stuff inside a zip file, you have to unpack it.

Photo of Zips and Containers   1
A zip file icon.

5. Whether a zip file is password protected or not, you need a program to unzip it. Windows can do this on its own, as long as the zip file is just that, a zip. (There are other types of ‘compressed archive’ files but, for now, we’ll deal only with zips.)

6. A container is more like your house. Your house has a lock on the door, a container has a password, same thing. Your password protected computer could be termed a container. In our world, containers are much larger than zip files.

Photo of Zips and Containers   2
An encrypted container can be put on a flash drive.

7. An encrypted container is something like a glass house where the windows are actually mirrors or they are smeared with petroleum jelly. You might be able to see inside but you can’t see what’s there. If you have the key to the lock, you can see everything. Without the key, no such luck.

Tip: A container can be a file or a folder but it could also be an encrypted flash drive or hard drive. In this post and in the future posts on encryption, we are discussing files and folders, not flash drives.

8. Using a program such as Notepad, you are able to look into any computer file. If you open a .jpg file, you’d be able to read the file header and know it was a .jpg. You wouldn’t be able to see the picture itself but you would know what type of file it is. If you open an encrypted file or folder in Notepad, everything inside it is illegible, nothing can be interpreted. Once the file or folder is unlocked, however, everything inside it becomes readable.

9. Nuts and bolts now. Use a zip file to send to someone via email. Use an encrypted zip file to protect passwords, personal documents, financial data from anyone who might intercept that file, on a flash drive or external hard drive, for instance. Use an encrypted container to store your files on your computer and online, in the Cloud. If you keep a copy of the container on your computer, you can simply upload it again and again, replacing the online one with the new, updated one.


Now you know a bit more about zip files and encrypted containers. In our next post we’ll show you how to encrypt a container using TrueCrypt. Finally, you may be asking yourself, “Why should I even bother to encrypt my stuff?” Here’s why.

Anything you put into an online storage facility, whether it is DropBox or Microsoft’s SkyDrive, is open to viewing by employees of that facility. If you think that these companies don’t go through your stuff, you’re mistaken. They do sift through your stuff on a regular basis. Your own and other government officials go through your files too but that’s not the point of our articles. We’re here to help you keep your personal data safe. 

Thanks for reading! How about heading over to our Facebook page and clicking Like? Sounds like a good idea to us! Here’s the link:  Computers Made Simple on Facebook

Security Questions – Don’t tell the truth!

Besides a good password, security questions are another way to keep your different online accounts safe. This is a good thing, isn’t it? Well, it is a good thing if you select the answers to those questions carefully. Remember, you don’t have to tell the truth when you choose an answer. Lie a little.

Here’s an example that you might see on the Internet when signing up for a new service:


Photo of Security Questions
Anyone who knows you might be able to answer these questions.

These are typical security questions. Before you simply plunk in ‘Benji’ and ‘Sheboygan’, think about it. Who knows where your parents met? You and anyone that you’ve told the story to.  Maybe your childhood friend is still a friend. Maybe he’s your husband! Here’s where you can lie a little, just to keep your accounts a bit safer.

For any security question, use completely different answers, ones that aren’t guessable. For your first car, you could put the answer as ‘123’. Mother’s maiden name? Tokyo. First pet’s name? Smith (assuming it wasn’t named Smith!).

When you use a series of numbers or names or words that don’t match any of the questions, your account is completely secured from anyone who happens to guess your password. Sure, they may have your password solved but they won’t be able to get past your security questions.  We showed you last time how to create a strong and secure password using mnemonics. This technique is somewhat similar, using easy to remember words that have no relation to the questions being asked. There are no rule books as far as security questions go. You’re dealing with a computer, not a real person, so you can say anything you want. Lock up your accounts with a good password and crazy answers to security questions and you’ll be a whole lot safer online. Good luck!

Thanks for reading! Why not like us on Faceboo? Here’s the link: Computers Made Simple on Facebook