In our last post we talked about containers. If you think about a container as a large box that you put things in, you’ll have the right idea. Today, let’s lock that box up tight using TrueCrypt.
We’ve written about TrueCrypt before but it’s certainly worth another post. First, it’s free and, second, it’s the easiest encryption tool we’ve ever used. Download it here: TrueCrypt
Point A. TrueCrypt can be installed on your computer or you can run it from a folder on your desktop (or anywhere else for that matter). It’s self-contained, in other words, able to run without being installed on your computer.
Tip: You can carry a copy of TrueCrypt around on a flash drive with your container. You would use TrueCrypt to open the container, interact with the contents then lock it up again.
Point B. Basically, you will create a folder, name it, encrypt it and use a password to lock it. TrueCrypt is very simple to use but we’ll run through the steps using screen captures, just so you don’t screw things up. In reality, the only thing you have to worry about is forgetting your password. If you do, everything in the encrypted folder is lost for good. That’s how powerful TrueCrypt is.
Here we go:
1.
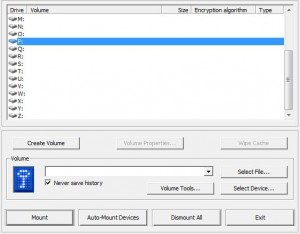
2. TrueCrypt has a few options to choose from but we want to do the simplest set-up here.
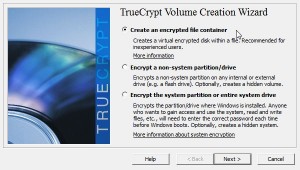
3. Again, stick with the simplest volume (container):
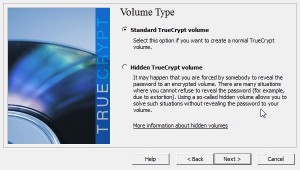
4. The next menu is a bit confusing. Take a look:
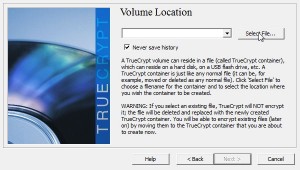
This menu seems to be asking you to choose a file/container, as if you have already created one. You haven’t created one yet but you will now. Don’t type anything in the space, just click the ‘Select File’ button. When the file menu opens, navigate to your Desktop. You can put the new file anywhere but we find it easier if it’s right in front of us, right there on our desktop. Read the warning! Do not choose an existing file. TrueCrypt will delete it and create a new file using the same name. Repeat, do NOT choose an existing file. Read step 5.
5. After you have navigated to your desktop, your next job is to type a name in the slot. You could name your new file Mary, Joe, Sparky, whatever you want. You can simply use a name or a number or an obscure combination of letters and numbers, it doesn’t matter. We would suggest, however, using a name and a file type. Why? We want a file type because someone who is looking for a hidden file would probably not look for a photo or video file, right? That’s why we named our file, ‘summertime.avi’. It’s not really an ‘avi’ file, though. It can’t be opened by any program other than TrueCrypt.
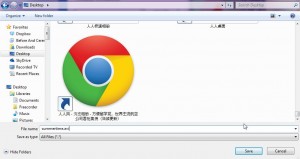
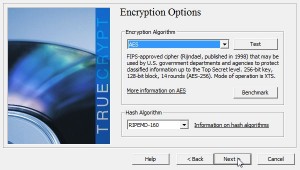
5. Once you click Save, TrueCrypt knows that the file it creates will be named, in our case, summertime.avi. Next, TrueCrypt will ask you what kind of encryption algorithm you want to use. Go with the defaults here unless you know what you’re doing.
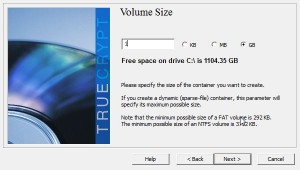
6. How big should your container be? Only you know that. For our example, we set it to 1 gigabyte in size.
7. Next comes the password. Use a good one. Make sure you don’t forget it. Read the tips that TrueCrypt gives here. You can always change the password later on, no worries.
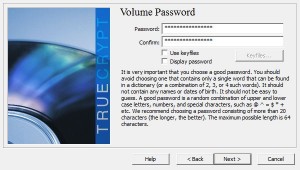
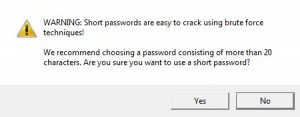
8. If your password is too short, TrueCrypt warns you about it.
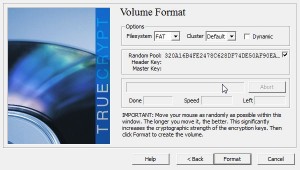
9. Now comes the fun part. You’ll never see this anywhere else. You are now creating the encryption key as you move your mouse over this menu box. Take your time and do what the instructions tell you. Once you’re bored of darting back and forth, click Format and TrueCrypt will create the volume/container for you.
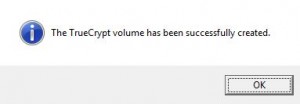
10. This is what you should see next:
11. OK, you’ve created the container. It’s sitting on your desktop waiting to be used. How do you open it?
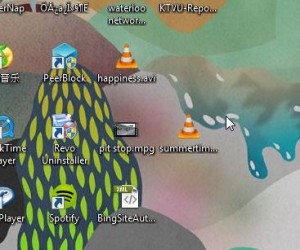
Well, you won’t open that file with anything but TrueCrypt.
12. Using the same technique as before, navigate to the file on your desktop. What you want to do now is to tell TrueCrypt to ‘mount’ the container you just created. (Container, volume, file, all the same thing.)
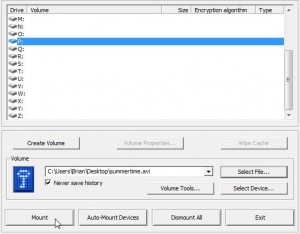
13. TrueCrypt will ask for your password. Again, don’t forget it.

14. Click OK and the file is shown in the TrueCrypt window:
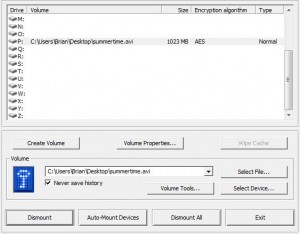
15. You’ve managed to create an encrypted container that is locked with a strong password. Now it’s time to fill it with your stuff:
16. When you have finished adding files, make sure you click Dismount All before you close TrueCrypt. You mount the volume, enter the password, add or look at the files in it, then close the folder then dismount it in TrueCrypt. Don’t forget the last part.
This is a long post, next time we’ll explain the DropBox part of it. Thanks for sticking with us so far!
