Category Archives: DVD Authoring

DVD Authoring with DVD Flick

Instead of watching a video file on your computer, you might want to see it on the big TV screen in your living room or family room. While you could hook up your computer to your HDTV, it’s sometimes easier to simply pop a disk into your DVD player. How do you get a video file from your computer onto a DVD disk that you can watch on any tabletop DVD player? Here’s how we do it:

NOTE: You need a DVD burner for this project. Virtually every computer, whether it’s a laptop or a desktop, comes with a burner. If not, you can pick up an external USB burner for under $40.00.

1. Download and install DVD Flick. It’s free, don’t worry.
Photo of DVD Flick Authoring     1
Free and fast, DVD Flick is open source. An excellent product.


2. When DVD Flick is ready to go, find the video file that you want to make into a DVD and open it, either drag it into the DVD Flick interface or use the Add button on the GUI. DVD Flick will work with just about any video file, even home movies that you shoot with your camcorder or digicam.
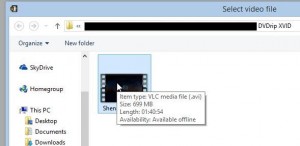
Photo of DVD Flick Authoring     2
Click Add title and find the video file on your computer.


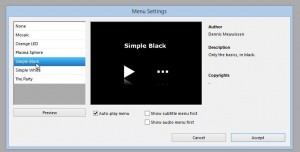
3. DVD authoring means that you’re taking a plain video file that you watch on your computer using VLC Media Player or Windows Media Player, etc., then adding a clickable menu that looks almost the same as a DVD that you buy in a store and burning it to a writable DVD disk. This final product can be played in any tabletop DVD player as well as in any DVD player in any computer, Mac/Linux or Windows. That means that you have to tell DVD Flick which menu style you want to use. Click Menu Settings to see the choices and make your decision:
DVD Flick Authoring     3
We like the Simple Black option.


4. You have to set some parameters for DVD Flick. Click on Project Settings to see this:
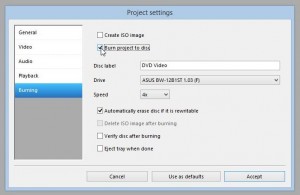
Photo of DVD Flick Authoring     4
Click on the Burning tab and choose ‘Burn project to disk’, type the name you want to see on the menu, but leave Speed at 4. You’ll get a better disk that way. 


5. If you’re going to burn a few copies of the same disk, name your project and save it. That way you can burn the same video at some later date without having to do everything again.

6. Once you’ve got everything set, you have to tell DVD Flick where to save the temporary files it creates in order to make your DVD. Basically, it takes your video file and converts it into a package, according to the parameters you’ve just set, then burns the whole thing to a blank, writable DVD disk. Once you make sure the DVD works, you can go back and delete the files but, for now, look down on the bottom left of the GUI. DVD Flick saves the first DVD you make in a folder named ‘dvd’, usually in your Documents folder. You can either name each folder with the name of the video or add a number at the end of ‘dvd’ as we have here:
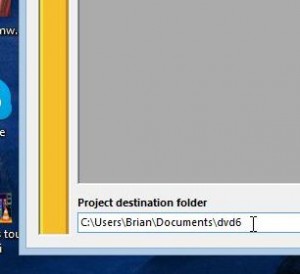
Photo of DVD Flick Authoring     6
We’ve burned six separate DVDs, as you can see.


That’s pretty much all you have to do. When you’re ready, click ‘Create DVD’ up at the top, after making sure you have a blank DVD disk in the burner.

NOTE: We have wondered how many videos we can put on one DVD. The answer doesn’t seem to be out there but we’ve figured out that if you use a time limit of about an hour and a half, you’ll be fine. If the video you are burning isn’t great quality to begin with, it is possible to get a couple of full-length movies on one DVD. If you’re burning home movies, you can create separate menu titles for each one.

Lastly, this process is NOT for ripping a DVD that you have purchased. DVD ripping (copying) is not the same as authoring. We use DVD Shrink for ripping. It’s free and we may write about it at some point later on.

Thanks for reading! Questions or comments are welcome. You can also ask questions on our Facebook page. Here is the link: Computers Made Simple on Facebook 

_______________________________________________

Here’s a link that might help us if you are interested in hosting your own blog with Fatcow Hosting. We’ve signed up to become an affiliate and we make a bit of money if you sign up for hosting via this link: FatCow Hosting Thanks!

Burn a Video DVD – April 5th, 2013

In our last post we described how to use DVD Flick to ‘author’ a DVD video. When you author a DVD, you’re creating a set of files that you can burn to a normal DVD which will then be able to play on a standalone DVD player. It will play on your computer too, of course.

Today, we’re going to take those files which we created with DVD Flick,  and burn them to a DVD. Here are the steps:

1. Pop a blank writable DVD into your DVD burner.

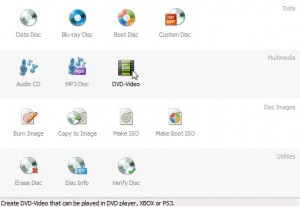
2. Open Burnaware, download it here: http://www.burnaware.com/ , and choose DVD Video on the main menu:

Photo of Burn DVD With Burnaware1
Click the DVD Video button.


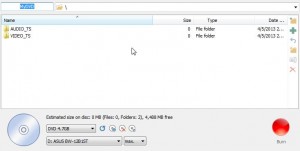
3. Burnaware then opens another menu, shown here:

Photo of Burn DVD With Burnaware2
Ignore the Audio_TS and VIdeo_TS folders that seem to be there now.

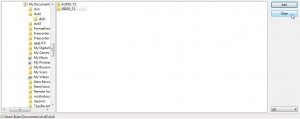
Burnaware knows that it needs to replace its current AUDIO_TS and VIDEO_TS folders (which are empty) with the AUDIO_TS and VIDEO_TS folders that we created using DVD Flick. Click on the green arrow up on the top right. This will open Window’s file menu. Search for the DVD folder in My Documents.


Photo of Burn DVD With Burnaware3
DVD Flick created the dvd folder when it authored the movie. That folder is on the left, you want the VIDEO_TS folder inside it.

DVD Flick has already made the folders you need, you just have to find them. Click on the VIDEO_TS folder and choose Add. (You only need to choose the VIDEO_TS folder. Since we made the video from an AVI file, sound and video are all in the VIDEO_TS folder. This is the way it will be for virtually every DVD you create this way.)

Remember when we said Burnaware had already placed two empty folders in its menu? When you try to add your own Video and Audio folders, this error menu comes up. That’s normal. Simply click ‘Replace’ and your full VIDEO_TS and AUDIO_TS folders will be replace the empty ones. Once you’ve added the folders, click Close:

Photo of Burn DVD With Burnaware 5
Close this menu.


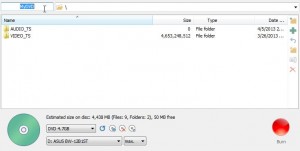
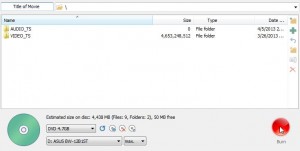
4. Back to the main menu again. This time, you’ll see that the VIDEO_TS file is full and the red burn button is lit. Don’t forget to make a title for the DVD. See the highlighted MYDVD in this photo?

Photo of Burn DVD With Burnaware 6
Look for the blue MyDVD words.

5. Name your movie by typing in that slot and then click the red Burn button:

Photo of Burn DVD With Burnaware 7
Name the DVD and then burn it. You’re done!

The speed of the burning process depends on your computer’s speed, of course. Try to limit your computer use during the burning unless you have the latest and greatest computer out there. The burn takes a big chunk of your computer’s resources and you don’t want to make a ‘coaster’, right? Coaster is the old term for a ruined DVD.

That’s it! You’ve created a DVD that you can play anywhere, on your computer or on a standalone DVD player. Pat yourself on the back.

Thanks for reading! Questions and comments are welcome. Follow us on Facebook: Computers Made Simple

Using DVD Flick – April 2, 2013

DVD Flick, available here: http://www.dvdflick.net/ , is a free DVD authoring program. DVD authoring means taking a video file that you can play on your computer and changing it into a file that you burn to a normal DVD  which will play on a standalone DVD player, just like the movies you buy at the store. DVD Flick takes just about any video file, it supports 45 file formats, making it much more versatile than other similar apps. It’s free, easy and foolproof. You can make simple DVDs that play as soon as you pop them into the player or you can create fancy menus, just like a real DVD. We’ll explain the basics here but feel free to explore DVD Flick on your own.

TIP: We recommended Window’s DVD Maker in a previous post but we’ve changed our minds on that program. Yes it’s good but it doesn’t work as well as DVD Flick. We recently ran into a problem where the Window’s app made DVDs with no audio. We tracked down the problem to an issue with ‘codecs’ and could have fixed things but we decided to use DVD Flick instead. DVD Flick supports over 40 audio codecs, just so you know. We doubt that you’ll run into a problem with silent DVDs if you use DVD Flick.

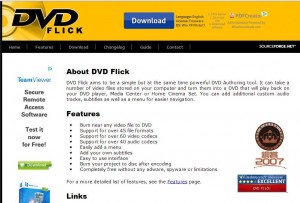
Here’s a rundown of DVD Flick’s features, straight from their website:

Photo of DVD Flick  Splash Screen
Lots of video formats and lots of audio codecs, can’t ask more more than that.


The first thing you want to do after you install DVD Flick is to add the video file that you want to turn into a DVD. While you can add more than one video file, adding more than one degrades the video quality that you’ll see on your TV screen. We’re talking full length videos here, not snippets of home videos. If you’re simply making a DVD of various family movies, that’s different. Add as many as you want up to the time limit of a normal DVD, about two hours. Again, you can add even more videos, past the two hour limit, but the final result won’t look nearly as good.

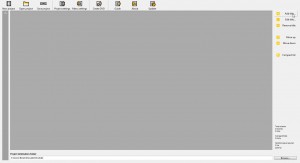
Photo of DVD Flick   2
A blank window, click the words ‘Add title…’ up on the top right.


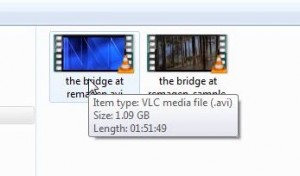
When you click ‘Add title’, you’ll open the normal Windows file window. Find the video you want and click ‘Open’.

Photo of DVD Flick   3
Choose the video then click ‘Open’.


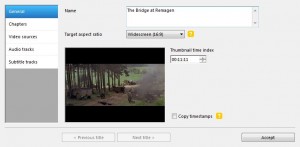
DVD Flick will show you a new menu that has the name of the movie (change it to caps), how long the thumbnail will be shown as well as different settings for things like audio, chapters and subtitles.


Photo of DVD Flick   4
All we did was to change the name a bit, adding caps.

DVD Flick will save the final DVD files in your documents folder. It always uses the same folder, which brings up the following menu if you forget to change things: 

Photo of DVD Flick   5
Change the folder where each set of DVD files is stored.


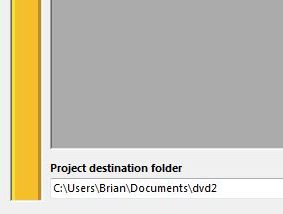
If you’re authoring several videos, make sure you change the name of the folder each time. Looks on the lower left of the DVD Flick menu:

Photo of DVD Flick   6
Change the dvd designation at the end to ‘dvd2’ or ‘dvd3’ or just change it to the name of the movie.


Once you’ve done all of this, click the Create DVD button on the top row and wait. Depending on the speed of your computer, this process could take a while. In our test, on a reasonably fast computer, it took 35 minutes. When DVD Flick is finished, you’re left with a folder that contains two other folders. These creations are named VIDEO_TS and AUDIO_TS. Each folder contains the various files needed to make your DVD look like one you buy in a store. Next time, we’ll show you how to burn those files to a DVD.

TIP: Although we could, we don’t use DVD Flick to actually burn the DVD. We ran into a few problems when we tried. For now, we’ll create the DVD with DVD Flick and burn the final product to a DVD using Burnaware. We’ll show you how to do that in our next post.

Thanks for reading!