All posts by Computers Made Simple

Editing an MP3

Today, we’re going to edit an MP3. We’ll take a long MP3 and edit out one part of it. The original sound comes from a Youtube video. That video is about 14 minutes long but we only need to save a small portion. Here’s how we did it.

1. Here’s a link to the video. It’s quite funny, at least one part of it:

Wits: Paul F. Tompkins and Aimee Mann


2. Using Offliberty, we saved the sound portion of the video as an MP3. Here is the link that tells you how to do that:

Use Offliberty to Download Music for Free 


3. Once the MP3 was downloaded, we opened Audacity, the free and fantastic sound recording/editing program. We have mentioned Audacity many times. Here’s a link to one of our posts about it: Recording LPs to Digital  The program is available here:   Audacity


4. Once Audacity was up and running, we then opened the MP3 file that we had just saved from Offliberty.
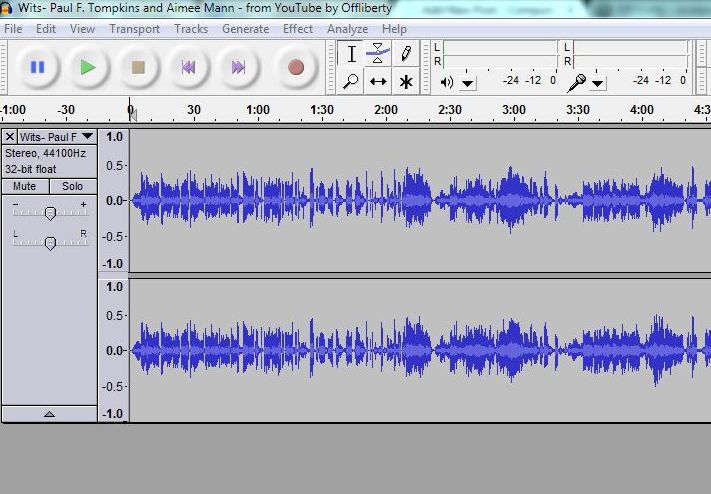
Photo of Clip 1
Here is the MP3 open in Audacity.


The buttons above the blue squiggly lines control the playback and recording of the open file. This particular file is 14 minutes long, more or less. We know that the part we want to clip out starts at the 8 minute mark. We grabbed the line that you see on the 0 in the photo above and dragged it over to the 8 minute mark.

5.
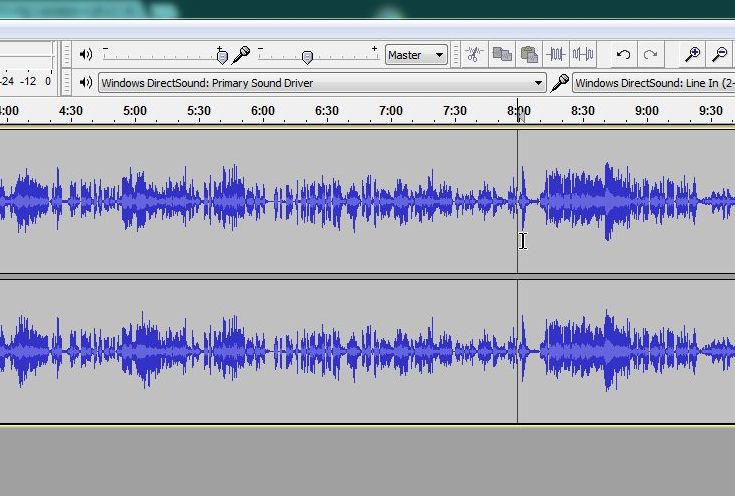
Photo of Clip 2
Here is the cursor sitting at the 8 minute mark.

Once the cursor was sitting at the 8 minute point, we played the track and noticed when the part that we wanted was finished.  At this point, all we were interested in was cutting out the bulk of the sound that we didn’t need. No sense in fine tuning just yet. Why? Because this is a long clip. In order for Audacity to show the whole thing, the blue lines are very compressed. Once we cut out the part we want, with some extra bits at the front and back, you’ll see what we mean.

6. Once you have the parameters of the clip you need, in other words the start and finish points, hover your mouse on the start line until you see the icon of a hand with a pointing finger, then drag the hand across the screen until you hit the end point. Here is the icon you want to see:

Photo of the hand icon.
The hand icon.


Here is the section that we want after we highlighted it::
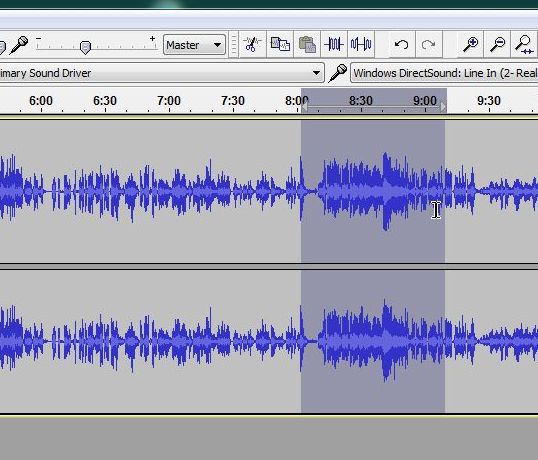
Photo of Edited Section Highlighted
The highlighted section is that part that we want to cut and save.


7. After you highlight the section, find the word Edit on the top menu of Audacity and click it. You will want to Cut the section out of the full 14 minute sound clip. Here’s what you want:
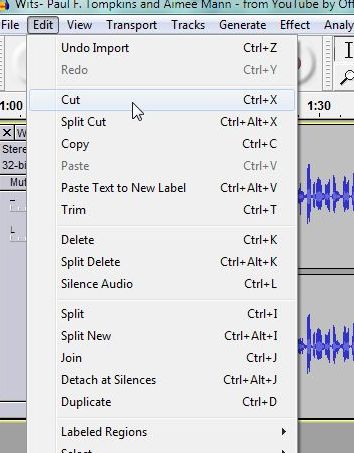
Photo of Audacity menu
Cut the section out. This puts it into your clipboard in Windows and holds it there.


8. Once you click on the word Cut, Audacity cuts the selected section out of the full sound bite and holds it in memory until you paste it into a new Audacity file. Go up to the top and choose File, then New. A fresh new Audacity window will open up. Go up to the top again, click on Edit and choose Paste. Here are the two menus:
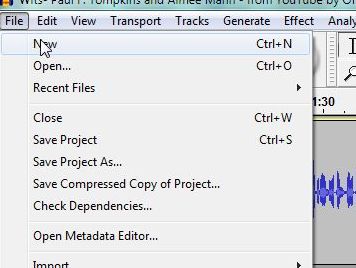
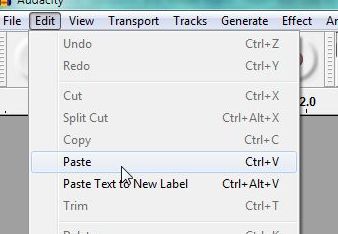
Photo of Clip 6
File then choose New.


Photo of Clip 7
Edit then Paste to put the section that you cut out into the new window.


9. Now for the fine tuning. We still want a little bit of room before the sound we like, then a little bit after. Here’s how the section looks in Audacity:
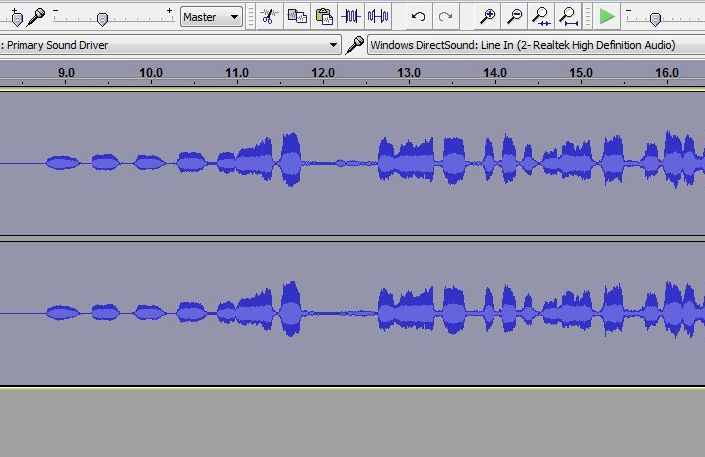
Photo of sound bit in Audacity
See how the blue lines are spread out more?


Since this section is only about a minute long, Audacity can spread it out farther across your screen, making it look far less compressed. The three or four bits at the start are actual words that Tompkins is singing.

10. Using the same technique are we did before, we cut out any extraneous bits that we don’t want at the beginning and end of the clip. Next, we will export that section as another MP3, a much smaller file than the original. Go up to File then Export. Like this:
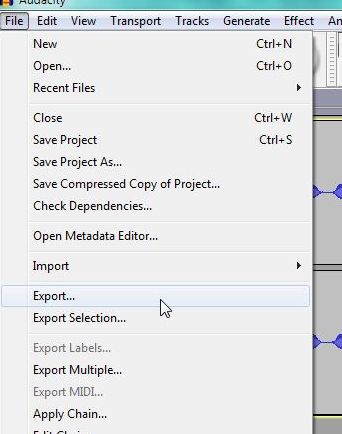
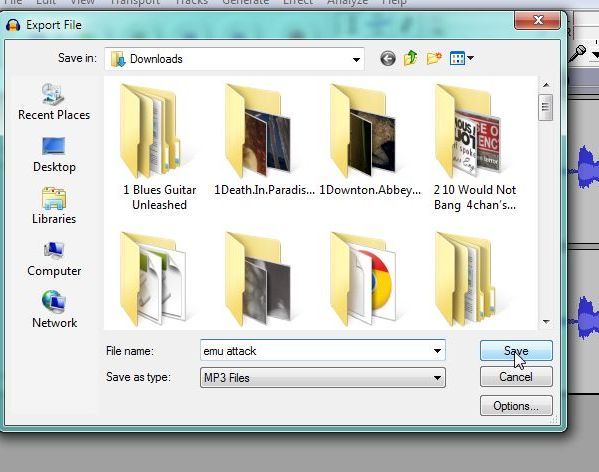
Photo of Audacity Menu
We want to Export the section as an MP3.


Photo of Audacity MP3 save.
Save the file under another name, or add ‘edited’ to the end.


Photo of Clip 13
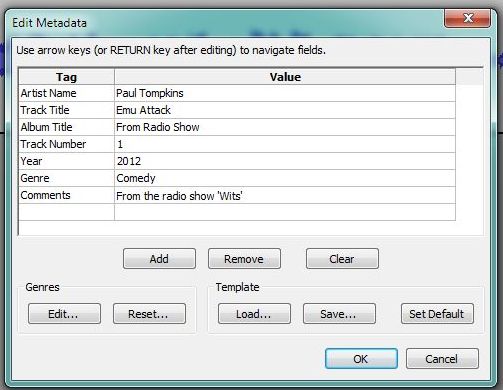
Edit the Metadata


The final menu lets you put in your own Metadata, the information that you see on the screen of your player or stereo system when you play the particular file. In this case, we made up our own description for the clip. Click OK and you’re done.


That’s it! You can use this technique to edit out bits of family movies, podcasts, basically any and all kinds of sound bits and pieces. Once you do one editing job, you’ll find the next one much smoother. Let us know if you have problems. OK?

Thanks for reading!

How to Hide Anything on Facebook

It seems we’ve been writing about Facebook for longer than Facebook has been around. Judging from the popularity of our “Hiding Likes on Facebook” posts, everyone has something to hide. In this post, which will be a long one, all we’re going to do is post screen captures of as many Facebook menus as we can find. In some photos you won’t see a menu but in the next one, we’ll show you where to find it.

Before we begin, there are two caveats here. First, while we’ll show you how to hide almost everything on Facebook, some of those things may pop up in other areas. Consider the fact that liking a page is different from showing that like later on in a series of your ‘likes’. Liking and showing likes are two different things. For this reason, we suggest that you don’t do something on Facebook that would cause you grief later on in your life or your career.

Secondly, there are two things that you cannot hide on Facebook. First, photos that you post cannot be completely hidden. You can selectively choose who can see the photo but you can’t completely hide it. Think about it. Facebook employees can see the photo, right? Even if the privacy settings for that photo are set to ‘Only Me’, someone at Facebook can see it.

Lastly, you cannot hide mutual friends from anyone. Yes, you can partially hide your friend list but you can’t hide the fact that you have a mutual friend with someone. If being friends with someone will cause problems in your life, especially if that person is a friend of a friend, you can’t hide it. We can see many situations where this would cause a problem so keep this in mind when you’re ‘friending’ someone.

TIP: Why did we say that you could partially hide your friend list? Read this post and you will see why. You can set your friend list’s privacy to ‘Only Me’ but that won’t prevent Facebook from suggesting every one of your friends to someone else. Here’s the link to the post: Stalking Friends on Facebook

Here we go with the screen caps:

Photo of HIde 1
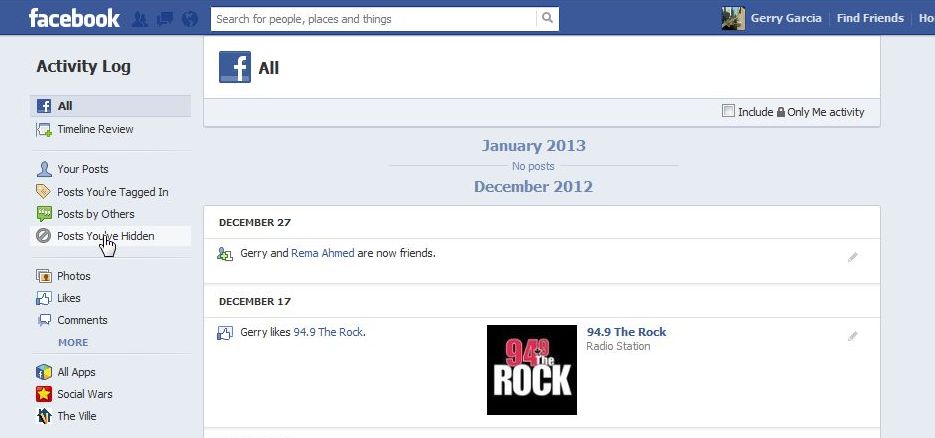
Most things that you’ve done are shown on your Activity Log, available from your Timeline.


Photo of HIde 2
On the right side of almost all items shown, there is an edit icon which allows you to hide that activity from your Timeline.


TIP: Remember that you can’t hide comments that you make on something that you did not post. Keep that in mind. If you like a photo that someone else posted, you can’t hide it. Same thing for a comment on a photo. You can’t hide that either. All of those things are controlled by the privacy settings that the other person used. Make sure you understand this before you go randomly clicking ‘Like’ on photos or making comments on things posted by other people.

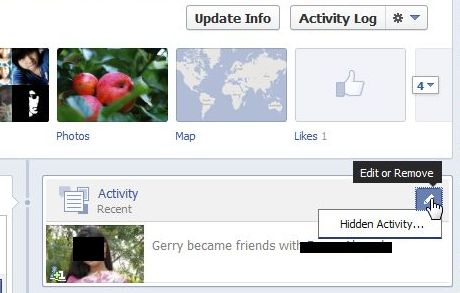
Photo of HIde 3
On your Timeline, you can find the edit icon up on the top right of most boxes.


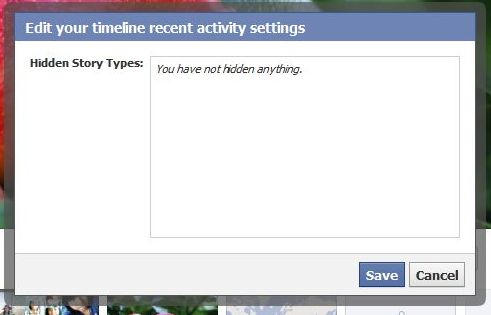
Photo of HIde 4
You can check on story types that you have hidden. Seems we haven’t hidden any…yet.


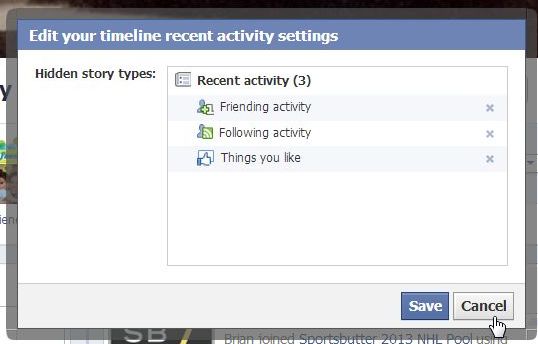
Photo of HIde 5
Here, we’ve hidden three types of activity.


Photo of HIde 6
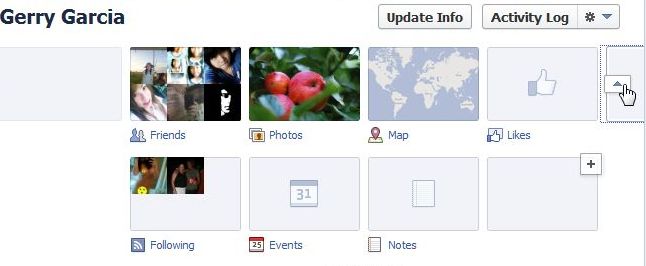
Click the arrow to open up all the boxes in your Favourites. Only then can you edit them.


Photo of HIde 7
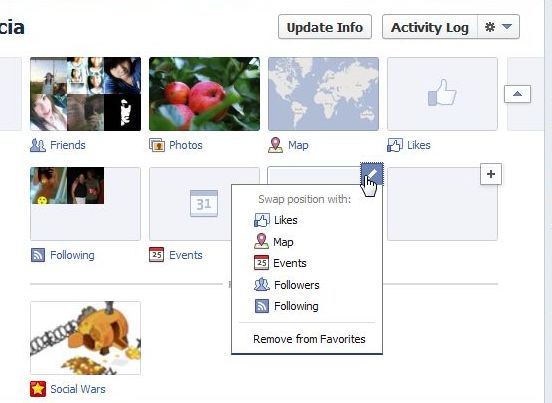
You can swap positions or remove the box from your Favorites.


Photo of HIde 8
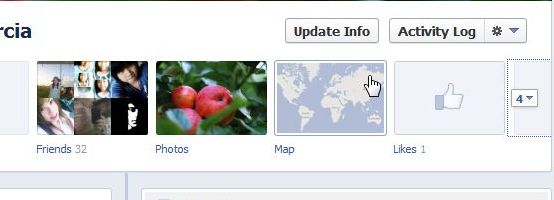
If the box menu isn’t open, you can’t edit any of the Favorite boxes. Click the arrow just to the right of the 4.


Photo of HIde 9
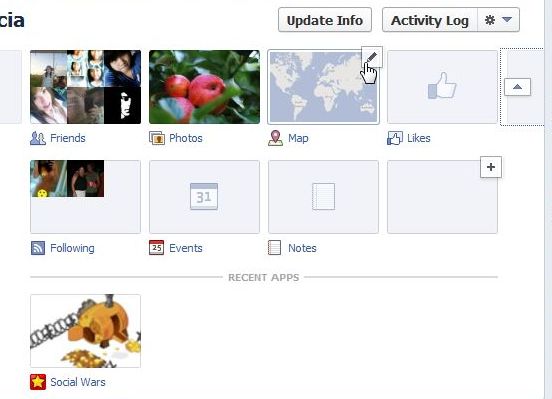
See? Now the Places or Maps box can be edited.


Photo of HIde 10
You can check what posts you’ve hidden by looking at your Activity Log and choosing the correct link on the left.


Photo of HIde 11
Here is the full list of activities that you can check by clicking More down near the bottom (shown as Less here).


Photo of HIde 12
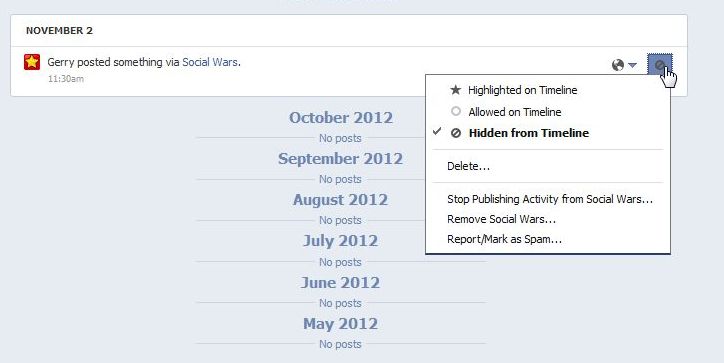
Hide all of your game posts here. Click the Stop Publishing Activity. Please do this for your friends!


Photo of Hide 13
Hide all Friending activity here.


Photo of  Hide 14
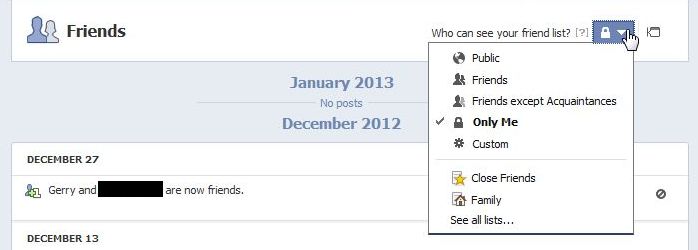
Here’s where you can hide your friend list from everyone or from some people, Choose ‘Custom’ to select specific people or lists.


This has been a long post, we know that, but we think you’ll be able to find most of what you’re looking for here. If not, let us know! We love questions.

Thanks for reading! Follow us on Facebook. Just click Like and you’ll get our updates and tech tips as soon as we post them: Computers Made Simple on Facebook
Capture Game Photos and Videos

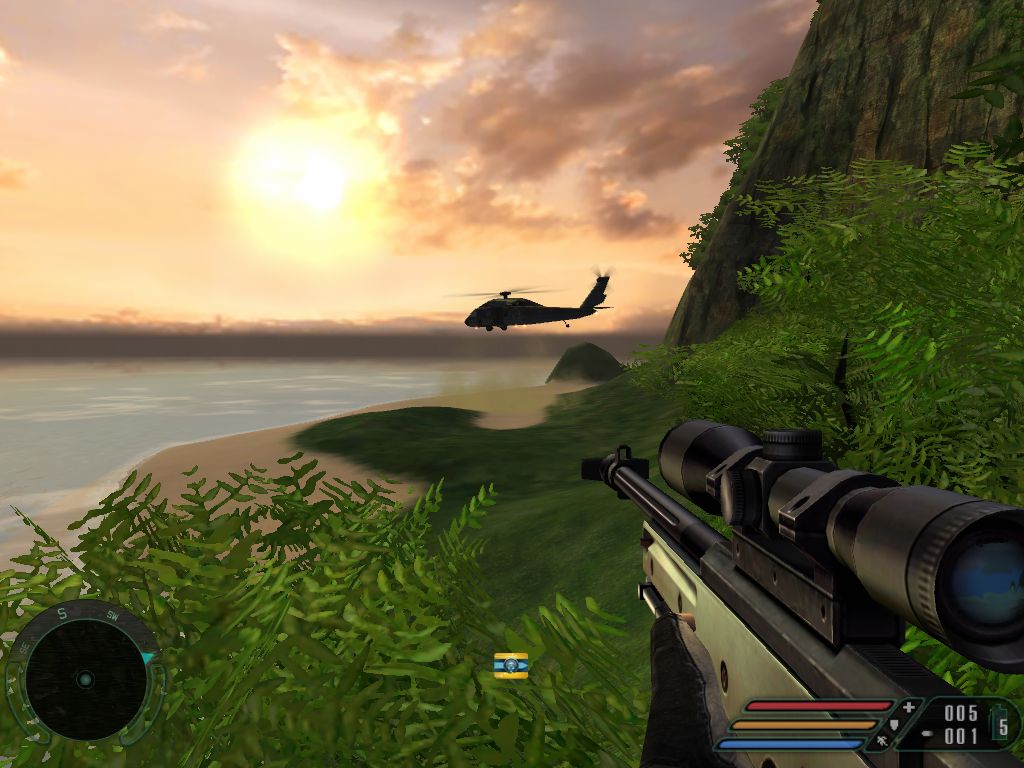
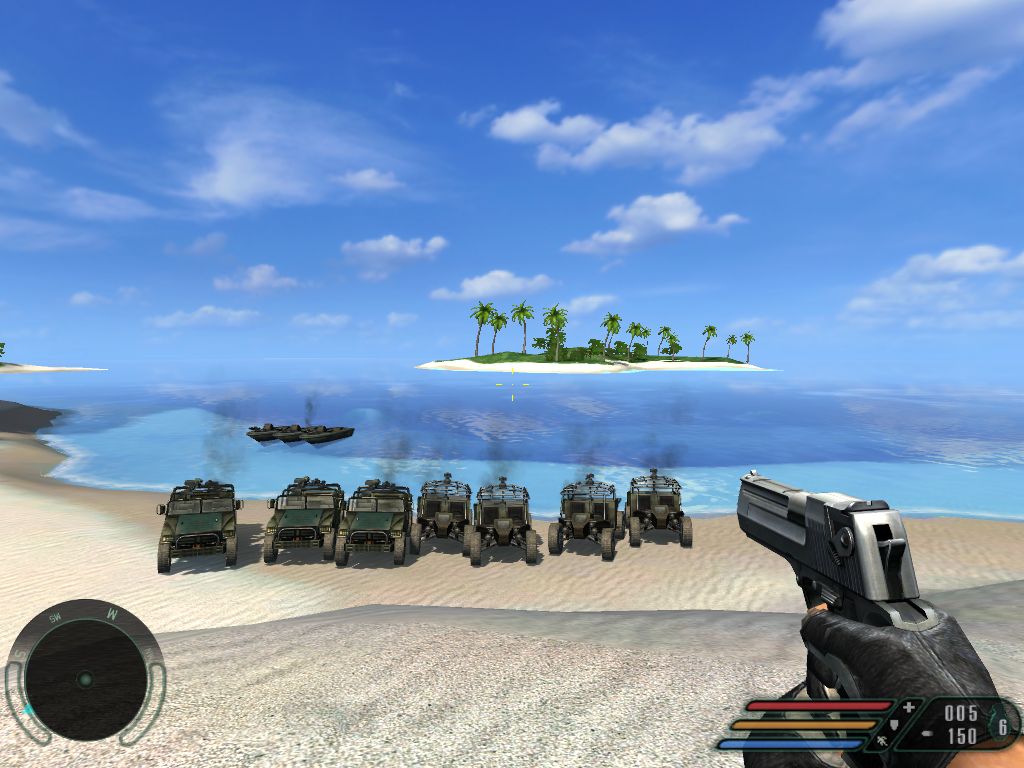
Part of the fun of playing a video game on a PC is sharing in-game photos with friends. Until FRAPS came along, the process was quite complicated. With FRAPS, capturing a photo while playing a game is as easy as a keystroke. FRAPS isn’t new, it’s been around for a few years but you may not have heard of it. Here are some shots from Far Cry, an older game but still one of the favorites around this office:


Photo of FRAPS    1
One of the ghost ‘copters that can’t be destroyed but never attacks.


FRAPS   2
We like to collect vehicles and boats. These are all one owner vehicles…


Download FRAPS here:  FRAPS  and install it. Directions are easy to follow, just make sure you start FRAPS before you start the game. You can choose to have the frame rate shown on your game screen, the original purpose of FRAPS, and then choose to record stills or videos. We’ve found FRAPS to be foolproof, simple and a great tool to test out your computer and/or new video card.

TIP: FRAPS saves stills as BMP files, rather large file size. If you’re going to post or share images, open each one up in Irfanview and change them over to JPGs. File size in the JPG format, because it is a compression or ‘lossy’ system, is much smaller.

Thanks for reading!
Make Text Bigger – two simple ways to make text on your computer screen larger

Is the text on your computer screen looking a bit smaller than normal these days? While this is a natural part of the ageing process, we can help a bit. Here’s how you can increase the size of the text on your computer screen:

1. In any browser, at least the ones that we’ve tested, as well as programs such as Word, simply hold down the CTRL key (control key) and roll your mouse button away from you. To make the text smaller, roll the mouse button towards you.

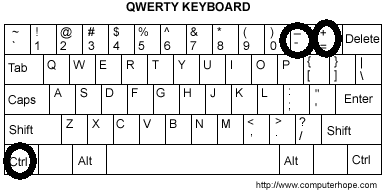
2. Alternatively, just in case you are using a laptop or an older mouse, hold the CTRL key and press the key just to the left of the backspace key, the one that has the = and + symbols on it. This is easy to remember because of the + sign. Conversely, hold the CTRL key and press the – key, just to the left of the + key, to make the text smaller.

Photo of qwerty keyboard.
Here are they keys to look for.


If you’re using a photo editing program, Irfanview for instance, you can zoom in or zoom out using this same key combination. This won’t work on menus but it will work in just about every software program that we’re tried. When you want to change the text back to normal, in Google Chrome anyway, look for the magnifying glass icon up on the top right. Click it and you can instantly set the text back to its default size.


Photo of Chrome Zoom Setting.
This is at 110% but click Reset to bring it back to normal.


While you may not need the zoom all the time, remember this tip for those times when you do. Also, if a friend or a relative seems to be having a problem with this, show them how to make use of this tool.

Thanks for reading!
 

Ease of Access Magnifier in Windows

We’re starting a series on different aids that are available to computer users who require special tools to assist them while using technology. At this point, we’re gong to concentrate on free aids that are currently available inside Windows itself or in other applications. Let’s start with Magnifier, a handy tool…even if you are not visually impaired.

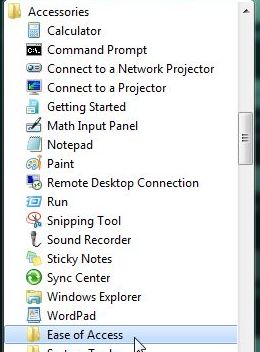
Head to the start button (the globe down on the lower left of your taskbar in Windows 7). Click it and then click on All Programs. Scroll down to Accessories and click there:

Photo of Magnifier  1
Start, All Programs, Accessories then Ease of Access.


The Ease of Access folder contains different tools to assist various users who need them  but, of course, anyone can use those same mini-apps.

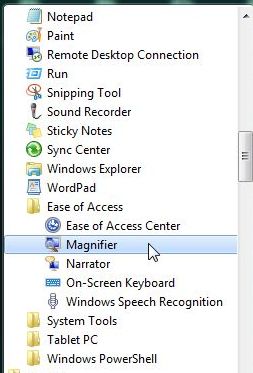
Photo of Magnifier  2
Click on Magnifier.

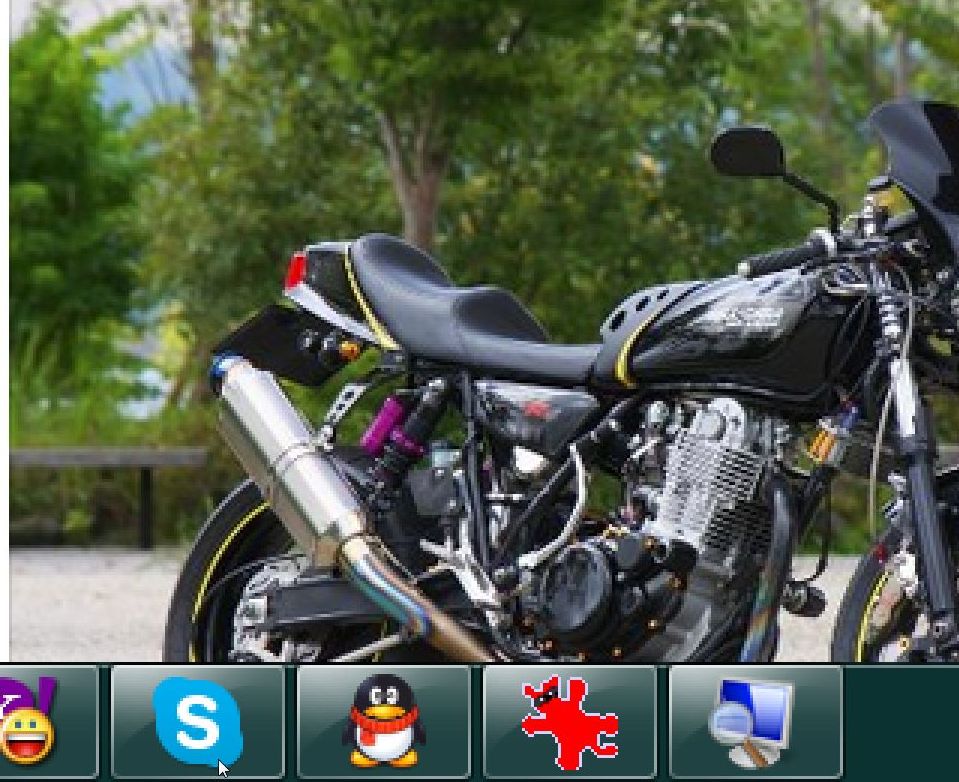
In this post we’re going to use the Magnifier. Once you click it, everything on your screen gets much larger. Since your actual screen doesn’t get any larger, obviously, you are faced with only one section of your desktop. Move your cursor (mouse) around the screen and the desktop or current application will move around accordingly. Everything seems a lot larger.

Photo of Magnifier  3
Icons, images and type are all larger.


Everything is still there, it’s just magnified by whatever percentage the magnifier is currently using. You can adjust that percentage by clicking on the icon of the magnifying glass.

Photo of Magnifier   4
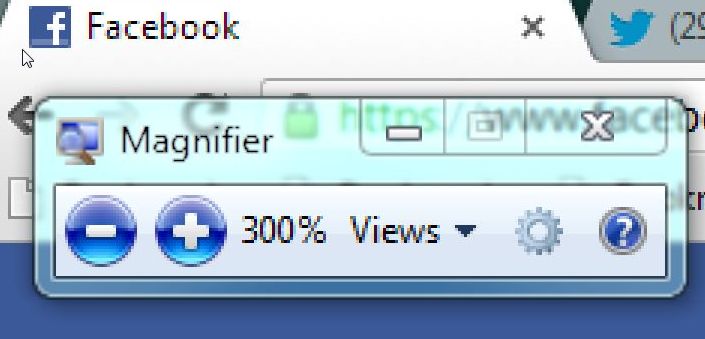
The – and + icons zoom in or out, depending on which one you click.


Zoom in or out. You can make things a lot bigger or just a bit larger, it’s up to you. When you’re finished, click the X up on the top right of the menu to go back to normal. We’ve found this tool to be very handy when we’re examining old photos or handwritten documents. Details that aren’t visible in the originals are often much easier to see or read using it. Try Magnifier out yourself and we think you’ll find quite a few uses for it.

Thanks for reading! Like us on Facebook to keep up with the latest posts and interesting bits of news: Computers Made Simple on Facebook