We’ve talked before about creating a separate Facebook profile, just in case you need an extra layer of privacy. Now, we’re going to show you another way to protect your privacy while using only one account. It’s a bit complicated and it only works for things that you post but we think it might help some of you. Stay tuned for subsequent posts on this. We can’t do it all in one post.
Here’s how to isolate parts of your profile:
The theory works like this: out of say 100 friends, 15 of them are family, 30 are close friends and the rest are simply acquaintances that you’ve picked up over time. Your family photos are probably private. Maybe you don’t want to share all of your birthday photos with your other 85 friends. By the same token, that party at Mickey’s last week isn’t something that you want to share with your family. Get it? You want to share some things with some friends, but not others.
The first step is to sort your friends out into groups. You want to make lists to keep them all separate. Here’s how to sort your friends into lists:
1. Make sure you are logged-in to your account, right? Then, click on your profile photo up on the top right to bring up the timeline. Then, click on the little box that says Friends. You might have to click on the right side of the boxes if your Friends box is tucked underneath your Likes and Photos, etc. Ultimately, you want to see this page (or one like it):

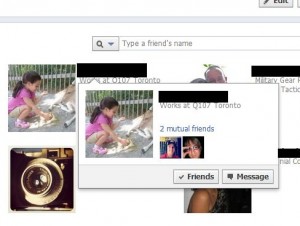
2. Now we get into some hovering. Hovering is when you rest your cursor (mouse) over something but you don’t click on it. You hover, OK? If you click, it makes things much more difficult so just hover. Practice. We’ll wait. (insert coffee break here…) Got it? Good. Start at the top left and hover over that person’s name. This is what you want to see:

3. Hover over the word friends. You’ll see this next :

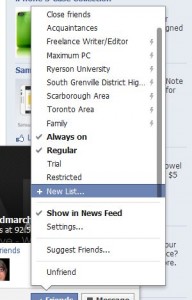
4. If you have hundreds of friends, this could take a while. Do 10 or 20 a day, something like that. Anyway, this time you get to click. Click on ‘show all lists’ to bring out this menu:

5. Now, you might have some lists already. Facebook arbitrarily makes some lists for you, based on geography or school or some arcane algorithm that only they understand. You want to start dividing your friends into different groups. Take some time and think about it. A list of family members is an obvious choice but some of your family might be more open-minded than others. Then again, they are in contact with your other family members so the next step is to figure out how discreet they are. You get the gist of what we’re trying to say here.
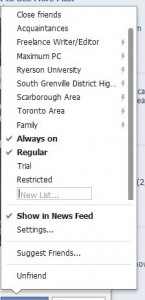
Click on the words, New List. Like this:

6. Type in the name of your new list, Men from Mars sounds good, and continue on through all of your friends. Sure, it’s a chore but you might find it easier than creating a separate profile. If you only have 50 or 60 friends, this won’t take long. Remember that some friends can be on more than one list. You’ll work it out, no problem.
Tip: Remember, when you add a new friend, make sure you put them on one of the lists you’ve created or start a new list.
This is step one. As this week progresses, we’ll get deeper into the layers of privacy as we attempt to simplify your Facebook experience and protect your reputation.
Thanks for reading!

One thought on “Layered Privacy on Facebook – Part 1”