Tag Archives: facebook privacy

Custom Facebook Privacy Settings – Part 2


In our last post, we explained how to create a list of friends on Facebook. In this post, we will use that list to create a custom privacy setting for certain posts that you make. This setting will guarantee that only the people on this list will be able to see what you post. Let’s get started!

1. From any page in Facebook, click on the little down arrow up on the right, beside the word ‘Home’. This is what you’ll see when you click on it:
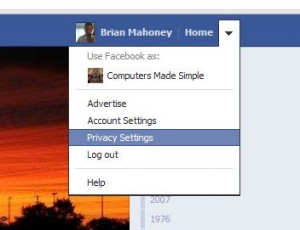
Photo on how to create Custom Privacy Settings
Click on Privacy Settings.


2. This is the next menu that you’ll see:
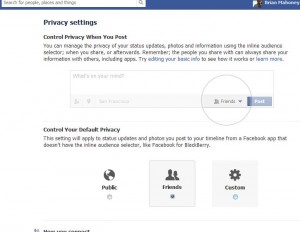
Photo of Custom Privacy Settings 2
What you’re looking for here is the ‘Custom’ button.


3. Once you set up this custom setting, you’ll be able to choose who can see certain posts. You can name them all individually or simply choose a list that you’re already created. Here’s the next menu, the one you’ll see when you click ‘Custom’:
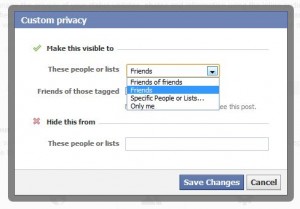
Photo of how to Custom Privacy Settings 3
Choose ‘Specific People or Lists’


4. Once you choose ‘Specific People or Lists’, this is the menu that pops out:
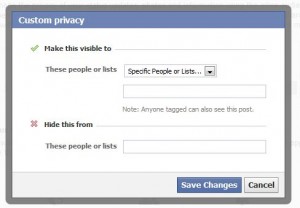
Photo of Custom Facebook Privacy 4
Choose to hide or make the post visible. Note the tagging reminder.


You can choose to make certain posts visible or you can choose to hide the posts from some people. We would suggest hiding the posts as opposed to restricting who can see it. It’s the same thing, pretty much, but when you hide something, it seems to be more secure, more private.

Warning: Before you go nuts with this, specially where family or significant others are concerned, think about what you’re posting. A mistake here could be disastrous. 

Tip: This setting is your default setting. Whenever you post something, you will have to check which setting you’re using, this custom one or one of your other settings. You can change your default setting at any time using this set of menus. Good luck!

Thanks for reading!


Custom Facebook Privacy Settings – Part 1


If you want to post something on Facebook but you don’t want all of your friends to see it, here’s what you have to do.

1. First, you need a list. Facebook allows you to create lists of your friends very easily. You can use these lists for privacy, which is what we’ll do here, or to sort out your newsfeed/friend updates. If you only want to see updates from a certain group of people, you have to make a list first.

2. Go to your own timeline, click on the box that says ‘Friends’ to bring up a list of all of your friends.

3. On your list of friends, this is a typical pop-out when you hover your cursor over a name.

Photo showing how to Create a List 1
Pick a friend who you want to add to a list.

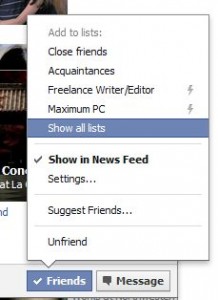
4. See the word ‘Friends’ in the photo above? Hover over that until you see this menu:

Photo of how to Create a List 2
Hover on the word Friends to bring up this menu. Look for ‘Show all lists’


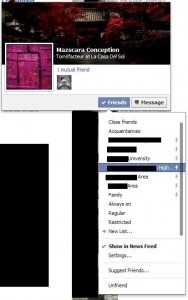
5. When you hover your cursor over ‘Show all lists’, the following menu will show up. This will allow you to create a new list for this friend. If you already have some lists, simply click on the list and that friend will be added to whatever list you choose.

Photo of how to Create a List 3
Down at the bottom, you’ll see ‘+ new list’. Click that.


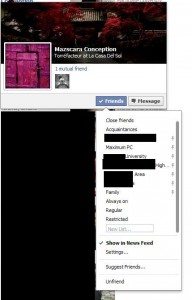
6. When you click ‘+ New list’, you’ll see a small rectangle which will allow you to name the new list.

Photo of how to Create a List 4
Name your list and your friend is automatically on that list.


7. Now you have one list. Add friends to it by hovering your cursor over their name and clicking any list that you want them to be on. Makes sense, right?


OK, now you have one or more lists. Once you sort your friends into these lists, you can then move on to post things that only they will see. That’s in part two of this instructional. Stay tuned!

Thanks for reading!