Once you’ve got your WeChat account up and running, make sure you add a real profile photo and a greeting. You can take a photo with your camera or use one that you’ve taken before. Your message should be polite and friendly. Don’t be rude, whatever you do or you’ll probably get banned.
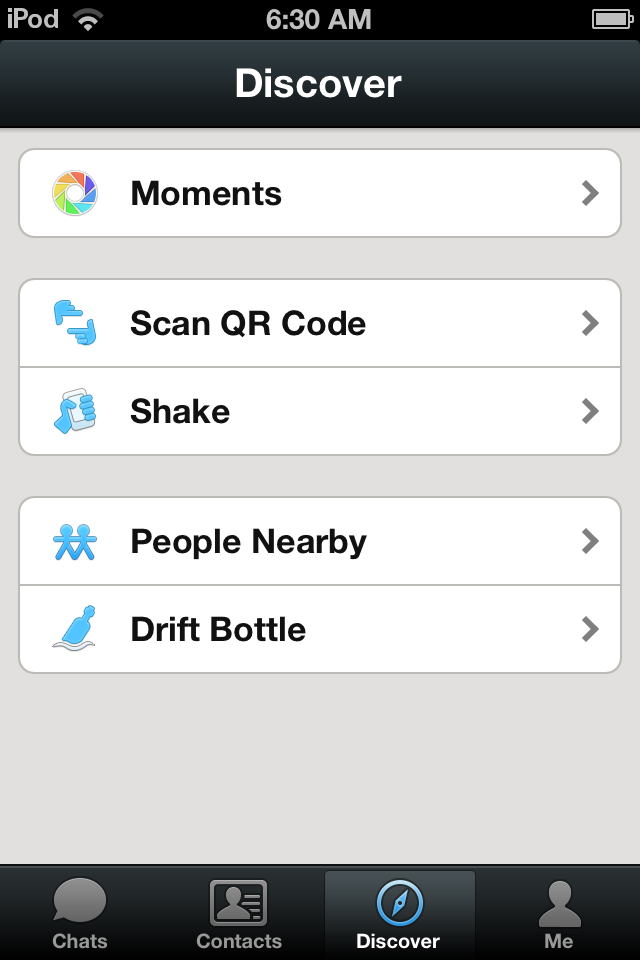
Here they are, WeChats social features.
Not that you’re all set up, share some Moments. Add photos or short videos, you can even type a message or thought or status update. Just hold the camera icon for a second or two. That will allow you to type your message. WeChat has changed the way you add photos to your Moments. Instead of a still photo, you can only add short videos. If you want to add a photo, you have to take the photo when you are outside of WeChat then choose ‘Images’ when you press on the camera icon. The video part is good but we kind of miss the immediate photo sharing.
If you want to meet people, WeChat has three options for you. The easiest to use is People Nearby. WeChat uses your GPS to show you other WeChat users who are close to your location.
You can choose to meet males or females here.
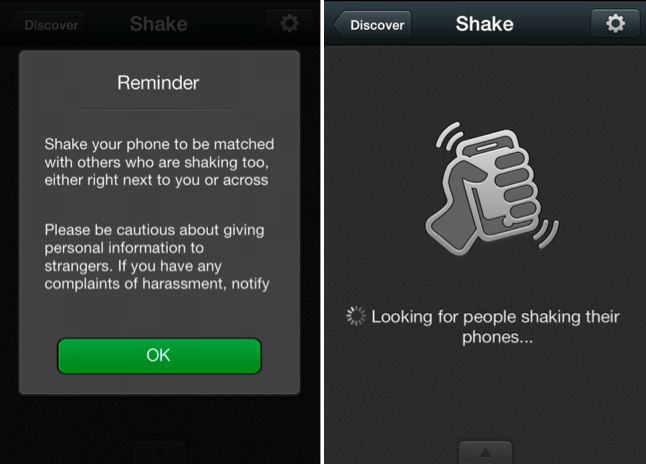
Shake is another way to meet people but it seems to cause problems for some users, problems we think that come from using it too often. Your mobile device must have a motion detector for Shake to work. If it does, all you do is Shake your phone or tablet and WeChat finds another user who happens to be shaking their device at the same time. Cool huh? We’ve had hundreds of questions about Shake so we’re pretty sure that it’s one of the most popular features that WeChat has to offer.
A warning and then a Shake. Works for us!
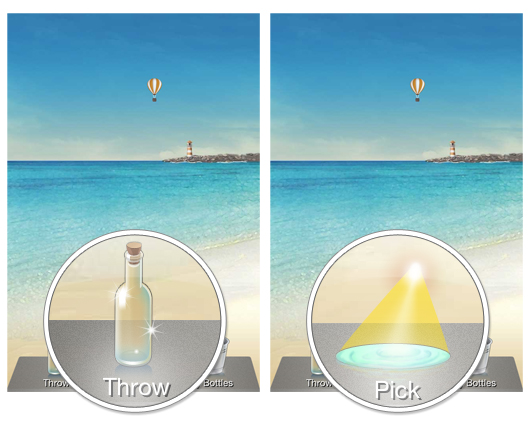
Finally, there is Drift Bottle. Just as it sounds, you write a message and toss the bottle containing it into the ocean. Sooner or later, much later it seems, someone might find your bottle and answer your message. It’s the least popular feature of WeChat but that’s not to say it doesn’t work. It just doesn’t work as often as the other systems.
Write a message and toss the bottle into the ocean. Quite romantic, actually.
Yes, this post was supposed to be about security in WeChat. We’ll do that in our next post. The social features of WeChat are VERY popular so we decided to describe them before we got into WeChat security.
Comments and questions are welcome but Likes on our Facebook page get immediate attention. Here’s the link: Computers Made Simple on Facebook . Thanks for reading!
WeChat isn’t new, that’s for sure. In the few short years that it’s been around, however, it’s become very popular in many parts of the world. WeChat is so popular, it’s become our #1 topic here on Computers Made Simple. Why is it so popular? Well, many of our readers seem to get into jams with it, situations that we’ve never encountered with our accounts but ones that need solutions.
Our next few posts will guide you through the basics, everything from getting a new account to the intricacies of recovering a lost password or a banned account. Off we go!
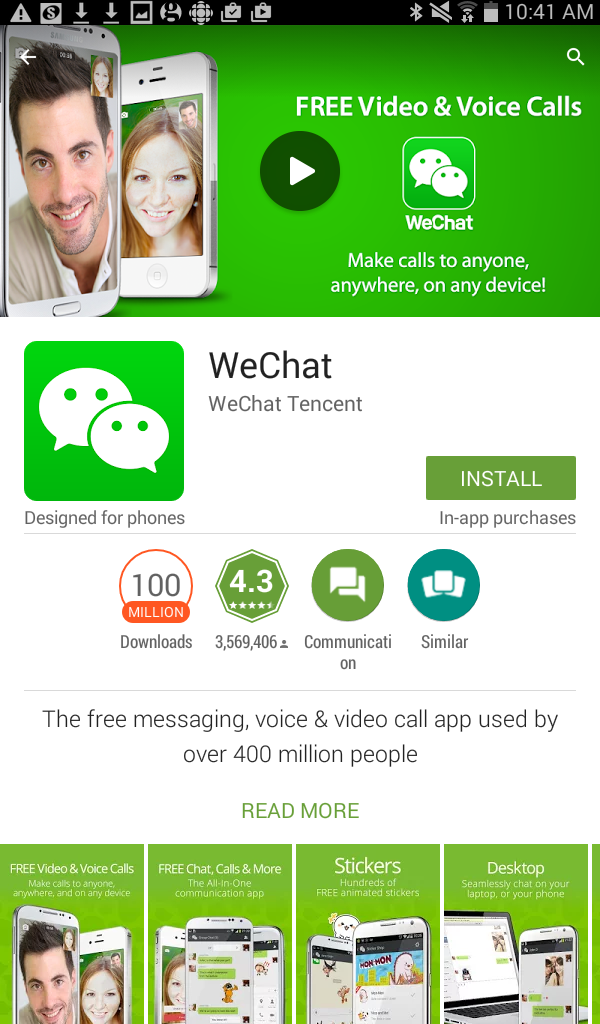
1. Download and install WeChat from your app store. Make sure it’s the REAL app, not a third-party fake :
This is what the REAL WeChat app looks like in the Google Play Store
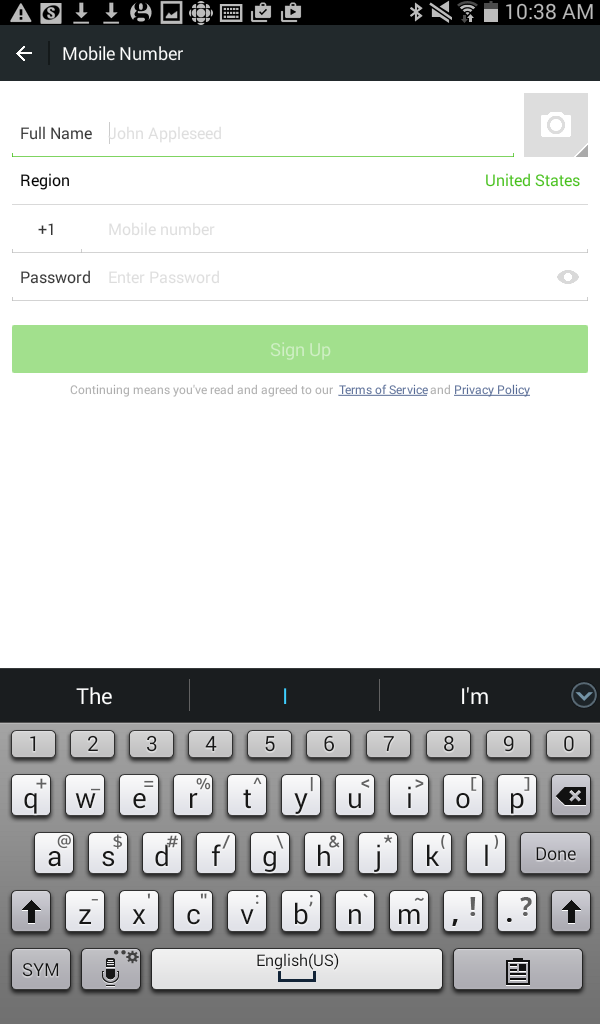
2. It seems that you need a mobile phone number OR Facebook to sign up for WeChat. That’s new. At one time all you needed was a QQ account or email. It seems that WeChat has tightened up their security for some reason.
Johnny Appleseed? How did they know? Use your real name or a fake name, doesn’t matter.
3. If you have Facebook installed on your mobile device, the ‘Sign in with Facebook’ option will come up on your screen when you attempt to register for WeChat. If you don’t have Facebook installed, you’ll have to cough up your mobile phone number.
NOTE: If you have an old account, you can still log in with your QQ account number, your email or your WeChat ID but for new registrants, it’s mobile number or Facebook, that’s it.
4. If you don’t have a real mobile phone, let’s say you’re using a tablet instead of a smartphone, you can try registering with one of the many free WiFi phone numbers that are available. We used Fongo to get our free number. Since we couldn’t seem to receive SMS messages, we chose to get the verification code via phone call. That too was hit and miss but we were finally able to get a code and enter it into the proper verification line.
5. Once you get the verification code via SMS or phone call, enter it in the proper space and you’re in. You’ll get a message or two or three from WeChat. Ignore them, unless you want to add some stickers to lighten up your chats.
6. Next, set up your profile. Make up a name for yourself, tell WeChat where you are and what city you’re in, things like that, and you can start to add contacts.
7. People Nearby and Shake are easy to use. We prefer People Nearby but it’s up to you. Tell WeChat who you want to meet ,as in men or women or both, then you’re off!
Installing and running WeChat is simple, no different from any other app that’s out there. What seems to be confusing is the security options. In our next post we’ll give you tips on how to secure your account.
Comments and questions are welcome but Likes on our Facebook page get immediate attention. Here’s the link: Computers Made Simple on Facebook . Thanks for reading!
WeChat is our most popular topic by far. It always amazes us that people don’t protect their accounts. As the saying goes ‘you don’t know what you’ve got till it’s gone’. Protect your account BEFORE you lose it…and all of your contacts.
It’s not rocket science, trust us. It’s all in the settings. The point of this protection is to prevent someone else from stealing your password and locking you out of your own account. If your account is accessed from a new device, you have to verify that device with WeChat.
You can use WeChat on any mobile device, no matter if it’s Android or iOs. We’re talking tablets, iPods, iPads, etc. Since WeChat is an app that you add to these devices, it can’t be used on a PC, neither laptop or desktop. Yes, you can chat on a computer but only with Web WeChat.
Even though you can use WeChat on any mobile device, you still need a smartphone to enable the SMS verification. WeChat limits this verification to one profile per phone number. If you change your phone, make sure you unlink your old number from WeChat. Here’s a post on exactly how to do that:
We’re going to run through all of this in a new series starting next week. Stay tuned.
Comments and questions are welcome but Likes on our Facebook page get immediate attention. Here’s the link: Computers Made Simple on Facebook . Thanks for reading!
Last time, we learned how to get our videos ready for iTunes. Remember that iTunes can’t play every kind of video. We used Handbrake to transcode (change) the videos from one file type to the one that iTunes can play. Today, we’ll do the actual streaming.
Make sure you’ve installed iTunes, that your Apple TV is on and connected to your HDTV via the HDMI cable and you have your video(s) in a folder somewhere that you can find on your PC. Here we go:
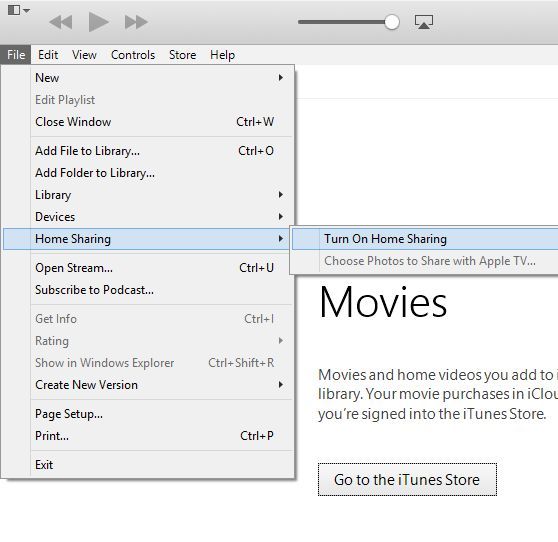
1. Open iTunes. Look for the word File on the top left. Click it then look for Home Sharing. Click it and choose Turn On Home Sharing.
Follow the path, it’s easy.
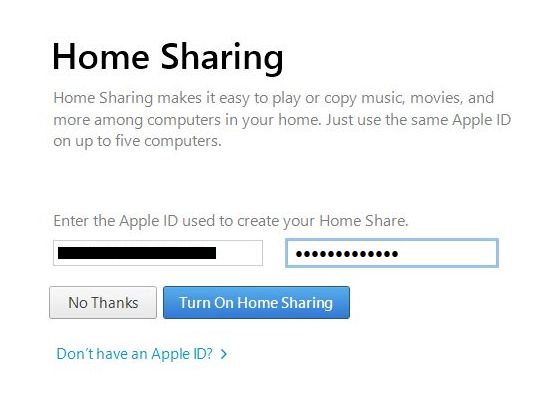
2. On the next screen that comes up, fill in your iTunes account details, just email and password. If you don’t have an iTunes account, you can register from this screen. Use a very strong password. iTunes accounts are often hacked.
If you don’t have an Apple account, get one here. If you do, fill in the details.
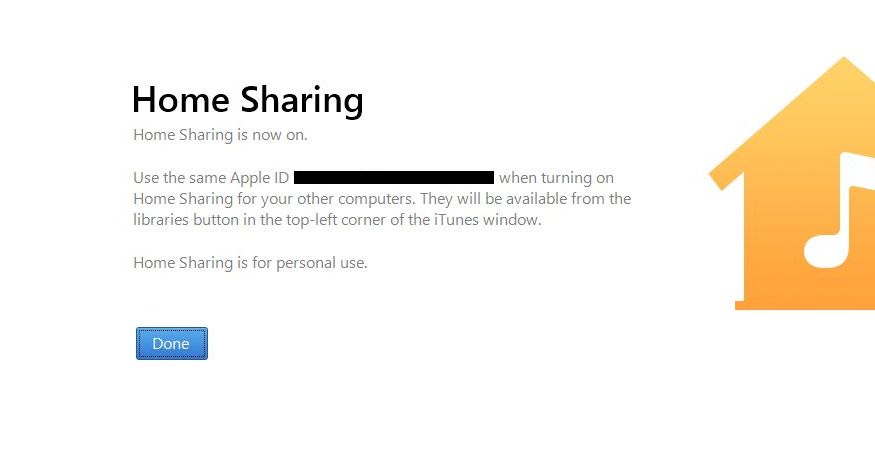
3. Once you’ve filled in your account details, click on Done.
You can share the same account on five computers.
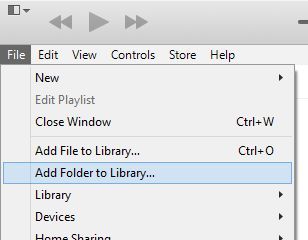
4. Next, we have to tell iTunes what we want to share with other people on our network. That’s why we suggested putting all of the videos that you want to share in one folder. If the files are all over your computer, this process doesn’t work as well. Make a new folder on your desktop, put the videos that you want to share into that folder and then tell iTunes that this is the folder you want to share. Click File then Add Folder to Library.
You can share a file or folder but sharing a folder is much easier and faster.
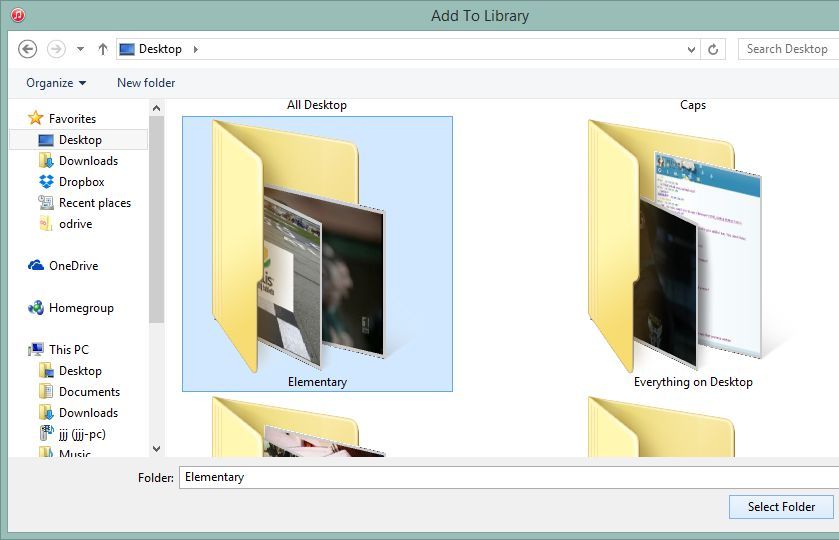
5. Navigate to the folder, select it and choose Select Folder.
Select the folder on this screen. If it’s on your Desktop, it’s easier to find, right?
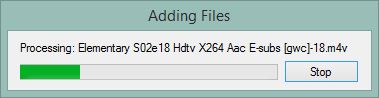
6. You don’t have to do anything now except wait. iTunes will scan the folder and process the various files that are in it. Just watch and wait, don’t do anything until iTunes is finished.
One file doesn’t take long to process. Lots of videos might take a lot longer.
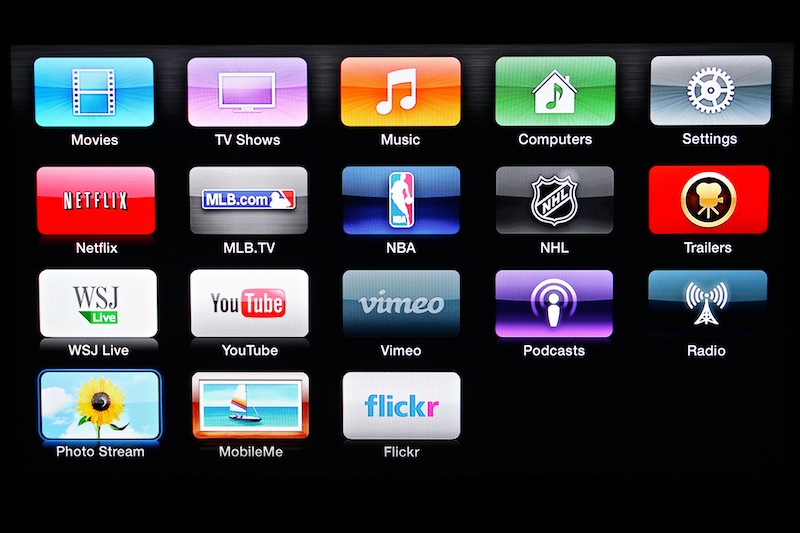
6. You’re finished with the computer part now. Head over to your Apple TV, turn it on and get its menu up on your screen. No screenshots here so follow this carefully. Scroll over to the right and click on Settings. Scroll down to Computers and go through the Turn on Home Sharing routine using the same iTunes account and password that you used on your computer.
Your Apple TV screen will look something like this.
7. Back out of that screen and scroll over to the Computers icon, just to the left of Settings. If everything is working correctly, once that icon is highlighted, the various things that are in your shared folder will show up on the very top of the screen.
8. Click on Computers and then down to Home Videos. All of the videos that you have run through Handbrake should be there. Click on one and it should play. You’re done!
Troubleshooting: Sometimes Apple TV and iTunes can be finicky. When something goes wrong and you can’t see the videos that you’ve shared, turn off home sharing on your PC and then turn it on again. If that doesn’t work, turn off home sharing on your Apple TV and turn it on again. One or the other always works for us.
Tip: iTunes does not automatically share videos in your shared folder. Every time you add a new video, you have to tell iTunes that you want to share the folder…again. That’s how it works for us anyway. Your mileage may vary. If you cant find your recently added videos, tell iTunes that you want to share that folder again.
Wow, you’re done well! Pat yourself on the back and watch a video on your fancy HDTV. Enjoy!
If you have problems, feel free to ask us for help. Comments and questions are welcome but Likes on our Facebook page get immediate attention. Here’s the link: Computers Made Simple on Facebook .
This is the first part of our series that will show you how to stream a video from your computer to your HDTV, using Apple TV. We’re Windows users here at Computers Made Simple but we have found Apple’s TV streaming device, Apple TV, to be one of the top devices out there, designed solely to put out content to HDTVs.
Here’s the Apple TV device. Small, cool looking and very easy to use. About $100.00
You’ll need some prerequisites for this how-to. Here’s the list:
1. A high-def TV (HDTV) with an open HDMI port.
2. A home network, could be wired or wireless. We prefer wired but a router that uses the N protocol will work just fine. The old G protocol won’t cut it here. G is fine for email and surfing but streaming video requires more bandwidth, something only N can provide.
3. To stream videos using Apple TV, you need a computer, could be a desktop or a laptop. These computers could be PCs or Macs but we’re only talking about PCs here.
4. Handbrake, the free video transcoder. Handbrake is open source. This means that it’s both free, reliable and upgraded on a regular basis. You can get it here: Handbrake . Download it and install it. Make sure you allow it to put a shortcut on your desktop. That way you won’t spend time looking for it in your Start or Program menu.
5. A video. Any video will do here, could be from your digital camera or camcorder, a torrent you’ve downloaded or a video that you’ve saved from Youtube.
6. iTunes. You’ll need an account with iTunes as well as the software itself. If you have any Apple device, whether it’s an iPod or iPhone or one of their music players, you will almost certainly have iTunes already.
TIP: While the Apple TV device is easy to use, it won’t play every type of file. You don’t have to understand file formats or types to stream videos but some basics would help. Here’s an example. Let’s say that most of the world can understand English. In order for an English speaking person to understand Arabic, for instance, the Arabic would have to be translated into another fileformat , in this case English. That’s what Handbrake does. It takes virtually any video file and translates it into something your Apple TV can understand.
The next little bit of this how-to will save you time and frustration once you get your Apple TV up and running. Since the device will only play certain types of files ( .m4v, .mp4 and .mov formats), you’ll want to make sure your video is one of those kinds. Here’s how to ensure that your video file can be streamed. Here we go:
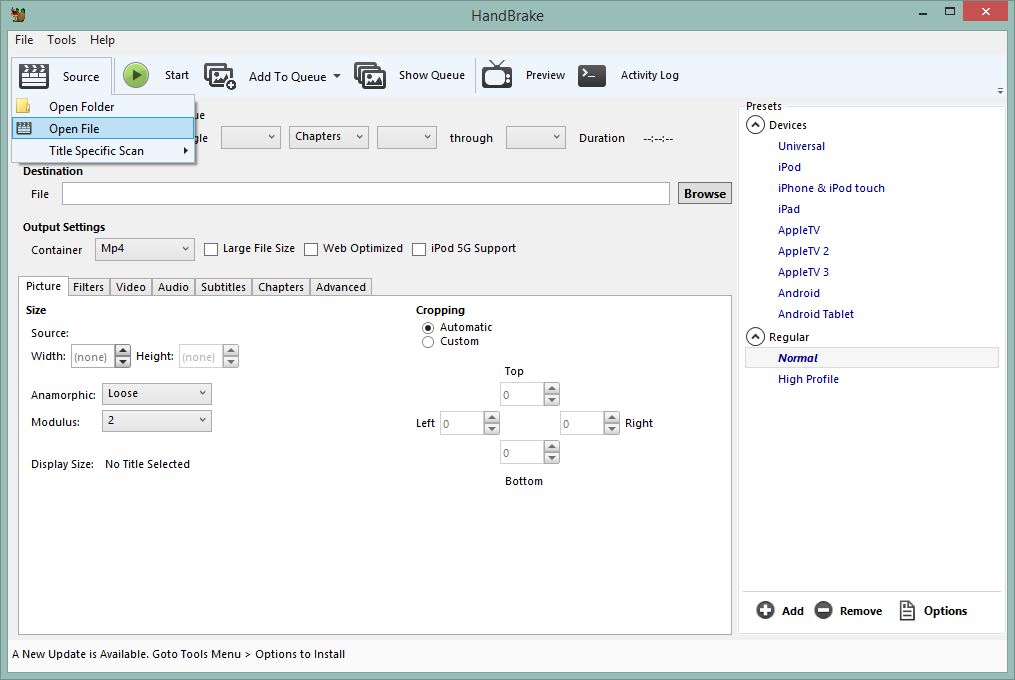
1. Open Handbrake. On the clapper icon on the upper left, choose Add File:
The clapper icon is what you look for, then Open File.
2. We downloaded one season of the Australian TV show, Rake. The videos are in our Downloads folder in Documents. Your location may be different. Here’s the path to our videos:
Click the one you want and then choose Open.
3. You’ll notice that the files already are identified as ‘MP4’. While they may be MP4s, Apple TV won’t play them. Why? Because there are many different kinds of MP4 files, just about as many as there are accents in the English language. Remember our previous example? Scottish people speak English, right? People in the American South speak English. Do the two versions of English sound the same? No, they don’t. Yes, they are all English and yes, the files are MP4s but Apple TV can’t read that particular type of MP4. That’s where Handbrake comes in.
4. Once you have clicked Open in the previous menu, you’re taken back to Handbrake’s main screen. What you’re looking for here are the words AppleTV3 on the middle right side of that screen.
5. We have an AppleTV 3, you might have something else. Choose whatever it is you have and Handbrake will know what file to type to ranscode your video into in the next step.
The choices are on the right, so find out what device you have and press its name on this screen.
6. Press Start and Handbrake will start the transcoding process. One of our files took eleven minutes so, depending on the speed of your computer, you’ll have to wait for a while.
OK, now you’ve got one file ready to stream. That’s all for today. Next time we’ll show you how to get the file from your computer to your HDTV. It’s easy and works like magic.
If you have problems, feel free to ask us for help. Comments and questions are welcome but Likes on our Facebook page get immediate attention. Here’s the link: Computers Made Simple on Facebook .
Thanks for reading!
a little bit of hi-tech, a little bit of common sense and a lot of fun