Tag Archives: Streaming Media

How to Stream Videos Using Apple TV – Part 2

Last time, we learned how to get our videos ready for iTunes. Remember that iTunes can’t play every kind of video. We used Handbrake to transcode (change) the videos from one file type to the one that iTunes can play. Today, we’ll do the actual streaming.

Make sure you’ve installed iTunes, that your Apple TV is on and connected to your HDTV via the HDMI cable and you have your video(s) in a folder somewhere that you can find on your PC. Here we go:

1. Open iTunes. Look for the word File on the top left. Click it then look for Home Sharing. Click it and choose Turn On Home Sharing.
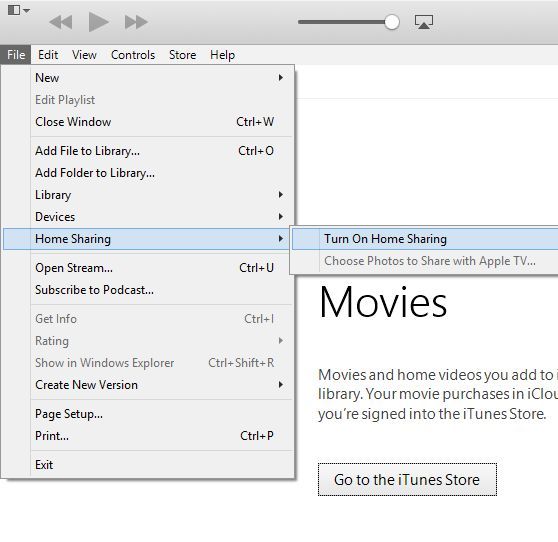
Photo of Menu
Follow the path, it’s easy.

2. On the next screen that comes up, fill in your iTunes account details, just email and password. If you don’t have an iTunes account, you can register from this screen. Use a very strong password. iTunes accounts are often hacked.
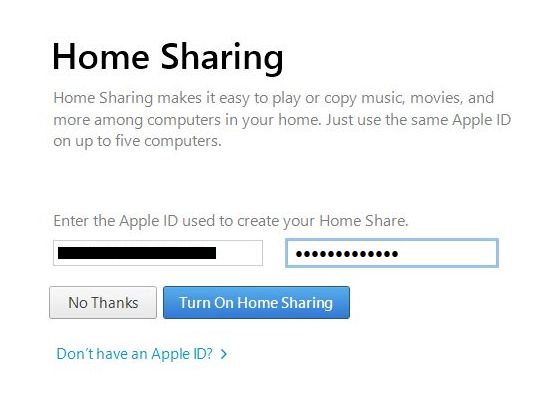
Apple iTunes screen
If you don’t have an Apple account, get one here. If you do, fill in the details.

3. Once you’ve filled in your account details, click on Done.
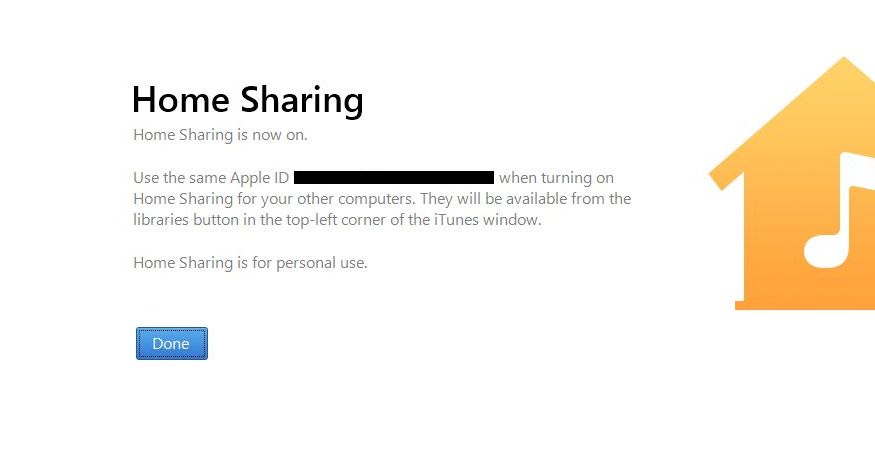
Apple iTunes screen 2
You can share the same account on five computers.

4. Next, we have to tell iTunes what we want to share with other people on our network. That’s why we suggested putting all of the videos that you want to share in one folder. If the files are all over your computer, this process doesn’t work as well. Make a new folder on your desktop, put the videos that you want to share into that folder and then tell iTunes that this is the folder you want to share. Click File then Add Folder to Library.
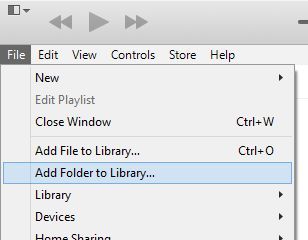
Photo of share folder screen.
You can share a file or folder but sharing a folder is much easier and faster.

5. Navigate to the folder, select it and choose Select Folder.
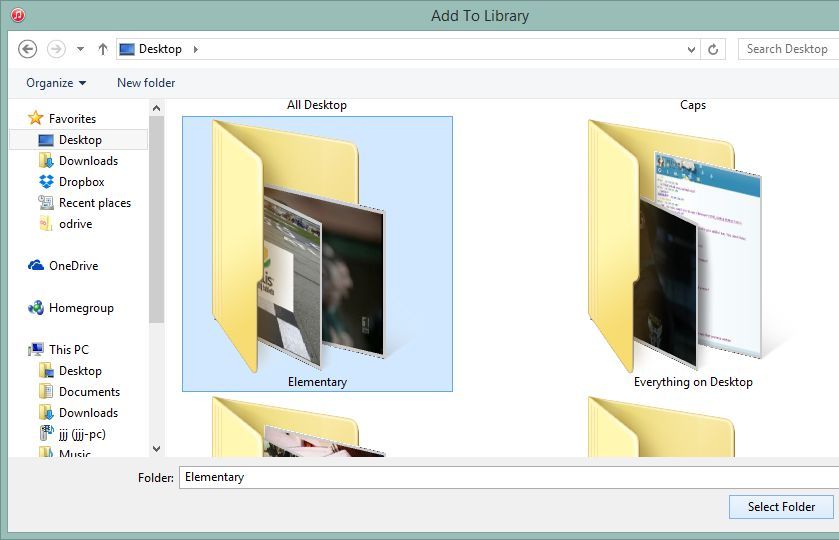
Photo of Select Shared Folder
Select the folder on this screen. If it’s on your Desktop, it’s easier to find, right?

6. You don’t have to do anything now except wait. iTunes will scan the folder and process the various files that are in it. Just watch and wait, don’t do anything until iTunes is finished.

Photo of file processing
One file doesn’t take long to process. Lots of videos might take a lot longer.


6. You’re finished with the computer part now. Head over to your Apple TV, turn it on and get its menu up on your screen. No screenshots here so follow this carefully. Scroll over to the right and click on Settings. Scroll down to Computers and go through the Turn on Home Sharing routine using the same iTunes account and password that you used on your computer.
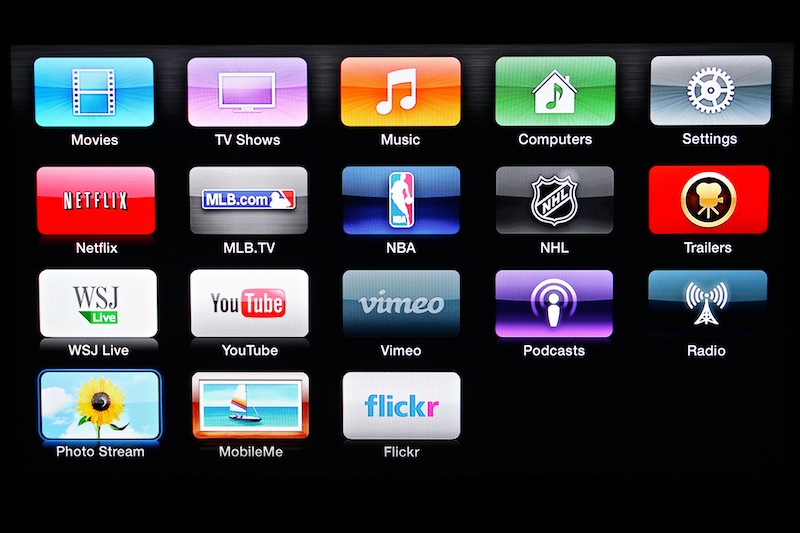
Apple TV screen
Your Apple TV screen will look something like this.

7. Back out of that screen and scroll over to the Computers icon, just to the left of Settings. If everything is working correctly, once that icon is highlighted, the various things that are in your shared folder will show up on the very top of the screen.

8. Click on Computers and then down to Home Videos. All of the videos that you have run through Handbrake should be there. Click on one and it should play. You’re done!

Troubleshooting: Sometimes Apple TV and iTunes can be finicky. When something goes wrong and you can’t see the videos that you’ve shared, turn off home sharing on your PC and then turn it on again. If that doesn’t work, turn off home sharing on your Apple TV and turn it on again. One or the other always works for us.

Tip: iTunes does not automatically share videos in your shared folder. Every time you add a new video, you have to tell iTunes that you want to share the folder…again. That’s how it works for us anyway. Your mileage may vary. If you cant find your recently added videos, tell iTunes that you want to share that folder again.

Wow, you’re done well! Pat yourself on the back and watch a video on your fancy HDTV. Enjoy!

If you have problems, feel free to ask us for help. Comments and questions are welcome but  Likes on our Facebook page get immediate attention.  Here’s the link: Computers Made Simple on Facebook .

How to Stream Videos Using Apple TV – Part 1

This is the first part of our series that will show you how to stream a video from your computer to your HDTV, using Apple TV. We’re Windows users here at Computers Made Simple but we have found Apple’s TV streaming device, Apple TV, to be one of the top devices out there, designed solely to put out content to HDTVs.

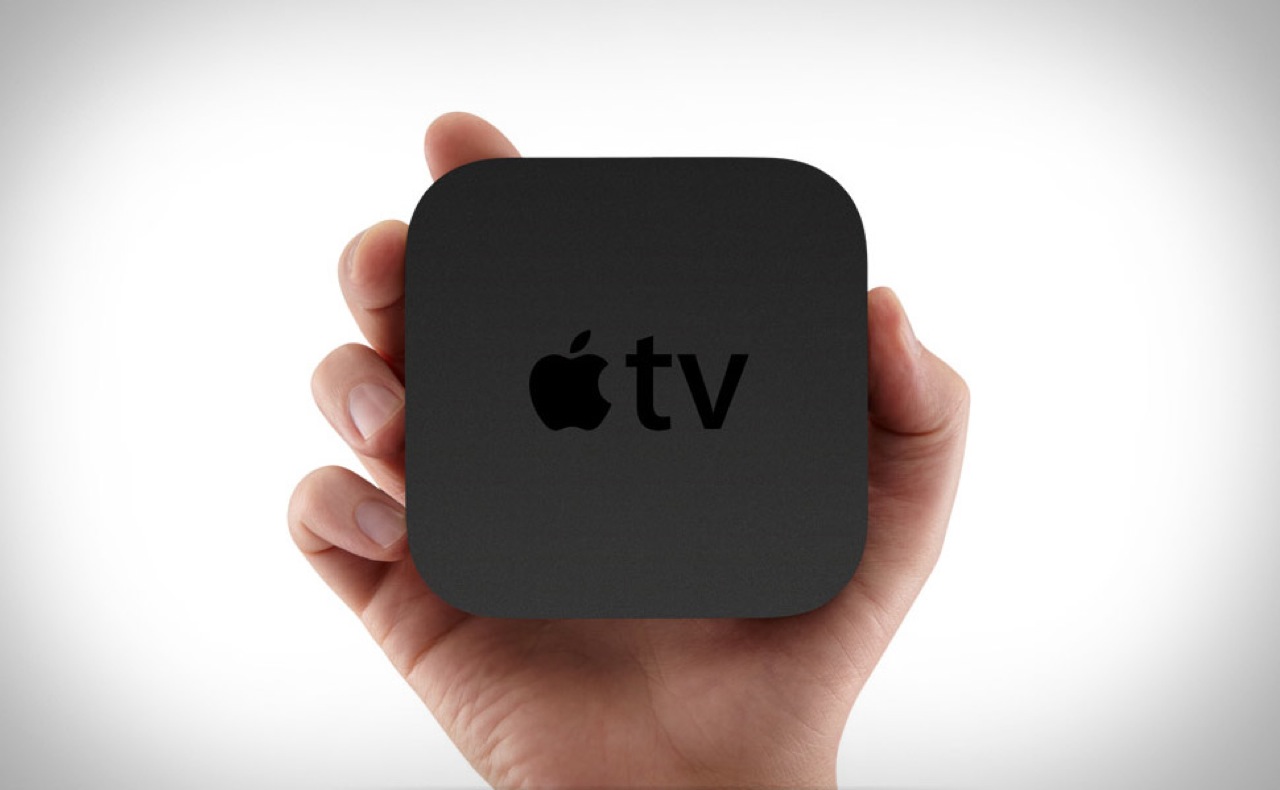
Photo of Apple TV
Here’s the Apple TV device. Small, cool looking and very easy to use. About $100.00

You’ll need some prerequisites for this how-to. Here’s the list:

1. A high-def TV (HDTV) with an open HDMI port.

2. A home network, could be wired or wireless. We prefer wired but a router that uses the N protocol will work just fine. The old G protocol won’t cut it here. G is fine for email and surfing but streaming video requires more bandwidth, something only N can provide.

3. To stream videos using Apple TV, you need a computer, could be a desktop or a laptop. These computers could be PCs or Macs but we’re only talking about PCs here.

4. Handbrake, the free video transcoder. Handbrake is open source. This means that it’s both free, reliable and upgraded on a regular basis. You can get it here: Handbrake . Download it and install it. Make sure you allow it to put a shortcut on your desktop. That way you won’t spend time looking for it in your Start or Program menu.

5. A video. Any video will do here, could be from your digital camera or camcorder, a torrent you’ve downloaded or a video that you’ve saved from Youtube.

6. iTunes. You’ll need an account with iTunes as well as the software itself. If you have any Apple device, whether it’s an iPod or iPhone or one of their music players, you will almost certainly have iTunes already.

TIP: While the Apple TV device is easy to use, it won’t play every type of file. You don’t have to understand file formats or types to stream videos but some basics would help. Here’s an example. Let’s say that most of the world can understand English. In order for an English speaking person to understand Arabic, for instance, the Arabic would have to be translated into another file format , in this case English. That’s what Handbrake does. It takes virtually any video file and translates it into something your Apple TV can understand.

The next little bit of this how-to will save you time and frustration once you get your Apple TV up and running. Since the device will only play certain types of files ( .m4v, .mp4 and .mov formats),  you’ll want to make sure your video is one of those kinds. Here’s how to ensure that your video file can be streamed. Here we go:

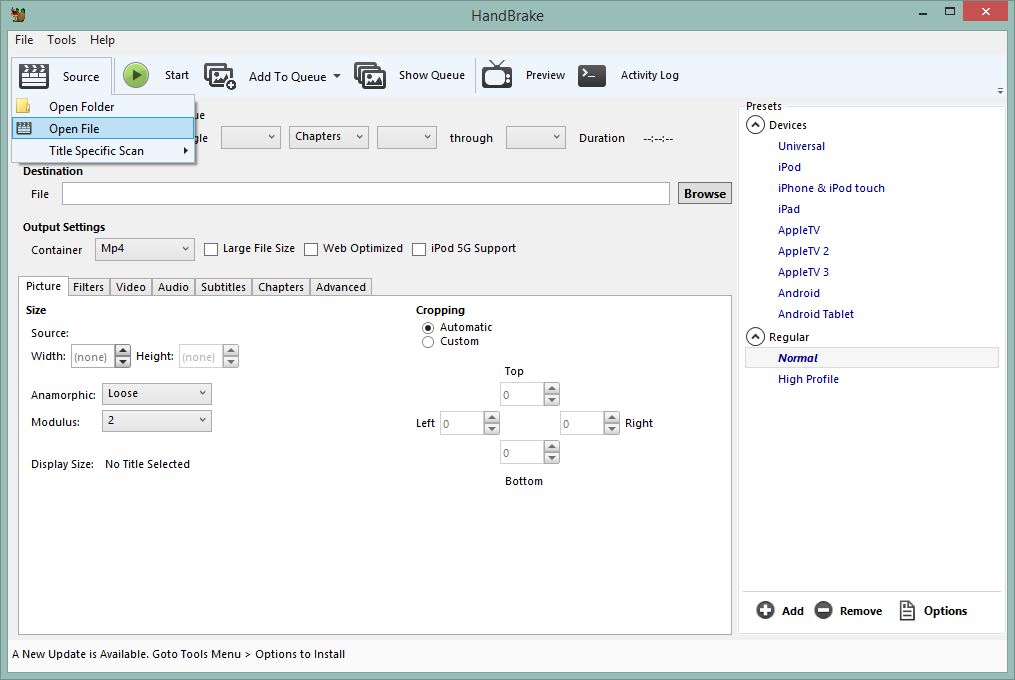
1. Open Handbrake. On the clapper icon on the upper left, choose Add File:

Photo of Handbrake 1
The clapper icon is what you look for, then Open File.

2. We downloaded one season of the Australian TV show, Rake. The videos are in our Downloads folder in Documents.  Your location may be different. Here’s the path to our videos:

Photo of video folder.
Click the one you want and then choose Open.

3. You’ll notice that the files already are identified as ‘MP4’. While they may be MP4s, Apple TV won’t play them. Why? Because there are many different kinds of MP4 files, just about as many as there are accents in the English language. Remember our previous example? Scottish people speak English, right? People in the American South speak English. Do the two versions of English sound the same? No, they don’t. Yes, they are all English and yes, the files are MP4s but Apple TV can’t read that particular type of MP4. That’s where Handbrake comes in.

4. Once you have clicked Open in the previous menu, you’re taken back to Handbrake’s main screen. What you’re looking for here are the words AppleTV3 on the middle right side of that screen.

5. We have an AppleTV 3, you might have something else. Choose whatever it is you have and Handbrake will know what file to type to ranscode your video into in the next step.

Handbrake Menu 2
The choices are on the right, so find out what device you have and press its name on this screen.

6. Press Start and Handbrake will start the transcoding process. One of our files took eleven minutes so, depending on the speed of your computer, you’ll have to wait for a while.

OK, now you’ve got one file ready to stream. That’s all for today. Next time we’ll show you how to get the file from your computer to your HDTV. It’s easy and works like magic.

If you have problems, feel free to ask us for help. Comments and questions are welcome but  Likes on our Facebook page get immediate attention.  Here’s the link: Computers Made Simple on Facebook .
Thanks for reading!