We’ve shown you how to create DVD movies and DVD slideshows in our last two posts. Since many of the DVDs that you create will be gifts, why not dress them up with an attractive cover?
DVD cases, at least the basic plastic ones, are about five inches by five inches. This refers to the size of the image that you’d want to create. For the front cover, a combination of words and images would work well and for the back cover, perhaps some notes or a dedication would be better. Either way, the covers are easy to create.
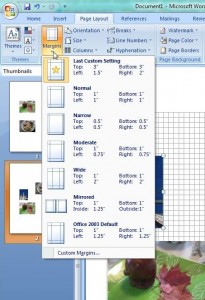
Here’s how we prepared a cover in Word. Setting the margins to leave a five by five square in the middle of the page works best. We used a top and bottom margin of three inches and one and a half inch on the left margin, two inches on the right. Then we chose to show a grid so we would know what our actual working space was. Here’s how it looked in Word:
Arrange the photos in the square and dress them up a bit using the menus in Word. Here are a couple of the settings that you can use:
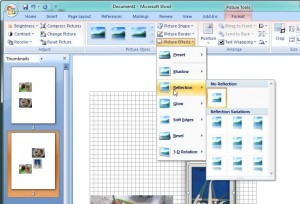
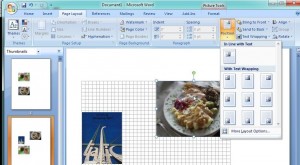
There are almost an infinite set of choices for your covers in Word. We’ve given you some ideas about the basics but you’re on your own as far as finalizing everything else. Once you have the photos set up, type in the words and print it up. Remember to leave a bit of wiggle room around the edge for cropping after you print. Keep your words away from the edge as much as you can. Our five by five dimensions are approximate, right?
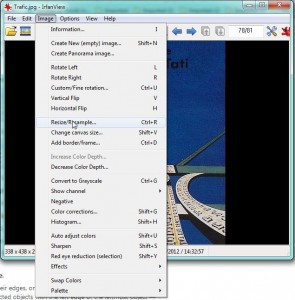
If you’ve created a DVD movie or copied a movie that you own, you can download cover art from the IMDB site, for example. Original movie posters abound on the Internet. Save the image to your computer, open it in Irfanview and adjust the size until one of the dimensions is about five inches. Since photos aren’t ever square, use your discretion as to which dimension you set to five inches. In our experience, setting the height to five inches is usually best, leaving the width to be settled according to the height you choose. You must preserve the aspect ratio in order for the image to look normal. Here are the menus you need when you’re editing a photo in Irfanview:
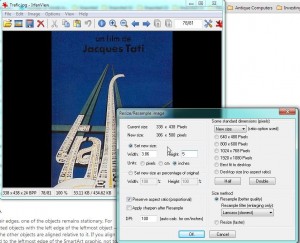
That’s about it, folks. Create the DVD using Windows DVD Maker, then use Word and/or Irfanview to create the cover. If you take your time, you’ll be able to come up with very professional results. If you have the program already, use Photoshop or GIMP to do the same thing. Most people have Word already, that’s why we chose it.
Thanks for reading! We love to hear your comments so don’t be shy, say something down below.
