Facebook Data Download – What to do with it after you get it


In our last post, we described how to download your Facebook data file. If you’re leaving Facebook, make sure you download your history, but even if you’re staying around, it’s interesting to see what’s in the download. Here’s how to check out your data download once you get it.

1. Download your Facebook data. Here’s the instructions for that: Facebook Data Download

2. Once you get the email that your file is ready, click on the link in the email, enter your password on the Facebook page that opens from the link (you have to enter your password even if you are already signed in to Facebook in another tab) and click the button to start the download.

3. The download is a zip file. On the profile that we used, the data download was 666 MB in size. Yours will vary from that, of course.

4. A zip file, in case you didn’t know, is compressed. It’s like buying something in a bubble pack. You have to spend a bit of time unzipping the file in order to see the data that’s in it. No worries. Windows knows how to handle the file. Find the file on your computer and right click it. This is what you’ll see:
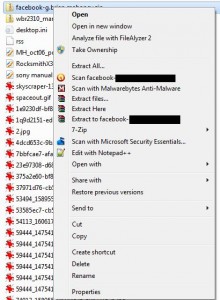
Photo of Unzip Menu
Choose ‘Extract all’


5. The extraction of the zip file creates a folder. Double click that folder to get to yet another folder, named for the Facebook profile you downloaded. Double click that folder to get to this:
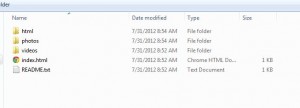
Photo of Folder Contents
The Facebook data is turned into one web page. Double click the index.html file.


6. Everything from the data file is available from the index.html page. Double click it and it will open in your default web browser. Here’s what you’ll see:
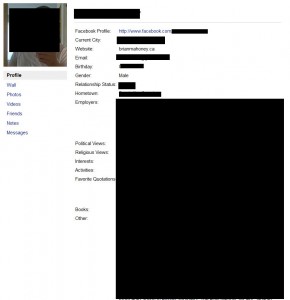
Photo of Facebook Data Download Web Page
It’s all here. Click on the items on the left side to see them on the right.


That’s it! The page is very plain, as you will see, but your data is all there…perhaps. The messages seem to be a bit sketchy, from what we’ve seen. Some are there, some are marked ‘unknown’, etc. The problem may be due to the fact that some of your friends have left Facebook or maybe they aren’t your friends now, something like that.

This should all be straightforward but if you have questions, just comment below and we’ll work it out for you.

Thanks for reading!


Facebook Data Download – How to do it


Before you leave Facebook, make sure you download a copy of your Facebook history. Many people leave Facebook every day. Sure, more people join Facebook than leave it but the word is that many of us are concerned about our privacy as Facebook ramps up to make more money for its investors.  Here’s how to save your Facebook history:

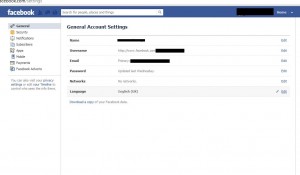
1. Navigate to your Account Settings (click the down arrow to the right of the word ‘Home’ from any page in Facebook and choose Account Settings.)

2. This is what you want to see:

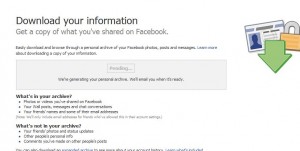
Photo of Facebook Data download 1
Click on ‘Download a copy’ to get to the next screen.


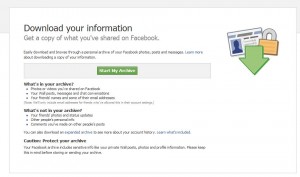
3.

Photo of Data Download menu
Click on the green ‘Start My Archive’


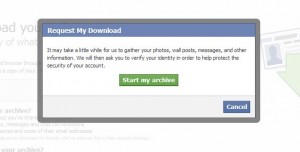
4.

Photo of Data Download Menu 3
A little blurb pops up. Read it and click the green ‘Start my archive’ button again.


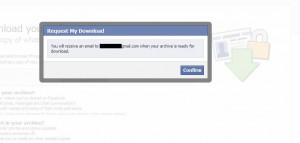
5.

Photo of Data Download Menu
Facebook sends you an email so click Confirm to start the process.


6.

Photo of Data Download Menu
You can watch the process here or just wait for the email. Depending on the amount of your involvement in Facebook, this could take a long time.


You’re done! Just wait for the email and download the zip file when it’s ready. Here are a couple of tips for you, just so you don’t get too excited about the whole thing:

Tip 1: The file may or may not include everything that you have posted or messaged on Facebook. One of our data downloads didn’t include all of the private messages, for instance. The photos were there, the notes too but not all of the messages.

Tip 2: Photos in which you’ve been tagged will not be included in the data download unless they are your photos. The data download is your data, not someone else’s. Don’t expect the tagged photos to be part of the download.

Once you get the zip file, right click it and Windows will unzip if for you when you choose ‘extract all’. Then you can go back through your Facebook life and reminisce.

Thanks for reading!

Download Tagged Photos in Facebook – Part 2


If you’re trying to download your tagged photos from Facebook, fbDownloader might work but, so far anyway, it won’t work for us. If you’ve read our previous posts, you’ll know that we’re trying to perform a relatively simple task. As more people are leaving Facebook, they want to take photos in which they’ve been tagged, with them. (We’re not sure why that is, really, because the tags don’t work unless the photo is in Facebook.)

In our last post, we suggested that the Facebook data download might include the tagged photos but it doesn’t. Even the advanced data download, which we haven’t been able to find yet, doesn’t include tagged photos.

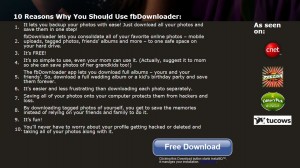
fbDownload (we won’t include a link until or unless we get it working), hypes itself as being able to download all of your tagged photos. While the download is free, this big, glossy app is full of adware which you have to uncheck from its default installation. Even then, three links appeared on our desktop leading to ‘free clipart’ (who uses clipart anymore?) and a couple of other ‘free’ offers. Trust us, none of this stuff is free or, if it is, it’s full of ads and could, potentially, slow down your computer significantly.

We’ve emailed and tweeted the people at fbDownloader and we’ll update this post if we get a suitable response. If we can get this app working, and we hope we can, we’ll edit this post to reflect that.

Finally, getting the tagged photos from Facebook involves more than a few technical problems. First, any app that works inside of Facebook has to comply to Facebook’s rules. Second, the tagged photos are usually in many different places. Very few of them would be in your own profile, right? Why would you tag yourself? Each photo has its own privacy settings, depending on whose profile it’s on. We’re not saying it’s easy to download your tagged photos but we take offence when a program says it can do something that it can’t. Even if the program is free, that’s false advertising, in our opinion.

Thanks for reading!

Photo of fbDownloader
Don’t believe the hype. It doesn’t work.

How to Save Tagged Photos in Facebook


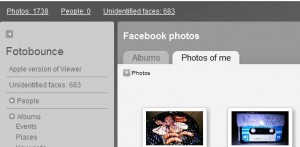
We’ve written about Fotobounce before, here and here plus more. One of our readers asked a very good question regarding Fotobounce, “How do I download the photos that I have been tagged in?” Fotobounce seemed like the place to start, so we fired it up and navigated to our own albums. Up at the top, there is a tab that reads ‘Photos of me’, like this:

Photo of Facebook Tagged Photos menu in Fotobounce
Photos of me is the tab you want.

We were dismayed to see that this tab showed some of the photos the user had been tagged in but not all of them. This user had 156 tagged photos but only 34 showed up in Fotobounce. Hmmmmm…what to do? The problem wasn’t that some of the photos were old ones since the oldest tagged photo was there. We think it might have to do with the original poster’s privacy settings but we’re not sure.

Next we tried a program named Photograbber. Photograbber is free, easy to use but, alas, it didn’t work either. We downloaded the tagged photos but, again, we only got 34 of them, not the full 156. Even though Photograbber says that it will download tagged photos, it won’t download all of them. We’re not going to plug a program that doesn’t do what it advertises on Computers Made Simple so, no link here.

Right now, we’re waiting for our Facebook data download to be prepared. We’re going to check it to see if the tagged photos are in it. If not, it looks like you’ll have to download the photos one by one. That’s a pain but it’s pretty fast. You can click your way through quite a few of them fairly quickly. Just click Options when the photo is on your screen and choose download. That’s pretty fast, all in all.

We’re going to do a post on downloading your Facebook data tomorrow. By then, we will know if the tagged photos are in it or not. Stay tuned!

Thanks for reading.


Slow Computer? Here are some tips.


If your computer is slow, slower than normal, there are several things you can do to try and fix it. Let’s see what we can do to speed up your computer:

1. Every time you add a program to your computer, it wants to run every time your computer starts. It wants to start when your computer starts and continue to be ready for action, even though it slows down your computer. Software companies think that you won’t notice the difference in speed and you might not, if you install just one or two programs. However, most of us install more than a few programs. If each of those programs runs all the time the computer is on, then the computer itself will start to run slower and slower. If you want to make your computer run faster, let’s get rid of some of them.

Tip: Preventing a program from starting when Windows starts does not mean that the program won’t work. You just have to start it from a shortcut on your desktop or from the Start menu. 

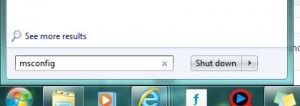
2. Go to your start button or the Microsoft Globe down on the bottom left, click it and type msconfig in the white space there. Like this:

Photo of msconfig
type msconfig in the space and hit enter


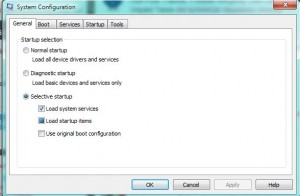
2. Hit Enter and the following menu will pop up after a second or two:

Photo of msconfig menu
This is the first thing you see when you start the msconfig program.


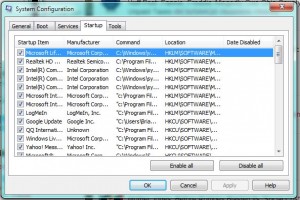
3. Look up at the top and you will see ‘Startup’. Click on it to see what programs are starting when you start Windows. Here is what we see on one of our computers:

Photo of startup menu
This is what you see, all the programs that are checked start when Windows starts.


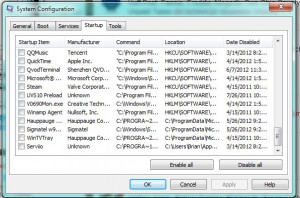
4. As you can see, there are quite a few programs that want to start. Here is a shot of ones that we have disabled:

Photo of disabled startup programs.
We have disabled all of these programs from starting when Windows starts.


5. How do you know which ones that need to run, as opposed to those that want run? Check with Google. You don’t need your CD/DVD burning software to run all the time, right? Some programs, Skype for example, use a lot of resources. So does MSN Messenger. If you’re not going to chat every time you use your computer, turn those off.

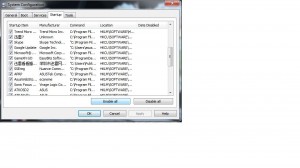
If you don’t know what a program is, check it out on Google.  Some are simply marked ‘unknown’. If the program is unknown to Windows, you can be sure that you don’t need it. Here is an example of an unknown program mentioned on a friend’s startup menu:

Photo of unknown program in startup menu

6. You can disable everything in the start menu if you want. Windows will argue sometimes but it will still run. All of the programs it needs, it makes sure to start. Anything in the startup menu can be disabled. Your scanner might not work or your sound system will be silent but your computer will run faster. You can add some back, one by one, to see what is slowing your computer down or causing conflicts. Whatever you want to do, this is one of the places to do it. Try it out.

Thanks for reading!

Here is a link to our Facebook page. Click ‘like’ and you’ll be able to follow us there, too:

https://www.facebook.com/ComputersMadeSimple?ref=hl