We’ve been writing about hiding Facebook likes for a long time. Our guides in past posts involve adjusting your privacy settings and can be quite complicated sometimes. In this post, we’re going to show you how to hide your Facebook Page likes with one single click. It works, beautifully!
TIP: We have always advocated starting another Facebook profile as the ultimate way to hide your page likes on Facebook. While this works well, it’s a pain to have to sign out of one account to then sign in to another. With the system we’re describing in this post, it takes just one mouse click to switch from your main Facebook profile page to your new ‘Facebook Page’.
1. Refer to our previous post to get the basics on starting a Facebook Page. A Facebook Page is usually started by a business or an entertainer, maybe a product or a cause, things like that. If you have liked a music star’s page before, then you know what a Facebook Page is. The cool part is that anyone can start a Facebook page. You don’t have to be a rock star.
2. There should be a link on the lower left side of your non-timeline Facebook page with the words Create a page. Click that to get to the next stage in this or look for the words Like Pages in the same location, bottom left. When you click on Like Pages, this page will come up which has a direct link to the Create a Page section. Here is what that looks like:

Alternatively, here is the link: https://www.facebook.com/pages/create.php Make sure you get to the page from your regular Facebook profile page. That way, your new page is linked to your Facebook profile. Switching between the two types of Facebook profiles is far simpler if it they are linked. More on that later.
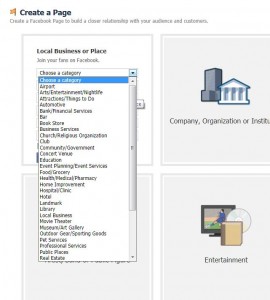
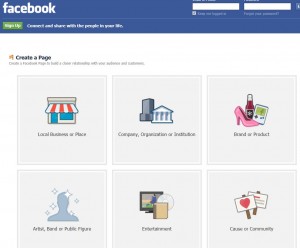
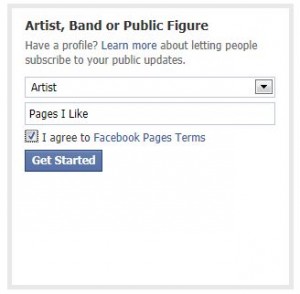
3. To simplify things, it’s best to choose the Artist, Band or Public Figure when you’re choosing the type of page you want. Here’s what your faced with:
4. Next, choose the type of entertainer you are, we chose artist, make up a name and agree to Facebook’s terms. Like this:
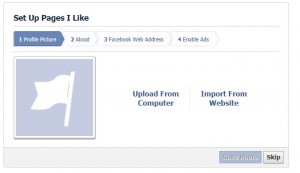
5. Skip your way through the next section. You’re not interested in spreading the word about your new page, right?
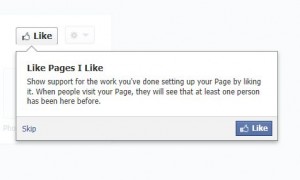
6. Next, Facebook suggests that you like your own page. Why not? Click Like and get it over with.
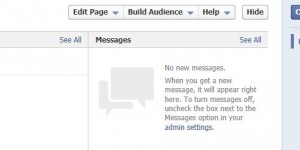
7. Click your way through the next few prompts. Facebook wants you to advertise your page but, of course, you don’t want that. Once you’re past the pop-up menus and are back to your main page, look for the blue ‘admin settings’. Here is your target:
8. Once you get to the next page, look at the top for the words ‘Page Visibility’. Check the box that says ‘Unpublish page (only admins can see this page). This is it:
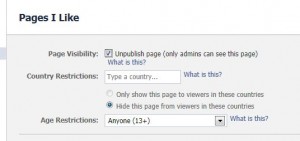
Facebook will prompt you to publish your page but ignore them. This is your very own private page.
9. Although you have created your new Facebook Page, you aren’t actually in it yet. You should still be in your old Facebook profile account. Click the word Facebook up on the top left to confirm that. Your name is up on the top left, correct? Up on the top right, click the little down arrow to the right of Home. This menu will appear:
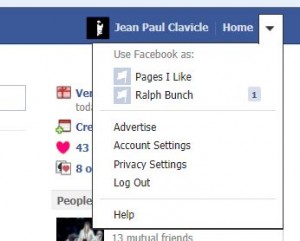
10. Once you click on your own Facebook Page name, you are taken to that page and this menu pops up:
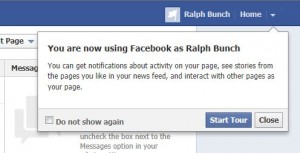
(We named our page Ralph Bunch for no other reason than this is the name that came to mind.)
11. At this point, you can either take the tour or simply start to like all of the pages that you wanted to hide on your main Facebook Profile. No one can access the page except you, therefore no one will be able to see any page that you like. You cannot add friends to this page, remember that. But you are still able to like photos that the other pages post, comment, you can even post things on their wall. The curious part of all of this is that whatever you do is pretty much hidden. Since no one can see your Facebook Page except you, anything you like or comments that you make are hidden. It’s as if you don’t exist.
12. When you want to go back to your main Facebook page, click up on the top right again and choose your own name:
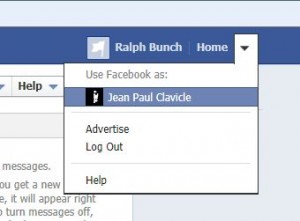
That’s it, easy and quick. No need to worry about anyone seeing any of the pages you like, they’re completely hidden. As long as you make sure that no one can access your account, say on a shared computer, you’ll be fine. If you want to add friends, you do have to start a whole new Facebook profile but for simply liking pages, this system works perfectly.
Thanks for reading! Why not ‘like’ our very own Facebook page while you’re here. Computers Made Simple on Facebook

