Encrypt Your Emails for Free

As of today, June 11, 2013, it’s been revealed the the U.S. government has been snooping in every email, every text message, every online chat and probably every other form of communication for quite a while. Your privacy is gone, you probably know that already, and we think it’s going to be a long time before you get that privacy back. We think that it’s not only the U.S. that is doing this. We’re in Canada and we’re quite sure it’s happening here, too.

How does all of this affect you? You’re probably saying, “I’m not doing anything illegal. I’ve got nothing to worry about”. That may well be true but this spying could affect your life in many different ways. Do you bank online? Do you do your taxes online? As you know, your tax information is supposedly between you and your tax department. It doesn’t matter if you are a hitman for the mob, as long as you declare your income, you are safe from prosecution by the tax department. That’s all changed, hasn’t it? Now the government knows you’re a hitman, they know how much you make and they know, likely, who pays you. Anything that you report to the IRS, for example, is wide open to every other government agency. This has been happening since 2007, by the way. Maybe it’s time to rethink how you do things on the Internet.

Today’s post deals with email encryption. We’ve been searching for an easy and free way to re-secure privacy when sending and receiving emails. We’re going to do at least two posts on this, so let’s get started.

1. Head over to this site:

JavaScrypt Encryption and Decryption

2. The page itself is self-explanatory but we’re going to run through the steps to use it, just in case you get lost. There are three parts to any encryption process. First you need to know how to decrypt what you encrypt. If you think of encryption as the secret code writing that you may have enjoyed as a child, you know that in a simple transposition code, the person who gets your message must know how to rearrange the letters to read it. With the type of encryption we’re discussing here, you need a key to both encrypt and decrypt any message you send. The key takes the place of the encoding rules that you used as a kid.

As you can see on the JavaScrypt site, the key is the first part of the process. You can use your own or have one generated for you. The generated key is quite long and complicated but, obviously, very secure. In your case, you could use a simpler key that could be made up of a series of numbers and letters, something that is relatively easy to remember. Think of parts of your first address, your old cell number, your mother’s maiden name, things like that. If the pieces of the key are easy to remember, then you don’t have to write it down. In that case, although the key may not be as secure as the generated one, it is a bit more secure because it’s not written down anywhere, right?

3. Once you have the key, you need the message to encrypt. You may not have a need to send an encrypted email to a friend or relative but maybe you want to send personal information to yourself. Let’s say you want to save a copy of your password list. Encrypt it and send it to yourself in an email. As long as you remember the key, your information is safe and you can retrieve it.

Let’s generate a key on the site:
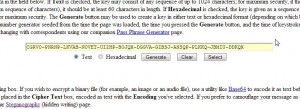
Photo of Email Encryption 1
A text key is shown.


4. The site describes the difference between a Text key and a Hexadecimal key. We’ve used a Text key but read the description and make your own decision. Next comes the message:
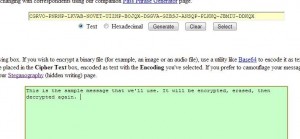
Photo of Email Encryption 2
Something simple for our example.

Enter the text in the green box. Don’t worry about length at this point. You can always send long messages in multiple emails.


5. Once the text has been entered and you have chosen a key, kit the Encrypt button:
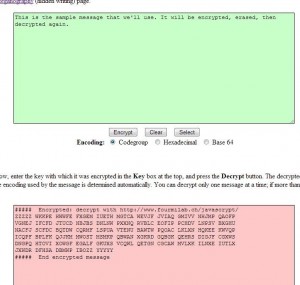
Photo of Email Encryption 3
Message above, encrypted message below. Jason Bourne would be proud of you!


6. So far we have two of the three parts we need. Let’s see how we get the third part. The encrypted message is in the pink zone. Let’s delete the original message from the green zone:
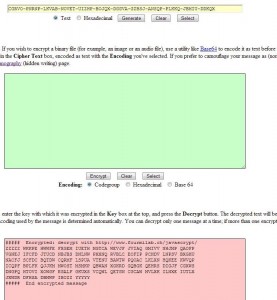
Photo of Email Encryption 4
The original is now history but the encrypted message still remains.


7. Move down to the pink area and set your cursor up in the top left corner and hit the Enter key to move everything down one line. That will leave an empty line at the top, right?
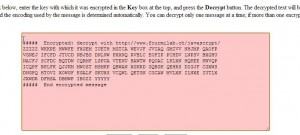
Photo of Email Encryption 5
An empty line is needed to copy and paste the key into the encrypted message.


8. Go up to the key line, highlight it and click the right mouse button then choose Copy. Go back to the pink area and click in the empty line, right click and choose Paste:
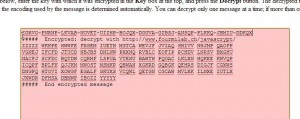
Photo of Email Encryption 6
The key is in place now so press the Decrypt button.


9. As long as the green box is empty, the message will reappear there as soon as you press the Decrypt button.
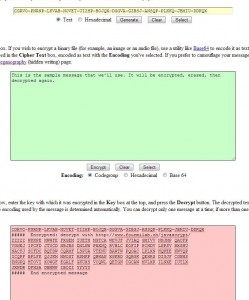
Photo of Email Encryption 7
There it is! As if by magic, the message appears again.


That’s it! You’ve just encrypted then decrypted a message than would be very hard to decrypt unless someone knew the key. How secure is this system? Secure enough that it would take a fairly long time for anyone to decrypt it, if indeed they could. The better the key, the more secure the message.

TIP: Keys are not a one-time, throwaway item. You could use a different key for each message but you could also use the same key for each friend. As long as someone has the key you used for encryption, they can decrypt your message.

If the key is easy for you and your friend/relative to remember, there is no need to write it down. Even so, you don’t want to send the key in an email, right? There are many ways to get the key to the person without using electronic means. Be creative!

This has been a long post but it’s an important topic, isn’t it? Let us know what you think about this or any other topic that’s important to you.

Thanks for reading!


Facebook – add more sections to your Timeline

By default, there are three sections on every Timeline on Facebook. Those are: About, Photos and Friends. While you can control who can see what in each of those sections, you can’t hide them. The other sections, made up of things like Places, Music, Movies, TV Shows, etc. can be on your Timeline or not, it’s up to you. Beyond that, you can adjust the privacy of each of those sections as well. Here’s how to get the sections to show up on your Facebook Timeline. Once you do that, you can adjust the privacy settings on your own. Let’s get started.

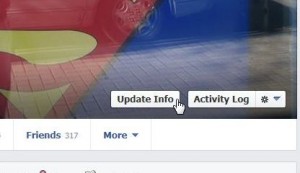
1. Go to your Timeline by clicking on your profile photo. Once you’re there, look for the words ‘Update Info’.

Photo of Add Facebook Sections  1
Click on Update Info.


2. On the page that comes up, look for the edit icon, click it then click Edit Sections:

Photo of Add Facebook Sections  2
Edit Sections.


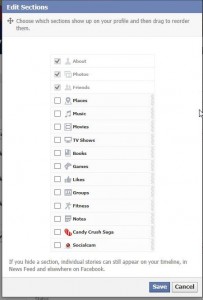
3. A new menu pops down which lists several sections that you can select to show on your Timeline. These may vary, depending on the apps that you’re using at the time:

Photo of Add Facebook Sections  3
There are more here than might be available to you, otherwise it should be similar.


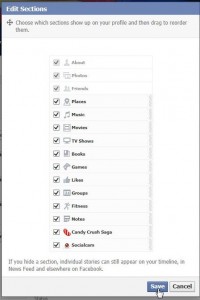
4. Check the ones you want to add, then click Save.

Photo of Add Facebook Sections  4
We selected the whole list.


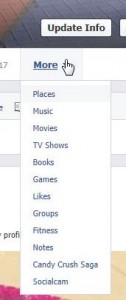
5. Now when you click on the word More, this is what you see:

Photo of Add Facebook Sections  5
Probably more More than you want but that’s how you do it!

Good luck! One of our readers isn’t able to add or click on Places. Does anyone else have that problem? Places may only be available in some parts of the world, we’re not sure. Let us know, OK?

Thanks for reading! If you have time, why not Like us on Facebook? Here’s the link: Computer Made Simple on Facebook. 


Facebook – How to delete places

Facebook Places shows where you’ve been in the world, right? Well, no, it doesn’t. Facebook Places shows your friends both the places you’ve been AND the places where your friends have been. How’s that? Let’s say you head to Timbuktu and take a photo of your hotel room. Just for fun, you tag your friend Raoul in that photo. Guess what? The next time Raoul checks his Places map, it will show that he’s been in Timbuktu. Fun huh?

If your Places map shows places that you’ve never been in your life, here’s how to get rid of them. Some of you may want to leave them, which is fine, but for the others, here’s how you do it.

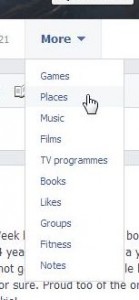
1. Head to your Places.

Photo of Facebook Places   1
Click on More, then Places, depending on how you have your Timeline set up.


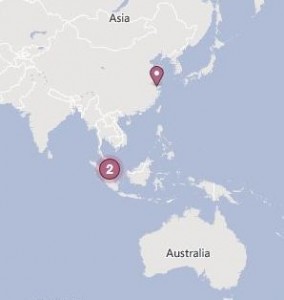
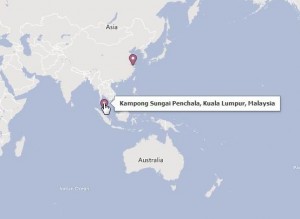
2. Here’s one of our maps:


Photo of Facebook Places   2
Two times in Malaysia? Really?


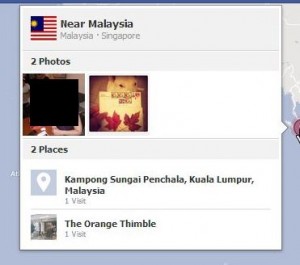
3. Looks like there are a couple of photos from Malaysia that we need to untag. Click on the place in question, something like this comes up:


Photo of Facebook Places 3
Two photos pop up once you click the number 2.


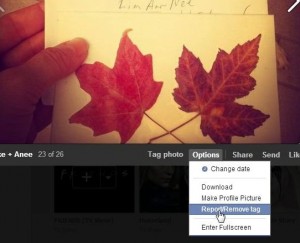
4. Two photos, both with tags. You don’t have to navigate all the way to the photo, just click on the one that you want to untag yourself from (is that good English or what?) Once the photo pops up, click on the word Options:

Photo of Facebook Places 4
Click Options then Report/Remove Tag.


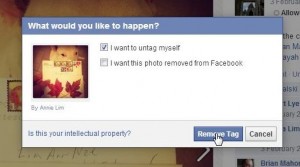
5. You don’t want to report the photo, you just want to untag yourself. Here’s how that looks:

Photo of Facebook Places 5
Choose ‘I want to untag myself’ then click Remove Tag.


6. Done! Let’s check the map again to see if it worker. Don’t forget to refresh the page before you check:

Photo of Facebook Places   6
And then there was one. 


7. This method will remove the places where you’ve been tagged by your friends. If you have added Location to some of your photos or for whole photo albums, those will all show on your map. If you’ve told Facebook that you’ve worked at a brand name company, such as Maximum PC for us, that will show also. You’ll have to remove the Location from your photos and/or delete the work or school history to get rid of those places. Once you know where these ‘places’ come from, you’ll find it much easier to erase them. Good luck! Let us know if you have problems.

Thanks for reading!


Facebook News Ticker – where did it go?

You either like your Facebook news ticker or hate it. There doesn’t seem to be any middle ground. If you like it, and it’s missing, here’s how to get it back.

1. Get busy! Like, share, comment, be active. That’s the prerequisite to getting it back. Facebook only lets you see what everyone else is doing if you’re doing something yourself. It’s that simple!  We’re not sure what the activity parameters are but the ticker was missing on one of our accounts but, after a week or so of simply logging in, we got it back.

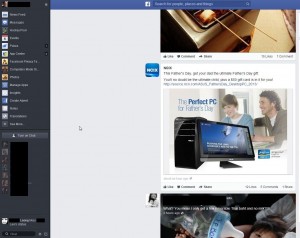
If you read our posts regularly, and you should, you’ll know that the beta edition of the new Facebook look has a very minimal ticker. It’s so minimal that it’s almost non-existent. Only one tick at the bottom of the chat list, that’s it! Here’s how it looks:

Photo of Facebook News Ticker 1
One lone tick down at the bottom of the chat list.


This pic will give you an idea of Facebook’s new look. Almost full photos in the middle, news ticker on the very bottom left, chat in black on the left side below the clickable apps and links. Lots of open space and it takes forever to scroll down.

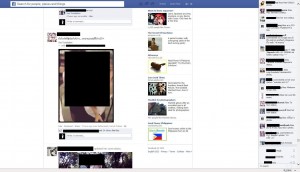
The old ticker, which you probably have now, looks like this:

Photo of News Ticker 2
Lots of stuff going on if you want to keep up with what your friends are doing.

In this photo, heavily edited, you’ll see the long list of news that looks like it will become a thing of the past. Ask yourself, how much attention did you actually pay to those instant updates? Maybe that’s why Facebook is shutting it down.

Thanks for reading! Like us on Facebook to keep up with all of our news. Here’s the link: Computers Made Simple on Facebook.


GPS and Location Setting

Lately, we’ve had a few people comment on one of the fun features of WeChat. People seemed to be having problems with the GPS settings to ‘look around’ for people using WeChat. Here’s a brief explanation.

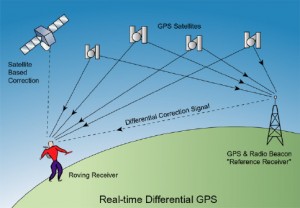
GPS uses satellites in space to define your location. If you know about triangulation, you’ll understand how it works. The GPS part of your mobile device figures out where it is by accepting signals from satellites that are in a fixed orbit, at least to the rotation of the earth, in space. They are, more or less, locked in one position up there.

You, on the other hand, move around. Because your GPS knows where the satellites are, it knows where you are, right? Remember that the satellites are up in space. It doesn’t matter if you can get wifi where you are or a data/voice signal, the GPS needs to know where the satellites are before it can figure out where you are.

Note: Some cell phones use the widespread mobile phone towers in order to configure GPS location. They may or may not use satellites all the time. For that reason, your cell phone probably works better than, say, an iPod, at least as far as GPS goes.

Knowing all of the above, it makes sense that you can’t be buried in a mineshaft and expect your GPS to work. You have to be near a window or outside for WeChat to figure out where you are and then figure out who’s around you. If you’re inside a multi-story building, your signal is probably quite weak. Keep that in mind when you’re looking around for someone to chat with. The problem isn’t WeChat, it’s your GPS signal (or lack of it).

Here is an image that explains some of the principles of GPS (Global Positioning System):

Photo of GPS Setup.
Satellites, towers, signals…this is very hi-tech stuff!


If you want to, click on the photo and you’ll be taken to the Directions Magazine site for a complete explanation of GPS.

Thanks for reading!

a little bit of hi-tech, a little bit of common sense and a lot of fun