Category Archives: Windows

Five Computer Tips to Save Time and Trouble

Here are five tips that just might relieve some of the frustration you feel when simple computer chores become more complicated than they should be.

1. Notepad is your friend: How many times have you filled out a form online, only to see your comment/description/idea disappear before your eyes? Whenever you write something in one of these forms, make sure you copy and paste your words into a new Notepad text file. Highlight the text you want to save, open Notepad and hit Ctrl and V at the same time. Instantly your words appear in the Notepad window. Go back to your form and finish with it. If everything does smoothly, close Notepad. If the form screws up, copy and paste your words into a new form without having to type them all over again.

Photo of Five Computer Tips   1
We use Notepad every day to save things like comments that just might get lost.

2. Ctrl Z is a lifesaver: For just about any error you make on your computer, hitting the Ctrl key and the ‘z’ key at the same time will undo that error. Let’s say you copy something to somewhere you don’t want it to be or you accidentally delete a whole paragraph in a document.  Don’t do anything else until you push and hold the Ctrl key down and then press the ‘z’ key. This is Window’s ‘UNDO’ key sequence. Whatever you’ve just done will be undone in an instant. Just about every program has an undo tool, every one is based on the CTRL/z key combination. Practice it and use it whenever you get into trouble.

Photo of Five Computer Tips   2
A real lifesaving key sequence.

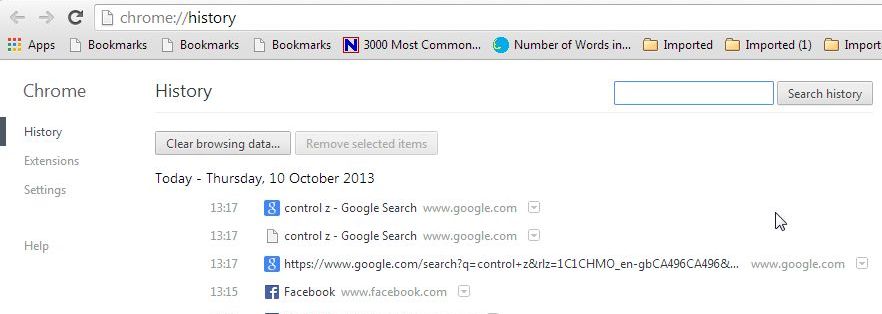
3. Lost an Interesting Website? In any browser, pressing Ctrl and h at the same time will bring up your browsing history. If you’ve come across an interesting page but can’t remember the address, press Ctrl/h and then search through the page that comes up. Remember that ALL of your recent history is there and anyone can search through it. That’s the other side of the problem, at least for some people. If you don’t want anyone to know where you’ve browsed, make sure you clear your history. It might be a good idea to clear your download data, too.

Photo of Five Computer Tips   3
It’s all there, whether you want it to be or not.

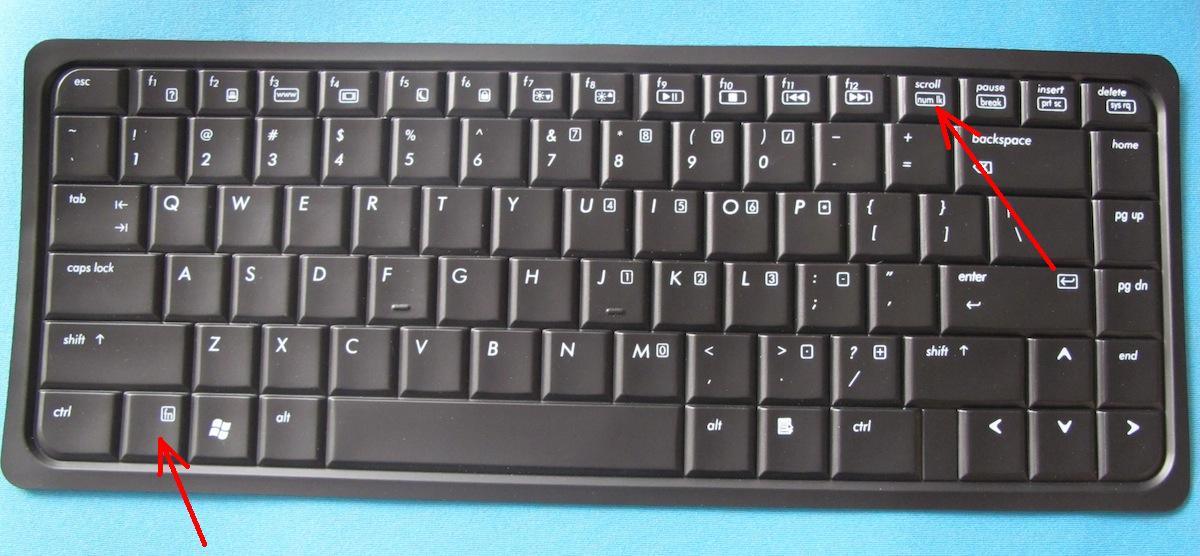
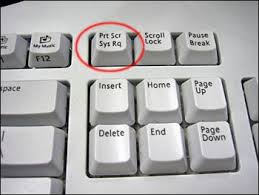
4. When Right Click/Save as doesn’t work: Some photos and material on the Internet are quite well guarded. Saving this material to your computer is forbidden, more or less. Every Windows computer has a ‘screen capture’ key to get around these restrictions. Let’s say your on a Flickr page and you try to save one of the wonderful photos there. You don’t want to make money from it, you just want to see it again, maybe use it as wallpaper on your desktop, something like that. Look for your ‘Prt Scr’ (Print Screen) key, usually it’s on the top row just to the right of your F keys, and press it. Then, open up an image viewer, we use Irfanview, hit Ctrl and v at the same time and the screen cap pops up in the window. Save it as a ‘jpg’ file and you’re done. (Even though the key reads ‘Print Screen’, it really doesn’t print what’s on your screen. It captures an image into your computer’s memory (clipboard) and waits for you to paste that information into an image program such as Irfanview.)

Photo of Five Computer Tips   4
‘Print’ here means ‘save’, same as copying before pasting it.


5. Save Some Videos Without Having to View Them: Some videos can be saved simply by right-clicking the link that leads to them and choosing ‘Save Link As’. When you choose this, the save menu pops up and shows you the name and the type of video it is. This doesn’t work all the time but it’s a fast easy way to save the objects that a link leads to, sometimes a video, sometimes a PDF file.

We’ll have more of these as time goes by. Do you have some favorites? Take a moment to comment below and let us know what tips you can give us. We’ll share everything with our readers.

Thanks for reading. We have a Facebook page, too. Here’ the link: Computers Made Simple on Facebook. 


Computer Troubleshooting – fixing random problems

We ran into a problem this weekend with one of our laptops. For some reason, still undefined, we could connect to our central router’s WiFi but could not connect to the Internet. We had good signal strength but no go on the Internet connection. When we’re faced with this kind of situation, we try to look at the problem systematically, running through a series of troubleshooting steps to get to the root of the problem.  Even though we didn’t sort out the trouble, here are some of the steps we went through. If you’re in the same situation, you can try to use a few of these DIY (do it yourself) strategies.

1. We tried to use Windows to sort out the connection problem but, as usual, the Windows troubleshooter was useless. It’s nice that Microsoft tries to help but in all of our years of using Windows, we can’t remember when their troubleshooter worked. You’re welcome to try, but our success rate is dismal, to say the least.

2. Rebooting (restarting) a computer or mobile device is the first thing you should do. Save your work, bookmark any important sites you’re on and restart. Signing out won’t work as well as completely shutting down and starting everything up again.

2. In the case of our WiFi problem, we weren’t sure if it was software or hardware related. Our next step was to uninstall the Broadcom WiFi adapter. While this may sound extreme, it’s not. The adapter is a piece of hardware, yes, but we didn’t actually remove it from the laptop. We simply went into our device manager and uninstalled it from there. Next we rebooted the laptop and, of course, Windows found the adapter and reinstalled it. Why did we do this? Sometimes a driver, the thing that makes a piece of hardware work, gets corrupted. Removing a device then rebooting your computer can sometimes bring it back to life. Windows checks the driver and if it’s corrupted or old, finds a new one or asks you to find one for it.

Photo of Disable or uninstall hardware
This is an example of the ‘uninstall’ screen in Control Panel then Device Manager.

3. Since most laptops can use a wired connection as well as WiFi, we took the laptop down the hall and connected it with an Ethernet cable to a spare port on the router. This bypassed the WiFi connection and we were able to connect to the Internet immediately. Because of this, we knew that our problem was not a virus. On to step 4 to read why.

4. Sometimes a virus or malware can interfere with your computer’s stability. If you’ve downloaded music or a new piece of software from an unfamiliar site, there is a chance that a virus has hijacked your computer. If you do not do a virus scan on a regular basis, and you should, make sure you do one as soon as your computer starts to ‘act’ differently. Here’s a link to a good and reliable online anti-virus scan: Free Online Virus Scan  We’ve used these guys for years when we have reason to distrust our own anti-virus software.

Photo of Trend Micro House Call
This asks you to download a small file with allows Trend Micro to scan your computer online.

5. Windows’ computers have what is called a ‘safe mode’. If you are having problems, try to reboot your computer into this mode and see if you can duplicate the problem there. There are two ways to get into safe mode, the easiest is to tap the F8 key gently a few times just as your computer is restarting, after you see the first letters on your screen.

Photo of DOS Screen
Tap your F8 key when you see the first screen like this.

Choose Safe Mode or Safe Mode with Networking (as we did) if you want to check your Internet connection:

Photo of Safe Mode screen
Use your up and down keys to choose, then hit Enter.

When you are in Safe Mode, everything will look quite different. Manage as best you can to check the problem, free from the many other programs that start when you run your computer. If you find you are having a problem running your anti-virus software or deleting some software, try doing it while you are in safe mode. Some programs defend themselves from deletion but when you run safe mode, they cannot run and cannot stop themselves from being deleted.

Somehow we were able to reconnect to the Internet but we’re not sure why we couldn’t in the first place. Maybe one of these steps solved the problem, who knows? Whenever we encounter a problem that isn’t immediately obvious, we run through these steps one by one until we sort things out. Hopefully, you’ll be able to do the same.

Thanks for reading!


Encrypting Your Stuff – Zip or Container?

Warning: Lots of discussion in this post but we think it’s worth the time it takes to read it. These are the basics of encryption, things you should know. (But dull, unfortunately!)

Encryption week continues, this time with a discussion of a containers versus zip files and encryption in general. Here are some definitions with explanations:

1. If you use a password to log on to your computer, you can’t say that your computer is encrypted. Yes, it is locked but it’s not necessarily encrypted.

2. You can lock your computer with a password and encrypt the hard drive. That’s not difficult to do, Windows can do this by itself, but you run the risk of losing ALL your data if something screws up. With Windows, that is a distinct possibility.

3. If you encrypt something, you have to use a password. That may seem obvious but this site is for beginners, right? Go back and read number one then read this one again. Passwords don’t automatically mean something is encrypted but everything that is encrypted requires a password.

4. You can have a zip file that is not encrypted. Almost all zip files don’t require a password. If you’re confused about what a zip file is, think of a suitcase. You can pile socks, T-shirts,hats, gloves, etc.,  into that suitcase, packed as tightly as possible. The suitcase goes on the plane/train/car with you. When you get to your destination, you usually unpack that suitcase. The things that were in it can then be put into drawers, on to hangers, and so on. A zip file is a suitcase. It’s smaller than the original file but everything is still there, nothing has been removed. To use the stuff inside a zip file, you have to unpack it.

Photo of Zips and Containers   1
A zip file icon.

5. Whether a zip file is password protected or not, you need a program to unzip it. Windows can do this on its own, as long as the zip file is just that, a zip. (There are other types of ‘compressed archive’ files but, for now, we’ll deal only with zips.)

6. A container is more like your house. Your house has a lock on the door, a container has a password, same thing. Your password protected computer could be termed a container. In our world, containers are much larger than zip files.

Photo of Zips and Containers   2
An encrypted container can be put on a flash drive.

7. An encrypted container is something like a glass house where the windows are actually mirrors or they are smeared with petroleum jelly. You might be able to see inside but you can’t see what’s there. If you have the key to the lock, you can see everything. Without the key, no such luck.

Tip: A container can be a file or a folder but it could also be an encrypted flash drive or hard drive. In this post and in the future posts on encryption, we are discussing files and folders, not flash drives.

8. Using a program such as Notepad, you are able to look into any computer file. If you open a .jpg file, you’d be able to read the file header and know it was a .jpg. You wouldn’t be able to see the picture itself but you would know what type of file it is. If you open an encrypted file or folder in Notepad, everything inside it is illegible, nothing can be interpreted. Once the file or folder is unlocked, however, everything inside it becomes readable.

9. Nuts and bolts now. Use a zip file to send to someone via email. Use an encrypted zip file to protect passwords, personal documents, financial data from anyone who might intercept that file, on a flash drive or external hard drive, for instance. Use an encrypted container to store your files on your computer and online, in the Cloud. If you keep a copy of the container on your computer, you can simply upload it again and again, replacing the online one with the new, updated one.


Now you know a bit more about zip files and encrypted containers. In our next post we’ll show you how to encrypt a container using TrueCrypt. Finally, you may be asking yourself, “Why should I even bother to encrypt my stuff?” Here’s why.

Anything you put into an online storage facility, whether it is DropBox or Microsoft’s SkyDrive, is open to viewing by employees of that facility. If you think that these companies don’t go through your stuff, you’re mistaken. They do sift through your stuff on a regular basis. Your own and other government officials go through your files too but that’s not the point of our articles. We’re here to help you keep your personal data safe. 

Thanks for reading! How about heading over to our Facebook page and clicking Like? Sounds like a good idea to us! Here’s the link:  Computers Made Simple on Facebook

Encrypting Your Stuff – Create Very Strong Passwords

There’s no sense in encrypting your personal files and folders if you don’t secure them with a strong password. Today, we’re going to show you how to do just that. You’ll create an easy to remember password that will lock your material tighter than Fort Knox.

1. There are some prerequisites to this course. In order to create this special password, you have to use a number pad, either the one on the right side of your full-size keyboard or the numbers you can access using the FN key on a laptop, for instance. Yes, there are numbers across the top of every keyboard but those are not the ones we want to use here. If you always use a full-size keyboard, make sure the NumLock key is pressed down. If not, figure out how to use the ‘other’ numbers, usually on the top of certain keys, like this:

Photo of Character Map Passwords   1
See the small numbers on top of some keys, even on top of number keys?

On this keyboard, you would press the FN key and the J or K or L key, etc. The normal number keys on the top row are not what you would use, except for 7, 8 and 9 with the FN key.

2. Ok, once you’re clear on that, let’s bring out the Character Map. Click on start, down on the bottom left of your taskbar, then type ‘charmap’ into the slot. Charmap.exe should show up but, if it doesn’t, type charmap.exe and press enter.

Photo of Character Map Passwords   2
It’s up at the top there, but you may have to type the full charmap.exe.


3. Welcome to Character Map! Here’s what you should see when you hit Enter:

Photo of Character Map Passwords   3
This is known as Character Map.

With this handy part of Windows, you can pretty much type any letter in just about any language. Symbols, archaic letters, they’re all here.

4. The default typeface for us is Arial. Your default typeface may be different. Here are some of our choices:

Photo of Character Map Passwords   3
Lots of choices here but make sure you remember which one you choose.

Whichever one you choose to create your password, make sure you remember it. Each selection here has a completely different set of characters. You can make a password out of any of them but you must remember which typeface you chose.

5. Once you make a selection, click on one of the letters/symbols. This is an example:

Photo of Character Map Passwords   5
This is an O, sort of, with two dots on top. See the keystroke on the bottom right?

This letter, according to Character Map is ‘U+OOD6: Latin Capital Letter O with Diaeresis’. Phew! Forget that, it’s not important. What is important are the words on the bottom right corner: Keystroke: Alt+0214.

6. Open Notepad. Use Notepad not Word or Wordpad. Notepad doesn’t mess with letters, it just shows what you type, nothing else. Once Notepad is open, Press the Alt key down and keep it down. On your number pad, type 0124 then let up on the Alt key. Like magic, this Ö appears. Practice in Notepad until you get it right.

Note: Not every letter or symbol has an ‘alt+number’ shortcut. Obviously you would choose ones with a shortcut, otherwise you have to copy and paste the symbol which wouldn’t be as easy. What we want here is to be able to type the symbol/letter without opening Character Map, right?

7. Now it’s time to play a little memory game. You can do this a few ways but here’s a suggestion. Look for a symbol that has a familiar number shortcut. In our example above, the shortcut is Alt+0214. Maybe 0214 are the last four digits of your phone number. Get it? Look for a combination that rings a bell and is something you can never forget; your age, your address, your shoe size, whatever. Once you have that symbol, you’re on your way to a very secure password.

8. The hard part is done. You have a symbol that pretty much locks up your password from anyone who doesn’t know your secret. You could still use something simple for the rest of the password but once you insert that symbol, it is very, very secure.

9. Here’s an example of an unbreakable password:     !pass0214ÖBod

For fun, we’ve put both the typeface we used, Bodoni, and the number you have to use with the Alt key to create the special character, Ö.

These are the basics and we’re sure you can create very strong passwords using this technique. Have fun with this and make sure you comment if you have questions about this.

TIP: Character Map is for reference only. You only need it to find the character you want to use and the numbers that create it with the Alt key. Character Map does not have to be open when you are typing the character.


Thanks for reading!


Speed Up Your Computer

When you add software to your computer, that software usually insists on adding itself to your start menu. What does this mean? It means that, sooner or later, your computer will run slower and slower and/or it will take forever to boot. Here’s a quick way to speed up your computer without deleting any software.

1. Head down to your Start button:

Photo of Msconfig   1
That little search box is what we’re looking for.

2. Type ‘msconfig’ in the ‘Search programs and files’ slot:

Photo of Msconfig   2
msconfig is what you type, then hit Enter. 


3. In the window that opens, and it might take a while, look for Startup:

Photo of Msconfig   3
Click on Startup.

4. What you see next is a list of everything that ‘starts up’ when your computer starts. By this we mean software, of course. Windows has many things that run in the background but, for now, we’re only dealing with software that you’re installed. This list is pretty straightforward. If an item is checked, it starts when your computer starts. If it isn’t checked, most of the time it doesn’t start when your computer starts. We say most of the time because some software, malware, adware and things from Apple (usually), start up even when unchecked. We’ll tell you how to get rid of those things a bit farther down. 

5. Even if you don’t uncheck anything, this list gives you an idea of why your computer is slower than it used to be. Things on this list are in chronological order so the original stuff is at the top, the things you have added on later are lower down the line. If you scroll down, you’ll see some things like this, perhaps:

Photo of Msconfig   4
The one we hate is the Yontoo Desktop. We don’t know how we got it but we know we got rid of it.

6. Usually, the sketchy stuff is at the bottom. Nothing bad will happen if you uncheck something, so don’t worry about wrecking your computer. Unchecking something only means that you’ll have to wait for a bit before you can use the software. Want to run Spotify? Well, you’ll just have to look for the shortcut on your desktop and double click it, it won’t be on your taskbar after you uncheck it here.

7. Down on the lower right of your taskbar, you’ll see a row of icons. Those icons are the programs that are running right now on your computer. Yes, they are running but you probably aren’t using them. Some programs, Skype is one, have an icon on the right of your taskbar and another on the left. The icons on the left side usually are the ones you are actually using, as opposed to ones that are just running in the background, waiting for you to click on them. After you uncheck some of the items in the list, there should be fewer icons down on the right of your taskbar.

8. OK, so now you know why your computer is running slowly. If you can’t stop something from starting by unchecking it in msconfig, go to the program and find its preferences. Somewhere in the preferences is a menu where you can choose to uncheck ‘start when Windows starts’. Quicktime, Adobe Reader and some other third party software (as opposed to Microsoft software), want to run all the time, just in case you decide to use them. This eats up your resources and slows your computer down. Now you know how to stop them from starting!

9. Finally, remember those icons on the lower right? Sometimes you can right click them to get to the preferences menu. Here’s an example:

Photo of Msconfig 6
A right click on the icon brought up this menu.

This is a handy way to tell Open Live! Central 3 that we don’t it to start when Windows starts. We also chose to uncheck the second part, too. You’ll have to make your own decisions on all of this but you can use msconfig to control what starts and what doesn’t, most of the time. Next time, we’ll tell you how to use it for something else. Stay tuned!