Category Archives: Hosting

Register Your Domain Name – part of a series on setting up a new website


Last time, we talked about some ideas you should mull over before setting up your new website. Since you need a domain name, that’s the first thing you should consider. As we mentioned, we’ve got this diary from WW1 that we’d like to share. Our considerations for a name involved the words diary, war, lion, navy, ww1 and so on. Here is how you search for a good domain name:
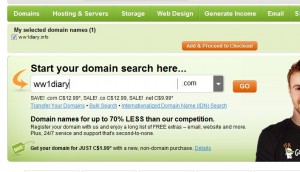
Photo of domain name search on GoDaddy
.com is the default name shown here but you can search and choose other letters.

As we mentioned, there are many types of domain. The TLD or Top Level Domains are the most popular and include: .com, .org, .net., .info, .gov and so on. The newest one, .xxx, is reserved for porn sites, in case you haven’t heard about that.

We searched and chose ‘ww1diary.com’. We felt that is was simple, effective and, because of the .com domain letters, it would be easy to remember. Everyone seems to know something something something.com as if that is the only domain out there and that’s the reason we like to stick to .com domains. In our case, it doesn’t really matter because we will depend on Google searches to develop an audience. If you want to develop a business, get a .com for sure unless you are willing and ready to work hard to develop an audience. Brand recognition and .com names go hand in hand.

Once you have selected a name and found that it’s available with the domain letters you want to use, you might want to think about the other variations of your name. If you’re trying to lock up your online identity, why not secure as many other domains that might piggyback on your fame. If you think that Microsoft or Apple doesn’t have every variation of their name locked up, you’re wrong. We still remember when ATI, the video card manufacturer that is now within AMD, didn’t lock up ati.com. They had atitech.com but who would search for that? If you searched for ati.com all you got was a photo of a pile of dog poop, believe it or not. This is a perfect example of why it’s important to lock up as many domains as you can afford if you’re worried about someone else benefiting from your site’s popularity. Here’s an example of a successful domain name search:

Photo of successful domain name search
The .com is available as well as other domain types.

Here you see that many other types of domains are available. GoDaddy offers the .info name for free with the .com name at this moment but don’t expect that all the time. GoDaddy has many revolving offers at any given moment.

After your successful search, continue on through the checkout process. GoDaddy will make offers all the way through, hoping to make a bigger sale than just the .com name but think about each choice carefully.  We just go for the domains, none of the extras. If you don’t want the hassle of renewing often, register your domain for more than one year.

TIP:  We don’t recommend hosting your domain from the same company that it is registered with. There isn’t much chance of GoDaddy going out of business any time soon but their hosting is expensive.  We’d rather spring for hosting with another company, knowing that our domains are safe with GoDaddy.

That’s it! You now own a domain. The next step is hosting your site and we’ll get to that next time.

Thanks for reading!


Set Up a New Website – from scratch!


We’ve written about all of this before but many of our friends are interested in having their own websites so we’ll do it again. Over the next few posts we’ll give you a step by step how-to on developing your own website. Stick around. It’s not as hard, or as expensive, as you might think. Here are some details to consider:

1. You’ll need a name for your site, of course. We’re in the same boat, almost literally. We’ve inherited a diary from an English sailor which describes his complete military service in World War 1. What makes this diary interesting is that he served on the H.M.S. Lion, the flagship of Admiral Beatty, famous for his role in the Battle of Jutland in 1916. On our new site, the handwritten diary will be transcribed page by page. Each day, a new post will be written, complete with links to the ships and places described in the diary. Therefore, we need a name. We’re thinking of something along the lines of ‘A Diary of War’ but we’ll shorten that down to something more manageable.

2. When it comes to a name, you have to choose what kind of domain you want to use. Everyone is familiar with ‘.com’ (dot com) domains but there are others. This site is a ‘.ca’ site, meaning that the domain is controlled by the Canadian Internet manager, know as CIRA. You can choose .org. .net or any one of the dozens of domains available. Check out the prices at GoDaddy or some other registrar to see what the differences are. Price is always a factor, right?

Photo of GoDaddy page
GoDaddy is cheap and fast and fairly secure. $12.99 is a good deal.

3. Hosting is the next thing you need. You don’t need hosting to get a domain name. Get the domain name first, then look for hosting. We use FatCow. It’s cheap, fairly fast and quite reliable, at least from our experience. As they say, your mileage may very. Let’s see what they have to offer today:

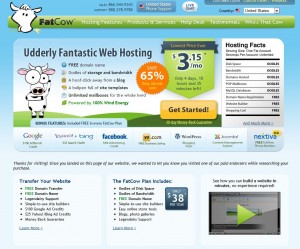
Photo of FatCow website
Price per month is good, usually billed at a full year in one shot. Cheap!

FatCow uses shared hosting. At these prices, you can’t expect a dedicated server and, quite frankly, you don’t need one. When, and if, your website becomes really popular, you can move to a dedicated server. With FatCow, you can add more sites to the same account, as many as you want. If you want to use WordPress, FatCow is perfect for you. It’s very easy to get things up and running. Just because we use FatCow, don’t think that you have to do the same. There are other hosting companies out there but be careful with who you choose. Make sure they offer everything that FatCow offers and that they are a well-known company. Search for reviews on any company before you sign up.

That’s it for now. Next time we’ll go over some of the types of domains. We’re thinking of a .ca name for our new site or, possibly, a .org.

Thanks for reading!


Buy Your Own Domain


Buying a domain (that’s a .com name, if you don’t know) is cheap, fast and fun. Even if you don’t know a thing about HTML or WordPress, if you’ve got a catchy name, why not register it? Sure, there are millions of domains that have been registered already, this doesn’t mean you should give up. Some people go as far as to snap up domains, locking them up before anyone else gets them. Personally, this doesn’t make a lot of sense but everyone is different. I guess if you’ve got money to tie up, maybe it makes sense.

Buying a domain means that you have it for a one year term. Many discount hosting companies offer significant discounts if you sign up for a two year or longer term. Many also give you discounts if you buy multiple domains at a time.

Right now, I would stick to the old .com domain if you’re going to try and make some money it it. People know .com, they assume that every site is a .com site and immediately head to whatever.com , even if the site is whatever.org.

In fact, when you are signing up for your domain with most companies, they will offer you all of the various combinations of your domain at the same time. Want whatever.com? How about getting whatever.org or whatever.net at the same time? The point of this, of course, is to guard against someone else stealing traffic away from your catchy name. Think of it. If you could snag google.org or google.info, you would. You’d be crazy not to.

Once you have your domain, think about doing something with it. As you might have read in past posts, I use WordPress on all of my sites. You can read about installing WordPress here and about how to set up your domain hosting here. Anything you want to know about installation and hosting is on this site, just search for the answers if you’re stuck. If I can do it, your probably can too.

Thanks for reading!


MySQL and WordPress


WordPress requires a relational database. Before you get WordPress up and running, you have to set up a MySQL database on your hosting account. Sure, this sounds complicated but it’s not. If you can make a new folder in Windows, you can create a database for WordPress. Here’s how it’s done. Pictures following are from a cPanel demo site. Yours may differ somewhat.

1. Head over to your hosting account, log in and take a close look at your dashboard or control panel. What you are looking for is ‘MySQL Database(s)’:

MySql Database Icon
This is what you are looking for.

2. Click on the MySql Database Icon. This is what you should see:

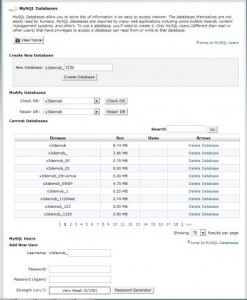
MySQL settings to add new database
Add a new database here, create a password and add a user.

3. Use this menu to create a database, create a password and add a user. You need these three pieces of information BEFORE you get WordPress up and running. When you are installing WordPress you add this information to it’s config file once. WordPress uses this database from then on. I would use the password generator but you can make up any name for the database and any user. You can name them both the same, if you want.

TIP: If your host has limited your account to only a few databases, mine has not, you can still run multiple installations of WordPress from the same database. I will show you how to do that later. I have 12 sites on the same account but I only have about 5 databases.

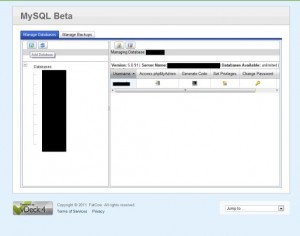
4. This is what the MySql menu looks like on my hosting account. Yours may be the same. :

Deck 4 MySQL Menu
Same concept, different look. The button on the top left is the one you want to create a new database.

This is the only preliminary work you have to do before installing WordPress. You’ve already created the folder in your root directory, right? We did that in this POST. Once you have done these two steps, it’s OK to download WordPress, unzip it and wait for my next post.

Thanks for reading! Follow me on Twitter: @_BrianMahoney 


Basic HTML Placeholder


An HTML placeholder is a small file that shows up when someone goes to your new domain name before you have a full-fledged website set up. Consider it a virtual ‘coat on the back of a chair’ at a party. You’re going to sit in the chair, just not yet. The placeholder lets everyone know that your site exists, it works but there isn’t anything there yet. It’s live in other words, just not fully filled out.

Putting up a placeholder is very easy. Here’s how you do it:

1. Open Notepad. Don’t use Word or Wordpad or anything else except a text editor. Notepad is free, comes with Windows and is in your Accessory folder.

2. Copy this text and paste it into Notepad :

<html><head><title>Welcome to suchandsuch.com</title></head><body><h1>Welcome!</h1>

This site is under construction. We'll be up and running as soon as possible. Bookmark this url and come back later. See ya!

</body></html>

3. Type in your domain name where I have ‘suchandsuch.com’ then save the file as an .html file NOT as a .txt. file. (Click on the tiny arrow to the right of .txt and choose ‘all files’.

4. If you accidentally save it as a text file, just rename it as an .html file, ending up with index.html on your desktop.

5. Double click this file to see what it looks like. It’s about as simple as it can be but it gets the message across. You can align the text in the centre, use colors or whatever you want but this is about the simplest .html file you can make.

6. Using FTP or your host’s File Manager, upload that file to the sub-directory that you created in my last post.

7. The index.html file should be the only file there. Once it’s up, open another browser window and type in your domain name and hit enter. There it is! Your placeholder. If you don’t see it, then the file is named incorrectly. Make sure that it is  index.html   (all in small letters, no caps and with the period before html, no spaces).

Once this page is up, you can relax for a while and figure out how to install WordPress. If you want to stick to html, fine but you’re on your own there. I have moved all of my sites to WordPress just because it’s so damn simple to update.

I’ve explained the WordPress installation in previous posts. Here is a link to the first one: WordPress Installation .

Over the next few posts I will revisit the WordPress installation for you but read the old ones for now. Good luck!

Thanks for reading! Follow me on Twitter: @_BrianMahoney