Category Archives: Layered Privacy

Facebook Safety Tips

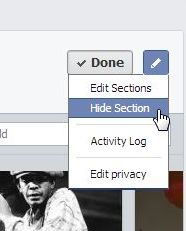
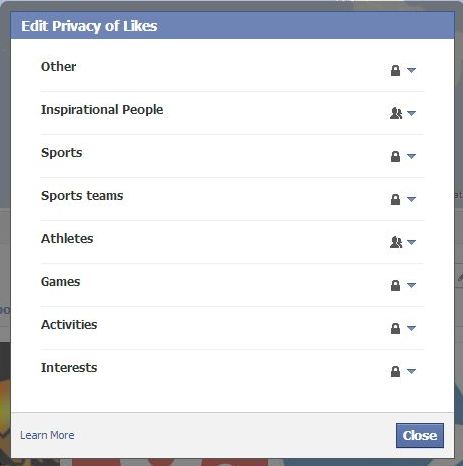
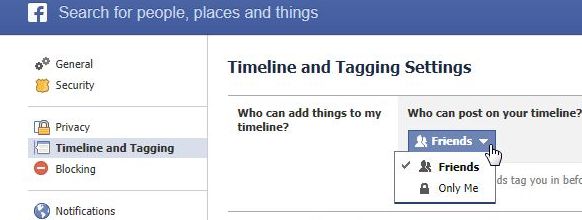
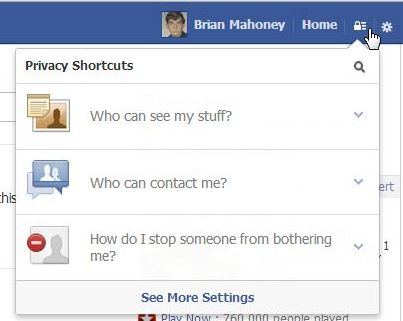
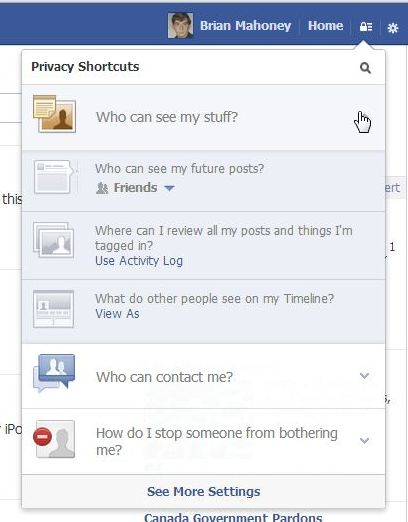
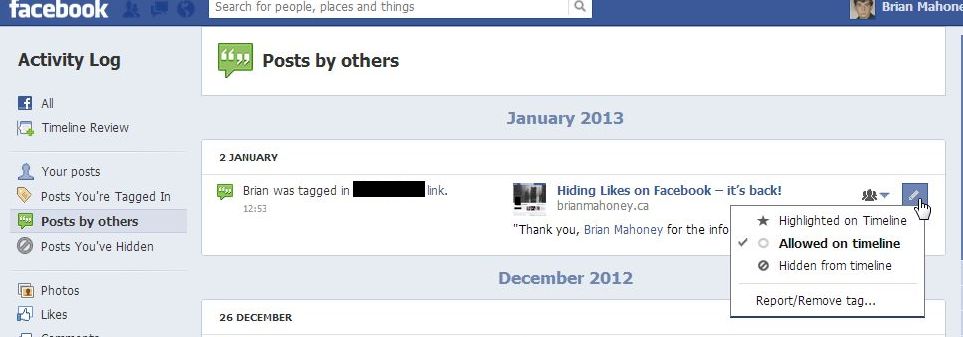
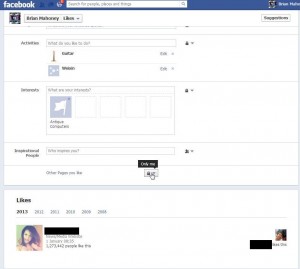
We were adjusting a few things on one of our accounts last week using the ‘View As’ feature. It must have been the first time we had used this tool because this message popped up:

Photo of Facebook's View As warning
Seems like nothing is really private, right?


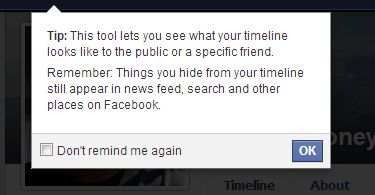
Read that carefully folks. We’ve said it before but it’s worth repeating here: Don’t put anything on Facebook that you’ll regret later on, even if you hide it. Someone will almost certainly find it.

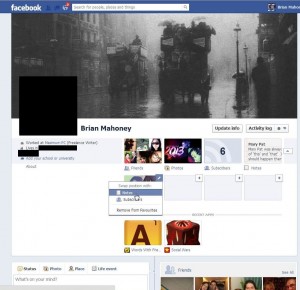
At about the same time, we discovered that your group affiliation is very visible, even if you hide everything about your groups from your profile. We checked one of our profiles from a different browser and there they were, all of our groups at the bottom of our profile. We’re pretty sure we weren’t signed into Facebook on that browser and had clicked on one of the facepiles on a site that we use. If we ever duplicate that glitch, we’ll be sure to save some screen captures.

Although we have written many posts about how to hide this and how to control access to that, there is one main point to keep in mind. A simple glitch on Facebook’s site has the potential to reveal anything or everything about you. That’s something to remember every time you use the site. You must also remember that Facebook itself has access to your material. Any employee with the right type of credentials could sift through your private photos, notes and messages. You may not know this but Facebook uses offshore workers to control its censorship policies. Offshore here means ‘not in North America’. Think about that the next time you post something that you think is shared only with a few friends.

We’re convinced that Facebook’s privacy controls are weak and, in many cases, ineffective. Facebook wants you to feel warm and cozy when you are on their site, using their seemingly effective privacy controls but, as we have discovered in the photo above, the controls are meaningless.

Here some safety tips that we’ve come up with. From time to time, we may add more to this list.

1. If you access the Internet on a shared computer, which is a bad idea at the best of times, make sure you remember to sign out from Facebook and, of course, don’t allow any browser to remember your password.

2. Don’t join any groups that may cause problems for you or your family. The group privacy controls are independent of your own settings and are needlessly confusing. If you feel the need to join a sketchy group, read number 3.

3. Create a second profile using a nickname or fake name and, above all, don’t use your real photo. Tell Facebook that you’re in Zimbabwe or Timbuktu, lie about your age and/or gender and access whatever scandalous groups, pages, people that you want, all in complete privacy. Use a new email address from Outlook or Gmail, not your ISP’s email setup, and only use that for the fake Facebook account. Don’t use your real name for the email account, either. Just remember that the authorities can always trace your IP address so keep all of your activities aboveboard, right?

4. Only add people that you know or have been recommended by friends. You don’t have to accept invitations from strangers. If you don’t know someone, don’t confirm the friendship. If they really persist, just block them.

5. Keep track of how your cell phone or tablet interacts with Facebook. Are you sharing your location every time you post something? Is Facebook accessing your contact list? Are you sharing more than you think you are? You have to ask yourself if Facebook is so important in your life that you might risk your own personal safety to use it. What about your children? Do they access Facebook through their cell phones? How much are they sharing? Start a dialogue with them and get some answers.

6. Create a Facebook account just for your family. If you’re going to share family pics, complete with details of your home, cars and location, make sure they are only seen by trusted family members. Once you get family mixed up with friends, you lose control of your privacy. Your family already knows where you live so you don’t have to draw a map to your house, right? Don’t share that information on Facebook . Share the cute, cuddly dog/cat/kid pics but don’t share everything!

7. Weed out your friend list, keeping in mind number 4. If there is someone you don’t know or don’t remember how you added them, get rid of them. Keep your friend list to just that, friends. If you take our advice in number 3, you can add whoever the heck you want, they won’t any danger to you.

8. This is important so read it carefully. If you are sending a message to someone that includes any personal information or is on a topic that could potentially cause problems for you, don’t send it. Use a proper and secure email system for those messages. Facebook messages may seem like email but they really aren’t. Think of them more like an interoffice memo. Facebook itself is not secure, right? How could its email system be any different?

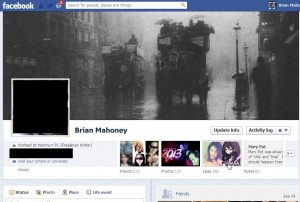
9. If you are a teacher, don’t even think about using your real name or photo for your Facebook profile. Use a nickname, one your students don’t know, and restrict your profile photo and cover photos to ones that reveal nothing about you. You can’t hide your profile photo or any of your cover photos. Remember that.

10. If you are not a teacher, read number 9. Profile and cover photos cannot be hidden.

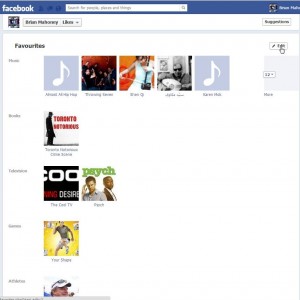
11. We’ve left the best till last. Here’s what a facepile looks like:

Photo of Facebook Facepile
Is your face here? Is your child’s?

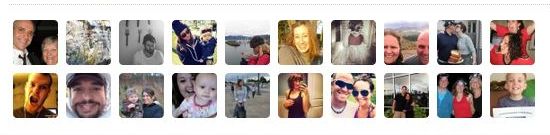
These are real and clickable Facebook profile photos. Anyone, anywhere in the world can click on those photos and be taken directly to a Facebook profile. Depending on how much information that person shares, in the blink of an eye a stranger could find out a city, a street and, sometimes, an address. Go back and read number 3 again. Can you see how this facepile relates to that suggestion? If you’re going to like a page, in this case Songza, why use your real profile photo? Use your fake account and go crazy liking this and that, knowing that no one can ever connect you to anything you do on Facebook. Think about it, OK?

Those are eleven suggestions to keep safe on Facebook. There are probably at least as many more but we’ll leave those for another post. Facebook is fun, addicting but, unfortunately, very deceptive in its practices.  The nice folks there want you to share everything, like everything and toss your privacy to the wind, just so they can make money selling your profile to advertisers. Don’t let them sell you out.

Thanks for reading! Comments and suggestions are welcome, as always.


The Ultimate Facebook Like Guide – Part Two

Our last post detailed how to hide or unhide your Facebook Likes ‘box’. Here’s that post: Part One of the Ultimate Facebook Likes Guide  In that post, we showed you how to control the privacy of each like. Since that part is a bit confusing, here’s a guide to the whole ‘Like’ section.

Before we begin, some explanation is required. The ‘likes’ we are talking about here are those that pertain to your interests, things such as Music, Television, Books, etc. None of this applies to photos or comments that you click ‘like’ on. As you know, those ‘likes’ are controlled by the owner’s privacy settings, not yours. Are we clear on that? If you like Ally’s photo, only Ally controls who sees either the photo or the fact that you like it. The only way to hide your ‘like’ is to ‘unlike’ it. Same goes for your comments, your liking a comment, etc. You control things that you post. You do not control anything that you do not post.

Second point: Some things, such as Music and Film, can only be hidden or shown as a group. If you like the Beatles and want to show everyone that you do, you can show them ALL of the music you like. If you like the Backstreet Boys and DO NOT want anyone to know that, you have to hide ALL of the music that you like. If you’ve got your main section settings set to ‘Friends’ or ‘Public’, and you happen to add Britney Spears to your Music likes, everyone will know. The ONLY way you can hide it is to remove poor old Britney from your list or hide the whole section.

Let’s get started. From your Timeline, click on Update Info. The rest of this post flows down from the top to the bottom of the page that comes up next after you click Update Info.

Photo of Ultimate Guide  1
Hide everything by clicking the Edit icon and selecting Hide Section.


Working down from the top, let’s see what you can hide and what you can’t.

1. About – You can hide different parts of your information. Click the Edit icon in each section to see what you can hide.

2. TV programmes – It’s all or one for this. Show everything or hide everything.

3. Books – All or none.

4. Films – All or none

5. Music – All or none.

6. Music – All or none.

7. Friends – Show all or hide all EXCEPT for mutual friends. If you have a mutual friend with someone, you can’t hide that.

8. Photos – You have complete control of all of your photos EXCEPT your Timeline cover photos. Please remember that you can’t hide your cover photos. We said that twice simply to emphasize it. If you have a questionable cover photo, everyone who sees your Facebook profile, even if they are not friends of yours, can see it.

9. Games (Recent Games, actually) – All or none.

10. Places – All or none.

That’s it for the sections of your ‘likes’ or your favorites. (Maybe everyone should start to use the term favorites instead of likes. It gets confusing otherwise, right? Read on….)

OK, now we are into the last section of these favorites. Conveniently, Facebook has named them Likes! The final section is divided up into these categories:

Other Likes, Inspirational People, Sports, Sports Teams, Athletes, Games, Activities and Interests. 

In previous posts, we’ve used the term ‘page likes’ for these items. Until recently, you could hide some of your individual likes but now it’s different. For better or worse, you only get to show or hide ALL of each category.  Click on any of the topics at the top of your Likes section. Most of them would probably be under the heading ‘Other Likes’, at least they were for us. Now you don’t have to worry about hiding some but showing others. It’s easy to hide them all. Click the edit icon on the right side and choose Edit Privacy. Here’s what you see:

Photo of Ultimate Guide  2
Choose your privacy settings here.


If a Facebook page doesn’t fall into one of the main categories, it will be placed under ‘Other Likes’. Keep that in mind. As you scan your individual likes, you’ll see a sub-heading under the name. Some may be Theatre or Travel Agency or something completely different. Weixin, for instance, is listed as an ‘Interest’ under ‘Activities’. Weixin or WeChat really isn’t an activity, it’s a bit of software.  Somehow it’s shown as an interest. Go figure.

We mention this because you may decide to show your ‘like’ of Inspirational People. Well, if you look at the list of inspirational people, you may be quite surprised at who Facebook deems ‘influential’. You may be expecting Mother Theresa but Charlize Theron shows up in the suggestion box. If you’ve chosen to Like Theron and expect her to show up under ‘Other Likes’ that you’ve hidden, you’d be surprised to find out that she’s in the Inspirational People section that you’ve chosen to show. See what we mean?

TIP: Facebook uses your Likes and Interests (Favorites) to tune the ads that you see on your pages. If you like Guitars, you will see Guitar ads. It’s that simple. Choosing a certain genre of movie or a certain type of music will almost certainly put you into an age demographic that Facebook will mine for ads that you just might click on. If do, they make money. Keep that in mind when you’re blithely ‘liking’ things that you see on Facebook.

There’s more to this than meets the eye, isn’t there? In our next post we’re going to get into these likes in more detail. Now you know what you can hide and what you can’t, we’ll work on some deeper concepts next time.

Thanks for reading!


Facebook – control posts on your timeline

Have you ever something posted on your Facebook Timeline that wasn’t appropriate? Something that upset you? Have you recently been tagged in some crazy photo or video? Here’s how to stop things like this from ruining your day.

1. Head over to your Account Settings:

Click on the gear (settings) then Account Settings.


2. Click on Timeline and Tagging:

Photo of Privacy 2
Timeline and Tagging.


3. Click on the word Edit up on the right. Start at the top and work down.

Photo of Privacy     3
Click on Edit.


4. Who can add things to my Timeline? You can choose to block all of your friends. Unfortunately, you can’t block only some of your friends. It’s all or nothing.

Photo of Privacy    4
Tough decision here, right?


5. If you choose to allow your friends to post on your Facebook Timeline, make sure you also choose to review those posts:

Photo of Privacy    5
Review posts before they show up on your Timeline. Read the warning note, though.


TIP: Make sure you read the note in the photo above, the one that says that nothing is private on Facebook. Quote: Note: This only controls what’s allowed on your timeline. Posts you’re tagged in still appear in search, news feed and other places on Facebook.

6. Limit visibility of posts that you’ve been tagged in:

Photo of Privacy    6
Set this to ‘Only Me’. No one else has to see the posts, right?


7. Continue on down the list and edit each one so that they match your own level of security and privacy. Here is an important one:

Photo of Privacy    7
Make sure you review tags on your own posts BEFORE they show up on your Timeline.


We hope this tour of your Timeline privacy settings helps you keep unwanted posts and tags off your Facebook page. Remember that you can block someone who posts troublesome things on your Timeline. Choose your friends wisely, right?

Thanks for reading!

Follow us on Facebook. Just click Like and you’ll get all our updates and tech tips as soon as we post them: Computers Made Simple on Facebook


Check Facebook Privacy Settings

Facebook recently changed the way that you can check who can see what you’re posted or been tagged in. Here’s a run-down of how you can quickly check your settings.

1. Start by clicking on the icon that looks like a padlock, up on the right of any Facebook page.


Photo of Facebook Activity Check  1
Click the padlock.


2. On the menu that pops down, click on ‘Who can see my stuff’.

Photo of Facebook Activity Check  2
Click on ‘Who can see my stuff?’


3. As the menu above spreads down a bit, click on ‘Use Activity Log’.

Photo of Facebook Activity Check  3
Click on ‘Use Activity Log’.


4. On the page that opens, everything that is possible to do on Facebook is on the left, everything that you can control is on the right.

Photo of Facebook Activity Check  4
Sort out your different activities from this single page.


5. The first time you access these areas, Facebook will walk you through the changes. Basically, this is a complete list of everything that you’ve done on Facebook since time began…well, since  you joined Facebook anyway. Depending on how busy you’ve been, the different pages may take a long time to load. Choose an activity on the left side, then look on the right side to see who can see it. You can even choose activities that are set to ‘only me’.

Photo of Facebook Activity Check  5
The default setting doesn’t include ‘Only Me’ activity but you can set it to include it.


6. On this page, you can hide activity from your own Timeline. Remember that any post’s privacy settings are controlled by the original poster’s settings. You control your own posts, of course, but if you are tagged by someone else, you have the option of removing that activity from your timeline or removing the tag completely.

Photo of Facebook Activity Check  6
You can hide posts that you’re been tagged in.


7. Once you get used to finding and using this page, we think you’ll appreciate its power. Each post, each activity has it’s own settings. You can hide things from your Timeline, limit the audience for things you post or share, all kinds of things. Don’t forget that you can set an audience for a post/comment/photo when you do it but you can always backtrack and change the settings here.


Play around with this page. If you find something cool, let us know. We think you’ll feel a bit better about controlling your own privacy now.

Thanks for reading!

Hiding Likes on Facebook – it’s back!

We’ve written quite a few posts on hiding your likes in Facebook. After months of confusion, it seems that Facebook has reverted back to their old system of hiding or showing likes. Here’s the latest, January 2013, version of hiding your likes:

1. Go to your Timeline page by clicking on your name up on the top right. Once you’re there, look for the boxes of favorites, the ones marked Friends, Photos, etc. Here’s what you are looking for:

Photo of Likes Box
If your Likes box is on the top or bottom row, doesn’t matter. Click either the word Likes or inside the box.


2. If you can see your Likes box, click on it. If you can”t see your Likes box, it might be in the second row of Favorites. (There are only two rows and only eight possible boxes.)  Click on the little arrow to the right of the first row to bring the next row into view. Like this:

Photo of two rows of Favorites.
The second row is now visible, so click on the word Likes or in the box.

When you can finally see your Likes box, click on it.


3. Once you see the page that reads ‘Favorites’ (mine says ‘Favourites’ because we’re in Canada), look up on the top right for the word Edit and click on it.

Photo of Favourites Page
Click the word Edit.


4. For each section of your Favorites, there is an icon that controls who sees it. Click the icon to set the privacy level of each Favorite. Standard Favorites are Music, Books, Movies and Television, etc. but you can always add other categories.

Photo of Facebook Likes Page 4
Set the privacy level for each category here.

You cannot hide some ‘Likes’ in each category and unhide others. If you like Madonna, that will be visible to all of your friends if you choose to make your Music ‘likes’ visible. To hide the fact that you like Madonna, you have to hide all of your Music ‘Likes’.

5. Finally, as far as ‘Page Likes’ go, you can hide them all or make them all visible to whoever you want. You cannot hide some pages and make others visible. Better to hide all of your page likes, just to avoid trouble. This is the way we’ve got our’s set:

Photo of Page Likes
Even though this icon controls the pages that you like, the heading is ‘Likes’. Confusing, isn’t it?


Very Important Tip (please read this): If the page you like is set to a category that you haven’t hidden, the fact that you like that page will be visible to whoever your settings allow. Let us explain that further. Let’s say that Madonna has her page set to be a ‘Music’ page or a ‘Movie’ page. Even though her Facebook page looks the same as our Facebook page (Computers Made Simple), the fact that you like it will show up in your ‘Favorite: Movie” box. Keep that in mind, please.

We’re going to update all of our other ‘Facebook Like’ pages to lead to this one. As of January 2013, this page is valid, at least in North America. Facebook may have different settings, depending on which country you are in at the present time. Europe seems to have better privacy guidelines, from what we’ve seen. Bravo to Europe for making Facebook tow the line!

If you have comments, problems or suggestions for topics, let us know. Thanks for reading!


While you’re here, why not add our Facebook page to your Likes? Here’s the link: Computers Made Simple on Facebook.