Category Archives: Facebook Tricks

Facebook – Third Party Apps


The new-ish Facebook Timeline doesn’t seem to be as popular as its originators thought it would be. The latest addition to it, the ‘trending’ section at the top of the news ticker, is upsetting thousands of users. On our own Facebook page, which is available here: https://www.facebook.com/ComputersMadeSimple?ref=hl  , we were asked about removing that item from our Facebook page. We discovered a way of doing it but we don’t recommend using it. Here’s why.

When a site becomes as popular as Facebook has become, many third-party applications pop up around the Internet. A few of these apps are totally safe, others aren’t. The app that will get rid of this particular pest on Facebook isn’t one that we can recommend. Here’s how their site looks:
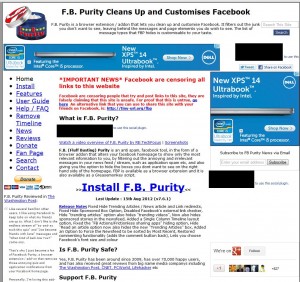
Photo of a web site
Check for spelling mistakes and bad grammar.


What is your first impression? Does it look like a reputable site? We’ve been around the Internet for a long time and sites like this should be avoided, in our opinion. Would you trust your Facebook profile, password and personal information to these folks? We wouldn’t.

The other thing that gives Facebook Purity less of our confidence is the fact that, while it’s been around since 2009, only 70,000 people would be labelled ‘happy users’. Indeed, their own Facebook page has less than 65,000 likes. If this app did what it says it can do, we’d think it would be a lot more popular than this.

The real problem with these third-party apps is that they can change your whole Facebook experience, far beyond what we’d call normal. Facebook itself is blocking the url. Whether this is a legitimate danger or not, that in itself should tell you something about Facebook Purity.

From time to time we’ll look at other apps such as Facebook Purity but, for now, we’d advise you to steer clear of it. We’ve posted many suggestions about how to fix these annoyances on your own without the need of these add-ons. The fewer apps that know your information, the better off you’ll be.

Thanks for reading!

Fewer Facebook Updates


Some Facebook friends are just too active, right? Your newsfeed is full of ‘X did this’ and ‘X did that’. Here’s how you can stop those updates from making it to your Facebook newsfeed.

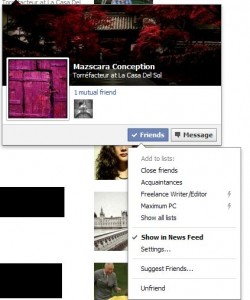
1. Go to your troublesome friend’s timeline. Hover your mouse over the word ‘Friends’. This is what you’ll see:

Photo of Hiding Friend's Updates 1
Hovering on the word ‘Friends’ will bring out this menu.


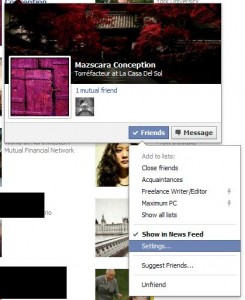
2. On the menu that pops out, look for the word Settings, as shown here:

Photo of Hiding Friend's Updates 2
Settings is the one you want on this menu.


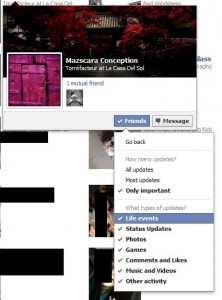
3. Click the word ‘Settings’ to bring up this menu:

Photo of Hiding Friend's Updates 3

Choose which updates you want to receive.


4. From the list, choose which updates you want to receive. If you’re getting spammed with game updates, make sure that the ‘Games’ word is unchecked.

Thanks for reading!

Block Facebook Game Invitations


Facebook game invitations are frustrating, aren’t they? If you don’t play Facebook games, these invitations are no different than spam. Here’s how to stop them. Actually, there are two ways to do this. You can block the app itself or you can block that pesky friend or relative who just loves to send you Facebook game invitations. You decide how you want to do it.

1. Head to your Facebook Privacy settings from any Facebook page. Top right, click on the down arrow and choose ‘Privacy Settings’.

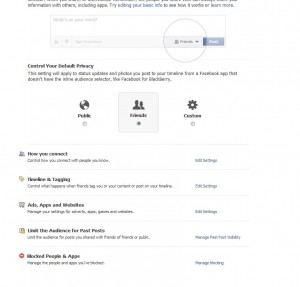
2. This is what you will see next:

Photo of how to Block Facebook Game Invitations  1
Look for ‘Blocked People & Apps’ at the bottom then click on the blue ‘Manage blocking’


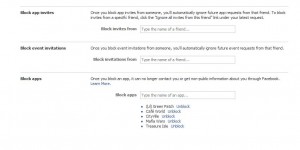
3. Click on the blue link at the bottom right, ‘Manage blocking’. This is what you’ll see next:

Photo of how to Block Facebook Game Invitations 2
You have a choice here. Block the person or the app. You decide.


4. Decide if you want to block app invites from that pesky friend or relative or block that stupid game that you hate. We would recommend blocking the person(s) since there are always new apps/games on Facebook. You can also block event invitations here. That’s handy if you follow someone who’s always throwing a party or some art event that you’re not interested in. All of these settings can be undone, of course.

Thanks for reading!

Custom Facebook Privacy Settings – Part 2


In our last post, we explained how to create a list of friends on Facebook. In this post, we will use that list to create a custom privacy setting for certain posts that you make. This setting will guarantee that only the people on this list will be able to see what you post. Let’s get started!

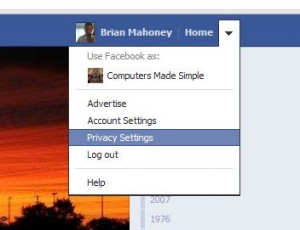
1. From any page in Facebook, click on the little down arrow up on the right, beside the word ‘Home’. This is what you’ll see when you click on it:

Photo on how to create Custom Privacy Settings
Click on Privacy Settings.


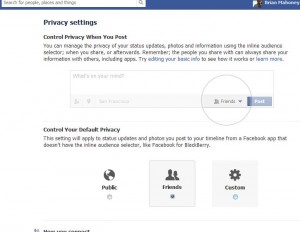
2. This is the next menu that you’ll see:

Photo of Custom Privacy Settings 2
What you’re looking for here is the ‘Custom’ button.


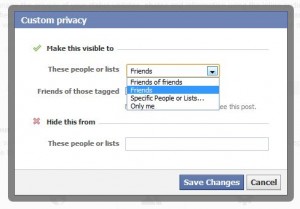
3. Once you set up this custom setting, you’ll be able to choose who can see certain posts. You can name them all individually or simply choose a list that you’re already created. Here’s the next menu, the one you’ll see when you click ‘Custom’:

Photo of how to Custom Privacy Settings 3
Choose ‘Specific People or Lists’


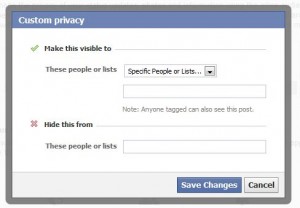
4. Once you choose ‘Specific People or Lists’, this is the menu that pops out:

Photo of Custom Facebook Privacy 4
Choose to hide or make the post visible. Note the tagging reminder.


You can choose to make certain posts visible or you can choose to hide the posts from some people. We would suggest hiding the posts as opposed to restricting who can see it. It’s the same thing, pretty much, but when you hide something, it seems to be more secure, more private.

Warning: Before you go nuts with this, specially where family or significant others are concerned, think about what you’re posting. A mistake here could be disastrous. 

Tip: This setting is your default setting. Whenever you post something, you will have to check which setting you’re using, this custom one or one of your other settings. You can change your default setting at any time using this set of menus. Good luck!

Thanks for reading!


Best Protection for Facebook Hacking


If you’re concerned about the security of your Facebook account, here’s how to eliminate the biggest threat. It’s easy, fast and once you set it up, you can rest a lot easier knowing that one route into your account has been plugged.

Facebook loves to send you emails. If you let Facebook have it’s way, your inbox would be chock full of notifications about this and that. Right now, there are many email scams out there. You might get an email that looks like it’s from Facebook, but it’s a very clever attempt to get your password in order to hijack your account. Here’s how to stop those emails in their tracks:

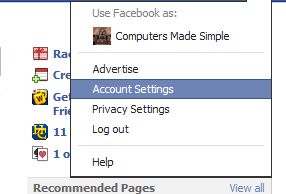
1. From any page on Facebook, look up on the top right and click on the arrow beside Home to bring down this menu:

Photo of Facebook Account Settings menu
Click on Account Settings

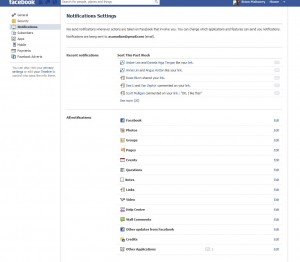
2. Once you are there, click on Account Settings then Notifications and you’ll see this menu next:

Photo showing notifications in Facebook Account Settings
Notifications is the one you want now.

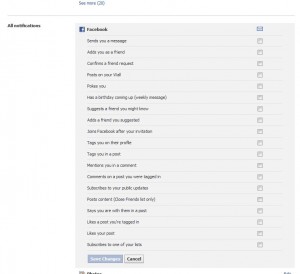
3.Start with clicking on the word Edit to the right of Facebook. This is what you’ll see:

Photo of Facebook Account Settings showing unchecked boxes
This is what you want the menu to look like, all boxes unchecked.

4. If you use Facebook every day, why do you need an email to tell you that something has happened inside Facebook? You’re going to sign in and see the notices anyway, why do you need a follow-up email? We would strongly advise you to uncheck every box here.

5. Move down the list for each of the sections: Photos, Groups, Notes, Pages and so on. Make sure each box in each section is unchecked.

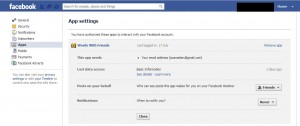
6. Now, look up on the top left for the word Apps and click on it. This is what you’ll see next:

Apps Menu in Facebook Account Settings
Make sure that the Apps never notify you.

7. Here you will see that we have prevented Words With Friends from notifying us. See the word ‘never’ on the bottom right? Make sure that is showing and click Close to ensure that you will not get any notices from this app. Move down the list and do the same for every app that you use.

You’re done! Now, you won’t get any email from Facebook. Whatever email comes to your inbox or your junk box will be a scam. Guaranteed. If you follow our directions here, you’ll be safe from phishing emails. Phishing is where an email tries to get information from you in order to hijack your Facebook or your bank account.

If you still want Facebook to email you, you’re on your own. You risk getting tricked by one of these clever emails. Good luck! It’s scary out there sometimes.

Thanks for reading!