Category Archives: Controlled sharing

Hiding Likes on Facebook – it’s back!

We’ve written quite a few posts on hiding your likes in Facebook. After months of confusion, it seems that Facebook has reverted back to their old system of hiding or showing likes. Here’s the latest, January 2013, version of hiding your likes:

1. Go to your Timeline page by clicking on your name up on the top right. Once you’re there, look for the boxes of favorites, the ones marked Friends, Photos, etc. Here’s what you are looking for:

Photo of Likes Box
If your Likes box is on the top or bottom row, doesn’t matter. Click either the word Likes or inside the box.


2. If you can see your Likes box, click on it. If you can”t see your Likes box, it might be in the second row of Favorites. (There are only two rows and only eight possible boxes.)  Click on the little arrow to the right of the first row to bring the next row into view. Like this:
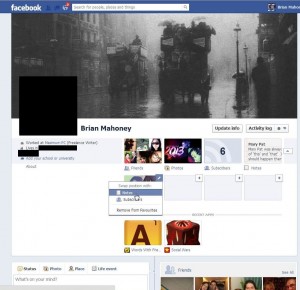
Photo of two rows of Favorites.
The second row is now visible, so click on the word Likes or in the box.

When you can finally see your Likes box, click on it.


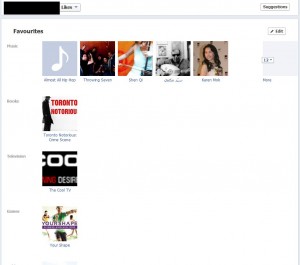
3. Once you see the page that reads ‘Favorites’ (mine says ‘Favourites’ because we’re in Canada), look up on the top right for the word Edit and click on it.
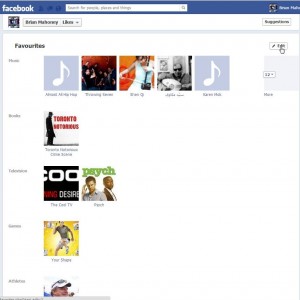
Photo of Favourites Page
Click the word Edit.


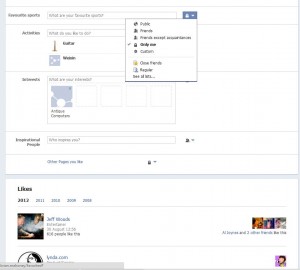
4. For each section of your Favorites, there is an icon that controls who sees it. Click the icon to set the privacy level of each Favorite. Standard Favorites are Music, Books, Movies and Television, etc. but you can always add other categories.
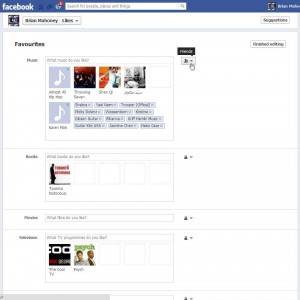
Photo of Facebook Likes Page 4
Set the privacy level for each category here.

You cannot hide some ‘Likes’ in each category and unhide others. If you like Madonna, that will be visible to all of your friends if you choose to make your Music ‘likes’ visible. To hide the fact that you like Madonna, you have to hide all of your Music ‘Likes’.

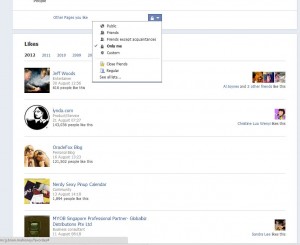
5. Finally, as far as ‘Page Likes’ go, you can hide them all or make them all visible to whoever you want. You cannot hide some pages and make others visible. Better to hide all of your page likes, just to avoid trouble. This is the way we’ve got our’s set:
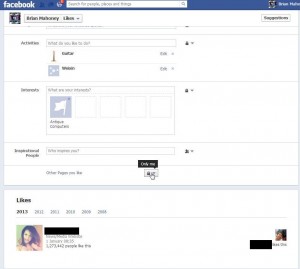
Photo of Page Likes
Even though this icon controls the pages that you like, the heading is ‘Likes’. Confusing, isn’t it?


Very Important Tip (please read this): If the page you like is set to a category that you haven’t hidden, the fact that you like that page will be visible to whoever your settings allow. Let us explain that further. Let’s say that Madonna has her page set to be a ‘Music’ page or a ‘Movie’ page. Even though her Facebook page looks the same as our Facebook page (Computers Made Simple), the fact that you like it will show up in your ‘Favorite: Movie” box. Keep that in mind, please.

We’re going to update all of our other ‘Facebook Like’ pages to lead to this one. As of January 2013, this page is valid, at least in North America. Facebook may have different settings, depending on which country you are in at the present time. Europe seems to have better privacy guidelines, from what we’ve seen. Bravo to Europe for making Facebook tow the line!

If you have comments, problems or suggestions for topics, let us know. Thanks for reading!


While you’re here, why not add our Facebook page to your Likes? Here’s the link: Computers Made Simple on Facebook. 


Facebook Games and Apps – something to think about

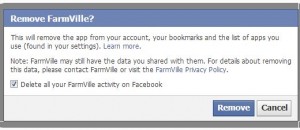
As we all know, Facebook plays pretty fast and loose with your personal information. How fast and loose? Take a look that this notice that popped up when we were removing Farmville from one of our Facebook accounts:

Photo of Facebook Games 1
What? Farmville may still have our data???

Once Facebook has shared your data with Farmville why do you have to go to Farmville to get them to delete it? Wouldn’t deleting Farmville from your Facebook account be sufficient? Looks like it’s not. You have to scramble around to ask a game to delete your own data. All the more reason to use a dummy profile to play games.

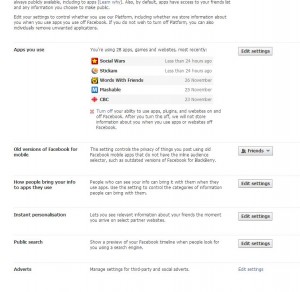
If you’re tired of worrying about Facebook sharing your data as you travel around the Internet, try this. Go to your privacy page, top right of any page and click on the down arrow and choose Privacy Settings. Once you’re there, look for Apps and Websites. Click on Edit Settings. Here’s the page that comes up:

Photo of Facebook Games  2
This is where you can change your game privacy settings.

Right now, this user has allowed 28 games or applications, including websites, access to their personal information. In the last few days, 5 apps/games have accessed that information. (We’ll show you how to limit some of this access in a later post.)

What if all of this third party sharing is not for you? From the looks of this page, Facebook is sharing everything about you with everyone. Lets change that. In the middle of this page, look for this:

Photo of Facebook Games  3
The highlighted words ‘Turn off” will stop the sharing.


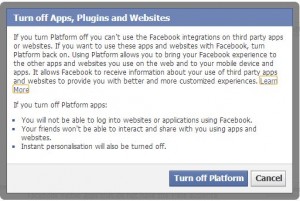
If you click on the words ‘Turn off’, none of your personal information will be shared with apps or games or websites outside of Facebook. The upside is that your data is substantially more private, the downside is that you won’t be able to play games or interact with websites the way you did before. Depending on who you are, this could be a good thing. Here’s what you see when you click on those words:

Photo of Facebook Games  4
The warning is self-explanatory.


One click and you’re done. None of your games will show up on your Facebook page, your notices won’t include game updates or requests and you won’t be hounded to ‘Sign in with Facebook’ when you travel around the Internet. If you don’t like this, head back to the same page and ‘Turn on’ what you just turned off. Or, you could just play a game. Read the next tip.

TIP: Even though you have turned off Apps, Plugins and Websites and received the dire warning posted above, Facebook does not warn you that your privacy is being invaded the next time you play a game. Read that again, we’ll wait. 

Facebook is eager to warn you when you turn off Apps, Plugins and Websites, right? It’s curious that there is no warning when you turn this on, isn’t it? All you have to do is play a game, even a game that you had been playing before you turned this off, and everything is back to normal. Your personal data is being shared outside of Facebook all over again.

Facebook is full of tricks and missteps, isn’t it? It’s like walking in a minefield blindfolded sometimes. We strongly suggest a secondary, anonymous account when playing games and ‘liking’ web pages. You never know when something you’ve done on Facebook will come back to haunt you later on. Use one account for friends and another for everything else. Using two browsers on a modern fast computer is simple and saves time logging in. Keep your main account on Chrome and your play account in Explorer, example.

Next time, we’ll tell you how to adjust your app and game settings to protect at least some of your privacy. Stay tuned!

Thanks for reading! Like us on Facebook and get instant notification of our posts: https://www.facebook.com/ComputersMadeSimple?ref=hl


Deleting Posts from your Facebook Timeline

There are several ways to hide your page likes from showing up in your Facebook news feed or on your timeline. We’ve shown you how to hide individual likes in previous posts. This time, we want to show you how to hide groups of things from your timeline.

All of this is done from your own Facebook timeline so head there now.  Depending on your settings, you’ll probably see big boxes with titles such as Activity, Friends, Photos, Likes, etc. These big boxes match up with the little boxes with the same names, the ones just below and to the right of your name.

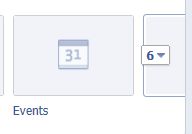
First, lets figure out what boxes we want to share with our friends. Click the small down arrow just to the right of the number of boxes you have in that section. This person has six. This is the box we are looking for:

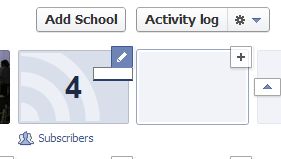
Photo of Cleaning up your Facebook Timeline 1
Click the little box with the number in it. You can’t edit your Favorite boxes until you do.


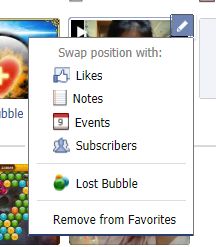
Once you click on that box, you can edit and shift the various boxes around. Each main box on the second row has an editable icon on the top right, just hover your cursor there. Two boxes do not have edit icons: Friends and Photos. You can hide your full friend list elsewhere but clicking this box will show either your full friend list or mutual friends that you have with whoever is looking at your timeline. Your photo box can’t be hidden or changed but you can, of course, limit your audience to any photo that you post yourself. Any of the other boxes can be swapped with anything else or you can remove that box from your Favorites. (All of these boxes are named Favorites.) Here is a menu of what you can do with the boxes:

Photo of Cleaning up you Facebook Timeline  2
Arrange your boxes or remove a box completely. You can add it back later.


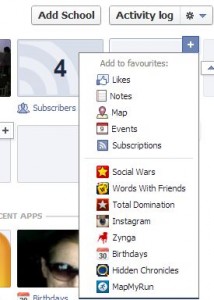
If you have removed a box from your Favorite boxes, you can add it back. Hover your cursor on the top right of any blank box on the top row and choose which box you want to add back. Here is the menu you see when you click the edit icon:

Photo of Cleaning up you Facebook Timeline 3
Pick a box name and add it back.


Just for fun, here is a glitch that we discovered in this section of the timeline. It looks like a menu where you can type in your own name but, unfortunately, it doesn’t work. This is what we saw:

Photo of Cleaning up you Facebook Timeline 4
It would be nice to make up your own name for a Favorite box, wouldn’t it?

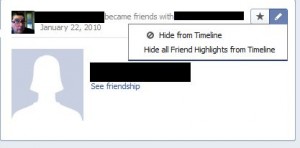
Move down the page and find the post that shows that you’ve recently added a friend.  Click on the edit button on the top right of that box and you’ll get to hide that whole activity, not just the one single post.

Photo of Cleaning up you Facebook Timeline 5
Hide all friending activity  with the click of a mouse.


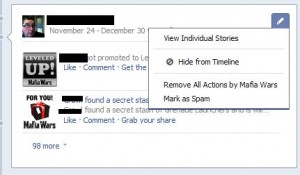
Facebook apps love to post every damn thing you do when you’re playing games. You can hide all posts by any game but, unfortunately, you have to do this game by game. Here’s one of the game menus which allows you to stop them from cluttering your timeline:

Photo of Cleaning up you Facebook Timeline 6
Remove all actions. Sounds good, doesn’t it?


Work your way down your own timeline and see what you can hide and what you can’t. Each time you do this sort of exercise, you will become more comfortable with maintaining your privacy on Facebook. By nature, Facebook is all about sharing but we think that you should be in control of what you share. We’ll help you all we can to figure it out.


Thanks for reading! Comments, questions, problems are all welcome. Follow us on Facebook to get the latest updates. Here the link:  Computers Made Simple 

Facebook Likes – The Ultimate Guide – Part Four


This post is strictly for your Likes, the ones that your Like box is linked to. Go to your Facebook timeline and click on the Like box. This is that page that will pop up:

Photo of Like editing page
See the word Edit up on the top right? Click it.

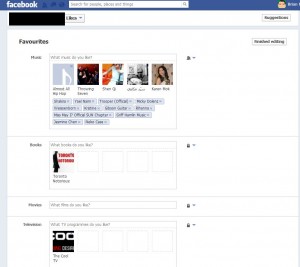
The next page, after you click the Edit button, looks like this:


Photo of Editing your Likes 2
This is where you choose what to show and what to hide.

This is a long page, starting with your Favorites. (The photo reads Favourites because we’re in Canada and use the British spelling.) Your page of Likes is made up of both your favorites as well as the pages you like. The pages are all at the bottom.  Right now, let’s look at the Music box. You can do two things with each favorite. You can show it or hide it. If you decide to show it, you can choose who you want to see it or who you want to hide it from, the same as if you post a photo on Facebook.

Once you decide who you want to share this favorite box with, you’re left with showing them every type of music you like. You can’t break up this box into pieces, say Techno being one piece that you don’t mind showing and Andy Williams being another piece that you don’t want to show. If you show your music to anyone, they see all of the music you like. If you want to hide old Andy, you have to hit the X beside their name to delete it.

The same applies to all of the topics that Facebook thinks should be listed as Favorites, whether they be books, TV, movies or whatever. If you want to hide your Favorites from someone or only show them to a group of friends, click on the icon on the right. That will bring up this menu:

Photo of Favorite share menu
Sort out this menu as best you can. This applies to the particular favorite you are working on, not every single one of them.

You can see from the photo above that you can hide a particular favorite from some people but you can’t hide only one of those individual items unless you hide the whole group of favorites. Get it? If you like Madonna in your Music favorites and you show your Music favorites to your friends, you can’t hide the fact that Madonna is in that group.

Useless Favorites Tip:  These favorites are really useless in the whole scheme of things to share on Facebook. The only reason they are even on your timeline is to open yourself up a bit to your friends. You may have an acquaintance who knows a bit about you but they didn’t know that you like Bladerunner (a movie). Once they find out that you like something, they have a fuller picture of you as a person and, possibly, might feel better about chatting with you about similar interests. Having a favorite in this group doesn’t mean that you’ll get inundated with offers or emails or updates on anything. These favorites are just there in order for people to get to  know you better.  Hide them, show them, it doesn’t matter.


Let’s move on to items that actually get updated every now and then, Facebook pages. As you know, Facebook pages are full of information, updates as well as photos and links, all pertaining to the person or company that created the page. Virtually every star, celebrity or company has a Facebook page. If they don’t, they’re missing the boat.

Facebook Page Likes – Options Available

As far as Facebook page likes go, you can hide them or show them as a group. Yes, you can show or hide them all to whatever group of friends you choose but you cannot hide one of the pages and show the others. This is the same as your other favorites, it’s all or nothing. All means every page you like will be shown to whoever you show any page you like. You can’t pick and choose what to show.

If you like a page, only you will see the updates and information that this page feeds out. No one else will see anything that a page feeds out to you unless they follow the same page.

TIP: There is no reason to show anyone what pages you like. Why not hide all of the pages you like? That way you won’t slip up. Close friends, relatives, employers and employees don’t have to know what pages you follow, do they? Instead of tripping up at some point as you try to keep track of who can see what, why not just shut out everyone? Makes sense to us. Once you lock your page likes from everyone, you are free to be yourself. We advise you to set your Page Likes to this setting:

Photo of perfect privacy setting
Set this page to ‘Only me’ and feel free to ‘like’ any page you bloody well want to! Yay freedom!


We’re done. Over the last few posts we’ve tried to sort out everything about Facebook like boxes, Facebook likes and, finally, Facebook page likes. We hope things are a bit clearer now for you. Questions, comments, all are welcome. Good luck!

Thanks for reading!


Facebook Likes – The Ultimate Guide – Part Three


To review, we know now that you can’t hide likes or comments on someone else’s post, no matter what kind of post or share it is. Next, lets take care of our ‘likes’, those  bits of personal information that Facebook feels are vitally important to share with your friends. They are contained in one of those little boxes under your cover photo. You can choose to show whatever boxes you want in that row that Facebook has termed ‘Favorites’. There are a total of eight possibilities for your Favorite boxes.

Not to confuse the issue even more, Facebook has two concepts of ‘Favorites’. The first has to do with which boxes you choose to show to the right of your profile photo. The ones across the top row are your ‘favorite’ boxes. The other boxes, if there are any, are available by clicking the little arrow on the far right of the row.

The second kind of favorite is used to describe your ‘favorite’ likes such as your favorite movie, your favorite TV show and so on.

The Boxes: 

The boxes to the right of your profile photo could show one of eight things. All boxes are links to whatever one of those eight things you decide to put up there. The eight things could be a link to your friend list, your photos, your likes, your notes, your subscribers (if you have chosen to allow subscribers), your maps, etc. It has occurred to us that there may be more than eight boxes available or your choices may very. Everyone’s Facebook timeline might be a little different.

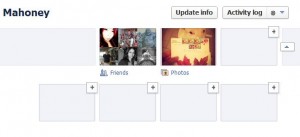
The bare minimum seems to be two boxes, those being friends and photos. Even if you hide your friend list from everyone, there will be a box that shows any mutual friends that you and the viewer have. Here is a shot of the skimpiest timeline you’ll ever see:

Photo of a streamlined Facebook timeline
Only two boxes, one of mutual friends and one linked to photos.

This is the least amount of information that Facebook allows you to show on your timeline. The Like box is gone, as are the rest of them. Let’s add the Like box back and see what we can do with it:

Photo of adding boxes
Two boxes are standard, click on a + sign to add more.


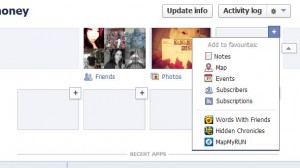
If you click on the + sign on the top row, remember that they are termed ‘favorites’ by Facebook, you will get a different menu than if you click on one of the bottom boxes. Here’s what you see on the top:

Photo of top box menu
Everything seems to be here but ‘Likes’.

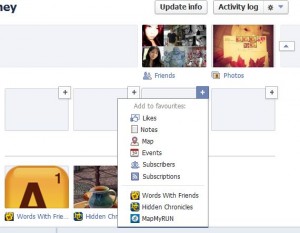
No Like box yet. Click on one of the bottom boxes to bring up this menu:

Photo of bottom row of boxes
Likes is there. Click the words Likes to add that box to the bottom row.


Seeing as how we only have two boxes on the top row, Facebook automatically adds your new ‘Likes’ box to the top row when you refresh the page. If you had a full row of boxes on the top, you’d be able to choose which ones you want to make your ‘favorites’. Hover your cursor (mouse) on the top right of the Like box and this menu will pop out:

Photo of swap box
‘Swap position with’ means you can arrange the favorite boxes as you wish.


Right now, we can only swap our Like box with Gamer Friends since we have removed all of the other box choices from our favorites.


Next time we’ll get deeper into sorting out our likes. This is enough information for this post. Play around with these settings until they are second nature to you.


Thanks for reading!