To review, we know now that you can’t hide likes or comments on someone else’s post, no matter what kind of post or share it is. Next, lets take care of our ‘likes’, those bits of personal information that Facebook feels are vitally important to share with your friends. They are contained in one of those little boxes under your cover photo. You can choose to show whatever boxes you want in that row that Facebook has termed ‘Favorites’. There are a total of eight possibilities for your Favorite boxes.
Not to confuse the issue even more, Facebook has two concepts of ‘Favorites’. The first has to do with which boxes you choose to show to the right of your profile photo. The ones across the top row are your ‘favorite’ boxes. The other boxes, if there are any, are available by clicking the little arrow on the far right of the row.
The second kind of favorite is used to describe your ‘favorite’ likes such as your favorite movie, your favorite TV show and so on.
The Boxes:
The boxes to the right of your profile photo could show one of eight things. All boxes are links to whatever one of those eight things you decide to put up there. The eight things could be a link to your friend list, your photos, your likes, your notes, your subscribers (if you have chosen to allow subscribers), your maps, etc. It has occurred to us that there may be more than eight boxes available or your choices may very. Everyone’s Facebook timeline might be a little different.
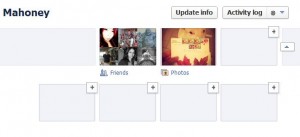
The bare minimum seems to be two boxes, those being friends and photos. Even if you hide your friend list from everyone, there will be a box that shows any mutual friends that you and the viewer have. Here is a shot of the skimpiest timeline you’ll ever see:

This is the least amount of information that Facebook allows you to show on your timeline. The Like box is gone, as are the rest of them. Let’s add the Like box back and see what we can do with it:

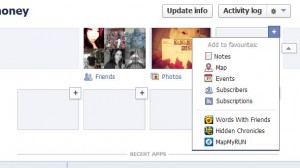
If you click on the + sign on the top row, remember that they are termed ‘favorites’ by Facebook, you will get a different menu than if you click on one of the bottom boxes. Here’s what you see on the top:

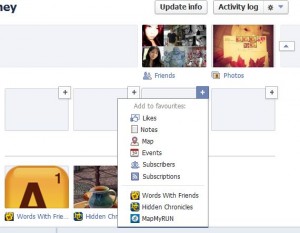
No Like box yet. Click on one of the bottom boxes to bring up this menu:

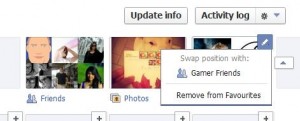
Seeing as how we only have two boxes on the top row, Facebook automatically adds your new ‘Likes’ box to the top row when you refresh the page. If you had a full row of boxes on the top, you’d be able to choose which ones you want to make your ‘favorites’. Hover your cursor (mouse) on the top right of the Like box and this menu will pop out:

Right now, we can only swap our Like box with Gamer Friends since we have removed all of the other box choices from our favorites.
Next time we’ll get deeper into sorting out our likes. This is enough information for this post. Play around with these settings until they are second nature to you.
Thanks for reading!
