Category Archives: Controlled sharing

How to Beat Facebook at Its Own Game

Facebook loves the fact that people share everything on their platform. In fact, the more you share, the more money Facebook makes on your information and preferences. If you’re reading this, you’re probably a bit concerned about privacy and how Facebook plays fast and loose with it. Here’s how to tune your profile so you can trick Facebook into thinking you’re someone other than who you really are.

1. While Facebook pretends that you have to use your real name on your profile, there is no real reason to do this. On Facebook, and on the Internet in general, you can be whoever you want to be. If you’re worried about whether your friends will recognize you, keep your real last name or, if you’re a female, use your maiden name. There are many ways around the ‘real name’ restriction but just remember that you don’t have to play by the rules here. Why is this important? Well, once Facebook has your real name, they can sell your information to third party advertisers, complete with your home city or state. This leads us to the next available spoof.

2. Don’t use your real city/town/country. Even if your IP address says that you are coming from Timbuktu, you can always tell Facebook that you live in Cincinnati, and vice versa. As long as your friends know who you are and where you really live, if they are real friends of course, you can tell Facebook that you live somewhere else.

3. Why does Facebook have to know how old you are? Simply because they can tune their ads to your age demographic. Why let them? You don’t have to give your real age when signing up and, if you do, you don’t have to show the year you were born. Adjust your privacy settings to show only the date, not the year. We all know that young teens or pre-teens pretend to be older when they sign up for Facebook. You can do the same thing …in reverse.

4. When you’re posting a photo of your house/dog/cat/kids, tag the photo with some random location. Facebook doesn’t have to know where you go or what you do. Your friends will know that it’s your house/dog/cat or kid, Facebook doesn’t have to.

5. There is no reason to share your sex, your marriage status, your date of birth, your political views, etc. Your friends already know you or they can ask if they want more information. Facebook pretends that this information is vital to your success on the site but, come on, why would anyone share this stuff in public?

Here are some photos of different settings that are available. Many of our friends do not use their real name while others change their name later on. You’re allowed to do one change on the same profile so change to a nickname or just make up a new one. It’s simple to message someone and say, ” Hey, this is me. I changed my name.”
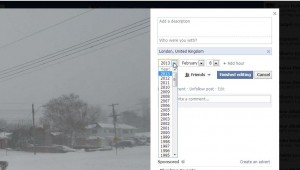
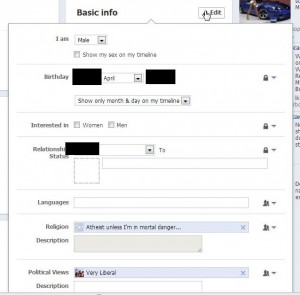
Photo of Facebook photo.
This photo was taken in Toronto. You can tell Facebook that it was taken just about anywhere.


Photo of Facebook photo 2.
Use this page to hide your personal information from Facebook and strangers.


Remember to hide what you can, change everything else and pretty much tell Facebook to stuff it. There is no need to share any personal information with them. Good luck and let us know if you have questions about any of this. We’re here to help.

Thanks for reading!

Follow us on Facebook and keep up with the latest tech news: Computers Made Simple on Facebook

Hide Your Game Updates on Facebook

If you’re worried about spamming your friends with game updates on Facebok, here’s how to hide them:

1. You can do this in at least two places. The easiest way to hide ALL of your game updates is to head to your Timeline first. Click on your name, top right side of any Facebook page. Once your Timeline opens, look for the words Activity Log.

Photo of Hide 1
From your Timeline, click on the words Activity Log.


2. When your Activity Log opens, all of your activities are shown.

Photo of Hide 2
All of your activities are shown here.


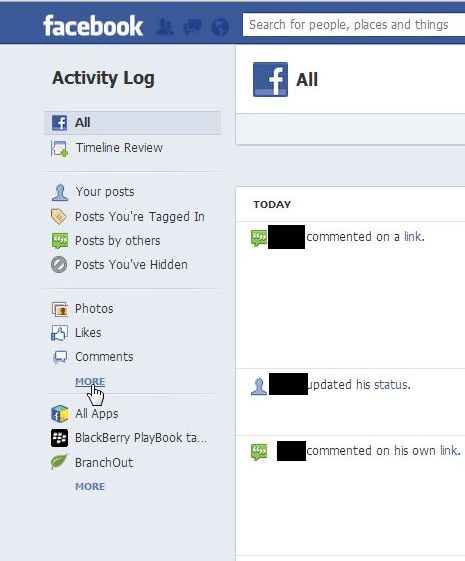
3. While you could scroll down and edit each post, we’re here to hide only your game updates. On the left of your screen, look for the list of activities. Normally, Games will be hidden so look for the word ‘More’ and click it:

Photo of Hide 3
Look for the word More and click it.


4. Once the menu spreads down, look for the word Games. Click on it.

Photo of Hide 4
Click on Games. All updates from all games that you play will show up on the right.


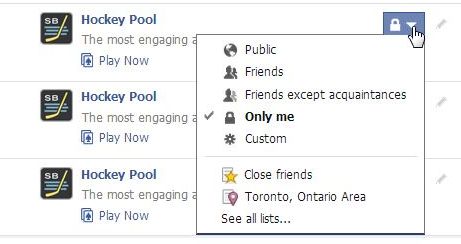
5. On the right side, click on the icon that is second from the right. If could be an icon of a globe, two heads in silhouette or maybe a padlock. Here are your choices:

Photo of Hide 5
Choose who sees each game’s updates. In this case, only the Facebook user can see this game’s updates.


6. Once you have set each game’s updates to Only Me, and that is the setting that we recommend,   the icon on the far right will be greyed out. Why? Because ALL updates will now be hidden. Do your friends a favor by making sure that each game you play will not spam their newsfeed.


Thanks for reading!  Like us on Facebook and we’ll keep you up to date on everything to do with Facebook and computers in General.  Computers Made Simple on Facebook 

How to Hide Anything on Facebook

It seems we’ve been writing about Facebook for longer than Facebook has been around. Judging from the popularity of our “Hiding Likes on Facebook” posts, everyone has something to hide. In this post, which will be a long one, all we’re going to do is post screen captures of as many Facebook menus as we can find. In some photos you won’t see a menu but in the next one, we’ll show you where to find it.

Before we begin, there are two caveats here. First, while we’ll show you how to hide almost everything on Facebook, some of those things may pop up in other areas. Consider the fact that liking a page is different from showing that like later on in a series of your ‘likes’. Liking and showing likes are two different things. For this reason, we suggest that you don’t do something on Facebook that would cause you grief later on in your life or your career.

Secondly, there are two things that you cannot hide on Facebook. First, photos that you post cannot be completely hidden. You can selectively choose who can see the photo but you can’t completely hide it. Think about it. Facebook employees can see the photo, right? Even if the privacy settings for that photo are set to ‘Only Me’, someone at Facebook can see it.

Lastly, you cannot hide mutual friends from anyone. Yes, you can partially hide your friend list but you can’t hide the fact that you have a mutual friend with someone. If being friends with someone will cause problems in your life, especially if that person is a friend of a friend, you can’t hide it. We can see many situations where this would cause a problem so keep this in mind when you’re ‘friending’ someone.

TIP: Why did we say that you could partially hide your friend list? Read this post and you will see why. You can set your friend list’s privacy to ‘Only Me’ but that won’t prevent Facebook from suggesting every one of your friends to someone else. Here’s the link to the post: Stalking Friends on Facebook

Here we go with the screen caps:

Photo of HIde 1
Most things that you’ve done are shown on your Activity Log, available from your Timeline.


Photo of HIde 2
On the right side of almost all items shown, there is an edit icon which allows you to hide that activity from your Timeline.


TIP: Remember that you can’t hide comments that you make on something that you did not post. Keep that in mind. If you like a photo that someone else posted, you can’t hide it. Same thing for a comment on a photo. You can’t hide that either. All of those things are controlled by the privacy settings that the other person used. Make sure you understand this before you go randomly clicking ‘Like’ on photos or making comments on things posted by other people.

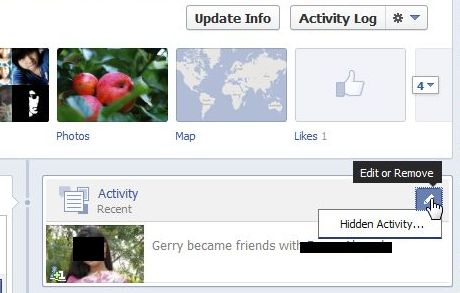
Photo of HIde 3
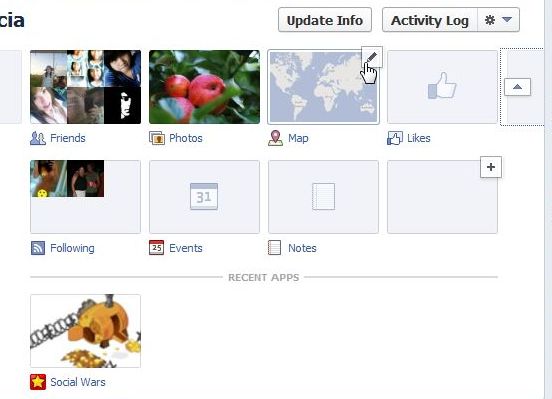
On your Timeline, you can find the edit icon up on the top right of most boxes.


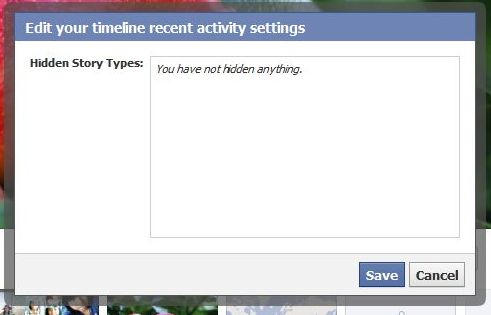
Photo of HIde 4
You can check on story types that you have hidden. Seems we haven’t hidden any…yet.


Photo of HIde 5
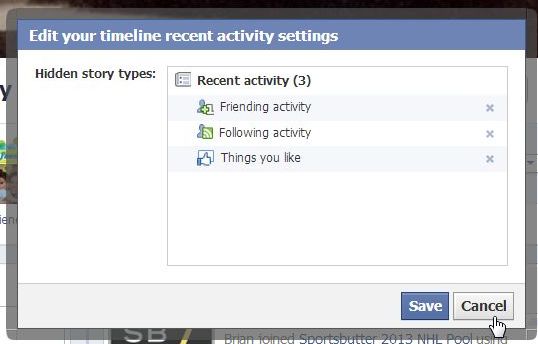
Here, we’ve hidden three types of activity.


Photo of HIde 6
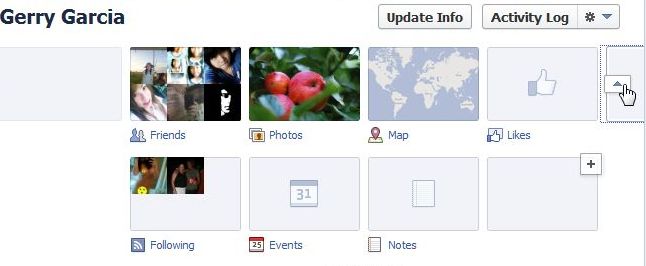
Click the arrow to open up all the boxes in your Favourites. Only then can you edit them.


Photo of HIde 7
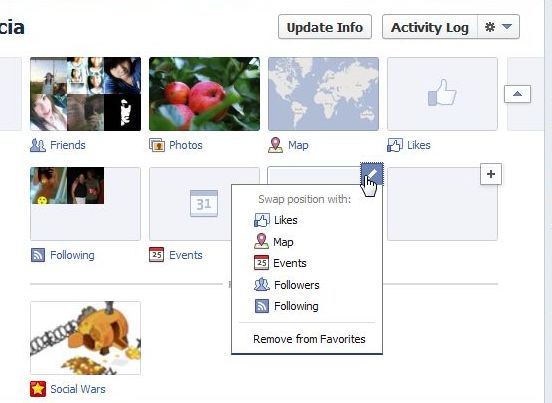
You can swap positions or remove the box from your Favorites.


Photo of HIde 8
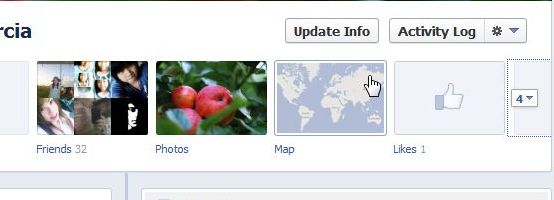
If the box menu isn’t open, you can’t edit any of the Favorite boxes. Click the arrow just to the right of the 4.


Photo of HIde 9
See? Now the Places or Maps box can be edited.


Photo of HIde 10
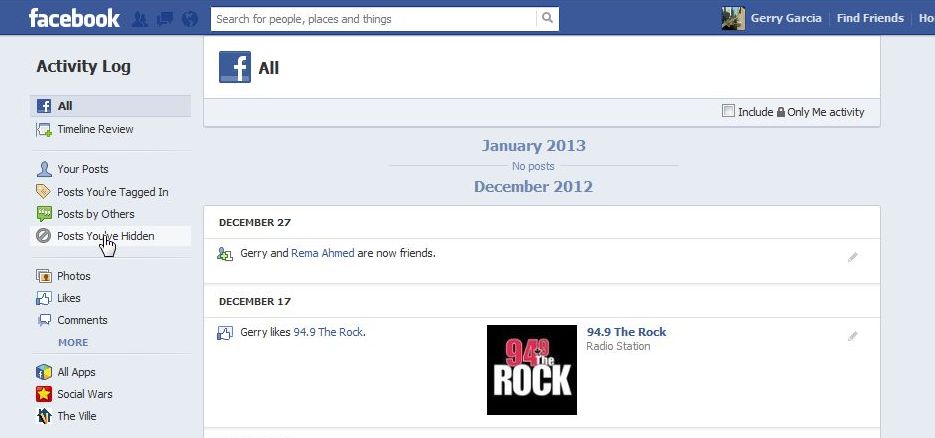
You can check what posts you’ve hidden by looking at your Activity Log and choosing the correct link on the left.


Photo of HIde 11
Here is the full list of activities that you can check by clicking More down near the bottom (shown as Less here).


Photo of HIde 12
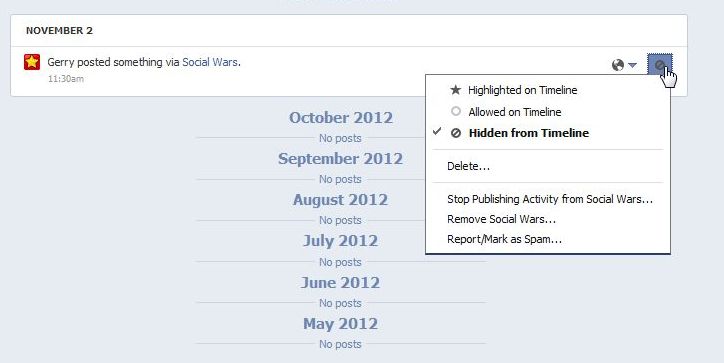
Hide all of your game posts here. Click the Stop Publishing Activity. Please do this for your friends!


Photo of Hide 13
Hide all Friending activity here.


Photo of  Hide 14
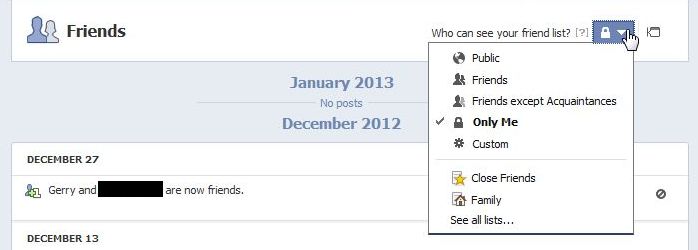
Here’s where you can hide your friend list from everyone or from some people, Choose ‘Custom’ to select specific people or lists.


This has been a long post, we know that, but we think you’ll be able to find most of what you’re looking for here. If not, let us know! We love questions.

Thanks for reading! Follow us on Facebook. Just click Like and you’ll get our updates and tech tips as soon as we post them: Computers Made Simple on Facebook

Check Facebook Privacy Settings

Facebook recently changed the way that you can check who can see what you’re posted or been tagged in. Here’s a run-down of how you can quickly check your settings.

1. Start by clicking on the icon that looks like a padlock, up on the right of any Facebook page.


Photo of Facebook Activity Check  1
Click the padlock.


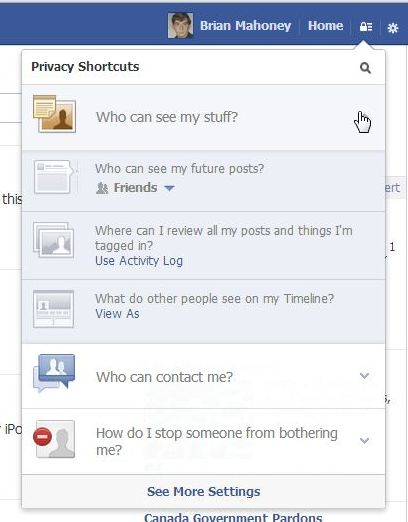
2. On the menu that pops down, click on ‘Who can see my stuff’.

Photo of Facebook Activity Check  2
Click on ‘Who can see my stuff?’


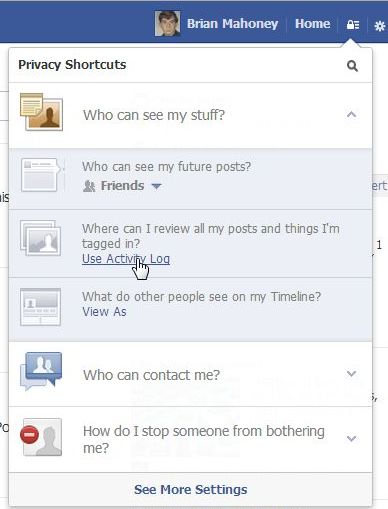
3. As the menu above spreads down a bit, click on ‘Use Activity Log’.

Photo of Facebook Activity Check  3
Click on ‘Use Activity Log’.


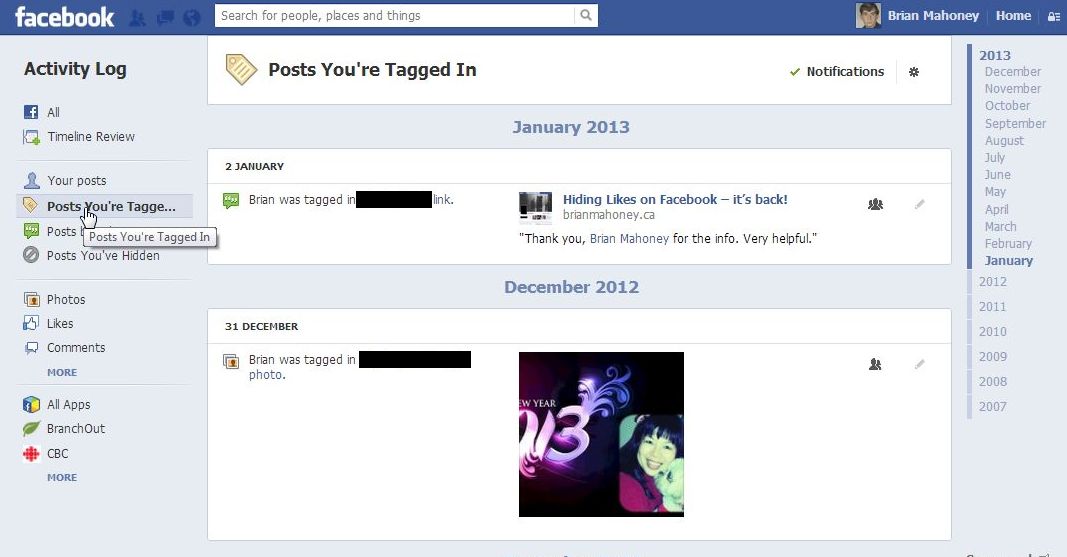
4. On the page that opens, everything that is possible to do on Facebook is on the left, everything that you can control is on the right.

Photo of Facebook Activity Check  4
Sort out your different activities from this single page.


5. The first time you access these areas, Facebook will walk you through the changes. Basically, this is a complete list of everything that you’ve done on Facebook since time began…well, since  you joined Facebook anyway. Depending on how busy you’ve been, the different pages may take a long time to load. Choose an activity on the left side, then look on the right side to see who can see it. You can even choose activities that are set to ‘only me’.
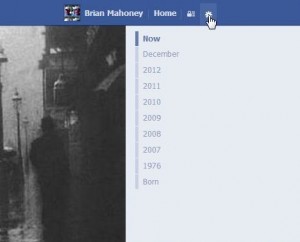
Photo of Facebook Activity Check  5
The default setting doesn’t include ‘Only Me’ activity but you can set it to include it.


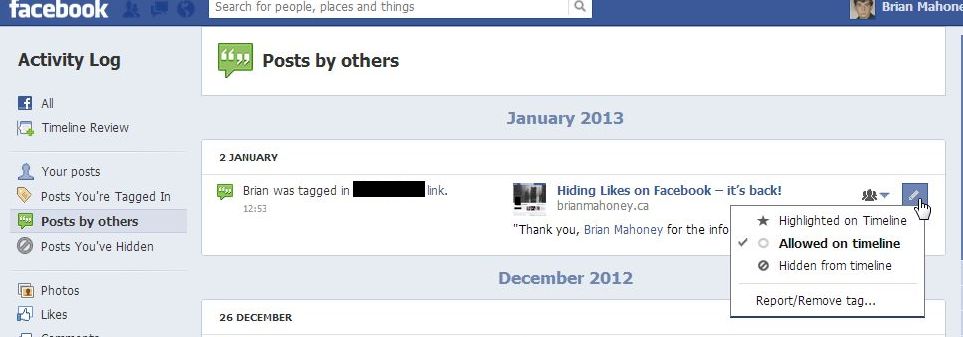
6. On this page, you can hide activity from your own Timeline. Remember that any post’s privacy settings are controlled by the original poster’s settings. You control your own posts, of course, but if you are tagged by someone else, you have the option of removing that activity from your timeline or removing the tag completely.

Photo of Facebook Activity Check  6
You can hide posts that you’re been tagged in.


7. Once you get used to finding and using this page, we think you’ll appreciate its power. Each post, each activity has it’s own settings. You can hide things from your Timeline, limit the audience for things you post or share, all kinds of things. Don’t forget that you can set an audience for a post/comment/photo when you do it but you can always backtrack and change the settings here.


Play around with this page. If you find something cool, let us know. We think you’ll feel a bit better about controlling your own privacy now.

Thanks for reading!

Facebook Privacy Shortcuts

Facebook recently introduced a new interface (the thing that you see when you check out your Timeline). You may not have noticed the new privacy shortcuts, however. Here’s a quick guide to how to use them.

1. Click on your profile photo from anywhere in Facebook to get to your Timeline. Up at the top are some new icons. Here is what they look like:
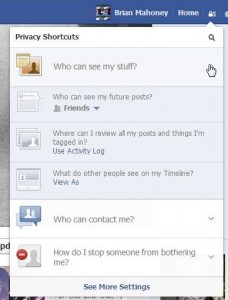
 

Photo of Facebook Privacy Shortcuts 1
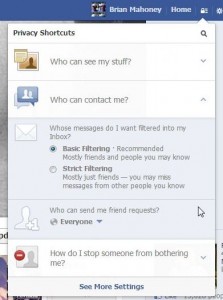
Look for the gear and padlock icons.

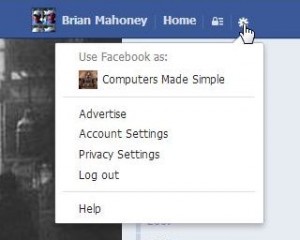
The gear icon hasn’t changed much. It leads to your account and privacy settings. The ‘Advertise’ link is new, we’ll explain that another time, but the links are pretty much the same as before. Here they are:

Photo of Facebook Privacy Shortcuts 2
Same old, same old except for ‘Advertise’. What the heck is that? Details later.


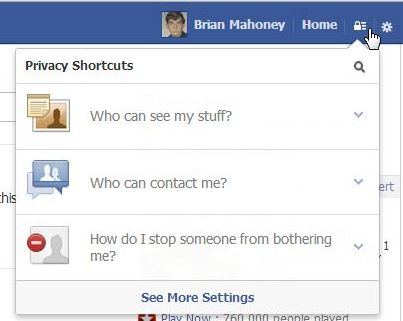
2. To the left of the gear, look for the padlock icon. It’s the one that we’re dealing with today. Instead of going to a completely different Facebook page, you can adjust your settings from your Timeline. Here’s a rundown of the different menus:
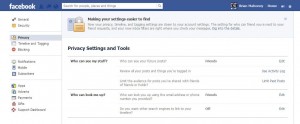
Photo of Facebook Privacy Shortcuts 3
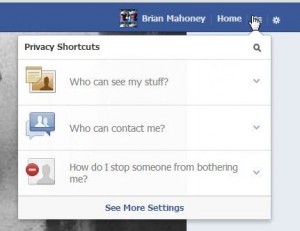
Three icons with a down arrow to the right.

Here’s where you can change ‘Who can see my stuff?’ and ‘Who can contact me’ as well as ‘How do I stop someone from bothering me?’


3. One by one :

Photo of Facebook Privacy Shortcuts 3
Adjust your post setting here. There are two links to other tools, your Activity Log and the View As feature.


4. Next we have the ‘Who can contact me?’ settings:

Photo of Facebook Privacy Shortcuts 5
This setting is quite odd, isn’t it?

If you can tell us why Facebook uses such nebulous English, we’d love to know. It seems to us that ‘Basic Filtering’ would let your friends contact you but prevent strangers from sending you messages. Instead, neither setting makes any sense. Why would you want to receive messages from some friends and not others? How can you determine who can send a message?

As for the ‘Strict Filtering’, why would you miss messages from some friends? The ‘Mostly just friends’ line seems to say that only certain friends can get through the filter. This is, bluntly, absurd.

Lastly, choose who can send you friend requests.

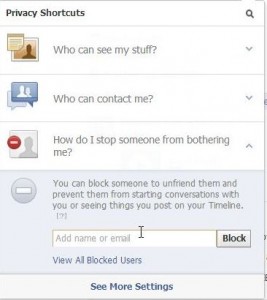
5. If you have blocked someone on Facebook, you’ll remember that the process was fairly difficult. With the new shortcuts, it’s substantially easier.

Photo of Facebook Privacy Shortcuts 6
Start typing a name, then click Block when you find the right person.


6. The See More Settings link down at the bottom leads to this page:

Photo of Facebook Privacy Shortcuts 7
These are more settings that you can adjust. We’ll do another post specifically on this page at a later date.


That’s enough for today. Play with the settings here to control who sees what and who can contact you, etc. Again, Facebook has made this more confusing than necessary but, at least, the controls are easier to find. Let us know if you have a problem with any of this.

Thanks for reading!