Category Archives: Adjust Default Privacy Settings

Facebook Changes Its Like Privacy – get the details here.

As of November 7, 2012, Facebook has completely changed its privacy settings for pages that you like. Pages include artists pages, tech pages, etc. Here is what we’ve found so far:

1. Your activity log is one place to start. Get to this page by clicking on Activity Log from your Facebook timeline. The first page that comes up is your own posts and posts from whatever apps (games) you have used recently. What’s new here is the Start Tour button. That should clue you in to the fact that something has changed.

Photo of Facebook Likes  1
Click on your Activity Log under your cover photo on your timeline.


2. Click on the Start Tour button and this pops up. The settings described here affect only the things that you have posted. 

Photo of Facebook Likes   2
This is the ‘friends only’ icon.


3. Once you click Okay, another message pops up. This one is key to the new Facebook privacy…or lack of it. It’s worth emphasizing, we think: Hidden posts may appear in other places on Facebook.  It seems now that there is no privacy on Facebook at all, right?
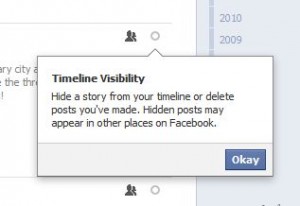
Photo of Facebook Likes  3
Read these words carefully. ‘Hidden posts may appear in other places on Facebook.’


4. Click Okay once this has settled in. The next box says that you can sort out your activities by clicking on the box up at the top.
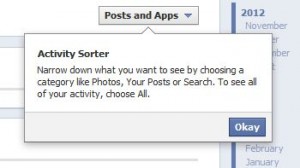
Photo of Facebook Likes  4
Sort through your activities by clicking on the box near the top.


5. Here is the list of your possible activities.  Finally, your Likes appear.
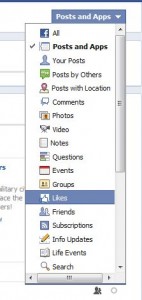
Photo of Facebook Likes  5
Click on Likes.


6. The page that comes up when you click Likes isn’t your page likes. These are your photo likes and comment likes. Nothing has changed with these likes. The photo below shows that this user, Emily Cheng, has set her photos to ‘Public’.  Anyone who gets to her profile can see her photos, not a setting we would recommend.
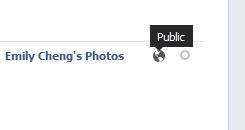
Photo of Facebook Likes  6
Don’t set your photos to Public, that’s our advice.

Remember that the settings shown here are completely out of your control. We think that this is shown in order to warn you about who can see that you liked the photo. In this case, it’s possible that everyone on Facebook could potentially see that you liked it, not just this person’s friends.


7. Next, we want to show you what your options are when you like someone’s photo. There is only one. The first, shown below, seems to suggest that you can keep this like from your timeline.
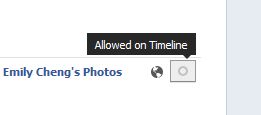
Photo of Facebook Likes  7
If it’s ‘Allowed on Timeline’, you’d think there was a ‘Not allowed on Timeline’ choice. There isn’t.


8. The only thing you can do to hide your like from your timeline is to, you guessed it, ‘unlike’ the photo. That is the only choice you have.  When you click the circle to the right, this is what you see:

Photo of Facebook Likes  8
Unlike is the only choice you have to keep this like off of your Timeline.


9. When it comes to liking a page, you have one more option.
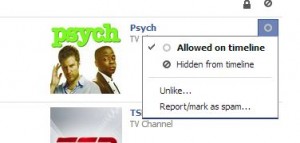
Photo of Facebook Likes  14
You can hide this like from your Timeline.

Hiding this like from your timeline may or may not keep it hidden from your friends. Let’s head over to another area of Facebook to see if we can keep this ‘like’ away from your news feed.


10. On the same page that you are on now, your Activity Log, look up on the top left. You’ll see this:
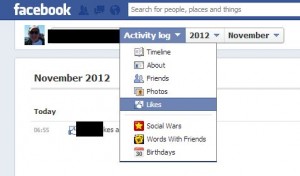
Photo of Facebook Likes 15
Click on the words Activity log, then on Likes.

11. Once you click the word Likes, this page will pop up. It looks like you can’t do anything here but hover your mouse up on the top right. You’ll see the word Edit appear.

Photo of Facebook Likes 12
Hover your cursor on the top right and Edit will appear. Click it.


12. This next page is quite empty and it looks as if there is no way to edit anything. Hover your cursor over the name of any like here and this is the menu that pops up:
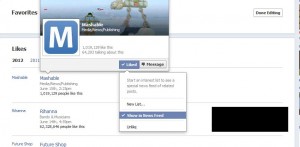
Photo of Facebook Likes 13
Here are your choices for these Likes.


13. Three choices are available. Show in News Feed, unchecked Show in News Feed meaning ‘not Show in News Feed’, and Unlike. You can also create a new list. More on that next time.

That’s it. Once you have unchecked the ‘Show in News Feed’ box, make sure that you click Done Editing to save your changes.


OK, so far so good right? Well, not really. We suspect that this whole thing is in a state of flux. As you saw before, Facebook is telling you that things you hide may be visible elsewhere on Facebook. That kind of sums up our feelings about all of this hiding from your news feed or timeline. These items may or may not be hidden at all. Yesterday, for example, we played around with hiding the fact that we liked the Mashable site. Even though it was a hidden activity, hidden from our timeline and hidden from our news feed, there it was in plain sight when we checked from another profile on two different browsers, even after we refreshed the page again and again. Nothing was hidden. Today, it isn’t there but yesterday it was. Go figure!

We love to hear from you. Keep your comments and suggestions coming. If you have problems, let us know. We’re here to help.

Thanks for reading!


Save Facebook Albums – a new way to do it

PhotoLive is a new way to download photo albums from Facebook. We’ve used it a few times and it still has some bugs but we thought we’d share our experiences so far. We’ve written about FotoBounce before and it works quite well. PhotoLive, however, was able to retrieve some albums that FotoBounce could not. Here’s how you can use PhotoLive.

TIP: PhotoLive did not work for us when we tried it in Internet Explorer. It worked quite well in Google Chrome but not IE. Again, your mileage may vary.

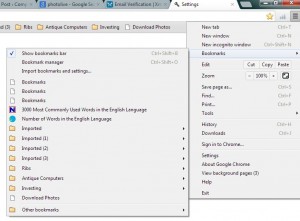
First, make sure that your bookmarks bar is showing at the top of your browser window. Each browser is different so your settings may vary. We use Chrome and this is how it’s done with it:

Photo of Chrome menu
Top right, Bookmarks then ‘Show bookmark bar’.


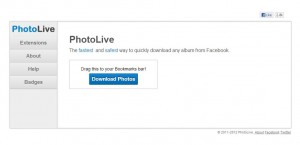
Head to the PhotoLive Site, then drag the blue bar up to your bookmarks bar. (Click once on it and hold the mouse button down, then drag it up to the bar and release the button.) PhotoLive  doesn’t ask for permissions, unlike Fotobounce. It’s a browser add-on more than a Facebook app.

Photo of PhotoLive home page
Drag the blue box up to your bookmarks bar.


Now  your bar should have these words on it:

Photo of Chrome Bookmarks Bar
Look for the words ‘Download Photos’.

Just remember that none of this is going to work unless you are inside your Facebook account. Head over now and log in, if you aren’t already, then go to a photo album that you want to save to your computer. When you get there, click on the Download Photos button that we just put on your booksmarks bar. This is what you’ll see next:

Photo of PhotoLive menu
Click the green button to start the download.


Here is where you might run into a problem. PhotoLive can’t function inside of a secure browsing environment. What does that mean? It means that if you have turned on Secure Browsing in your Facebook Privacy settings, PhotoLive won’t work.

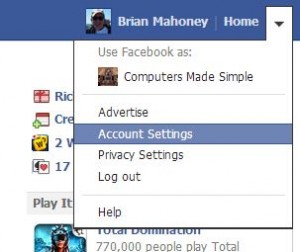
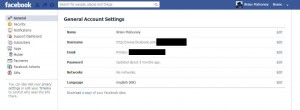
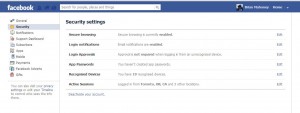
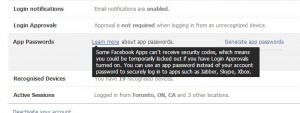
You should always have Secure Browsing turned on, however. In this one case, you can turn it off, download the album, then turn it back on again. The error page that comes up when you click Download Photos describes how to turn Secure Browsing off. (Head to your Account Settings, click on the Security badge on the top left side then uncheck the box to the left of ‘Browse Facebook on a secure connection (https) when possible’. Then click on ‘Save Changes’ and you’re done.)

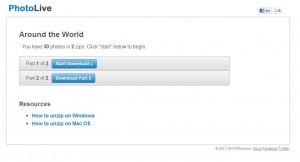
Head back to the album you want, do the same steps as before to save the album and PhotoLive will show you this screen next:

Photo of PhotoLive download screen.
PhotoLive saves the albums in zip files.


The zip files will be saved to your normal download folder, usually Downloads. A zip file is a compressed folder. You can read how to unzip them here: How to Zip and Unzip Folders. Once you unzip the file, you can browse the images.

TIP: For some reason, PhotoLive does not download every photo in an album. We’re not sure why that is but you won’t get them all. An alternative to PhotoLive is Fotobounce, mentioned before, which will get every photo if it can get any at all. If you use a combination of both programs, you’ll probably be able to save almost any album that you come across on Facebook.

Now that you’re finished downloading the album, head back to your Facebook Security settings and turn Secure Browsing back on again.

Hopefully, this how-to is crystal clear but if it’s not, let us know. Questions, comments are always welcome.

Thanks for reading! While you’re on Facebook, why not like our page:  https://www.facebook.com/ComputersMadeSimple?ref=hl


Facebook – Restricted Friend List


Everyone has some people on Facebook who aren’t really friends. Maybe they are relatives or co-workers but, because of circumstances, you may have to have them on Facebook. Even though they are on your friend list, you probably don’t want to share everything that you post with them. Facebook has a setting for this situation. Here’s how it works.

1. Head to your timeline by clicking your profile image up on the top right of any Facebook page.

2. Click on the box that says Friends. Here’s the box:

Photo of Friend Box
Click the box.


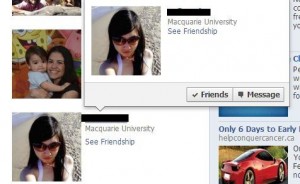
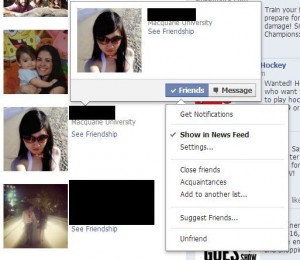
3. Once your list comes up, choose any friend that you want to put on the restricted list. Hover over their name and a bigger box pops up. Like this:

Photo of Friend's Info
Don’t click for a while, just hover.


4. Again, hover over the word Friends. This box will appear:

Photo of Popdown on Facebook
Different settings are available from this one menu.


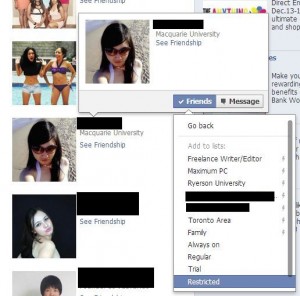
5. This person isn’t on any list right now but let’s click ‘Add to another list…’ to see what happens. Here’s the next menu:

Photo of Facebook Lists
Down at the bottom, look for Restricted.


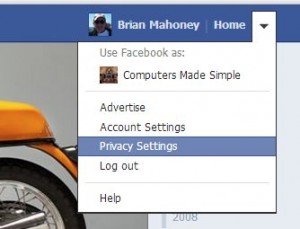
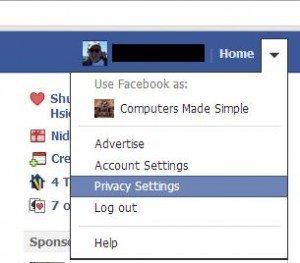
6. Click on the word ‘Restricted’ and that person is now on the restricted list. Details on what that means in a minute.  For now, head back to any Facebook page and click on the little down  arrow just to the right of Home. Click on Privacy Settings. Like this:

Photo of Privacy Settings on Facebook
Let’s check our privacy settings.


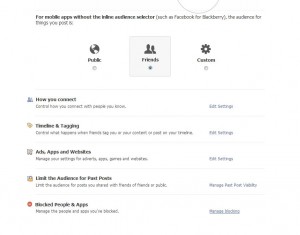
7. What we’re doing now is checking to see who is on the restricted list. If you add a few friends to this list, it’s a good idea to check who is on it, right? Here is the page that shows up next. Click on ‘Manage blocking’ down at the bottom right.

Photo of Facebook Privacy Page
Down at the bottom, look for Manage blocking and click there.


8. When the blocking page appears, at the top you’ll see a section for your restricted list. There is a short description of what happens when you put a friend on this list. As far as Facebook is concerned, they are not friends since they cannot see anything that you post that is set to ‘Friends only’. However, people on this list will see anything that you post that is public. Additionally, Facebook does not notify your friends that they are on this list. Here is the photo of this menu:

Photo of Facebook Restricted Settings
Read about what the restricted list means.


9. Once you are here, you might as well add more friends to this list. Here’s how we do that. Click on Edit List. This box appears:

Photo of Friend on Facebook Restricted List
All of the friends who are on the list are shown here.


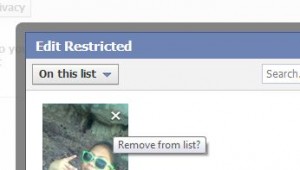
10. The people who are on the list are shown here. To remove them, click the X that appears when you hover over the person’s photo. If you want to add more people to the list, click on the words ‘On this list’ and the following choices show up:

Photo of Facebook Restricted List
Click on the word Friends.


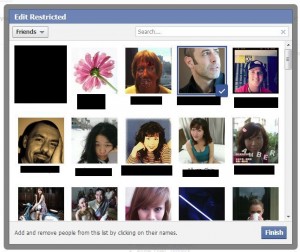
11. Now you will see a page full of all of your friends. Simply click on any friend who you want to add to your Restricted list. You’ll see a check mark to signify that they are now restricted from seeing most of what you post on Facebook.

Photo of Facebook Restricted List  11
Click any profile photo here to add that person to your restricted list.


This is a long post, to be sure, but we feel it’s important to do everything in a step-by-step manner. If you still have questions, comment below. We’ll help you out.


Thanks for reading! Check out (and like) our Facebook page here: Computers Made Simple


Facebook Stalking – how to stop it


Even though you may have your Facebook contact info privacy settings for your phone number set to ‘friends only’ or ‘only me’, did you know that anyone can find you on Facebook using that phone number? Read that again. You’re right. It doesn’t make sense. But, that’s Facebook, right? Read on and we’ll tell you how to stop complete strangers from stalking you and finding you on Facebook.

1. Go to your privacy settings page. Here is how you get there:

Photo of Privacy Settings link
Down arrow, then click on Privacy Settings.


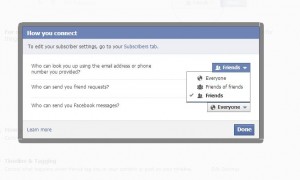
2. On the page that pops up, look for the words ‘How you connect’. This is where you edit the settings for how people search for you. If you don’t change the settings here, anyone can find you using your phone number, the one that you might have given Facebook, or your email address. This is how it looks:

Photo of Facebook Privacy settings page
How you connect, that’s what you’re looking for.


3. This ‘How you connect’ setting is not  overridden by your basic info settings. If you have your phone number listed in your basic info and if you have that set to ‘friends only’ or only me’, anyone can still search for you using that phone number. Sad but very true. Here are the settings that we suggest:

Photo of Facebook search settings.
We suggest that you set this to ‘Friends’.


4. If your friends happen to know your phone number, they can find you on Facebook. If they know your email address, they can find you. Then again, if anyone knows your phone number or email, they can find you on Facebook…unless you change this setting. Sure, anyone can search for your real name and they may or may not find you, depending on how many other people share your name and whether you used your real name or your nickname when you signed up. In other words, people can still find you, old school friends, ex-lovers, whoever, but they won’t be able to link up your phone number to your Facebook account. Change it now!


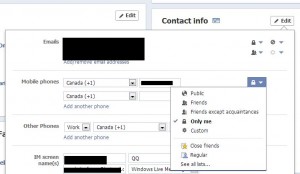
Working backwards here, your friends won’t be able to see your phone number on Facebook if you have this particular privacy setting:

Photo of Phone Number privacy settings
You decide…Only me or Friends or whatever you want.

OK, if your friends already know your phone number, that’s fine. With your phone number privacy set to ‘only me’ , at least they won’t be able to find the number on Facebook. If you set this to ‘friends’, then they can find your number here. Either way, using the privacy settings outlined above, no one will be able to search for you using your phone number.

Are we chock full of paranoia? Not really. Consider this scenario: You apply for a job. Obviously, you have to provide a telephone contact number. If that number is linked to your Facebook account, the person who is hiring you can search for you on Facebook using that number. Like it or not, they can find out quite a bit about you, depending on your privacy settings. If you remove your email and your phone number from your search settings (unfortunately you can’t separate them), then no one can find you that way.

Lastly, should Facebook even have your phone number? Think about that for a while. Sure, they say that they need it in case your account is compromised. Hmmmm, really? Your phone number is a direct link to you and/or your home. Mull that over for a while.

Thanks for reading!