In our last post we showed you how to author a DVD using DVDFlick. Here is the link for that: DVD Authoring with DVDFlick. Today we’re going rip a DVD. Essentially, ripping is copying. Using this system you can make a backup copy of just about any DVD that you own. We specify ‘own’ here since copying a disc that you don’t own is theft, at least according to most governments. Let’s get going.
1. Download and install DVDShrink. Get it here: dvdshrink.org Do NOT download DVDShrink from any other site. The software is free and always has been free. Don’t ever pay for it.
2. Load the DVD that you want to copy. Basically that means to put it in the DVD burner in your computer. Don’t play it. If your DVD player starts up, close it down.
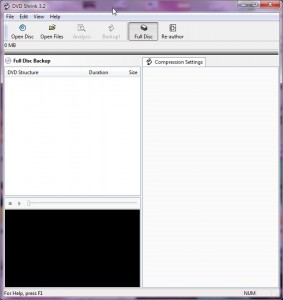
3. Open DVDShrink. This is what you will see:
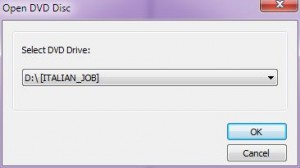
2. With the DVD movie in your DVD burner, click the Open Disk button. DVDShrink will automatically find your DVD burner and it will already know the movie’s title. Here’s what you’ll see next:
3. DVDShrink then analyzes the movie. You can see a preview while it works or turn the preview off, no matter.
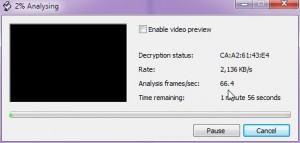
4. Once DVDShrink has finished its analysis, you have some decisions to make.
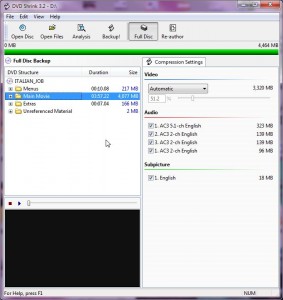
Usually there are other languages in the right panel, Spanish and French, for example. Un-check the languages that you don’t want on your new DVD. Each time you un-select a language, the more room for picture you have on the disk. Here’s the explanation for that:
TIP: DVDs, the non-BluRay ones that you buy in the store, are normally around ten gigabytes in size. They are burned onto DVD stock that has dual-layers which simply means that they hold more stuff. The normal blank DVDs that you buy usually only allow 4.7 gigabytes of storage. Here’s where the word shrink comes in. DVDShrink takes the full movie on the original DVD and shrinks it down to a size that fits your blank 4.7 gigabyte DVD. See the green line at the top of the photo above? That means that the full movie can fit on a normal DVD blank. Farther down, look for the box with 51.2 % in it. DVDShrink has made the movie about half the size it was before. Any time you uncheck something, there is less material to put on the disk so the video quality can be improved.
What does this mean to you? Simply that the video on your copy will not be a crisp and clear as it is on the original. Most people won’t notice the difference. All we are saying is don’t expect a perfect duplicate. (You can get dual-layer blanks but they are very expensive. 4.7 gigabyte blanks are priced at 100 for less than $20.00 here in Toronto. Use Verbatim brand only, preferably ones made in Japan. Don’t buy no-name disks, whatever you do.)
5. You can choose to not burn the Extras or extra languages which makes the video quality better. Don’t worry too much about this since the extra quality is minimal at best. Once you are ready, click the Backup! icon at the top. The backing up process takes a while, depending on the speed of your computer. DVDShrink will store the files it creates on your C:/ drive using the name of the movie to identify them.
6. When the software has finished, you can burn the files to a DVD and play them on any DVD player you own or on any computer. If you have Nero Burning Rom installed on your computer, DVDShrink will burn the DVD to a blank disk for you. You have to take the movie DVD out then insert a blank DVD, obviously. If you don’t have Nero on your computer, we will show you how to burn this DVD using Burnaware. That’s for next time. Stay tuned.
Thanks for reading! Questions or comments are welcome. You can also ask questions on our Facebook page. Here is the link: Computers Made Simple on Facebook
______________________________________________________
Here’s a link that might help us if you are interested in hosting your own blog with Fatcow Hosting. We’ve signed up to become an affiliate and we make a bit of money if you sign up for hosting via this link: FatCow Hosting Thanks!

