In our last post, we created an encrypted volume using Truecrypt. This volume could be thought of as a folder but it’s a bit more than that. If you think of this thing that you created as a separate drive on your computer, you will have a better picture of what it really is. When you add a new hard drive to your computer, you have to mount it before you can use it. Before you can use your newly created folder, you also have to mount it. Using Truecrypt, we’ll show you how to mount the new volume in order to make use of it. 1. The new volume (folder) should be on your desktop. It may or may not have a three digit file-type designation, depending on how you chose to name it. If you didn’t use a three letter name, such as .avi or .mp3, Windows will not use an icon to give you an idea of what it thinks it is. Here’s what our volume looks like:
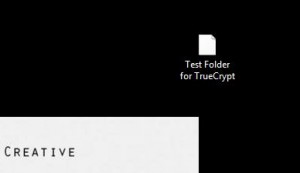
Just a simple, generic page icon. Windows does not associate a program with this volume/folder. You can’t double-click it to open it, right? Don’t forget that. Open Truecrypt now. 2. When Truecrypt is open, you’ll see this screen:
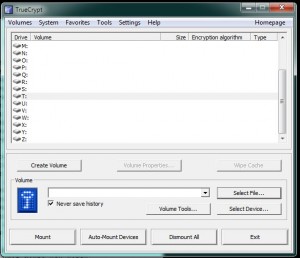
This is a standard Windows dialogue/menu, nothing different from most other programs. You open the program first, then use it to open a file that it can handle. Click on Select File, find the volume that you created then click Open to go back to the menu shown below. 3. Here is what you should see next :
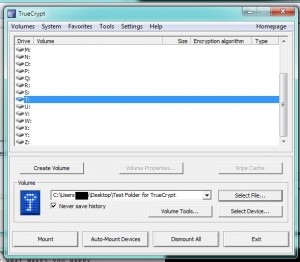
You will see a number of drive letters in this menu, everything from G to Z. Choose a letter that isn’t currently being used by your computer. You’re pretty safe with anything past O or P. We have chosen T for this drive. Click on the word ‘Mount’ on the lower left of the menu. 4. Make sure you have the password that you used to create this volume. Truecrypt will prompt you for the password:
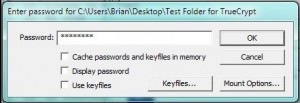
If you forget your password, there is nothing that you can do to retrieve it. Whatever volume you created is lost for good. Don’t lose your password. You’ve been warned. 5. Once you enter the correct password, Truecrypt will mount the volume. In other words, it will allow you to access it. It’s not open yet but it is accessible. This is what you should have on your screen now:
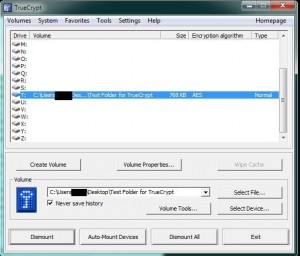
This drive is now accessible in two different ways. You can either double-click it now on the Truecrypt menu or navigate to it through Windows Explorer. In our case, it is listed as ‘Local Disk T’. Once you open the drive/volume/folder, drag and drop something into it. We chose to keep our encrypted text password document in ours. In this way, our passwords are protected by two walls, one through Notepad ++’s encryption and the other through Truecrypt ‘s. TIP: After you put the files into this volume/folder/drive, make sure that you dismount it before you close down Truecrypt. The process is this: Mount the drive, add or subtract files into it, dismount it. You can’t open the volume without mounting it and you should not close it without dismounting it. This is the only way that Truecrypt can guarantee to keep its contents safe. Two long and fairly convoluted posts, right? Keeping your data safe isn’t simple but we feel that using Truecrypt doesn’t require much tech savvy. If you follow our simple step-by-step instructions, you’ll be fine. What’s next? Moving this folder around inside of Dropbox. One more post on this topic and we’re done. Thanks for reading!
