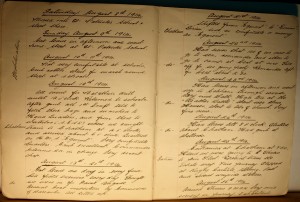
As you may know, we’re working on another blog, http://ww1diary.com/ . That blog requires us to crop photos of a 100 year old diary. Some of the text isn’t legible or decipherable, meaning that the photos of the original words are necessary in case there is a mistake. Hopefully, as the blog becomes more popular, readers will point out our mistakes. Here’s how we crop the photos that we use in our blogs.
1. Download Irfanview and install it. Make sure you download it from Tucows, fourth or fifth down the list here: http://www.irfanview.com/main_download_engl.htm . The other download sites often insist on downloading a special program first, which it total bunk. Head to Tucows and get it there.
2. When you install Irfanview, it will ask you if you want to associate your image files with it. This means, “Do you want to allow Irfanview to be the default program for image files”. We always say yes to that but you may have different preferences. Irfanview is fast, free and very dependable. We have relied on it for years.
3. Choose the photo that you want to crop. Here is one that we will work on today:

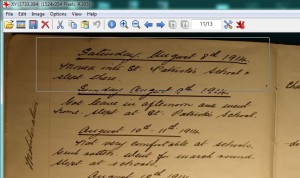
4. When you are cropping a photo, you’re essentially cutting out everything except the part you want. That could involve taking people out of a photo that aren’t part of the final image that you want, for instance. Drag your cursor across the image while holding down the left mouse button. You will see a box shape forming as you move from left to right. Practice this a few times to get it right. If you don’t get the right section, click once outside the rectangle to start again. You want something that looks like this:

5. Once you have the box formed around what you want to save, release the left mouse button and press the Control key and the y key at the same time. Instantly, the box that you formed will become the full photo.
6. Press the Control key and the s key at the same time and the Save dialogue will come up. Make sure you change the name of the image file to something else, otherwise the original photo will be replaced by the cropped image.
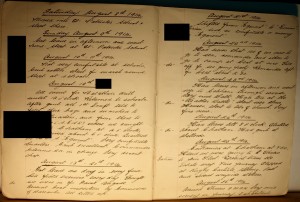
Tip: Just as you can crop a photo by hitting Control/y, you can keep the original but cut out sections by hitting Control/x instead. You’ve seen the photos of someone with a rectangle around the spot where there eyes would be, in order to disguise them. This is done using Control/x instead of Control/y. Here’s an example of that:

We use GIMP for fine photo editing, using its cloning tools, etc., but Irfanview is our go-to tool for cropping, cutting, batch resizing, etc. Try it. We guarantee you’ll wonder what you did without it.
TIP: Although it is a bit more difficult, you can use Irfanview for batch photo cropping as well. You have to make sure that your photos are all EXACTLY the same except for some partial content, a series of screen captures comes to mind. We will deal with bulk processing in another post.
Thanks for reading! Check out our Facebook page here: https://www.facebook.com/ComputersMadeSimple?ref=hl Remember to like it, OK?
