Last time, we showed you how to open up your Qzone. This time, we’ll show you how to add photos to it. Here we go:
First, open your Qzone.

Hover at the top to bring down the list of icons.

Click on the second icon to start the album upload process.

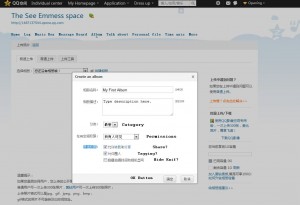
Here’s where you can name your album, describe it and select different permission settings.

Ignore the next menu. Click the X to close it.

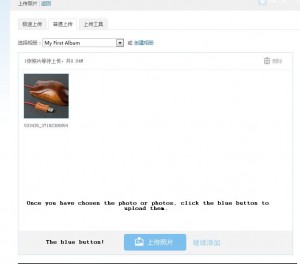
Clicking the blue button brings up a typical Windows file choice menu.

Once you choose the photos and click the OK button in Windows, you get a thumbnail pic of whichever ones you’ve chosen. Click the upload button to finish the process.

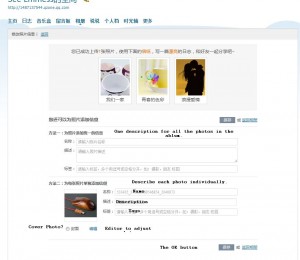
At this point you can describe the photos as a group or, one by one. If you’ve taken a trip, for instance, you can describe them all saying something such as ‘Summer Trip 2012’.

You’re done! If you use Google Chrome, the whole process is somewhat easier since Chrome will translate most menus for you. For the ones it doesn’t translate, copy and paste the text into Google Translate.
Other than photos, you can add blog posts to your zone, ask questions and interact with your friends in many ways. We’ll show you how to add blog entries in a future post.
Thanks for reading!
