Windows allows you to change your desktop to suit your personality or mood. With different color schemes and a wide choice of backgrounds and screensavers, you can pretty much tune the look of your desktop any way you want. Changing the icons for folders and shortcuts isn’t quite as intuitive as changing your desktop background but it’s not rocket science. Here’s how you do it.
1. Before you begin, download and install Irfanview (if you haven’t already). If you have read my blog before, you’ll know that I love Irfanview. It’s free and totally indispensable when you want to view a photo or do some minor editing on an image.
2. Decide what kind of icon you want. Windows has some icons already which you can access by right clicking any folder and choosing Properties then Customize then Change Icon. These are your typical icons, nothing too far out here. They are available in this location: %SystemRoot%\system32\SHELL32.dll in Windows 7. But, let’s make our own, OK?
3. Find an image or a color swatch, anything that you suits your style. Open the image in Irfanview.
4. Select the area of the image that you want as an icon then left click your mouse and drag a rectangle or square to suit the size you want. (If you use GIMP, you can draw an oval or circle to make really different icons.)
5. Press your Control key and the y key at the same time to crop your selection.
6. Press the Control key and the s key to save your new icon.
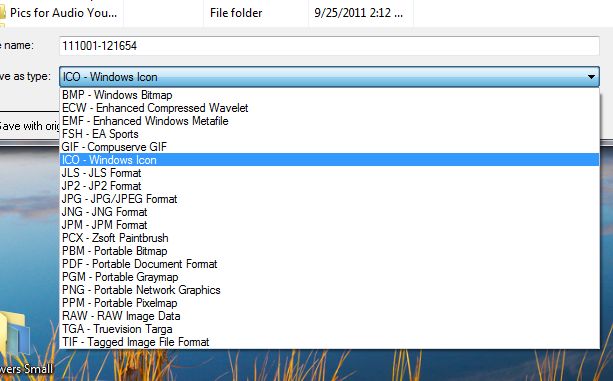
7. In the ‘save as’ menu, click on the arrow to the right of the ‘save as type’ and choose ‘ICO – Windows Icon”, as pictured here.

8. Save the cropped image on your computer, preferably your desktop so you can find it easily.
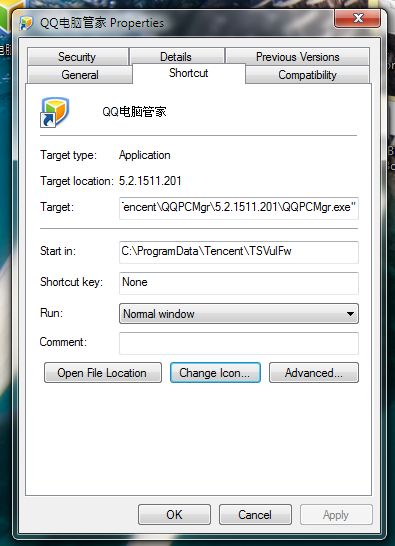
9. Choose the folder or shortcut icon that you want to change. Right click it and choose Properties then the Shortcut tab. It looks like this:

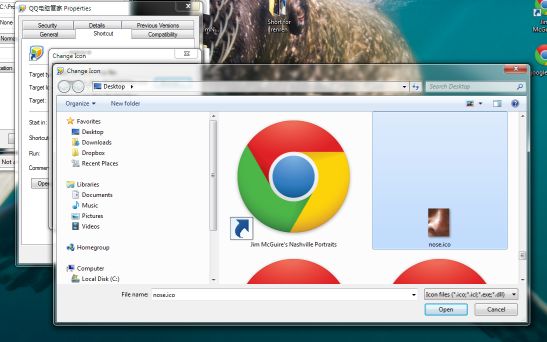
10. Click the “Change Icon’ button and use the ‘Browse’ button to find the icon you created. Here is an icon I made of my own nose that I cropped from a photo on my desktop:

11. Click ‘Open’ after you find it and then click OK all the way back.
12. Your newly created icon is now showing as the shortcut or folder that you chose originally.
There are many sites that offer free icons for downloading but why not make your own? Use pics of your kids, your favorite bands or movie stars, whatever you want. You can see that I made an icon out of my nose, as a matter of fact! I cropped a self-portrait and used it as an icon for a program shortcut.
That’s it. Have some fun with this and make your desktop your very own, not something from Microsoft.
Thanks for reading. Follow me on Twitter: @_BrianMahoney
