Everyone has some people on Facebook who aren’t really friends. Maybe they are relatives or co-workers but, because of circumstances, you may have to have them on Facebook. Even though they are on your friend list, you probably don’t want to share everything that you post with them. Facebook has a setting for this situation. Here’s how it works.
1. Head to your timeline by clicking your profile image up on the top right of any Facebook page.
2. Click on the box that says Friends. Here’s the box:

3. Once your list comes up, choose any friend that you want to put on the restricted list. Hover over their name and a bigger box pops up. Like this:
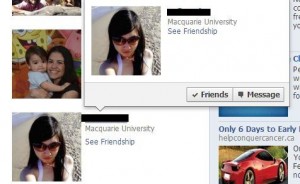
4. Again, hover over the word Friends. This box will appear:
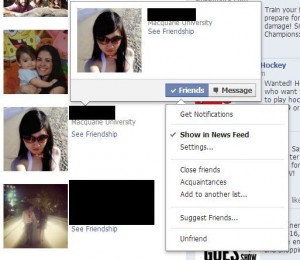
5. This person isn’t on any list right now but let’s click ‘Add to another list…’ to see what happens. Here’s the next menu:
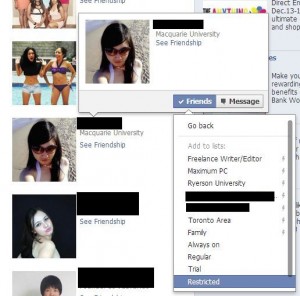
6. Click on the word ‘Restricted’ and that person is now on the restricted list. Details on what that means in a minute. For now, head back to any Facebook page and click on the little down arrow just to the right of Home. Click on Privacy Settings. Like this:
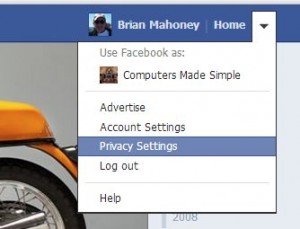
7. What we’re doing now is checking to see who is on the restricted list. If you add a few friends to this list, it’s a good idea to check who is on it, right? Here is the page that shows up next. Click on ‘Manage blocking’ down at the bottom right.
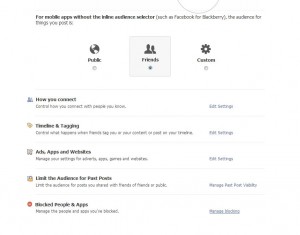
8. When the blocking page appears, at the top you’ll see a section for your restricted list. There is a short description of what happens when you put a friend on this list. As far as Facebook is concerned, they are not friends since they cannot see anything that you post that is set to ‘Friends only’. However, people on this list will see anything that you post that is public. Additionally, Facebook does not notify your friends that they are on this list. Here is the photo of this menu:

9. Once you are here, you might as well add more friends to this list. Here’s how we do that. Click on Edit List. This box appears:
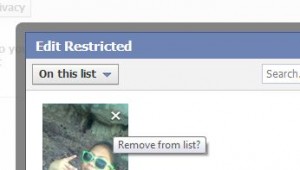
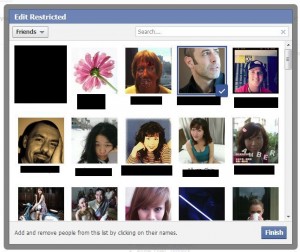
10. The people who are on the list are shown here. To remove them, click the X that appears when you hover over the person’s photo. If you want to add more people to the list, click on the words ‘On this list’ and the following choices show up:

11. Now you will see a page full of all of your friends. Simply click on any friend who you want to add to your Restricted list. You’ll see a check mark to signify that they are now restricted from seeing most of what you post on Facebook.
This is a long post, to be sure, but we feel it’s important to do everything in a step-by-step manner. If you still have questions, comment below. We’ll help you out.
Thanks for reading! Check out (and like) our Facebook page here: Computers Made Simple

What if you do not have your friend checked off for any list such as close friend. Do they still see your posts.
What is the difference between a star and a check mark next to your friends name.
You set your current and future restrictions for a post by clicking on the icon just to the left of the word ‘Post’. Once you do that, only the people selected can see what you post. If you haven’t created any lists to sort out your friends, choosing ‘Friends’ for a post will mean that everyone who is on your friend list can see it and any future post until you change your settings. A star means that this person is a close friend. A check mark means they are a friend. This has nothing to do with what you post but everything to do with how their posts show up on your newsfeed. Facebook assumes that you want to see everything your close friends post. You can fine tune that using the ‘Get Notifications’ choice on the drop-down list beside your friend’s name. Does this help? Let us know if you still have problems and we’ll sort them out. Thanks for commenting.