Sometimes things go wrong with your computer. It starts to act different, freezing or locking up after you’ve installed some software or added a new driver for a piece of hardware. In the old days, you’d have to figure out the problem, sort it out and maybe reload Windows. Remember those days? Well, thanks to Microsoft Window’s restore function, there’s no need to do any of this. Just go back in time to when your computer was functioning properly. Here’s how you do that:
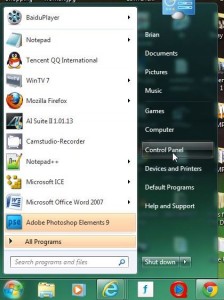
1. Head over to the Start/Windows icon button, click it and look for Control Panel.
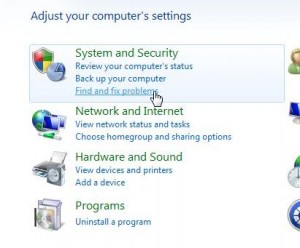
2. Here’s the next screen. Look for System and Security.
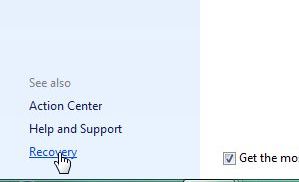
3. The next screen that pops up is pretty much vacant but down on the lower left, look for the word Recovery on the bottom left, as in this photo:
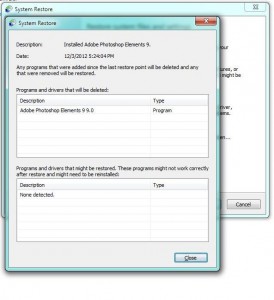
4. The next menu explains what system restore is all about. There is even a recommended time and date, basically the last restore point. Read the menu then click on ‘Scan for affected programs’. Restore does not affect anything that you have created, such as a document or photo. All it does is restore your computer to an earlier date and time, getting rid of any changes to system files or installed software. When you ‘scan for affected programs’, Windows will tell you what software you’ll have to reinstall. Here’s the menu that we’re talking about:
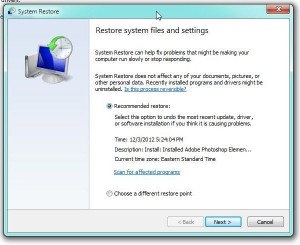
5. Let’s see what would be affected if we restored this computer right now:
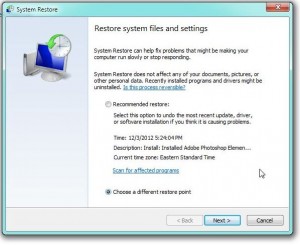
6. If you know that the suggested restore point is not the one you want, click on the button to the left of ‘Choose a different restore point’. Like this:
7. At any given point in time, Windows has several restore points to choose from. Obviously, the farther back you go in time, the more programs will be affected. Here’s a list of the restore points for this computer:
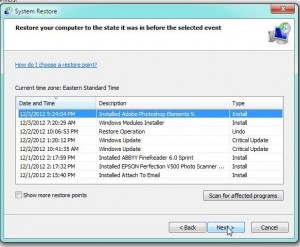
8. Before Windows installs any software or even its own updates, it creates a restore point. That way, if something screws up, you can go back to the time before that software was installed and start over again. If you’ve made a mistake in the installation process, you get to go back in time to fix it. Wouldn’t it be great if life were like that?
9. Once you decided on which restore point, click Next and the final menu pops up:
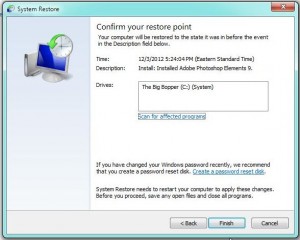
10. Once you click ‘Finish’, Windows will start the process and reboot. When you log in again, your computer will be set back to the date you chose, complete with all of your documents, photos, etc. but without the offending software or update. Life is good again, right?
Thanks for reading! Hit us up with a ‘like’ on Facebook and you’ll get all of our updates and tips. Here’s the link: Computers Made Simple on Facebook
