Tag Archives: privacy

Encrypting Your Stuff – Zip or Container?

Warning: Lots of discussion in this post but we think it’s worth the time it takes to read it. These are the basics of encryption, things you should know. (But dull, unfortunately!)

Encryption week continues, this time with a discussion of a containers versus zip files and encryption in general. Here are some definitions with explanations:

1. If you use a password to log on to your computer, you can’t say that your computer is encrypted. Yes, it is locked but it’s not necessarily encrypted.

2. You can lock your computer with a password and encrypt the hard drive. That’s not difficult to do, Windows can do this by itself, but you run the risk of losing ALL your data if something screws up. With Windows, that is a distinct possibility.

3. If you encrypt something, you have to use a password. That may seem obvious but this site is for beginners, right? Go back and read number one then read this one again. Passwords don’t automatically mean something is encrypted but everything that is encrypted requires a password.

4. You can have a zip file that is not encrypted. Almost all zip files don’t require a password. If you’re confused about what a zip file is, think of a suitcase. You can pile socks, T-shirts,hats, gloves, etc.,  into that suitcase, packed as tightly as possible. The suitcase goes on the plane/train/car with you. When you get to your destination, you usually unpack that suitcase. The things that were in it can then be put into drawers, on to hangers, and so on. A zip file is a suitcase. It’s smaller than the original file but everything is still there, nothing has been removed. To use the stuff inside a zip file, you have to unpack it.
Photo of Zips and Containers   1
A zip file icon.

5. Whether a zip file is password protected or not, you need a program to unzip it. Windows can do this on its own, as long as the zip file is just that, a zip. (There are other types of ‘compressed archive’ files but, for now, we’ll deal only with zips.)

6. A container is more like your house. Your house has a lock on the door, a container has a password, same thing. Your password protected computer could be termed a container. In our world, containers are much larger than zip files.
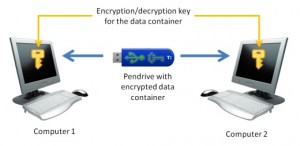
Photo of Zips and Containers   2
An encrypted container can be put on a flash drive.

7. An encrypted container is something like a glass house where the windows are actually mirrors or they are smeared with petroleum jelly. You might be able to see inside but you can’t see what’s there. If you have the key to the lock, you can see everything. Without the key, no such luck.

Tip: A container can be a file or a folder but it could also be an encrypted flash drive or hard drive. In this post and in the future posts on encryption, we are discussing files and folders, not flash drives.

8. Using a program such as Notepad, you are able to look into any computer file. If you open a .jpg file, you’d be able to read the file header and know it was a .jpg. You wouldn’t be able to see the picture itself but you would know what type of file it is. If you open an encrypted file or folder in Notepad, everything inside it is illegible, nothing can be interpreted. Once the file or folder is unlocked, however, everything inside it becomes readable.

9. Nuts and bolts now. Use a zip file to send to someone via email. Use an encrypted zip file to protect passwords, personal documents, financial data from anyone who might intercept that file, on a flash drive or external hard drive, for instance. Use an encrypted container to store your files on your computer and online, in the Cloud. If you keep a copy of the container on your computer, you can simply upload it again and again, replacing the online one with the new, updated one.


Now you know a bit more about zip files and encrypted containers. In our next post we’ll show you how to encrypt a container using TrueCrypt. Finally, you may be asking yourself, “Why should I even bother to encrypt my stuff?” Here’s why.

Anything you put into an online storage facility, whether it is DropBox or Microsoft’s SkyDrive, is open to viewing by employees of that facility. If you think that these companies don’t go through your stuff, you’re mistaken. They do sift through your stuff on a regular basis. Your own and other government officials go through your files too but that’s not the point of our articles. We’re here to help you keep your personal data safe. 

Thanks for reading! How about heading over to our Facebook page and clicking Like? Sounds like a good idea to us! Here’s the link:  Computers Made Simple on Facebook

Using Peerblock – protect your computer

Peerblock, available here: http://www.peerblock.com/ , is a small, free app that prevents websites from accessing your surfing information. Many of you may not know that everything you do on the Internet is visible to someone. In most cases, these ‘someones’ are companies who make a profit by directing ads to you or by selling your surfing habits to other companies. Peerblock can protect you from being spied on by these companies.

There are other uses for Peerblock but private surfing is the main reason for this post. You don’t really have to know how Peerblock works but let’s just say it uses lists to decide which websites to block. Those lists are compiled on a regular basis and Peerblock updates them for you if it detects a change. Peerblock also has a user manual that is worth checking out. You are able to fine tune the blocking mechanism yourself, just in case you need to access one of the blocked sites.

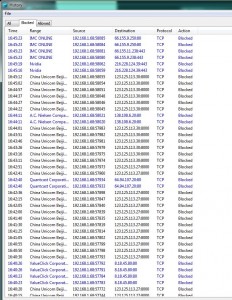
Once you’ve installed Peerblock, part of the fun is seeing which sites it is blocking. Prepared to be amused and, perhaps, shocked at the names you see in Peerblock’s block log. Here’s a sample:

In a span of a few minutes, Peerblock protected us from these websites.


You’ll see the names of the sites, the time that they tried to access your computer as well as the IP address. Most of these names are ad sites that are trying to feed ads to the pages that you have open in your browser. Others may be product or software update inquiries. We’ve seen Adobe and Nvidia in these logs. There are some unusual ones too.

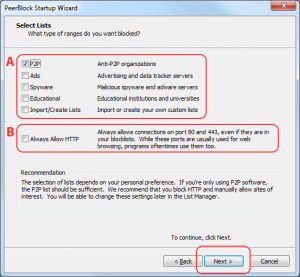
Install Peerblock and keep an eye on who is trying to access your computer. Accept the defaults in the installation process, there was no adware or ‘free’ toolbars in our download, and choose what level of protection you want. We chose to block P2P snooping, ads and spyware. Here’s a shot of the installation wizard that we copied from the Peerblock site:

Photo of Peerblock Start-up Wizard
We checked off the top three for our settings.

There is ample information in the online user manual. We’d recommend that you read it, at least the first two parts, before you install Peerblock. Peerblock does not have to run all the time so don’t worry about it screwing up your settings. If you can’t access a web page, simply turn Peerblock off. Then use the manual to figure out how to add a site to your list of allowed sites. 

Thanks for reading!

Welcome to Your Facebook Interview!

Hi! Glad you could make it. Hey, before we begin, give me your real name and email address. Yes, it has to be a real email address and, yes, you must give us your real name. OK good, thanks. Now, tell us about yourself. Here’s what we need to know:

1. How old are you?

2. Are you male or female?

3. What is your current location? Yes, we need city, state and country.

4. For security purposes only, we need your phone number. Better give us your cell number too.

5. Where did you go to school? Try to list every school that you attended…ever.

6. Where have you worked in the past? Yes, we need a complete history.

7. Now we need a recent photo of you, your family and friends, your home…anything to make you more interesting to us. If you have a bikini photo, even better. We ask guys if they have a photo where they’re not wearing a shirt. We love that kind of thing. What was that? Yes, we will use your photos for our own promotions and we won’t tell you about it. OK? Privacy? Well…we have some privacy settings but they’re really hard to figure out and we keep changing them, almost every month. Better leave your stuff open to the public. It’s better that way.

8. What do you like? Yes, we know. There are so many things to like in the world, right? Well, we’ve broken everything up into categories. Music, video, hobbies…all laid out for you. Why do we need these? It’s simple really. We sell your information to advertisers. Once you tell us everything about yourself, we turn around and tune the ads that you see to your own demographic. Do you make any money from all of this? Certainly not! This is our company, not yours. We just use your information, we’re not about to pay you for anything. It’s a privilege to be with us, you should know that!

9. We also need some of your financial details…well, we would like them. Maybe you could give us your credit card number, simple things like that. Security? Oh yes, we have pretty good security here. What’s that? Well, we have been broken into a few times but not much was stolen. No, not much. Just a complete list of usernames and passwords, nothing major.

Photo of Facebook Logo
Look familiar!


We think you get the point. Share, reveal personal details, give out your personal information just like that, let complete strangers see your photos….it’s all there on Facebook. The point of this article is simply to make you think about what you’re doing. Hand all of this stuff out and let Facebook make money on it. Is that what you signed up for?

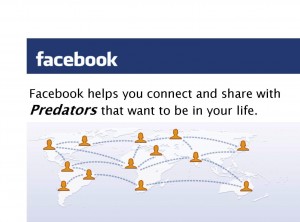
Photo of Facebook Warning
Facebook is very helpful, that’s for sure.

Sign up for Facebook and your profile photo might end up in a facepile somewhere. Anyone in the world could click on your photo and be taken directly to your Facebook profile page. Here’s an example:

Photo of Facepile
If you see something like this, click on a face and see what happens.


Make sure you set your privacy settings accordingly to avoid being seen on a website. You have no control over where Facebook posts things like this but you can control whether they can use your photo or not.

We’re simply trying to make you think. Be smart, learn all you can about Facebook privacy before you reveal too much of yourself to strangers.

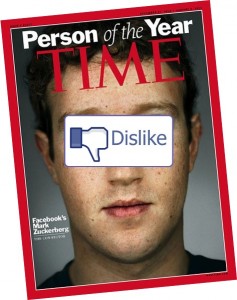
Photo of Time Cover
This man is a billionaire because of your information.


Thanks for reading! Let us know if you have problems with anything on Facebook. We’ll try to help.

A Dangerous Facebook App

There are thousands of Facebook games and apps, most of them are fun, entertaining and relatively safe. Some aren’t. Here is an anatomy of one Facebook app that we feel is dangerous and sneaky. Use the details in this post to judge other Facebook apps. Hopefully, you’ll be a smarter Facebook user after this.

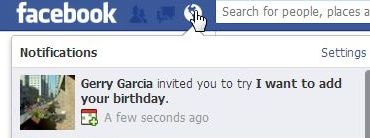
Here’s the scenario. You get a request from one of your friends:

Photo of App Request
Seems like a simple request, one of many you probably get each week.


This request looks innocuous enough, right? Just wait till you accept. Let’s see what happens then.


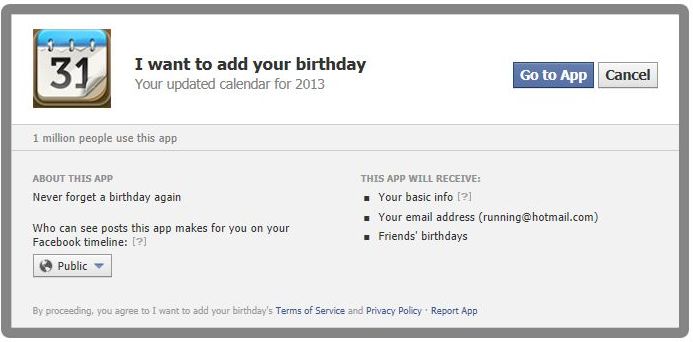
Photo of App Invitation 2
Oh great! You’ll never forget another birthday. Hmmmm.


The nastiness begins as soon as you click ‘Go to App’. The screen will flash then, all of a sudden, you’re not in Kansas (Facebook) anymore.

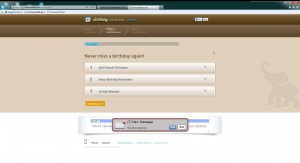
Photo of App Invitation 3
Are you still on Facebook? What’s with all the ads?


You were on Facebook, right? Suddenly, you’re not. Every other app leaves the Facebook name up at the top. This tricky app doesn’t. Lots of ads but no way to get back to Facebook. When you see this, you should stop immediately. An app that takes you away from the relative security of Facebook is trying to trick you. Watch out for this.

Read the page carefully. This app will add your friend’s birthdays, see the check mark beside number 1? It will also send you birthday reminders, see check number 2. Lastly, it will kindly accept requests on your behalf, check number 3. Conveniently, they’re already checked for you. (That was sarcasm, in case you missed it) What do you do now?  Run!

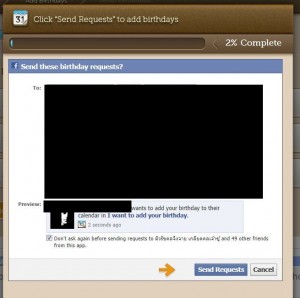
If you click the word Continue, here’s what you get:

Photo of App Invitation 4
We’ve blacked out the names for privacy.


Depending on the number of friends you have, you will get a page like this for every 49 names on your list. If you choose to Cancel this prompt, another 49 names pop up. But wait! What is that check mark down at the bottom? This one:

Photo of Game Invitation 5
If you don’t uncheck the box, this app will send out requests any time it wants to.


Do you see how devious all of this is? Do you see how rapidly you’d become very unpopular on Facebook?

We think that you’ve got the general idea here. This is a pretty sick app, not in a good way. When you come across something like this, warn your friends and immediately delete it from your app list. We’ll show you how to do that next time.

Thanks for reading!

Protect Your Privacy with TrueCrypt – Part 2


In this post, we’ll describe how to encrypt a small folder using TrueCrypt, a free and very powerful encryption tool. You can put anything you want in this folder, of course, but the point of this exercise is to have something that is extremely safe from prying eyes that will allow you to keep your passwords or online account numbers private. Once you create this folder, you can put text files, documents…basically whatever you want to, as long as the total size is not larger than the folder you create. We’ll explain that later.

1. Download and install Truecrypt. You can install Truecrypt or run it from a folder. You could even keep the Truecrypt folder inside your Dropbox folder in order to make it available on every computer that you access Dropbox with.

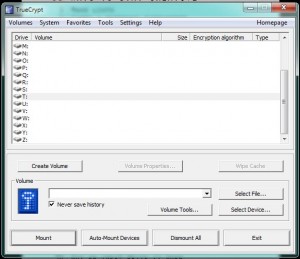
2. Run Truecrypt. Here is the window that comes up at the start:

Photo of TrueCrypt menu
Click on the Create Volume button or click on Volumes then Create New Volume.

A volume is something that only Truecrypt can open. As you will notice later on, there is no three letter file designation to the folder/file/volume that you create. No other program will recognize it, not Windows, not Notepad, only Truecrypt.


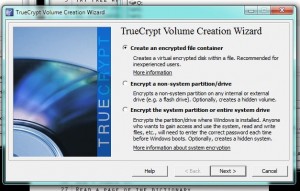
3. 

Menu for TrueCrypt
For the next few screens, you’ll just accept the default settings. Here, choose ‘Create an encrypted file container’ then click Next.


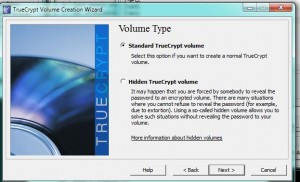
4. 

Menu for TrueCrypt  3
Click Next to start creating a Standard TrueCrypt volume.


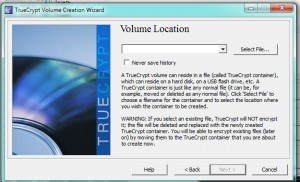
5. 

Menu for TrueCrypt
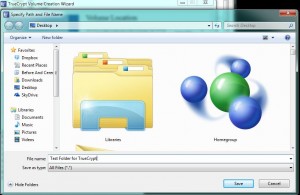
This menu looks complicated but it’s not. Click on the Select File and the standard Windows dialogue will open up.


6. 

Menu for TrueCrypt
You do not actually choose a folder, you are making one. Type in a name, we’ve used Test Folder for TrueCrypt.

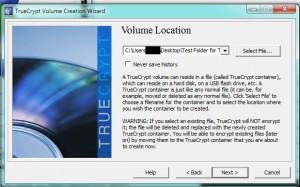
Don’t get confused here. You’re not choosing a file or folder, you are really creating a volume somewhere you are on your computer. We chose our Desktop but you’re on your own here. All you do in this menu is simply type in a name, make up anything you want. You can even use a three letter file name to make this Truecrypt volume look like another kind of file. The default program for that type of file, .avi or .mp3 for instance, will NOT be able to open it, remember? Only Truecrypt can open this file.


7. 

Photo of TrueCrypt menu
This menu just confirms the file location. Click Next. 


8. 

Photo of TrueCrypt  menu.
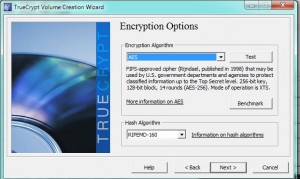
Just click Next here. The default AES algorithm is fine.


9. 

Photo of TrueCrypt
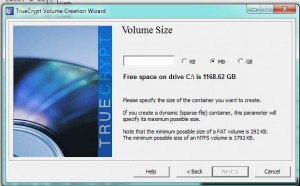
You’re on your own here but we chose a 1 MB file, lots of room for our password text file.


10. 

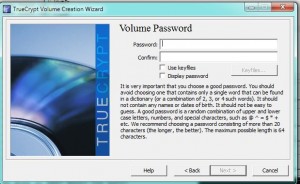
Photo of TrueCrypt  menu
Choose your password. If you make it less than 20 characters, Truecrypt will give you a nudge. Whatever you do, don’t forget the password you use. You can’t open this volume without it, no matter what you do.


11. 

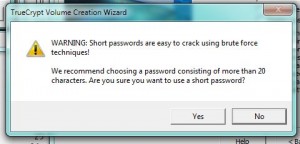
Photo of TrueCrypt menu.
Your password is too short! Don’t worry about this. You’re not protecting state secrets, right? If you can remember a 20 digit password, however, use one.


12. 

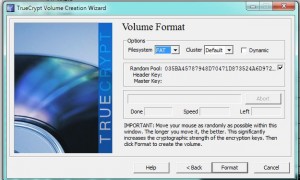
Photo of TrueCrypt menu
We would normally choose NTFS for the filesytem but our volume is only 1 MB so NTFS isn’t available. Move your mouse over this screen in a random order to create a very strong encryption.

Move your mouse all over this menu for a minute or two then click Format. Truecrypt will then format the volume that you just made, creating, more or less, a separate drive on your computer. That drive is controlled by Truecrypt, nothing else. Windows doesn’t know anything about it, other than it takes up space. It cannot open the volume and will not even suggest a program that might open it.


13. 

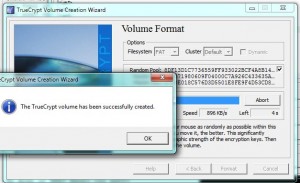
Photo of TrueCrypt menu.
Success! Click OK and you’re done.


14. 

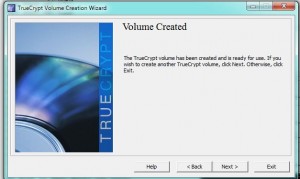
Photo of TrueCrypt menu
Click Exit to end this part of the lesson.


That’s it for now. This post is long enough but we’ve accomplished a lot. You now know how to create a locked volume that can be opened only by you. Even if someone gets access to your computer or your cloud folder, they will not be able to see what is inside this folder. Cool huh?

Next time, we’ll show you how to use this volume. Basically, you just mount it using your password, open it then drop files into it and then dismount it. Once you dismount it, it is locked again.

Thanks for reading!

Check out our Facebook page. Like and follow our updates. Here’s the link:  https://www.facebook.com/ComputersMadeSimple