Category Archives: GIMP

Photo Repair with GIMP

Here’s a quick and easy way to repair digital photos or scans. You can use these same techniques to get rid of red-eye, too, but we’ll do a whole post on red eye reduction, don’t worry. For now, let’s concentrate on fixing blemishes on old photos that you’ve scanned.

1. Download and install GIMP. Get it here: http://www.gimp.org/

2. Once GIMP is installed, find the photo that you want to repair and save it under another name somewhere else on your computer. We suggest putting a new folder on your desktop for copies of the original photos that you want to repair. Why? Simply because you want to preserve the originals, just in case you make a mistake. Keep the original scan or photo in one folder and save the copy in another. Save it using something like ‘edited’ or ‘fixed’ so you know which is which.

3. Right click the copy and choose ‘Edit in Gimp’.

4. Once GIMP opens, look up on the top right, in the Toolbox, for the icon of the magnifying glass. Making repairs is much easier when you zoom in on the pixels, the little things that make up the photo. Here’s how we started:
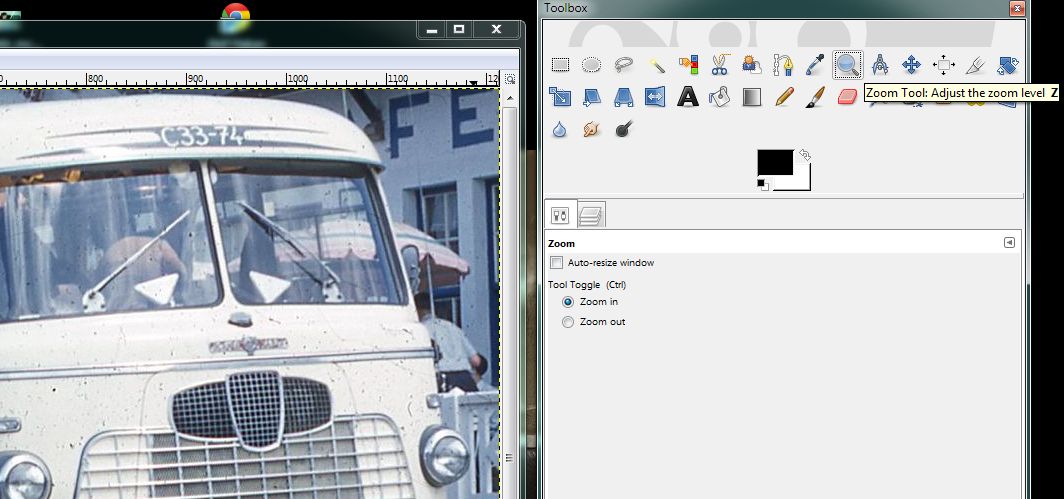
Photo of GIMP Photo Repair  1
Click on the magnifying glass.


5. Once you’ve clicked the zoom icon, move over to the photo and click on the area that you want to repair. You can click anywhere you want but if you stick to the part you want to fix, that area will be centered in the window.
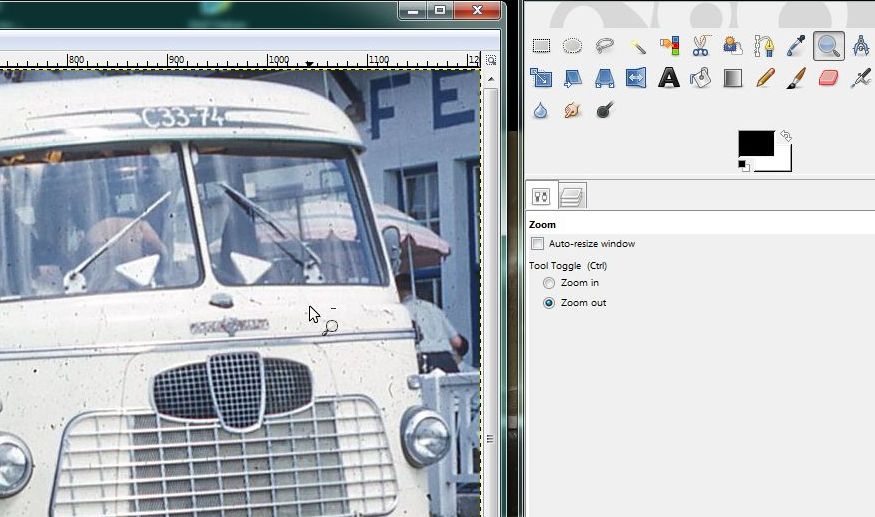
Photo of GIMP Photo Repair  2
We want to fix the hood of the bus so we start the zoom there.


6. Depending on the type of repair you are doing, zoom in very close or just a bit. We’ve found that with red-eye removal, it’s better to click as far in a possible. In this example, we don’t need to be quite so far in.
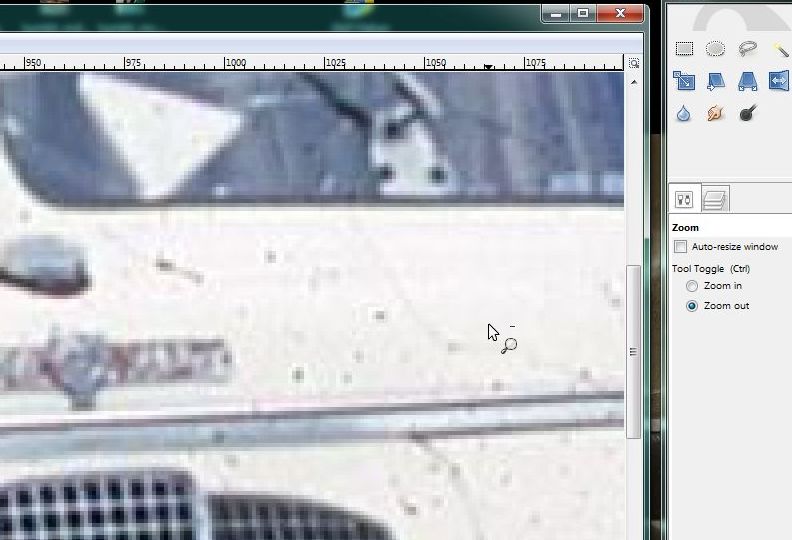
Photo of GIMP Photo Repair  3
Zoom in or zoom back out, if you get too close. See the ‘zoom’ toggle on the right?


7. Once you get the size you want, look over into the Toolbox and choose the Clone tool, the rubber stamp icon.
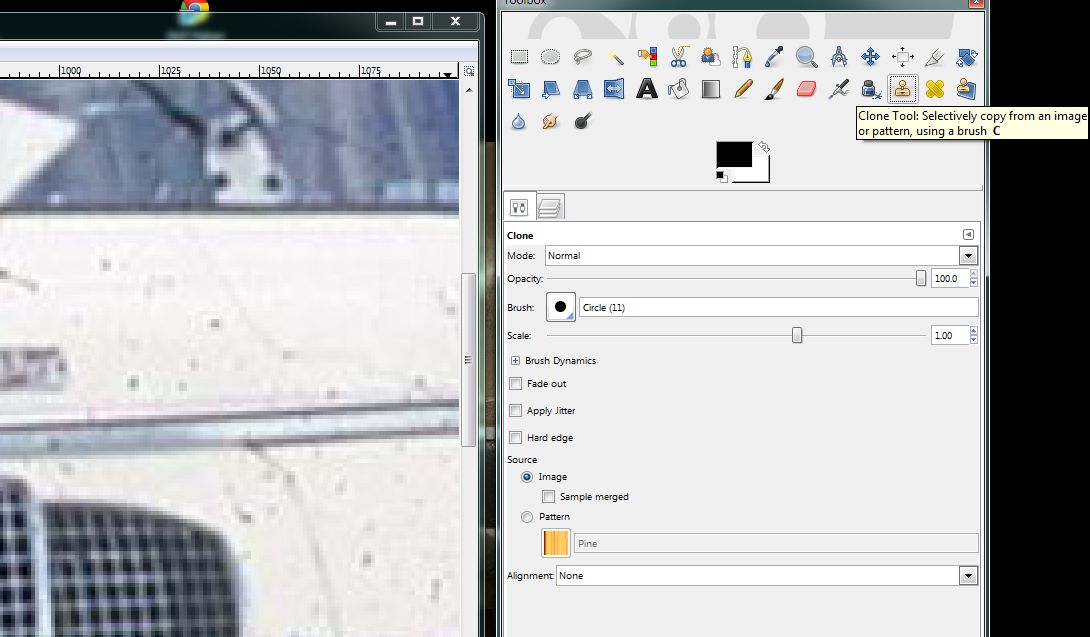
Photo of GIMP Photo Repair  4
Click on the rubber stamp icon.


8. Next, select an area of the photo that isn’t smudged or damaged. What you’re looking for is a section that is clean and completely unblemished. When you find that area, hold down the CTRL key and click once in the middle of that section. GIMP will place a small cross icon there. Like this:
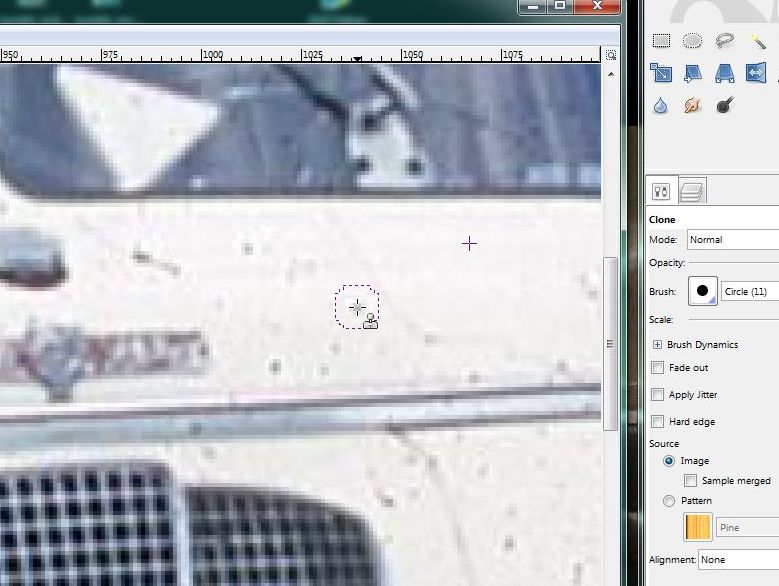
Photo of GIMP Photo Repair  5
We choose a clean section of the image.


9. Once you have a nice, smooth area chosen, move the cursor (mouse) to an area that you want to repair. Hold the left mouse button down while you move the cursor around that problem area. GIMP will replace pixels in that area with clean pixels from the area you choose before. In a way, you’re painting over a dirty area with clean, fresh pixels. You have to make sure, obviously, that the pixels you are moving from one place to another are the same color and brightness, etc., as the originals.  Here is how we did it:
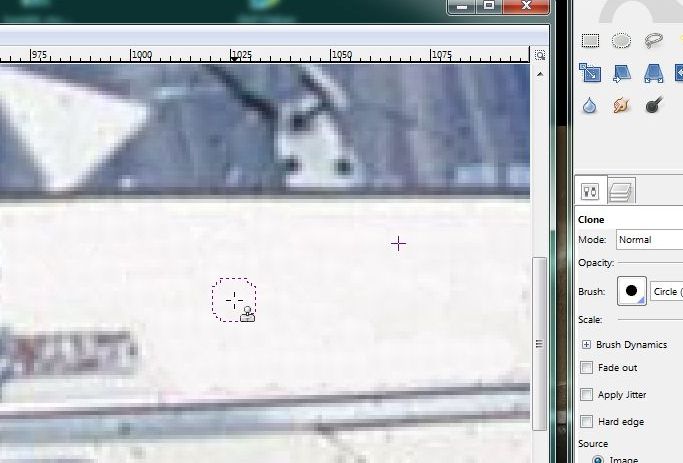
Photo of GIMP Photo Repair  6
See the difference? We’ve cleaned up one area of the bus.


10. Before you save your work, you might want to smudge the area that you worked on in order to smooth out any irregularities that cropped up when you replaced the pixels with clean ones. Back to the Toolbox and choose the icon of the hand with a finger sticking out. Here it is:
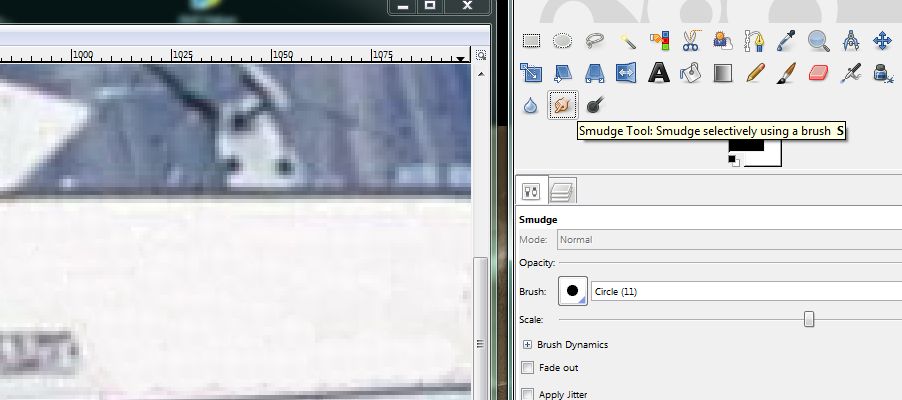
Photo of GIMP Photo Repair  7
The smudge tool will even out the area that you worked on.


11. Move the smudge tool around and you’ll see the area become much smoother. You might have to vary the size of the brush. Click on the icon just to the right of the word Brush in the Toolbox. This is what you’ll see:
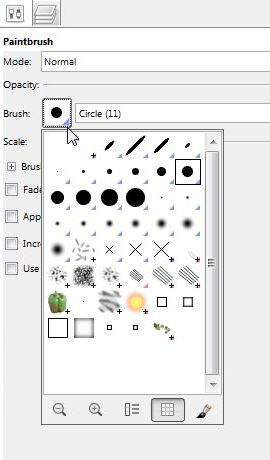
Photo of GIMP Photo Repair  8
Vary the size of your brush, specially when you zoom in.


TIP: You may find that the smudge tool is all you need to repair some photos. If there are slight blemishes, let’s say on an old document or newspaper clipping that you’ve scanned, the smudge tool is all you need to repair those spots. Give it a try.


12. Here is our work, not completed, but you can see how the repair is looking now:
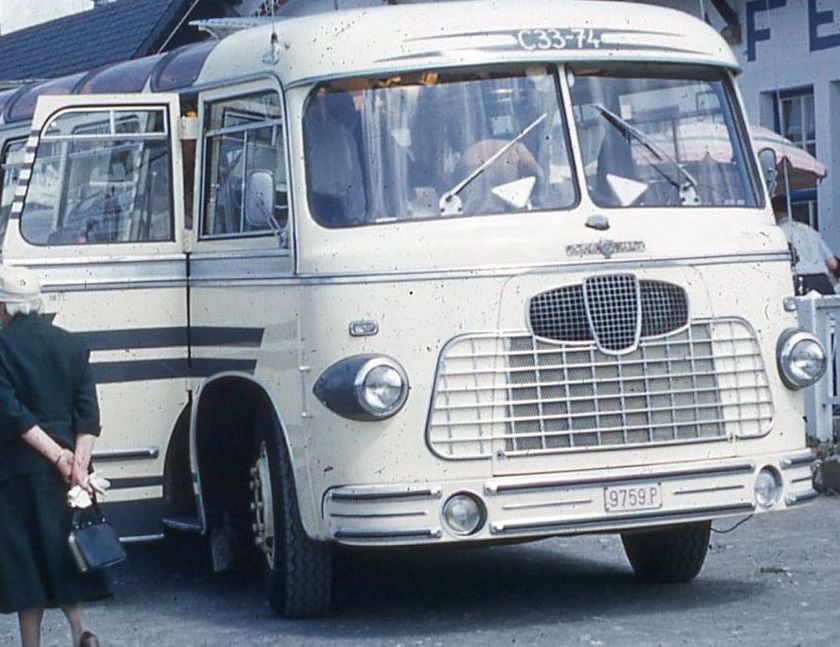
Photo of GIMP Photo Repair  9
The hood is clean and fresh after a bit or work.


Remember that you can undo anything by hitting CTRL and the z key or by going up to Edit on the top and choosing Undo. We hope you find our instructional helpful. Explore GIMP on your own. You’ll find that it is a very handy bit of software…and it’s free!

Thanks for reading!


Using GIMP – How to clone part of a digital image.

In our last post we taught you how to use the mosaic filter in GIMP to hide part of a digital photo. Today, we’ll have some fun with the clone tool. First, some basics.

Cloning is simply copying parts (pixels) of a photo and putting them somewhere else in the photo or, in some cases, into another photo. If you’ve seen the covers of certain trash magazines, the ones that show one famous person on a date with another famous person, then you’ve seen how cloning works. Fake celeb photos are (mostly) examples of cloning.

In your digital camera, the ‘remove red eye’ feature is another example of cloning. The camera takes pixels from surrounding areas of the photo and replaces the ‘red eye’ with those pixels. You can do the same thing on your own with photos that still contain red eye or, let’s say, photos with someone that you don’t want to see in the photo anymore. You can use the cloning tool to edit out a face, a cloud or a whole person. Have fun with it!

Here we go:

1. Open the photo that you want to work on in GIMP. The tool we want to use is available through the icon of a rubber stamp. Here’s what we want:

Photo of Clone 1
Look for the rubber stamp icon up on the top right side of the tool menu.


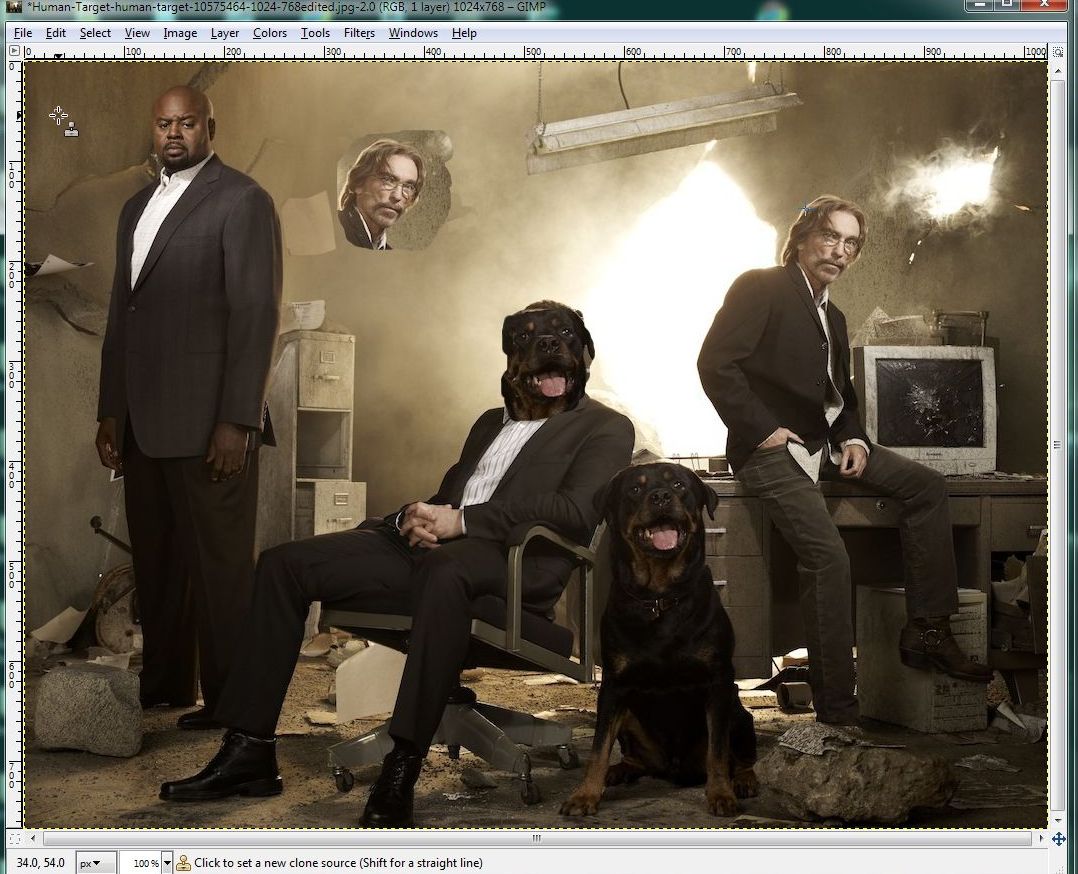
2. We’re using the same image as last time, an advertising photo from our favorite (but cancelled) TV show, “Human Target”. In our last post, we put that black spot on the wall using the mosaic filter. Today, we will have some fun replacing Christopher Chance’s (Mark Valley) face with that of Carmine (Simba), the friendly Rottweiler.

Cloning involves careful mouse work so be ready with a steady hand and slow, careful movements. First, we want to place the cursor right where we want to start cloning. In this case, we clicked on the top left of the dog’s face while holding down the CTRL key. In other words, move the cursor to where you want, then press the CTRL key and click the left mouse button once. You know when you’ve done this correctly because GIMP shows a kind of star icon where you clicked.

Next, move the cursor, without clicking any button, to the place where you want to start copying the dog’s face. Again, we moved the cursor up to the top left of Chance’s face. In order to clone a complete face, click the left mouse button and HOLD IT. Don’t let it go. Move the cursor to the right and left over the image that you want to copy to and GIMP will place pixels from the part of the photo that you selected there. Here’s the result of our efforts:

Photo of cloned image.
Guerrero has moved onto the wall and Chance’s face looks like Carmine’s!


There are a few things to remember. One, never let go of the mouse button when you are cloning a complete face or something that can be identified as an object. If you’re cloning over a cloud, for example, you can choose different parts of the sky separately,  then smudge the area to make it look more real. If you cloning a cloud from one area to another, however, don’t lift the mouse button.

Two, the size of the area cloned by the cursor is controlled by the size of the brush you are using. Look down under the tool menu and find the icon of the brush you are using. Click on the icon and you can vary the size and shape of the brush.

As long as you haven’t lifted the mouse button, you can go over the same area again, just in case your hand wasn’t steady. If you happen to make a mistake, remember that you can hit CTRL and z to ‘undo’ what you’ve just done. You can actually hit CTRL/z as many times as you want, going back to the start of the whole process again, if necessary.

The clone tool takes some getting used to but we’ve had a lot of fun with it over the years. We hope you find it useful and fun, too.

Thanks for reading!

Using Gimp – The Mosaic Filter

We’ve recommended GIMP before. GIMP is a free, powerful image editor, full of  the same tools that any Adobe product has. In our opinion, GIMP is faster and much easier to use. Here’s where you can download it:

http://www.gimp.org/

Every now and then, maybe on Facebook, you might want to edit out someone’s face or a part of their body, let’s say something that would upset Facebook’s censors. Here’s how you can do it with GIMP:

1. Once you’ve installed GIMP, right click the photo that you want to work on and choose ‘Edit with GIMP’.

2. When GIMP finally opens, and it might take a few minutes the first time, depending on the speed of your computer, this is what you’ll see:


Photo of GIMP  1
Look for the lasso tool on the Toolbox menu.

Up on the top right, you’ll see a list of icons which represent different tools to use in GIMP. What we want today is the ‘Free Select Tool’ which allows you to draw around an area to select it.


2. We chose to put a mosaic filter in one section of the wall. Here’s what it looks like when that area was selected:

GIMP 3
Choose anything and draw a random shape around it.


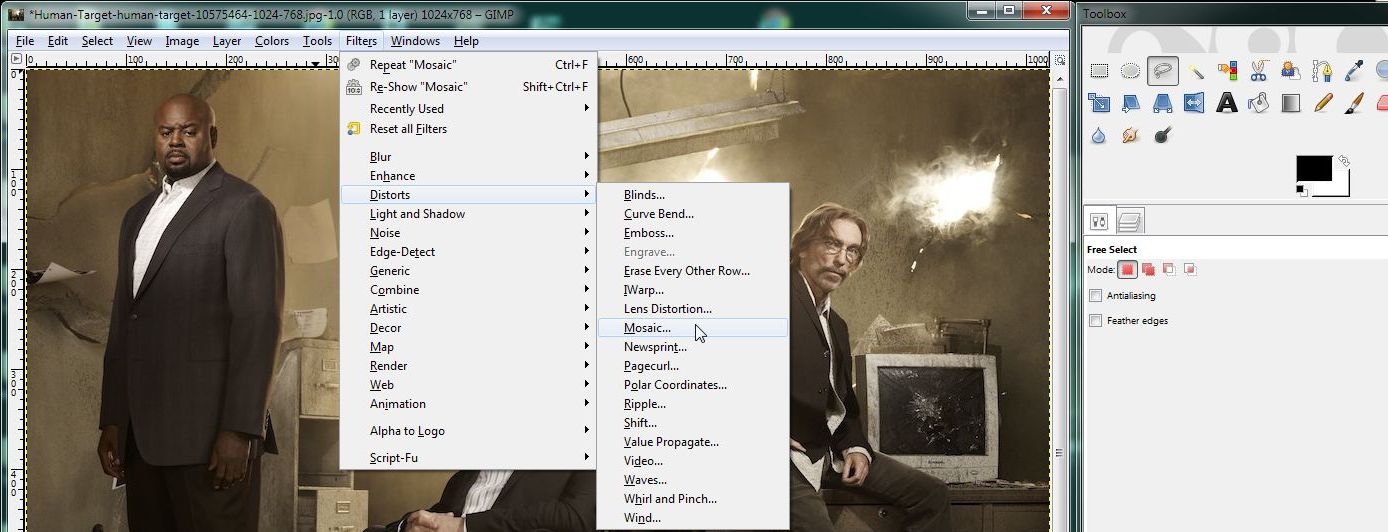
3. If you make a mistake, don’t worry. Either press the CTRL key and the z key at the same time, or go up to Edit on the top and choose ‘Undo’. Then try again. Next, we want to use a filter on the spot that we selected. There are a whole range of cool filters to use, don’t feel you have to stick to using mosaic. We’ll show you the basics, you’re free to discover and use whatever the heck you want! Here’s how to find the mosaic filter:

Photo of GIMP 2
Under Filters, go down to Distorts and then down to Mosaic.


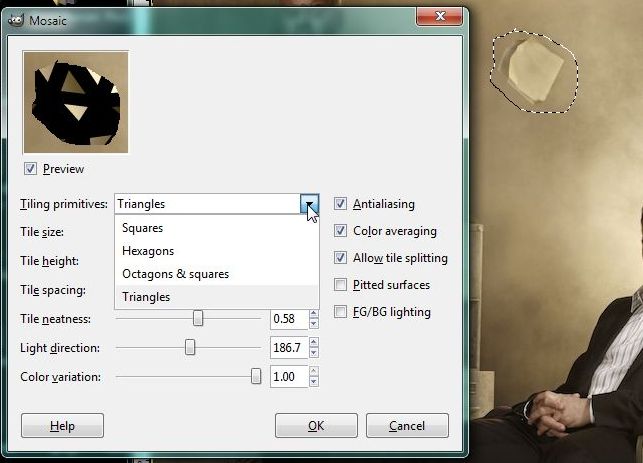
4. After you click on Mosaic, this menu will open. In it, you can change many settings for that one, single mosaic filter. We will show you the types of shapes that you can use to make the mosaic:

GIMP 4
Triangles, Squares, Hexagons, etc.


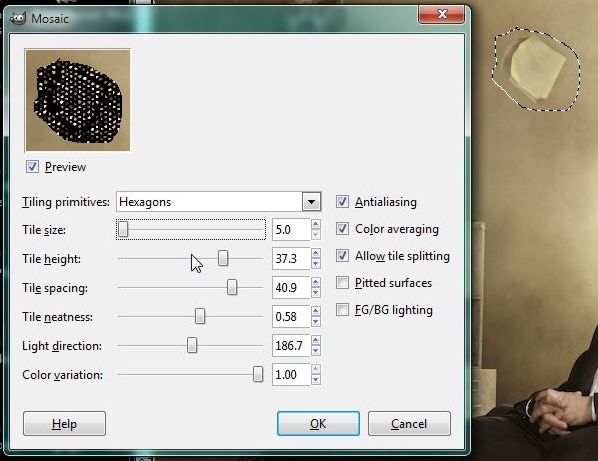
5. Just as you can select the shape that makes up the mosaic, you can also adjust the size, height, spacing etc. of that shape. Use the sliders to adjust these. Notice that the image in the small window changes, not the main image itself. That stays the same until you click OK.


GIMP 5
Use the sliders to adjust the properties of the shape you select.

6. Once you get the tile to look right, click OK and the filter will be applied to your main image. Admittedly, our photo looks kind of nasty but we’re sure that your’s will be much more attractive.

Photo of 6
The area we selected is now ‘mosaic-ed’, if that is a word.


7. Go up to File and choose ‘Save As’ when you are satisfied with your work. Why would you use ‘Save As’? Well, you want to keep the original photo, right? If you choose ‘Save’, you will overwrite the original photo with your new ‘mosaic-ed’ image. It’s up to you but we want to keep both pics. When you choose ‘Save As’, we suggest naming the new image something like ‘***edited’ as we did here:

Photo of GIMP  7
Now we know that this is the edited version.


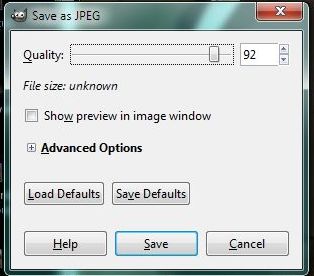
8. After you click OK, the last menu will pop up. This has to do with the quality of the .jpg that you are saving. Anything around 90% is fine.

Photo of GIMP  8
Quality menu in GIMP.


Once you’ve mastered this exercise, you can see how using these filters isn’t as difficult as you might have thought. Remember that there is a whole range of filters here. You can select part of an image or use the filters on the whole image. We’ll do more on GIMP in the next few posts. Let us know if you have questions and don’t be shy to make a comment below.

Thanks for reading!