This is Facebook week at Computers Made Simple. We’re going to highlight the various privacy settings that are available to you on Facebook. Stick around and bookmark this page or, better yet, Like us on Facebook to get immediate updates on our posts. Here is the link: Computers Made Simple on Facebook This is Part 1 of the series.
Posting Photos or Photo Albums.
When you post a photo or a whole album, Facebook uses your default privacy settings. What are those settings? Well, they are always the same settings that you used the last time you posted a photo or an album. Let’s say that you haven’t ever adjusted your privacy settings. In that case, Facebook assumes that you want everything you post to be public, available to anyone who happens to visit your profile, no matter if they are a friend or a complete stranger. Read that again if you want.
At this point you are faced with a fork in the privacy road. From now on, you will know how to change the privacy settings for everything you post. What about the things you have posted previously? Well, unfortunately, you’ll have to go back and change the settings for everything that you don’t want the public to see. There is no quick and easy ‘Press This’ button to change those privacy settings. Sorry!
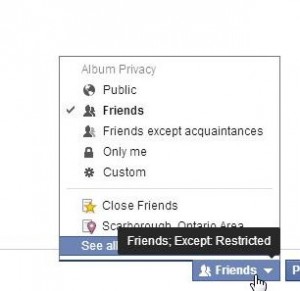
Let’s make a new album and set the privacy to Friends Only.
1. From any page on Facebook, click the Post button if you have the new Facebook look or scroll to the top and click on the Add Photos/Video button.

We’re making a new album so click on Create Photo Album. Read this:
TIP: Facebook has changed its privacy settings for photos that you post to your Timeline. We would strongly suggest that you ONLY put photos in separate albums, NOT simply to your Timeline. We will explain why in a later post.
2. Choose your photos from a folder on your computer. Usually the default location is Downloads, depending on which browser you use. We use Chrome and you should be using Chrome too.

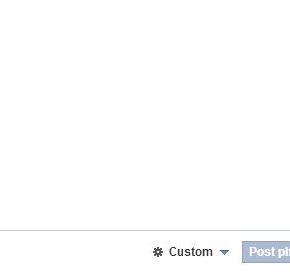
3. As the photos are uploading, look down to the bottom of the page, just to the left of ‘Post photos’. There will be a gear icon there. This is where you change the privacy settings for you new album.

4. Click on the word that is there. If you haven’t changed this setting in the past, it should read Public. That’s not what we want.

5. The setting that you choose here will be your current default setting. From now on, whatever you post, even if you just update your status, this setting will control who can see that post or update.
TIP: You can only control the privacy for things that you post. If you comment, like,or share on anything that you didn’t put up on Facebook, everything will be controlled by the privacy settings of the original poster. Please remember that. If you like a friend’s photo, you can only unlike it, you can’t hide the fact that you liked it.
OK, so this is about posting an album. Next time we’ll describe how to change the privacy settings for your old photo albums. That will be Part 2.
Thanks for reading!
