Facebook week continues here on Computers Made Simple. In our last two posts we’ve shown you the ins and outs of posting something and setting the privacy limits for it, then we described the various photo albums and their limitations. Today we’re describing how to adjust privacy for your profile photo.
Profile Photo Trick – As we told you here: Facebook Photos and Albums , some Facebook albums have different privacy settings than others. One album that we are concerned about is the Profile Pictures album. Your profile photo is made up of two parts, the thumbnail and the main photo. Everyone can see the thumbnail, remember that. You choose who can see the full photo. Here’s how to have a profile pic that doesn’t reveal too much.
1. Before we begin, remember that when you upload a new profile photo, it is set to ‘Public’ by default. You have to change that setting to ‘Friends Only’. The thumbnail will remain public but the photo itself can be made private. We’ll show you how.
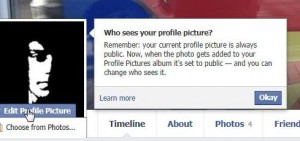
2. Click on your profile photo up on the top left of any Facebook page. This brings up your Timeline. Next, hover your mouse on the photo and choose ‘Edit profile picture’.
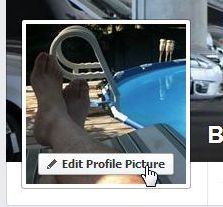
3. We strongly suggest that you choose ‘Upload Photo’ or ‘Take Photo’ (you can only use this if you have a webcam attached to your computer.) The reason we want you to use a new photo is that you can edit the thumbnail much better with a new pic. If you use one of your old profile photos, this trick doesn’t work quite the same way.
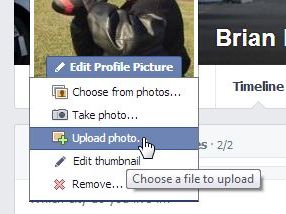
4. Choose the photo you want to use. This is the one we chose for this post:

5. Facebook uploads the photo. Initially, this is what we saw when we uploaded this photo:

6. Hover over the photo again and choose ‘Edit thumbnail’:
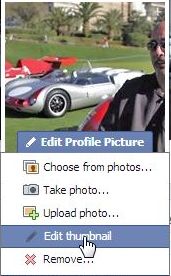
7. When the Edit Thumbnail dialogue comes up, drag the photo around until you can’t see or can’t recognize the person (you) in the photo:

TIP: If you choose ‘Scale to Fit’, Facebook simply makes a very tiny copy of the full photo and uses that as the thumbnail. In some cases this might be fine but make sure the thumbnail doesn’t reveal too much.
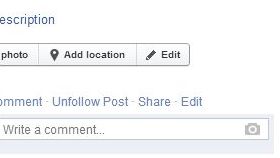
8. OK, we’re almost done. The new photo is set to Public, right? We want to change that. Click on the thumbnail and the full photo comes up. On the right, there are two Edit buttons. Both do the same thing so it doesn’t matter which one you click.
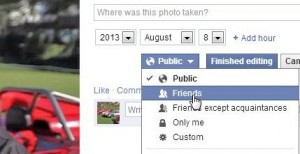
9. We prefer to choose Friends for the privacy setting. That’s up to you but we don’t advise you to leave it set to Public.
Yes, there are quite a few steps to this but we think it’s worth it. If you’ve got kids who are on Facebook, share this trick with them. Unless they are desperately seeking friends who are complete strangers, maybe it’s better to hide their face. Are we taking this search for privacy a bit too far? We don’t think so. If you had any idea of what some people reveal to strangers, you’d probably agree with us. Click on some Facepiles and see what turns up. You’d be shocked.
Thanks for reading! Questions, comments and problems are always welcome. Use the comment form below or Like us on Facebook: Computers Made Simple on Facebook

One thought on “Facebook Privacy Settings – Part 3 Profle Photo Trick”