In our last post, we described how to download your Facebook data file. If you’re leaving Facebook, make sure you download your history, but even if you’re staying around, it’s interesting to see what’s in the download. Here’s how to check out your data download once you get it.
1. Download your Facebook data. Here’s the instructions for that: Facebook Data Download
2. Once you get the email that your file is ready, click on the link in the email, enter your password on the Facebook page that opens from the link (you have to enter your password even if you are already signed in to Facebook in another tab) and click the button to start the download.
3. The download is a zip file. On the profile that we used, the data download was 666 MB in size. Yours will vary from that, of course.
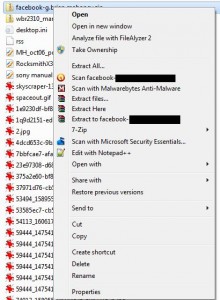
4. A zip file, in case you didn’t know, is compressed. It’s like buying something in a bubble pack. You have to spend a bit of time unzipping the file in order to see the data that’s in it. No worries. Windows knows how to handle the file. Find the file on your computer and right click it. This is what you’ll see:

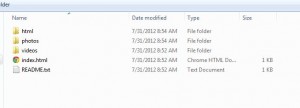
5. The extraction of the zip file creates a folder. Double click that folder to get to yet another folder, named for the Facebook profile you downloaded. Double click that folder to get to this:

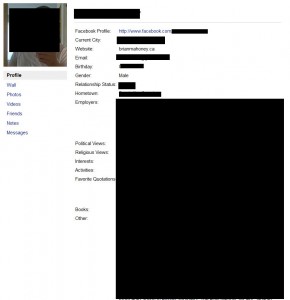
6. Everything from the data file is available from the index.html page. Double click it and it will open in your default web browser. Here’s what you’ll see:

That’s it! The page is very plain, as you will see, but your data is all there…perhaps. The messages seem to be a bit sketchy, from what we’ve seen. Some are there, some are marked ‘unknown’, etc. The problem may be due to the fact that some of your friends have left Facebook or maybe they aren’t your friends now, something like that.
This should all be straightforward but if you have questions, just comment below and we’ll work it out for you.
Thanks for reading!
