Category Archives: Router

Routers 101 – Connect your PC to your Xbox 360

This is the last in our series on routers. Today we’ll connect an Xbox 360 to one of our PCs. We’ll use Windows Media Center to do that. NOTE: You can only do this for free if you are using Windows 7. Microsoft in all of its brilliance has made WMC an extra-cost item for Windows 8. If you are using Windows 8, stay tuned for our XBMC solution for it. Today we are talking only about Windows 7 and Vista only.

TIP: Why are we stuck on the Xbox? We aren’t, not at all. For most of our gaming and entertainment we use the Sony PS3/PS4. Microsoft has made everything extra-cost, including Netflix, while Sony has left its PS line of consoles wide open as far as Netflix and other apps go. The big difference is live TV. There are ways to steam live TV to a PS3 but it’s much easier with the Xbox using Media Center. You still have to jump through some hoops but, in general, it’s easier to set things up on an Xbox 360. We will not be purchasing an Xbox Live but we assume that everything will be pretty much the same on it, except for the lack of a free version of Media Center with Windows 8.

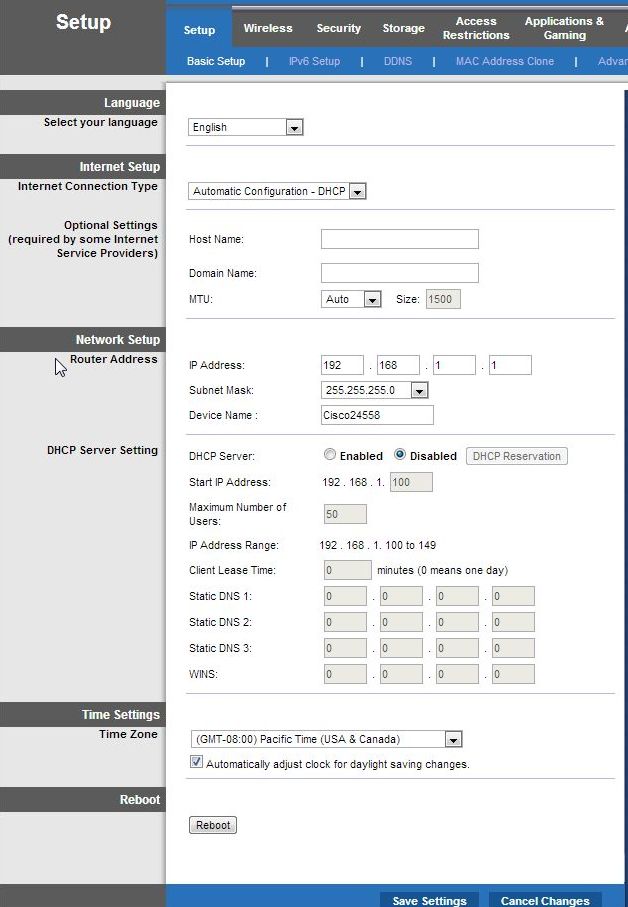
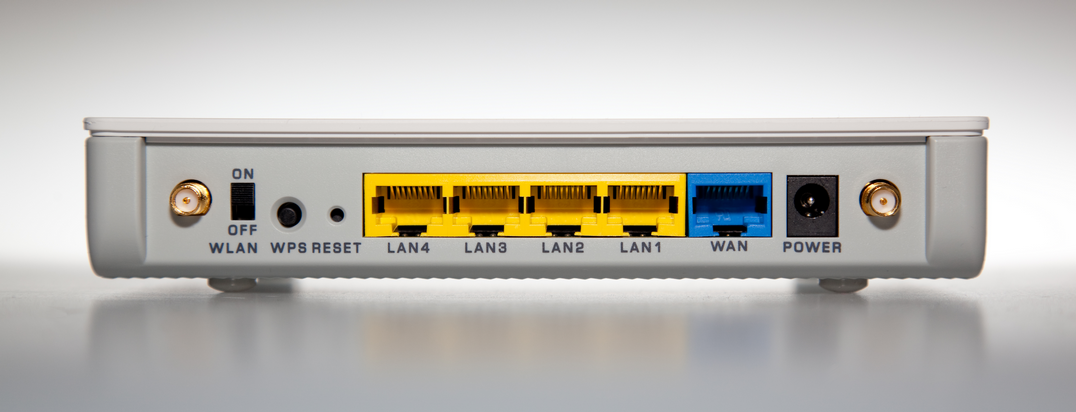
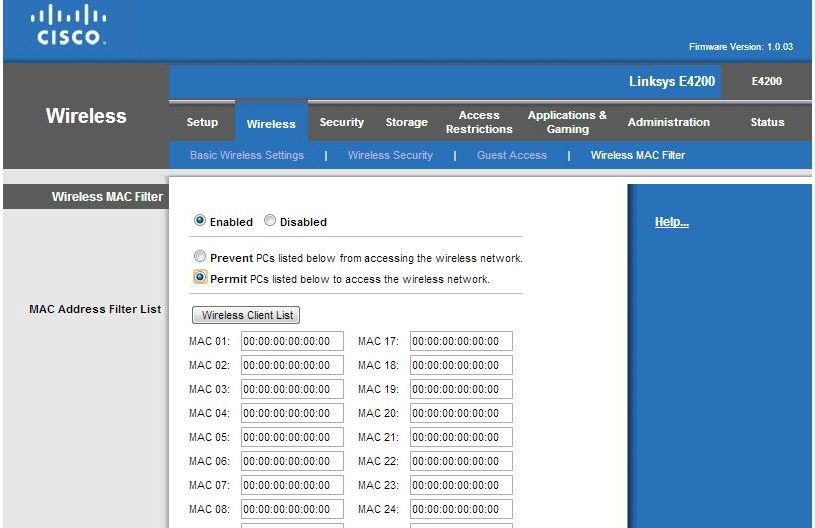
Setting up your network: We know. You’re saying, “Didn’t we just do that?” Yes you did but you have to make sure of one more thing. Even though all of your computers and game consoles are on the same home network, you must make sure that your Xbox and the PC you are going to use to stream HDTV/video from are connected to the same ‘node’. We mentioned this before but this is vital to the success of your setup. Connect your streaming PC directly to the same router that your Xbox is using for its wireless signal.

1. Make sure that you have turned on Sharing in the Media Center on your PC. Decide what folders you want to share and what devices, too. We use a Hauppauge TV tuner which we had to set up in Media Center. It found the channels by itself and even gave us up-to-date programming information. Once your HDTV is working on Media Center, it’s time to move to your Xbox.

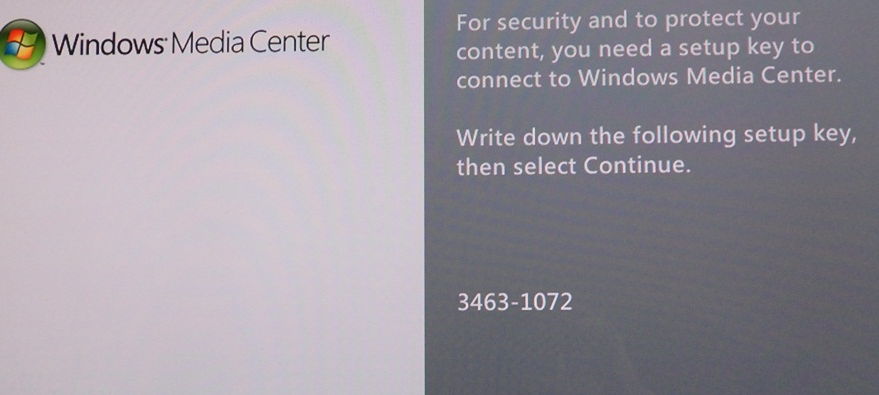
2. Fire up your Xbox 360, log on to the Microsoft Network and scroll across the screen to My Video Apps. If you’ve never used WMC (Windows Media Center) before, you may have to download the app first. Click on it and the app will describe itself then give you a key, something like this:

Photo of Xbox Key
Write down the key and head back to your PC.


3. Go back to your PC, open Media Center and go down toTasks. Scroll across to ‘add extender’ and click on that. Like this:

Photo of Add Extender Menu1
Tasks then over to ‘add extender’.


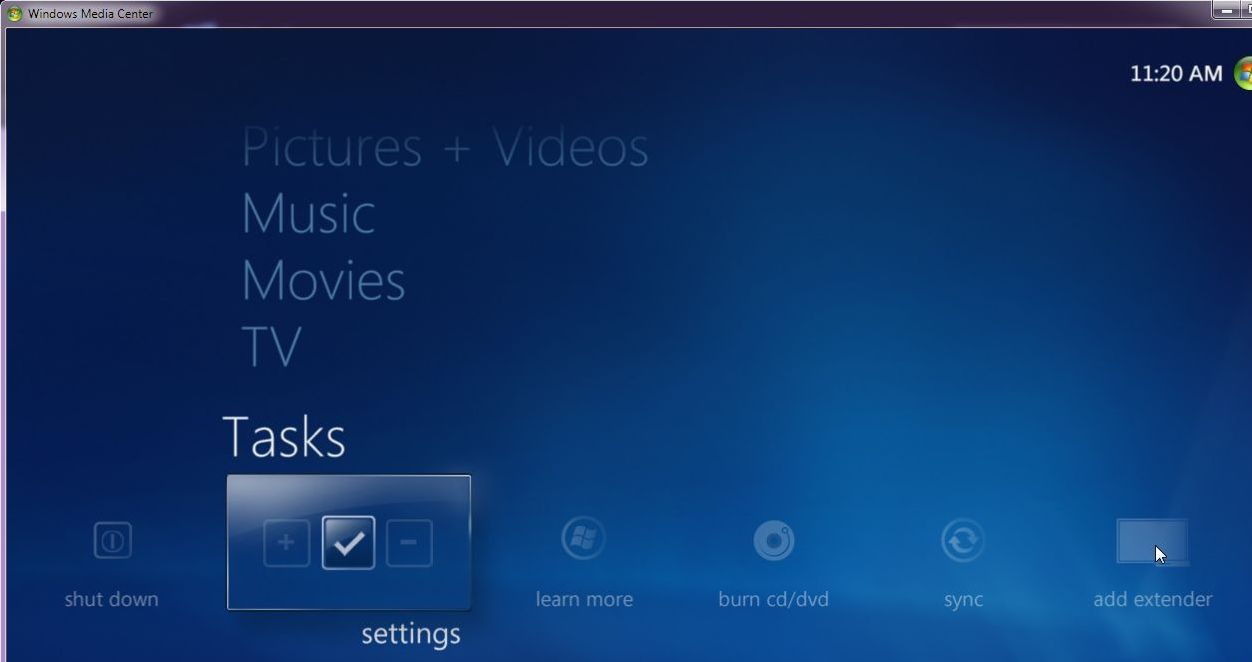
4. Once you click those words, WMC asks for the Xbox key that you wrote down previously. Enter that into the spaces and things should begin to happen. Once WMC finds your Xbox, it will start to communicate with it and set up all of the things it needs to work. Ours took a couple of tries but finally worked.

5. Head back to your Xbox and open WMC if it isn’t already open. Everything that you shared on your PC should be available on your Xobx. Remember that you can’t be watching HDTV in two places. If you are using your tuner on your PC, you can’t use it on your Xbox. Click on Live TV and wait until your PC starts streaming your tuner output to the Xbox. Like magic, a crystal clear image should appear on your screen. Move your controller’s center button up or down to change channels.

Yes, there are some steps that you’ll have to figure out on your own but they are very intuitive, nothing difficult at all. Once you’ve got your new router setup, it’s a snap, more or less, to get your PC and your Xbox to see each other. When it starts to work, you’ll wonder why you didn’t do this all before. We use the system for sports broadcasts. Instead of simply sitting around watching a game, we can enjoy the home gym we’ve added to the ‘man cave’ at the same time.

Thanks for reading! If any part of this seems obscure or difficult, let us know. Comment below or, better yet, Like us on Facebook and get all of our updates and tips. Here is the link: Computers Made Simple on Facebook

________________________________________

Here’s a link that might help us if you are interested in hosting your own blog with Fatcow Hosting. We’ve signed up to become an affiliate and we make a bit of money if you sign up for hosting via this link:FatCow Hosting Thanks!


Routers 101 – Adding a WiFi access point

Today we will add a wireless (WiFi) access point to our network. Not only will reception improve in some parts of the office but we will be able to stream HDTV and video through the new N router to our Xbox 360 without the need for Ethernet cables. Plus, most modern laptops and wireless devices use the N protocol. Their network traffic speed will increase dramatically.

1. Any wireless router can serve as an access point. You can buy a pre-fab access point but why spend the money? Access points are very expensive. Routers are very inexpensive. We’ll take the router anytime.

2. Find a spot in your home that has the three things you need. The first is an electric socket to plug the router in. The second is access to an Ethernet cable that is connected to your main router. This cable can be a few feet long, meaning that you can put the second router near your main router or modem/router, or it could be fifty feet long. That means you could put it in another room, perhaps closer to  your family room or entertainment center or, even better, right beside the PC that you are going to use for streaming. Why? Because both units, your Xbox and your Media Center PC must be connected to the same router. (In this case your second router is acting like a network switch but that’s just semantics.)

3. Log in to your main router, the one that gives you Internet access. What you’re looking for there is the IP range that it uses. The IP range is a set of 255 numbers that are assigned to the various devices that connect to that particular router. The numbers will be in a very standard format, let’s say from 192.168.0.1 to 192.168.0.256, something like that. Once you find the range, write the numbers down.

4. Now, hook up your new wireless router via an Ethernet cable to your computer, preferably a laptop. We’ve always found a laptop to be easier because we can turn off the wireless adapter which forces the computer to use the Ethernet connection.  On a desktop it gets a bit confusing.  Open a browser window and type in the address to the new router, log in as the admin and look for the main screen.

5. Here is what you’re looking for:

You want to disable DHCP Reservation. You also want to assign a special IP address.


6. You have to change or check two things on this menu. Since you already have one router that serves out DHCP numbers, you don’t need another. Make sure that this router’s DHCP server is disabled. Next, you want to set the IP address of your new router to an address that is not in the same range as your main router. For us, this was simple. We knew the range of our main router was already different from our new access point. We didn’t have to change anything.

If your main router uses a range such as 192.168.1.1-192.168.1.256, you can give your new router an IP address using 192.168.0.1, for instance.

7. When you are finished changing and checking everything, make sure you save your settings by clicking the save button down at the bottom.

8. Disconnect your new router and carry it to its new designated location. On the back of the router you will see several Ethernet ports. Here’s an example:

Photo of Router Back
One of these is not like the other. Ignore it on this router.


9. The blue port in this photo is where you would normally connect the Ethernet cable if you were using this as your main router. The WAN stands for Wide Area Network. Ignore it for this setup. What you want to do is connect the Ethernet cable that is directly attached to your main router to one of the yellow ports. Your colors will be different, of course, but make sure you connect the cable to one of the LAN ports, not the WAN port. Turn the router on and you’re set.

10. Since you’ve already locked the WiFi signal with a password, maybe even locked out foreign MAC addresses, all you have to do is to type in that password or passkey on any device that you want to access this particular section of your network. Go back to your Xbox 360 and use its wireless search function to find this router and log into it’s signal.

This is the second last post in the Router 101 series. Next time we will tackle setting up your Xbox to receive streaming video/HDTV from your PC. Compared to setting up your router, that will be a snap. Stay tuned!

Thanks for reading!

Why not Like us on Facebook? You’ll get good karma as well as instant updates on all of our news posts and tips. Here’s the link: Computer Made Simple on Facebook 


_____________________________________

Here’s a link that might help us if you are interested in hosting your own blog with Fatcow Hosting. We’ve signed up to become an affiliate and we make a bit of money if you sign up for hosting via this link:FatCow Hosting Thanks!


Routers 101 – How to find your MAC address

In order to really lock down your WiFi, you can limit access to certain MAC addresses. That way, only those computers/mobile devices can use your signal, all others will be locked out. We showed you yesterday how to do this. Here is the link:  Lock Down Your WiFi Signal  Today, we’re going to show you how to find your MAC address.

On a PC (Desktop or Laptop)

You have to navigate to ‘Accessories’ then find Command Prompt. Click on that and a black and white box will pop up. Once it does, just type getmac (just that, ‘getmac’) and hit enter. In a flash, your MAC or physical address will pop up. It will be made up of a combination of twelve letters and numbers. Here is what we found on one of our desktops:

Photo of Command Prompt Getmac
Type getmac , write down the physical address as you see it the close the window.


You can open a Command Prompt inside any folder by holding down the shift key and right-clicking in any open space in the folder. That might be quicker than trying to find Command Prompt in Accessories.

On a Mobile Device

Everything that connects to the Internet and/or uses WiFi has a MAC address. On these devices, the MAC or physical address is buried in the Settings area. On an Apple product go to Settings, General then About. The MAC address there is named ‘Wi-Fi Address’. You have a Bluetooth address as well but you don’t need that, don’t get them mixed up. Here is what you’re looking for:

Photo of iPod Mac Address
Wi-Fi Address is what you want. Again, copy it with caps, numbers and dots/periods/decimal points.


On our Nexus 4, the route is more complicated. This path should be similar to your device: Settings, About Phone then Status. Scroll down to the bottom and you’ll see something like this:

Photo of Android Mac Address
At least this Android device tells you that it’s a MAC address. This one uses small letters not caps.


TIP: Sometimes the MAC address will be in all upper case, in others, all lower case. We know that Cisco/Linksys routers only accept lower case so use lower case in all situations. If you are sure the number/letter combination is correct but the lower case entry still doesn’t work, try upper case. As we’ve said before, all routers are a bit different from each other.

That’s it for this week. Next week we’ll tackle adding an access point, one that will stream your HDTV or DVD videos from your computer to your home entertainment game console. Stay tuned!

Thanks for reading!

_______________________________________

Here’s a link that might help us if you are interested in hosting your own blog with Fatcow Hosting. We’ve signed up to become an affiliate and we make a bit of money if you sign up for hosting via this link:FatCow Hosting Thanks!


Routers 101 – Lock down your WiFi

If you live in an apartment or condo, you’ll know that there are many WiFi signals in your immediate area. Although all of those signals, including yours, should be protected by a strong password, savvy tech people can often hack into the systems anyway. Here’s how you can lock down your router’s wireless signal to ensure it’s not open to freeloaders. This is specially important if you’re on a capped plan from your ISP. It’s sometimes quite expensive if you go over your gigabyte or data limit, depending on which ISP you use.

1. Log into your router from any computer that is linked to it. Use the router’s IP number, usually something like 192.168.0.1, type in the username, usually ‘admin’, and the password. Remember that you must lock your router with a password before you can lock up your WiFi.

2. Each make/model of router has a different GUI so we’ll cover two in this post. Your router should have something similar to one of the two setups that we’re going to cover today. Regardless of which make or model you have, you must get to the ‘wireless’ control panel on your router. That panel should have several screens. The one you’re looking for has to do with security so start there.

3. On our main modem/router, an older Thomson TG784, we can lock out freeloaders by setting up a registration process. Here is the screen where we can do this:

Photo of Router Registration Menu
New stations, people you trust in other words, are allowed via registration.


4. What you’re doing on this menu is forcing new users to register. If you only have a few computers and they are already using your system, you can set this to ‘New stations not allowed’. This will prevent any computer or mobile device from connecting to your WiFi signal until you allow it. To do that, go back into your router and change the setting.

5. The other way of locking down your router is a bit more complicated but just as, or more, effective. Every device that has WiFi capability has what is known as a MAC address. MAC stands for ‘media access control’ and has nothing to do with Apple computers. When we said this method is more complicated, that’s because you have to know the MAC address for each wireless device that you want to give access to your signal. We’re not going to get into how to find your MAC address in this post but we will next time. For now, take a look at this screen capture and you’ll get an idea of how you can lock out foreign MAC addresses:

Photo of MAC Address Control
You can set this up two ways. We suggest this system.


6. You’ll see that there are two ways to set this up. First, you can lock out specific MAC addresses. Parents might use this to lock out certain computers that they do not want to access the Internet. The other setup is better, in our opinion, since it allows specific MAC addresses to access the signal but no others. If you get a new computer or if someone visits you and wants to use the Internet, it’s an easy job to add their MAC address to this list. This method of securing your WiFi signal is foolproof. It’s advisable to check your router every now and then to make sure no one has deciphered your router password and changed your wireless settings, just in case.

Thanks for reading! Questions, comments and suggestions are always welcome. Make a comment below or click Like on our Facebook page. Here is the link: Computers Made Simple on Facebook 


_____________________________________________________

Here’s a link that might help us if you are interested in hosting your own blog with Fatcow Hosting. We’ve signed up to become an affiliate and we make a bit of money if you sign up for hosting via this link:FatCow Hosting Thanks!


Routers 101 – Lock down your router

In the next two posts, we’ll show you how to lock down your new router and your WiFi connection, keeping them safe from intruders and freeloaders. You have to do this in two separate steps. There is no sense locking down your wireless connection until you secure your router. Unless you have set a password for your router, anyone with an Internet connection can discover the default password, login and change your WiFi settings.

Here’s a link that will give you all of the default settings for your router: List of Default Router Passwords and Default Router IP Addresses.  Find your router’s make and model number, look it up and jot down the default information. Your owner’s manual and/or the CD that came with the router will also have the same information.

TIP: We’re only talking about a new router in these posts. Your ISP has already setup your current router for you and should have given you the password and username for it with the documentation that you received at the time. Adding a new router with N WiFi is cheap and easy. We suggest that you do this instead of changing any settings on your current router. Just check that the router is locked down, specially if you live in an apartment. It’s very popular to freeload on unsecured WiFi connections.

1. Connect your new router to your computer with a short Ethernet cable. Almost all routers come with one. Ethernet cables have a plastic plug on each end. One end goes to the router’s Internet port, clearly marked on the back, while the other end goes into a plug on your computer. A laptop is much easier for this.

2. Open a new tab then type your router’s IP address into your browser’s url space. It should be something like 192.168.0.1 so make sure you get the numbers AND the periods in the right place.

3. Hit Enter and a small window should open up, something like this:

Photo of Router Sign-in Menu
From the link above, type in Admin and the default password, usually Admin or 12345, something like that.


4. Once you’re in, look for the word Administration somewhere in the maze of links on your screen. Here’s a shot of our Cisco/Linksys router menu with Administration highlighted:

Photo of Cisco/Linksys Router 1
Remember that the grey area brings up sub-menus. We want Administration for now.


5. Once you click on the word Administration, this menu, or something like it, should be the first thing you see:

Photo of Cisco/Linksys Router 2
There are two slots for the password, one to create it and the other to confirm it.


6. You’ve all seen these boxes before so don’t panic. Type in a new password and confirm your entry. Make sure you write this down and keep it in a safe place. None of this is life and death since you can reset the router with the push of a button but it’s a pain to get everything set but end up forgetting your password. Right?

7. Make sure you save your settings, that’s down at the bottom, and then you can close the browser window.

Just by doing this simple, precautionary setup, your modem is relatively save from intruders. Think about it. The only way someone could access that router is by a direct connection with an Ethernet cable or through your WiFi signal. In our next post we’ll show you how to lock down your WiFi using a passcode or passphrase. We’ll also show you a cool way to really lockdown your WiFi that is much more foolproof than a simple set of numbers and letters.

Thanks for reading! Keep up with everything we post here on Computers Made Simple by Liking our Facebook page. Here’s the link: Computers Made Simple on Facebook 

_______________________________________

Here’s a link that might help us if you are interested in hosting your own blog with Fatcow Hosting. We’ve signed up to become an affiliate and we make a bit of money if you sign up for hosting via this link:FatCow Hosting Thanks!