Category Archives: Cloud Privacy

Protect Your Privacy with TrueCrypt – Part 2


In this post, we’ll describe how to encrypt a small folder using TrueCrypt, a free and very powerful encryption tool. You can put anything you want in this folder, of course, but the point of this exercise is to have something that is extremely safe from prying eyes that will allow you to keep your passwords or online account numbers private. Once you create this folder, you can put text files, documents…basically whatever you want to, as long as the total size is not larger than the folder you create. We’ll explain that later.

1. Download and install Truecrypt. You can install Truecrypt or run it from a folder. You could even keep the Truecrypt folder inside your Dropbox folder in order to make it available on every computer that you access Dropbox with.

2. Run Truecrypt. Here is the window that comes up at the start:
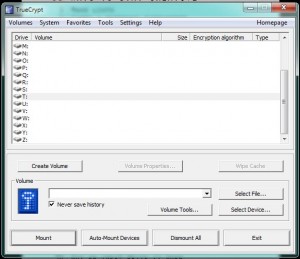
Photo of TrueCrypt menu
Click on the Create Volume button or click on Volumes then Create New Volume.

A volume is something that only Truecrypt can open. As you will notice later on, there is no three letter file designation to the folder/file/volume that you create. No other program will recognize it, not Windows, not Notepad, only Truecrypt.


3. 
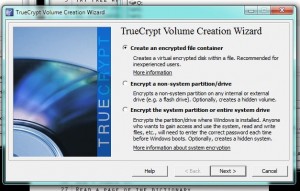
Menu for TrueCrypt
For the next few screens, you’ll just accept the default settings. Here, choose ‘Create an encrypted file container’ then click Next.


4. 

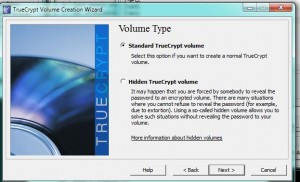
Menu for TrueCrypt  3
Click Next to start creating a Standard TrueCrypt volume.


5. 

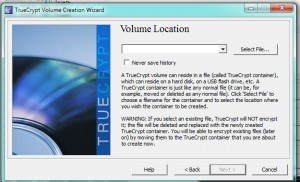
Menu for TrueCrypt
This menu looks complicated but it’s not. Click on the Select File and the standard Windows dialogue will open up.


6. 

Menu for TrueCrypt
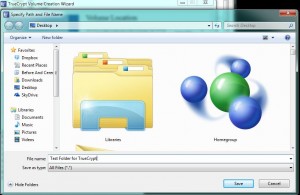
You do not actually choose a folder, you are making one. Type in a name, we’ve used Test Folder for TrueCrypt.

Don’t get confused here. You’re not choosing a file or folder, you are really creating a volume somewhere you are on your computer. We chose our Desktop but you’re on your own here. All you do in this menu is simply type in a name, make up anything you want. You can even use a three letter file name to make this Truecrypt volume look like another kind of file. The default program for that type of file, .avi or .mp3 for instance, will NOT be able to open it, remember? Only Truecrypt can open this file.


7. 
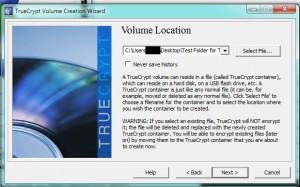
Photo of TrueCrypt menu
This menu just confirms the file location. Click Next. 


8. 

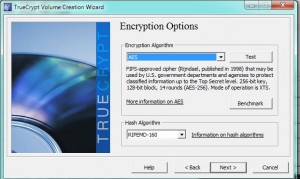
Photo of TrueCrypt  menu.
Just click Next here. The default AES algorithm is fine.


9. 

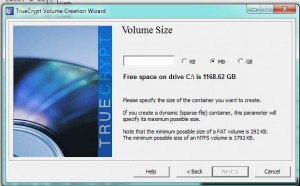
Photo of TrueCrypt
You’re on your own here but we chose a 1 MB file, lots of room for our password text file.


10. 

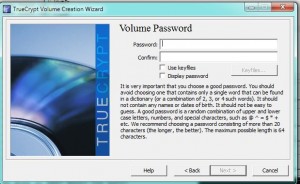
Photo of TrueCrypt  menu
Choose your password. If you make it less than 20 characters, Truecrypt will give you a nudge. Whatever you do, don’t forget the password you use. You can’t open this volume without it, no matter what you do.


11. 

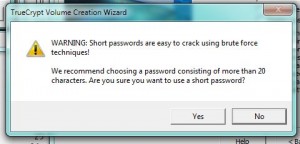
Photo of TrueCrypt menu.
Your password is too short! Don’t worry about this. You’re not protecting state secrets, right? If you can remember a 20 digit password, however, use one.


12. 

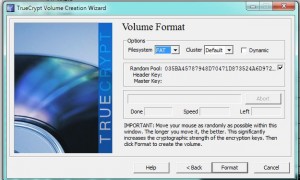
Photo of TrueCrypt menu
We would normally choose NTFS for the filesytem but our volume is only 1 MB so NTFS isn’t available. Move your mouse over this screen in a random order to create a very strong encryption.

Move your mouse all over this menu for a minute or two then click Format. Truecrypt will then format the volume that you just made, creating, more or less, a separate drive on your computer. That drive is controlled by Truecrypt, nothing else. Windows doesn’t know anything about it, other than it takes up space. It cannot open the volume and will not even suggest a program that might open it.


13. 
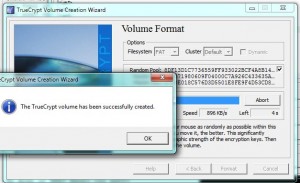
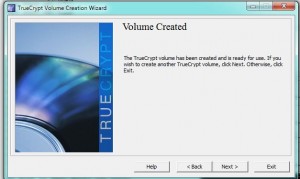
Photo of TrueCrypt menu.
Success! Click OK and you’re done.


14. 

Photo of TrueCrypt menu
Click Exit to end this part of the lesson.


That’s it for now. This post is long enough but we’ve accomplished a lot. You now know how to create a locked volume that can be opened only by you. Even if someone gets access to your computer or your cloud folder, they will not be able to see what is inside this folder. Cool huh?

Next time, we’ll show you how to use this volume. Basically, you just mount it using your password, open it then drop files into it and then dismount it. Once you dismount it, it is locked again.

Thanks for reading!

Check out our Facebook page. Like and follow our updates. Here’s the link:  https://www.facebook.com/ComputersMadeSimple


Privacy in the Cloud – Your personal files are not private or safe.


If you think your files on Dropbox or Microsoft’s Skydrive are private, think again. They’re not. Microsoft announced this week that nude photos, whether real or drawings, cartoons or paintings, cannot be uploaded to your Skydrive folder…even if your folder is set to Private. How would they know unless they look at everything users upload to their folder? As shocking as this may seem, you have to realize that anything you upload to the Internet can be seen by someone else.

Dropbox, one of our favorite free cloud companies, recently had a security lapse. Anyone could log in to any account without using a password. This went on for about four hours. In our estimation, cloud storage is neither safe nor private. Here’s how to take care of the private part. We’re going to walk you through a couple of options, one simple, one a bit more complicated, which you can use to keep your stuff away from prying eyes.

The concept: If you want to keep something private on your computer, you can use a password to protect the computer or you can encrypt the file or folder itself. When you put data up to the cloud, you assume that your password will keep it private. As we’ve seen with Microsoft and Dropbox, a password won’t keep anyone who works for the cloud company out of your stuff. Therefore, you are encouraged to encrypt it. Here’s an easy way to do that:

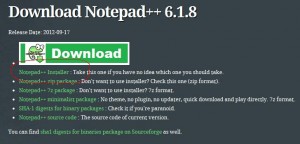
1. Download and install Notepad ++ . Get it here: http://notepad-plus-plus.org/  Notepad ++ is free and much more powerful than the standard Notepad that comes with any version of Windows. Most of you should download the installer version which is highlighted in this image:

Photo of Notepad ++ Download Page
Download the Installer version unless you know what you’re doing with the others.


2. Open Notepad ++ and type a few words. For now, it doesn’t matter what you type, even one letter will do. Here’s our example. You will notice that Notepad ++ is a bit more spartan than the regular Notepad but, believe us, it is far more powerful.

Photo of Test Text in Notepad ++
Sample text file.


3. At the top, look for the word ‘Plugins’. Click on it then click on NppCrypt then choose and click on Encrypt. Three steps represented in this image:

Photo of Notepad ++ Menu
Plugins,NppCrypt then Encrypt.


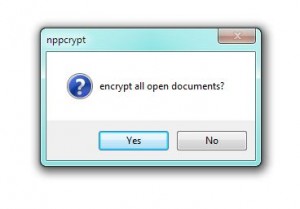
4.  Make sure that you only have ONE file open, the one you want to encrypt. This is important. If you have another text file open, you might encrypt it as well as the current file. Notepad ++ will attempt to prevent this, using this menu, but mistakes can happen, right?

Photo of Notepad ++ Menu
Do you want to encrypt all open files? No? Then close the ones you don’t want to encrypt.


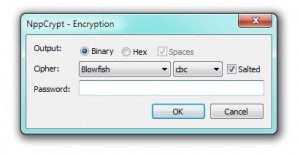
5. You’ll see a faint line of open documents in the second and third photos above. Click on your open files and close them down, one by one. Then click on Yes, simply because you only have one file open and you want to encrypt it. This menu will come up:

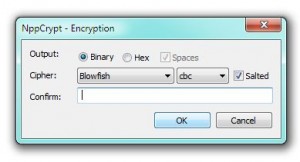
Photo of Encryption Dialogue
Enter your password here. Write it down so you don’t forget it or make it very easy to remember.


6. You’re entered the password once but Notepad ++ will ask you to enter it again. This is normal with encryption, basically making sure you didn’t commit a typo the first time.

Photo of Second Encryption Menu
Enter the password again.


7. As you will see in this next photo, the text is not encrypted. You can’t read the words until you decrypt the file.

Photo of Encrypted Text File
You can’t read the words but you can edit this encrypted file. Be careful.


TIP: The file that you have just encrypted is just like any other text file except that you can’t read it. You can delete text, add text, whatever you want. Therefore, make sure you save the file immediately and don’t make any changes in it. Why? Because you don’t know what you will be deleting if you accidentally backspace once. Sure, you can add text but it won’t be encrypted unless you re-encrypt the file again. Here is an image of a file that is partially encrypted.

Photo of Partially Encrypted Text File
We added the last part to show you what a partially Encrypted text document looks like.


As you can see, you are able to encrypt part of a text document or all of it. If you edit something that you have already encrypted, you have to re-encrypt it. We hope that makes sense. Save the file as normal, either on your computer or directly to your Skydrive or Dropbox folder. Make sure you remember the password. You can’t retrieve that password from anywhere else except your brain!

Tip: The file you have just created looks like any other text file. You cannot tell that it is encrypted until you open it. Notepad ++ will open the file but you won’t be able to read anything until you decrypt it. (Plugins, NppCrypt, decrypt then enter the password.) On the bright side, no one else can read it either!

This is step one on your journey to protect your privacy. If you don’t care about who reads your personal messages or notes, don’t worry about all of this. We feel that what we do or write or photograph is no one’s business but our’s. Employees do snoop, we guarantee it. Nothing in the cloud is private.

Next time, we’ll tell you how to create an encrypted folder that will keep prying eyes out of your cloud container. Once you put something into that encrypted folder, no one can see it without a password.

Thanks for reading!