We love WeChat. Many of our readers like it too. Our WeChat posts are almost as popular as our Facebook posts. For that reason, here’s a tip for the holiday season: Back up your chat history.
This is the time of year when many of us get new mobile devices as gifts. Sales of tablets and smartphones peak at this time of the year, at least in the western world. While WeChat automatically backs up your contact list, it doesn’t save any of your chat history. If you sign into your WeChat account from a new phone or mobile device, your contacts are there but your chats aren’t. Here’s how to temporarily save your chat history to the WeChat servers. Once you do that, you can restore the saved history to your new phone.
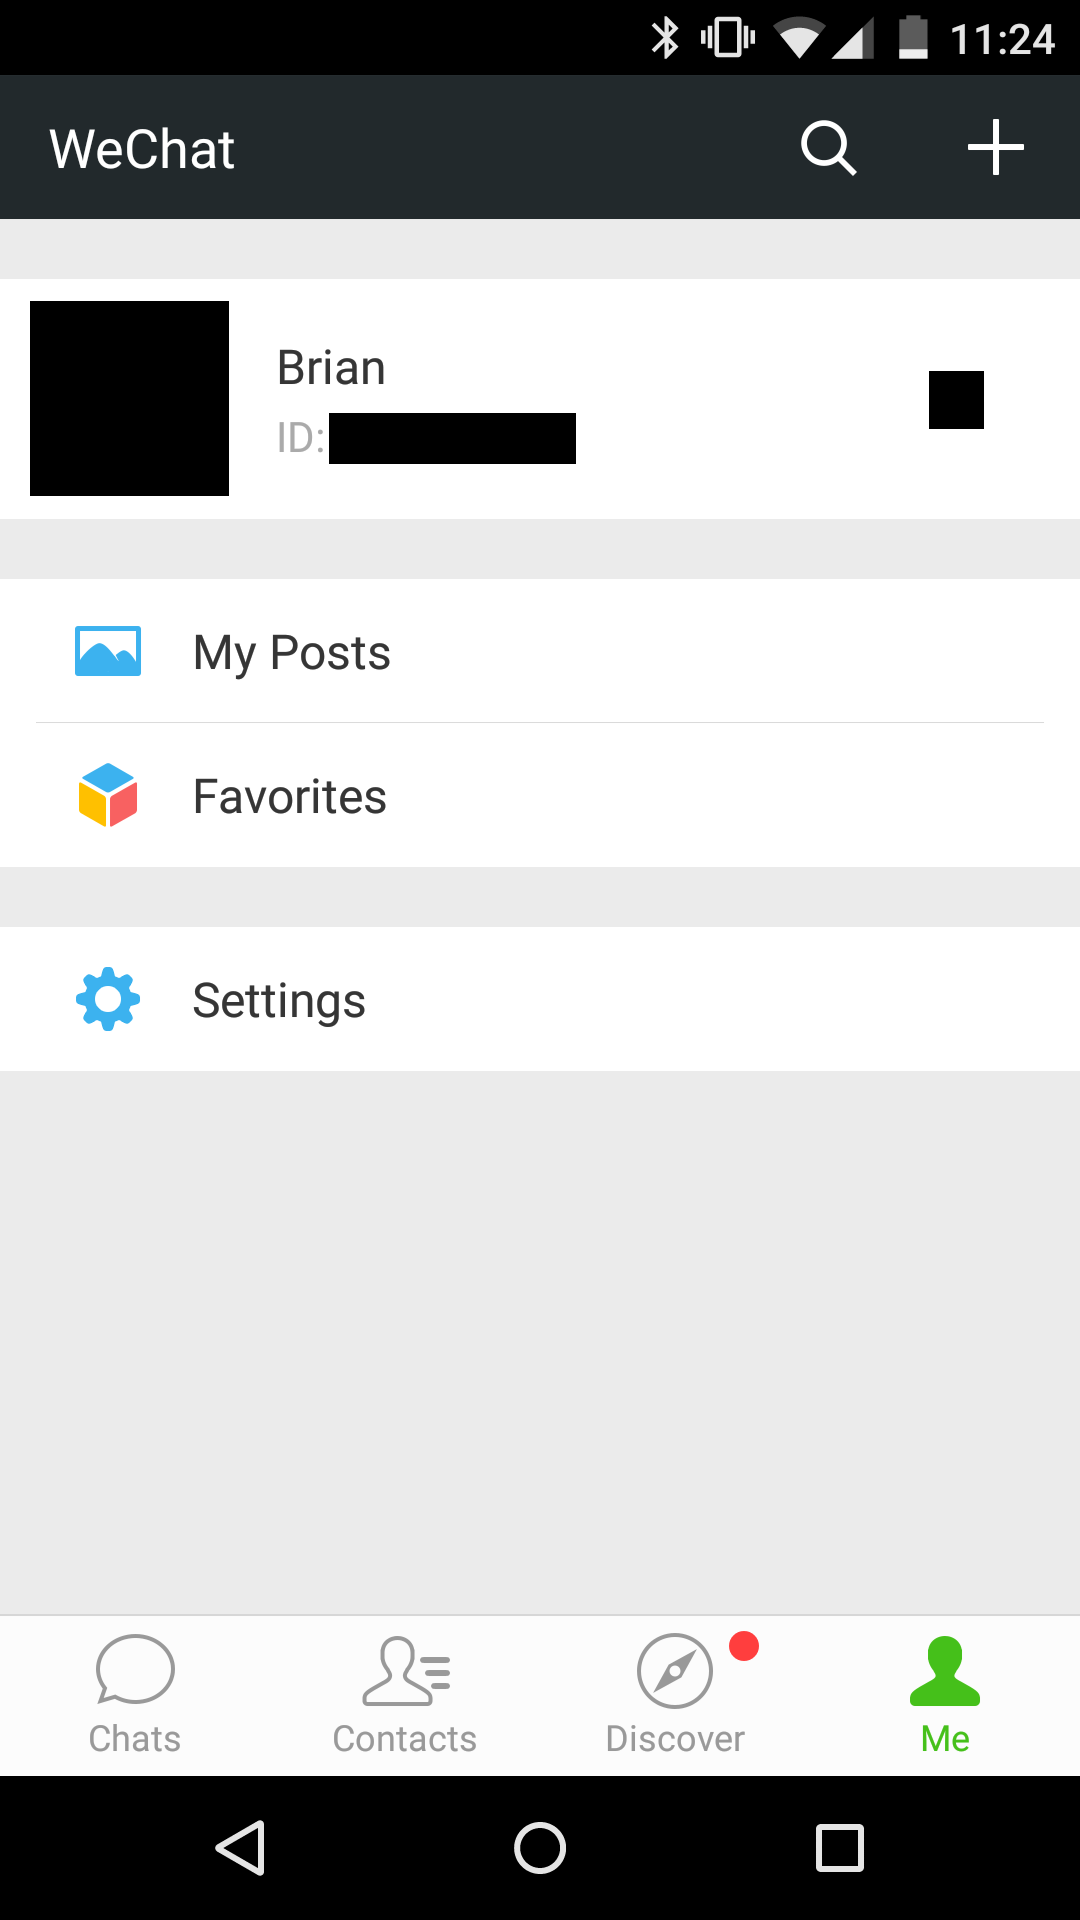
1. Head to Settings on your Me menu:
Head to your WeChat account and click Me in the lower right hand corner. Click Settings when you see this.
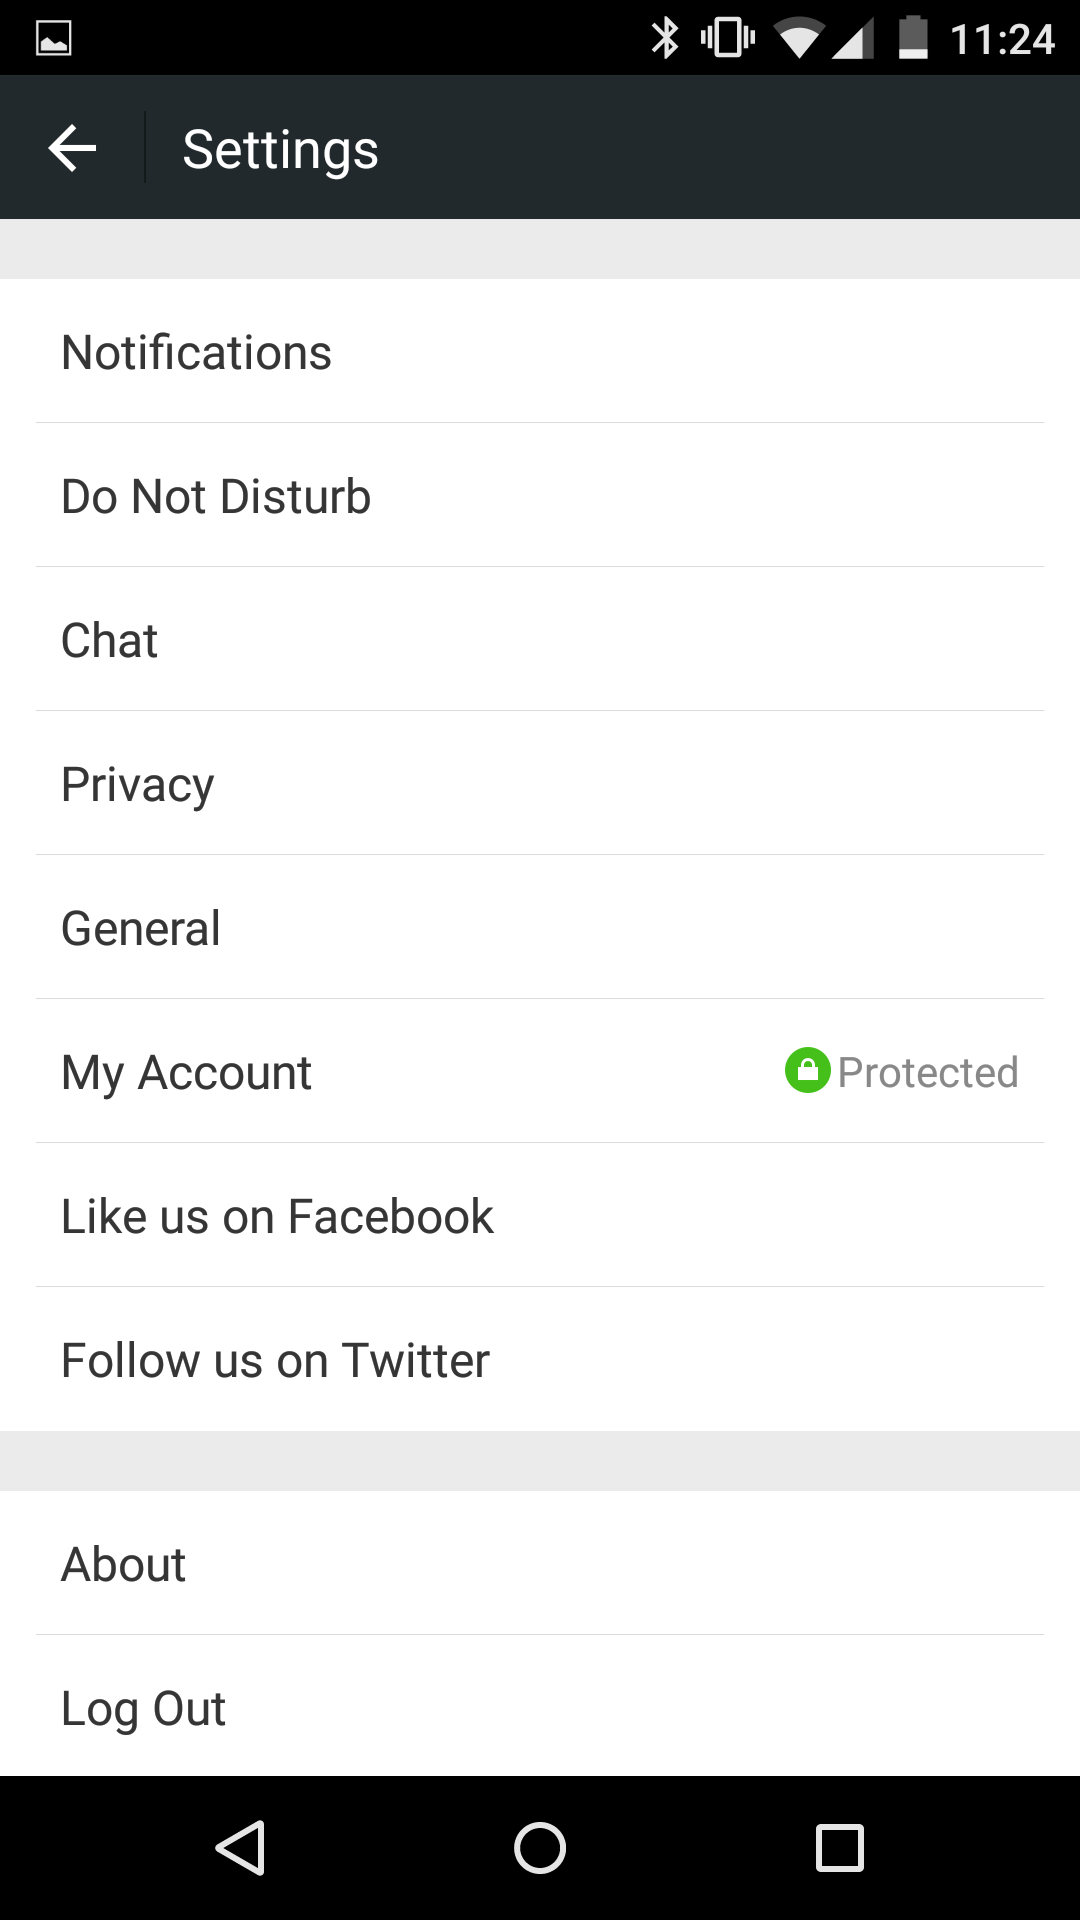
2. Look for the word Chat in your Settings and press it:
To backup your chats, press Chat.
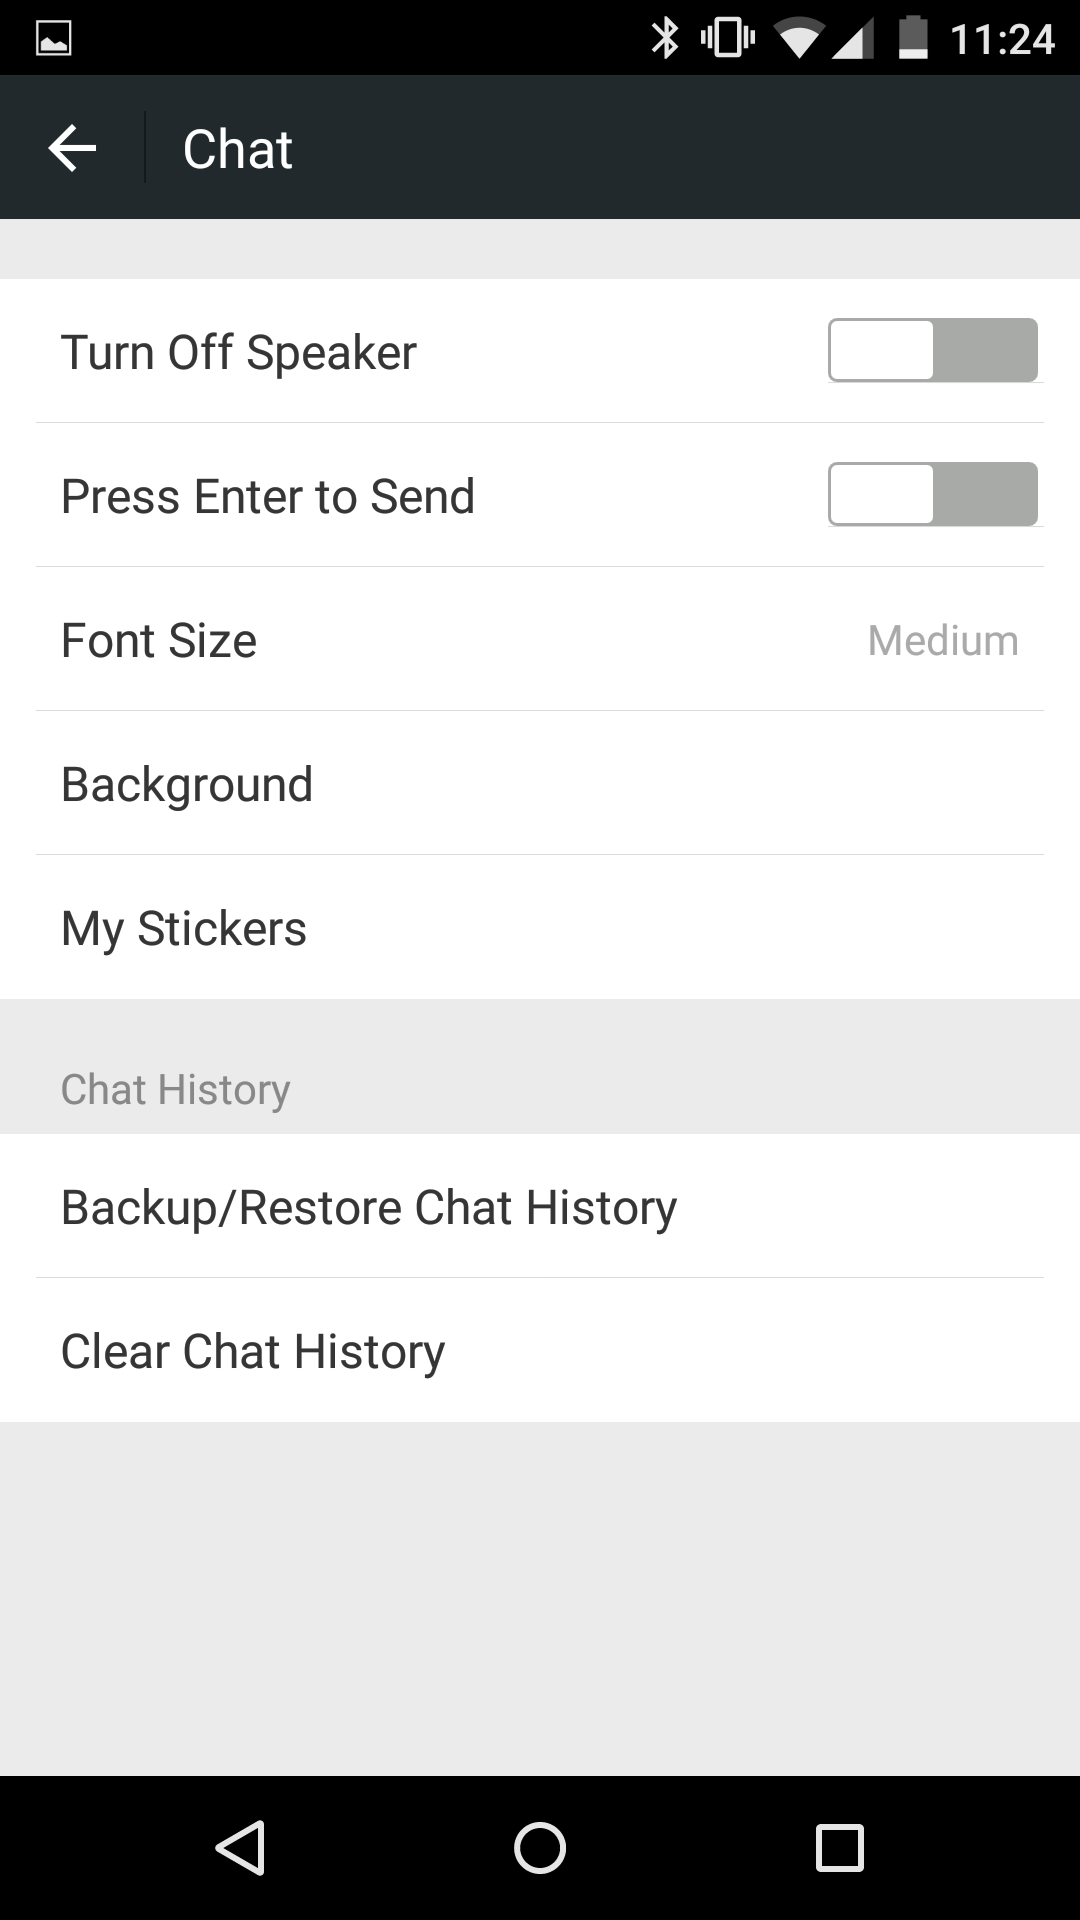
3. Under Chat History, we’re going to Backup/Restore Chat History. Backup first from this device then Restore on your new device.
Back up now, Restore later.
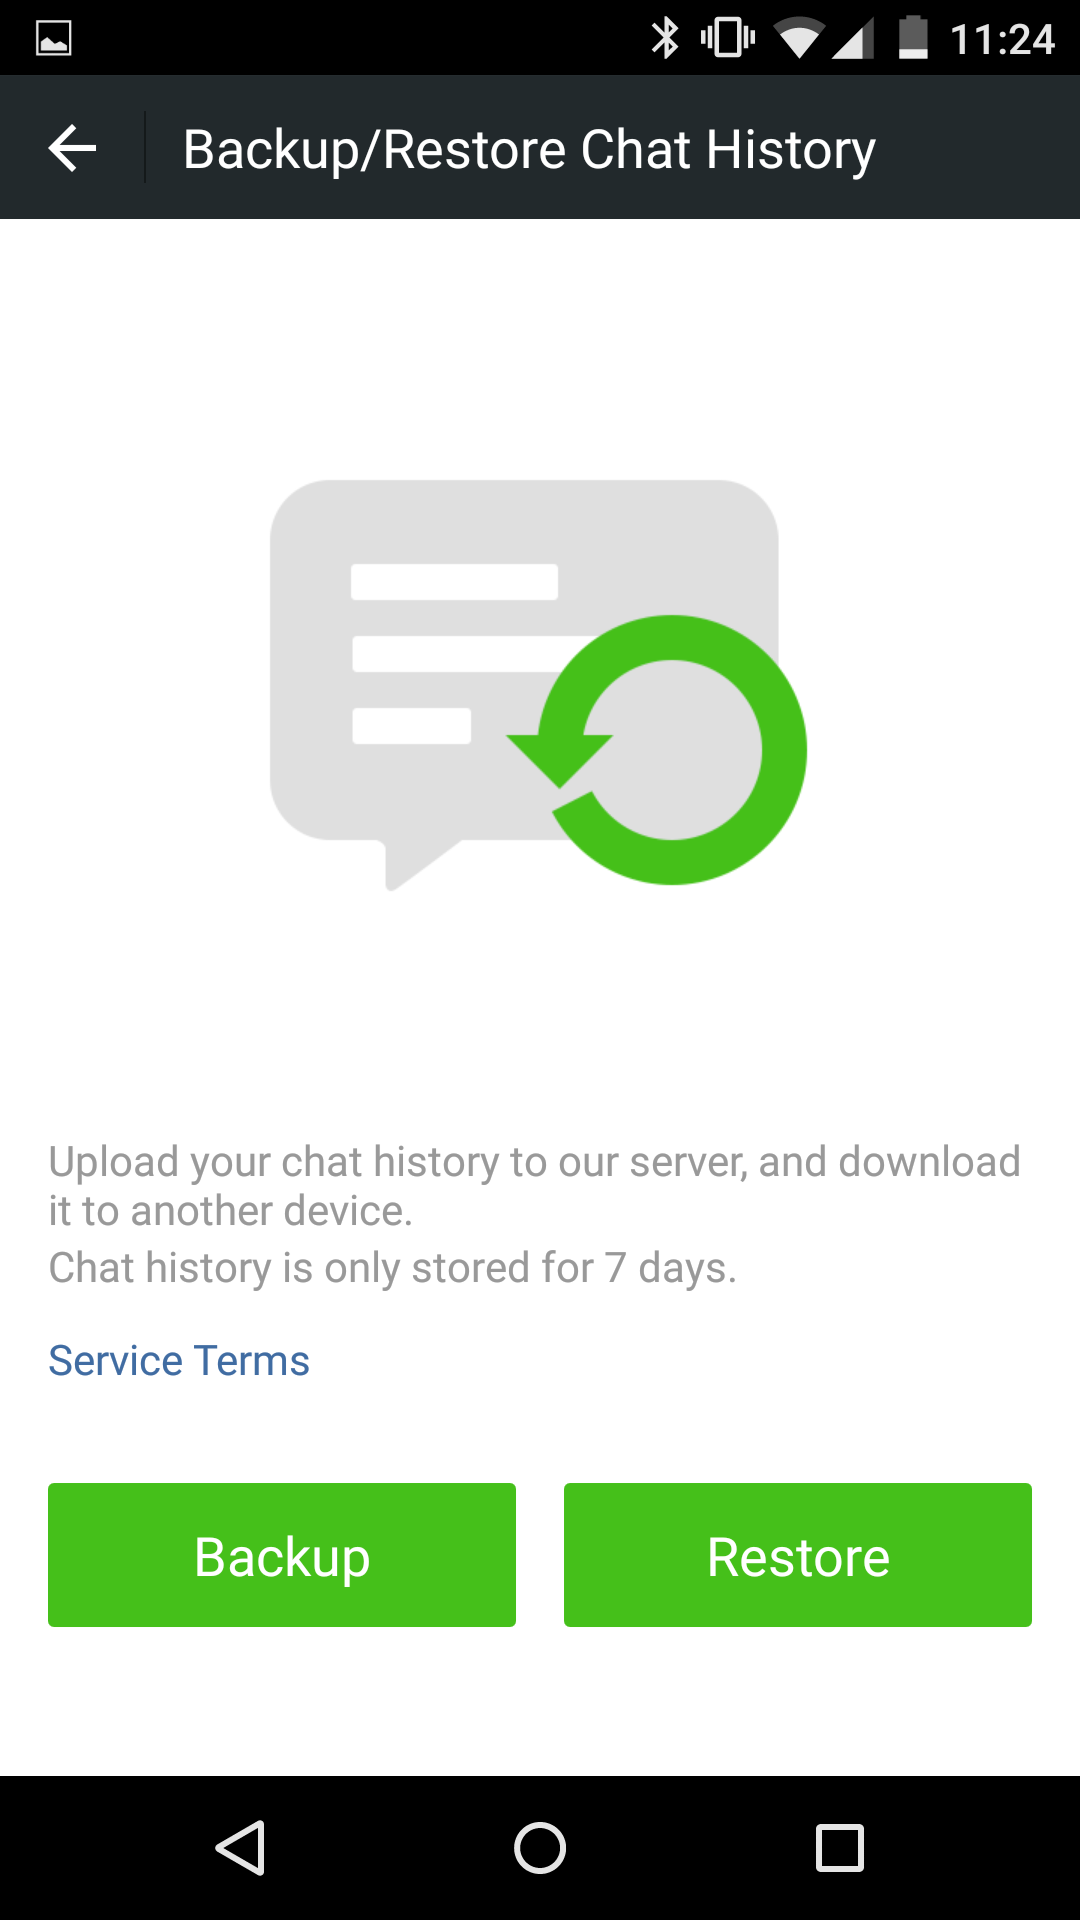
4. If you’ve got your new device all set up, click Backup. This whole process is temporary, right? Seven days is the limit.
Make sure you’re on WiFi and your battery is full then press Backup.
5. Once you’ve backed up your chats, sign into your account on your new device and go through the same steps shown here, except choose Restore instead of Backup. Depending on how large your chat record is, this whole thing could take some time. Make sure you’re on WiFi and that your battery is well charged or you’re plugged into a power outlet before you begin. If your phone dies in the middle of all of this or if you lose your connection, things will get screwed up. Prepare everything using your common sense and you’re all set.
Comments and questions are welcome but Likes on our Facebook page get immediate attention. Here’s the link: Computers Made Simple on Facebook
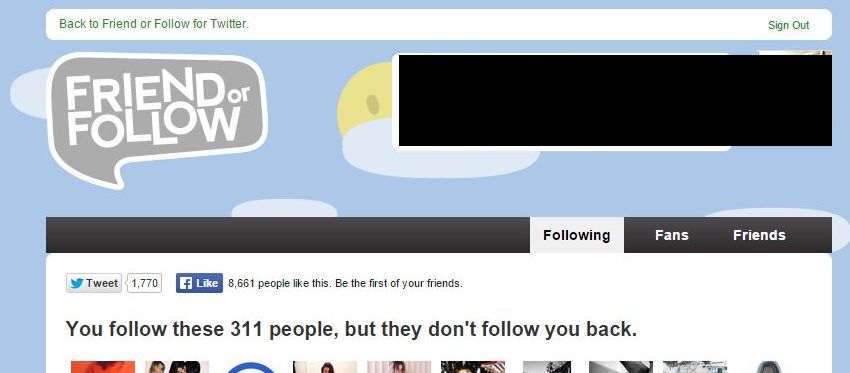
If you use Instagram, you know that many people follow you then, almost instantly, unfollow you. It seems that the principle here is to get you to follow them, then they unfollow you a bit later on, leaving you stranded. We’ve noticed lately that many start-up businesses do the same thing, it’s not just individual users. Here’s how we get rid of those tricksters once and for all.
1. Head over to insta.friendorfollow.com . If you have Instagram open on your computer, all you have to do is press the login button. Otherwise you have to enter your Instagram information. It’s safe, don’t worry about your security with Friend or Follow.
Click on the link and this is where you’ll end up.
2. Once you are officially inside the site, you’ll see three tabs across the top of the page. One tab shows Instagram users who you follow but do not follow you back. The next tab shows you who follows you but you don’t follow them back. The third tab show users who follow you and you follow back.
Here’s all you need to trim the deadwood from your follow list.
3. The most recent additions are at the top. Assuming that you’ve been using Instagram for a while, you’ve got a fair number of accounts that you follow. Your oldest follows are at the bottom. You can’t organize any of these lists of users any other way.
4. If someone has recently followed you and has tricked you into following them, they will be on the first tab, right up in the top left corner. If you hover your mouse over their icon, their mini-profile will appear. You can either unfollow them from there or you can click on their username and check out their posts. Then you can unfollow them from that page if their photo mix doesn’t meet with your approval.
Hover your mouse over any profile icon and a small mini-profile pops up. You can unfollow directly from it.
We’ve found that Instagram users play this game far more than people on Twitter. On Twitter, your followers generally stick around forever. If they don’t, there is a separate friendorfollow site for Twitter. It works the same way so there’s no need for a separate post, at least not anytime soon.
We’re winding down for the holidays but we’ll be checking for comments every day. There may be a few posts before we take a break, we’re not sure. Regardless, we love to hear from our readers. Comments and questions are welcome but Likes on our Facebook page get immediate attention. Here’s the link: Computers Made Simple on Facebook
If you’ve lost the videos that you’ve uploaded to Facebook, never fear. They’re still there. Facebook decided to move them, that’s all. They also removed the Video tab on your profile. Here’s how to get to your videos. Unfortunately we can’t get the category back, just the location of your Facebook videos.
1. Go to your own timeline. You get there by clicking on your name at the top of any Facebook page.
It’s always up at the top, click your name.
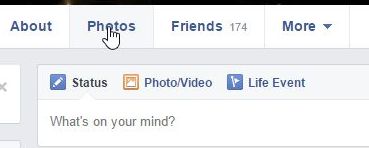
2. Look for the word Photos. Click it.
Click the word Photos.
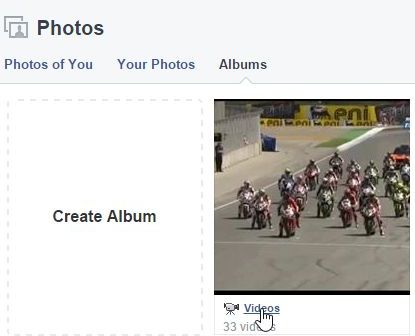
3. Once your photo page opens, look for the word Albums. Click.
Head over to your Albums to find your videos. Seriously.
4. On the album page, Videos is the first album. Cool huh?
Ah, there they are! Why did Facebook hide them?
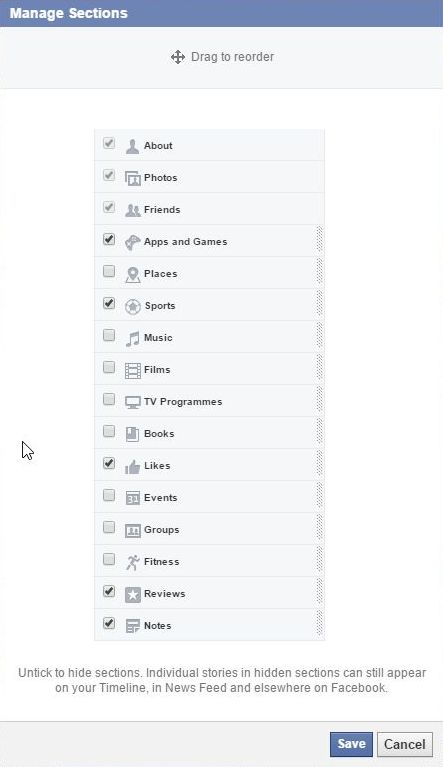
5. Now that you’ve found them, what can you do to make them more visible? Nothing. Here’s why. This is a list of what you can hide and unhide from your profile page. Unfortunately there is no separate setting for videos.
As we’ve shown you before, you can hide some of these but others you can’t.
That’s it. Now you can share some of them or, better yet, tell your friends how to find their videos by sharing this post! We’d appreciate it.
Comments and questions are welcome but Likes on our Facebook page get immediate attention. Here’s the link: Computers Made Simple on Facebook
There’s a new twist in the Windows 8/Google Chrome situation. For whatever reason, Windows 8 won’t allow Chrome to update itself to a new version. One of the main reasons to use Chrome is that it updates itself, if necessary, every time you open it. That’s changed for Windows 8 users and, perhaps, for users of older versions of the Microsoft O/S. Here’s one version of the error you get when you try to update Chrome when it says your version is outdated:
The error message has more than one form but this is a typical one.
Here’s how to get Chrome to update itself.
Note: This technique requires you to have admin privileges on the computer you are updating. If you don’t, get the person who does have them to do this. It might be better to print this page so you don’t have to go back and forth between windows.
1. This update requires you to install a template. Don’t worry, you can’t break your computer doing this so relax. A template is a small file that you ask Windows to install for you. After that, you change some of the parameters in the template. No big deal, no chance of ruining something. If you miss a step, Chrome can’t update until you go back and fix things. Everything else will work fine if you follow the steps as we describe them. Get the template here: Google Chrome Group Policies Template That should be a direct download. If it doesn’t work, go here and download it. The file should go to your Downloads folder. If it doesn’t, you’ve changed the settings so make a note of where the file is saved.
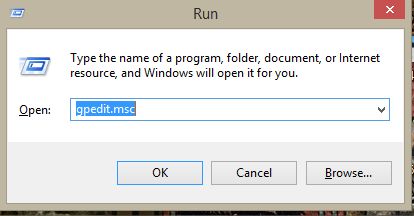
2. Next, we’re going to find and use the Run dialogue, the one that used to be just above the Start button. Press the Windows key on your keyboard and r (at the same time). A small window will open, like this:
Enter the letters are you see here.
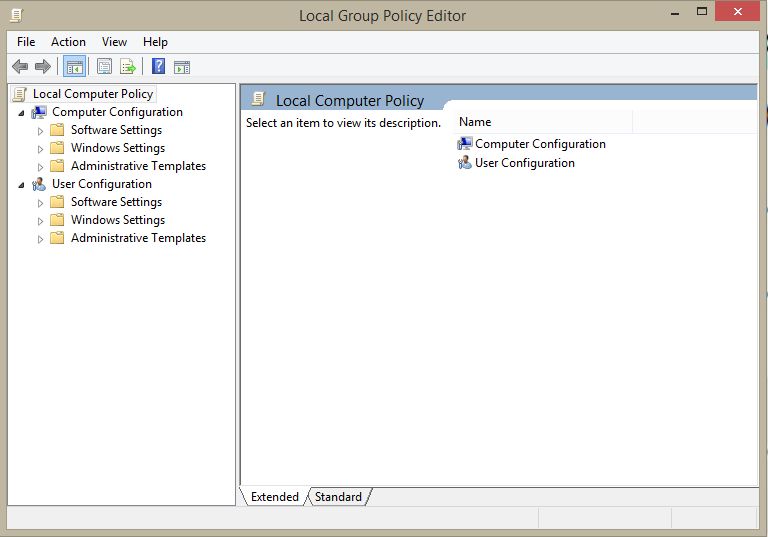
3. When it does, type gpedit.msc in the box, exactly as you see in the photo. Another menu will open after a brief pause while Windows thinks about it. This is what you’ll see next:
Here’s the group policy editor. Two panes, left and right. We will be working in both.
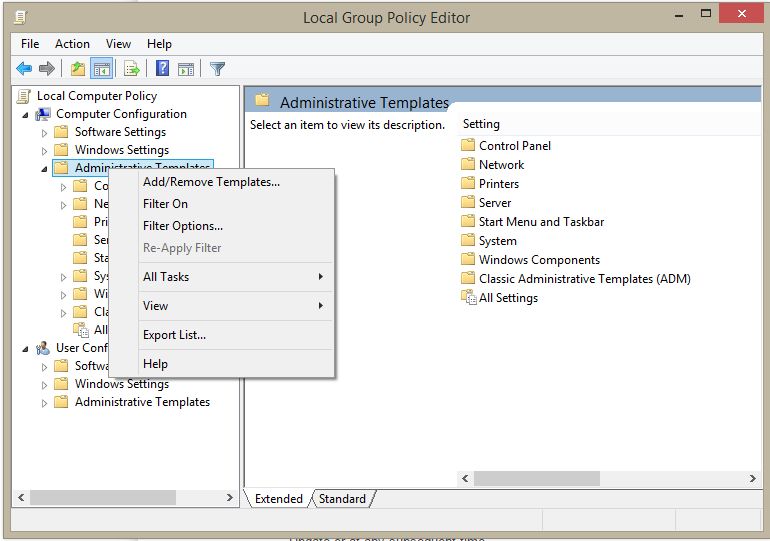
4. You’re going to be working in the right pane later on but right now, look for Administrative Templates in the left pane. Right click it and choose Add/Remove Templates. This tells Windows that you want to add the file (template) that you just downloaded.
You want to Add a Template so choose the Add/Remove line.
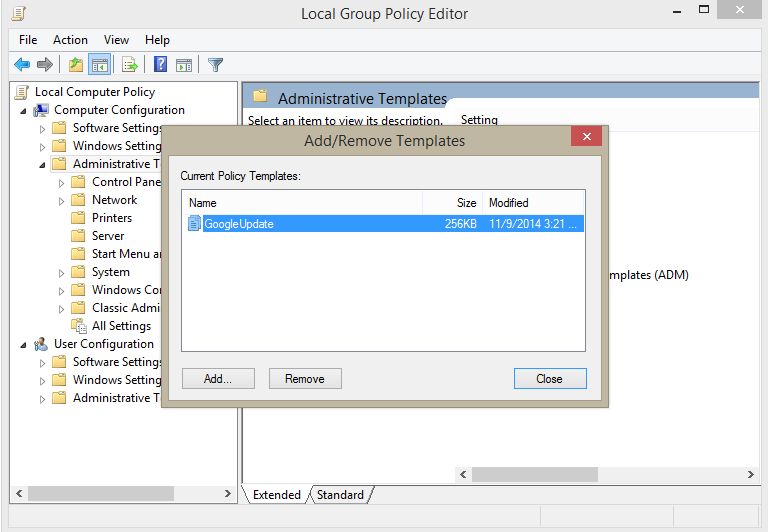
Another menu pops up, like this:
We have already added the template so it shows up here. Your window will probably be empty.
5. Note that your menu should be empty while ours has the Google Update already installed. Don’t worry if the box is empty, click on Add.
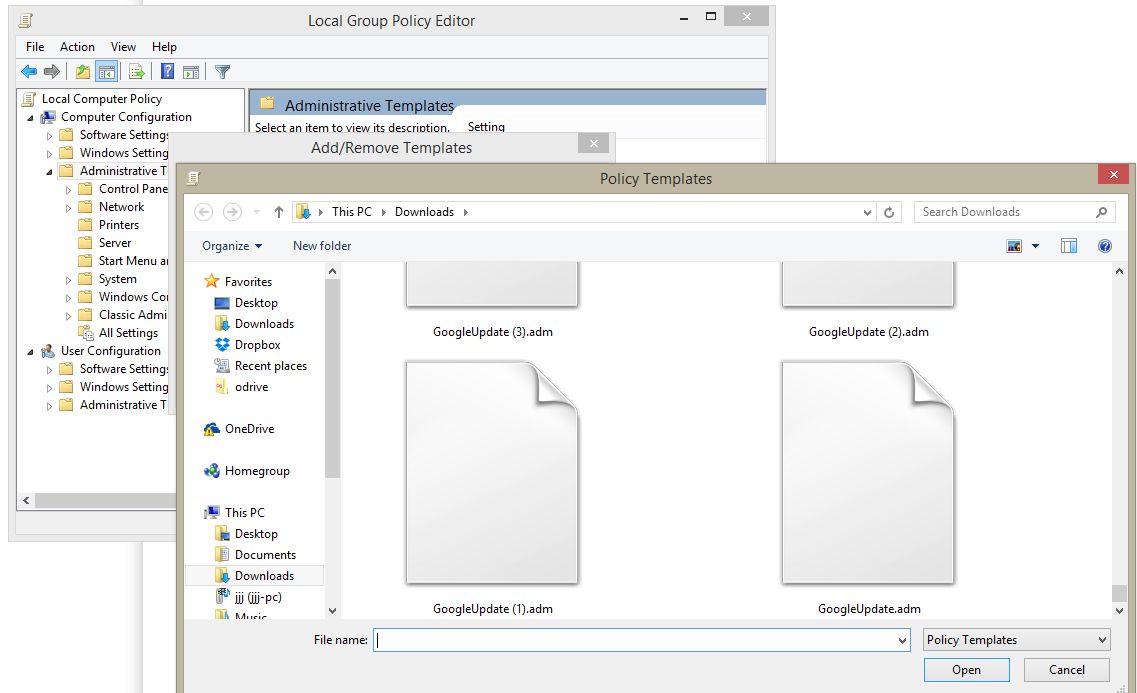
6. Navigate to your Downloads folder. The only file that should show up, other than any folders you have there, is the ‘adm’ file from Google. Click it then click Open down on the bottom right.
As you can see, we checked our link four times. The adm file is the only one that shows up…four times.
7. In the previously blank menu, you should see Google Update, a file size and today’s date. Click Close to add the template to Window’s list of templates. Note: This window is a bit confusing. Normally, the ADD button would ‘add’ the template but here it’s only used to find the template on your computer. Once you see the template in the menu box, close the box and the adm file is added to the list of templates.
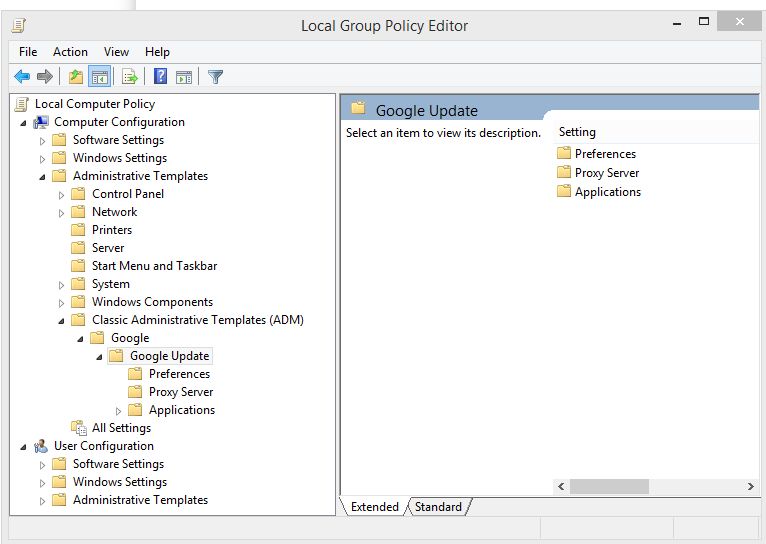
8. Back to the left side again. You should probably click on the box to the left of the X icon. That will open the menu to full screen. (Print this post so you can keep track of what you’re doing.) On the left side, click on the following arrow icons, just to the left of the words you will see next: Administrative Templates then Classic Administrative Templates (ADM) then Google then Google Update. If you’ve followed us so far, this is what you’ll see on your screen:
Left pane/right pane. You choose what you want to edit in the left one then edit it on the right.
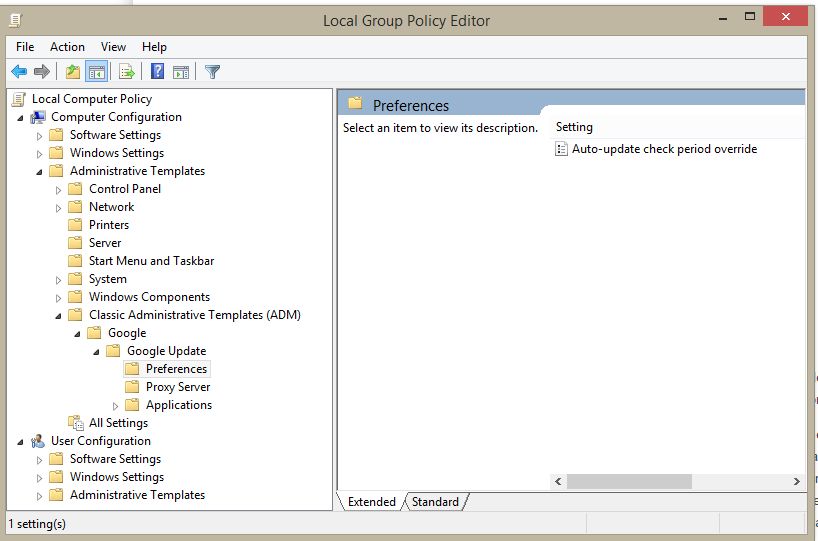
9. Here’s a tip to help you navigate through these menus. In the left pane, you just have to click on one of the folders to open it. In the right pane, you have to double click a folder to open it. The folder we want to open first is the one that reads Preferences. Once it’s open, this is what you’ll see:
Click on the folder in the left pane then you’ll see the file in the right pane that you want to edit.
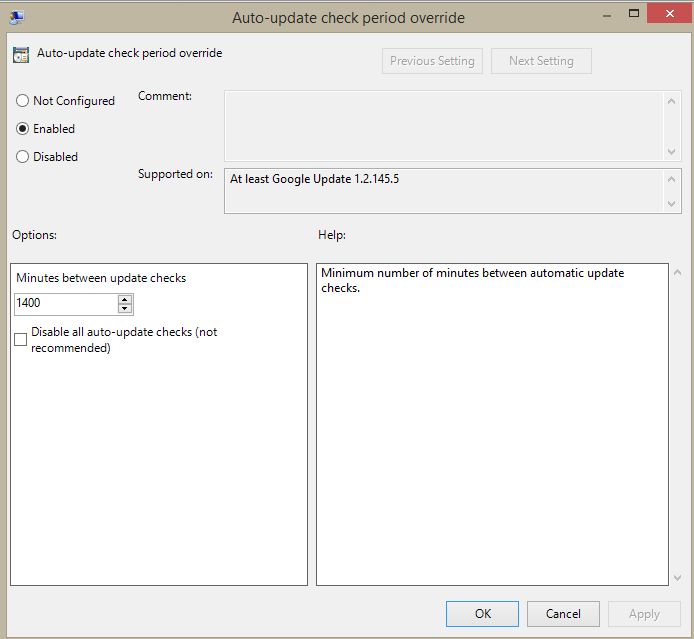
10. Over to the right side now. Under the Setting tab, you’ll see Auto-update check period override. You can open this two ways, first by double clicking it or simply by clicking one and choosing the link ‘policy setting’ that pops up. Make sure your box looks exactly like ours, click Enabled to choose it and set the minutes to 1400, if that is not set already. Click OK to save this step.
You want all of the boxes that you edit to read Enabled and/or allow updates.
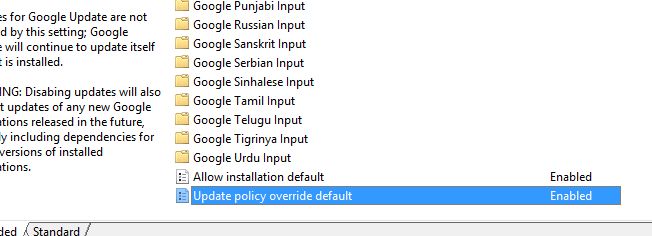
11. We’re finished with Google Update so let’s look a bit farther down the list on the left and find Applications. Click the word Applications once and a full list of folders opens up in the right pane. Guess what? The one we want is waaayyy down at the bottom of the list. Scroll down until you see Update policy override default. Our setting is Enabled but yours won’t be until you change the settings. You can either double click that line or highlight it by clicking once then clicking on the words ‘policy setting’ up at the top in the same pane. This is what comes up next:
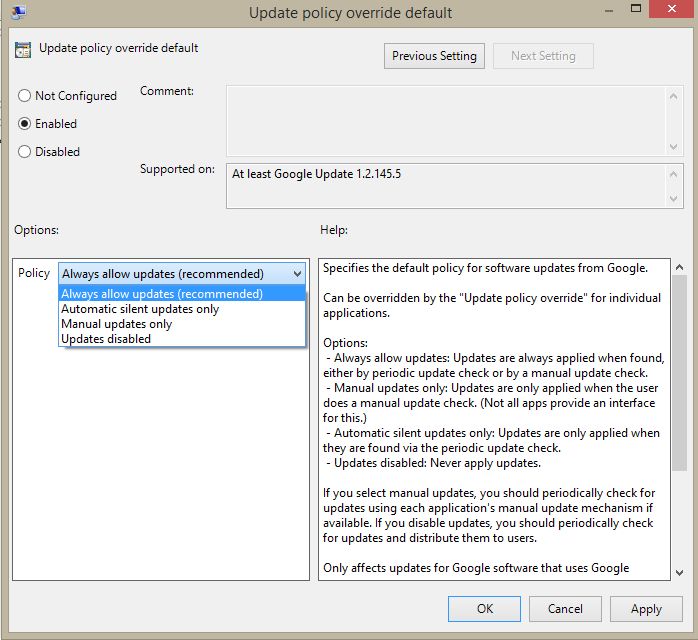
On the bottom of the right pane are two settings that you have to open and change separately.Enabled and then Always allow updates. Click Apply then OK.
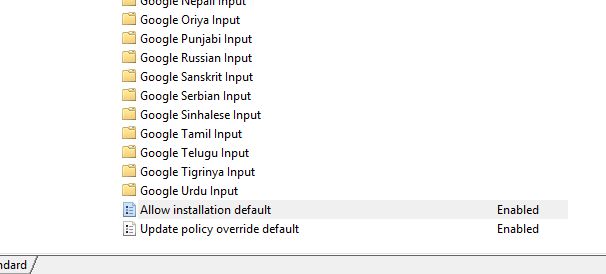
12. Make sure you choose Enabled then click on the arrow in the Policy pane and choose Always allow updates (recommended). Click Apply then OK to save your changes. Next, go back to the bottom of the right window and open the ‘Allow installation default setting’. It’s right above ‘Update policy override default’ that we just changed.
Second from the bottom.
13. In this window, choose Enabled then press Next Setting. In that window, choose Enabled also. Then click Apply and OK.
14. You’re almost done, don’t worry. At this point you’re a pro so we won’t hold your hand for the next four steps. Move back to the left pane and look for two folders: Google Chrome is one. Google Binaries is the other. They aren’t too far from the top. Once you’ve found the first, Chrome, change the two settings on the right EXACTLY the same as you did for step 11 and 12. Click Apply and OK for Chrome then move to Chrome Binaries and do the same thing for it. Two boxes, change them to Enabled and Always allow updates. That’s it!
15. In total, you have added one template and changed seven settings. Close the Local Group Policy Editor down, close Chrome then reopen it. On the top right of the page, click on the three horizontal lines and choose About Google Chrome. If you’ve done everything correctly, Chrome will run through the update routine and install the latest and greatest version of itself. Pat yourself on the back and smile. You did great!
Yes this is a long post but it’s not something we could do in two parts. If you have problems, let us know. We’ll see what we can do to help.
Comments and questions are welcome but Likes on our Facebook page get immediate attention. Here’s the link: Computers Made Simple on Facebook
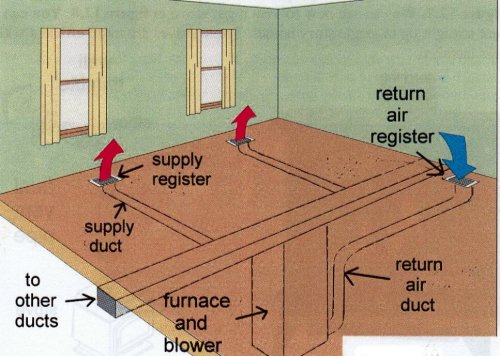
Efficient heating and comfort go hand in hand. The more efficient your furnace is, the more comfortable you will be. In our last post we discussed humidity and how the amount of water vapor in the air affects your ability to feel warm or cold. Today we’re going to show you how to get that air to where it’s needed in your house. Here’s what a basic furnace air distribution system looks like:
Cold air goes in, hot air comes out. Simple, right?
This photo shows the warm air vents that you will probably recognize but it also shows the cold air return vent, something you might not know about. Heating a house is based on two principles. The first is getting the hot air to where it’s needed. The second is to get the cold air back to the furnace in order to make it warmer. Sounds simple, right? It’s not as simple as you might think. There is another principle involved here, one that affects your comfort both summer and winter: warm air is lighter than cold air. Let’s see how that makes a difference.
If your house has a basement or lower level, you’ve probably noticed that it feels cooler down there than it does in the rest of the house. Since your furnace is almost always in the basement, this makes sense, doesn’t it? Well, it only makes sense if that cold air in the lower level of your house can get to the furnace to be warmed up. Remembering that cold air is heavier, the return vent in your basement has to be at floor level. That’s where the cold air is. If the cold air return isn’t on the floor or doesn’t even exist, then you’ve got a problem.
Many older homes don’t have a cold air return vent. No matter how much hot air you pump out of the warm air vents, the cold air pools at floor level while the lighter hot air rises to the ceiling.Your first job is to locate the cold air return vent in your basement or lower level. If there isn’t one, you will need to call a contractor or make one yourself.
TIP: Make sure that all of your cold air return vents are open and not covered up by carpeting or furniture. If the cold air can’t get back to the furnace, its efficiency goes down. So does your comfort level.
Once you get the cold air return problem fixed, look for these contraptions on the hot air ducts, the skinny pipes that run all over your house and are connected to the floor/ceiling vents (where the hot air comes out):
These don’t all look the same but the basic principle is the same for all of them.
These dampers control the flow of air through your duct system. In order to increase your furnace’s efficiency, and your own comfort level, these dampers have to be set correctly. The problem here is that you have to do this tuning twice a year. Why? Go back to the old ‘warm air is lighter than cold air’ principle. These dampers need to be set to control hot air in the winter then reset to control cold air in the summer, assuming that you have central air conditioning. Here are some tuning tips for you:
1. Usually, the furnace is located at one end of your house. That means that some hot air ducts are shorter than others. The longest ducts go to the back of the house. The shorter ones go to the room(s) directly above the furnace. Common sense should tell you that these short ducts don’t need to be fully open to work. Using the same logic, those long ducts should be open as wide as possible. The dampers on each pipe control how much air is allowed through it.
2. Your winter tuning should ensure that the rooms that you want to be warmest get the most hot air. Normally these rooms would be where you sleep but, depending on your home’s orientation to the sun, you might want that heat to go to other rooms.
3. In the summer, your home’s orientation is more important than it is in the winter. The rooms that get heat from the sun need more cool air, right? Again, you’d probably want most of the cold air to go to your sleeping area. If you’ve shut down air to those rooms for the winter, you have to adjust the dampers for the summer. Every home is different, obviously, so all we can give you are tips that you can use to help your efficiency.
4. Ideally, a multi-story (storey in Canada and Europe) house would have the furnace in the basement and its air conditioning unit on the roof. Why? The hot air/cold air thing, that’s why. Your furnace fan has to work doubly hard in the summer because the cold air from your air conditioning unit is much heavier than the hot air it pumps out in the winter. Warm air rises, cold air falls. Keep this in mind when you’re tuning your ducts. Close down the dampers for the lower part of your house in the summer, open the dampers for the rooms in the upper section.
TIP: If your home doesn’t have central air conditioning, try running your furnace fan on hot days. The cold air that has pooled in your basement/lower level will be sucked up and distributed throughout your house. You can frequently lower the temperature by a few degrees this way.
If you use these tips and some common sense, you’ll most likely find yourself feeling more comfortable in your house. You just might find some savings on your energy expenses too. Win/win!
Comments and questions are welcome but Likes on our Facebook page get immediate attention. Here’s the link: Computers Made Simple on Facebook
Thanks for reading!
a little bit of hi-tech, a little bit of common sense and a lot of fun