DVD Ripping with DVDShrink

In our last post we showed you how to author a DVD using DVDFlick. Here is the link for that: DVD Authoring with DVDFlick. Today we’re going rip a DVD. Essentially, ripping is copying. Using this system you can make a backup copy of just about any DVD that you own. We specify ‘own’ here since copying a disc that you don’t own is theft, at least according to most governments. Let’s get going.

1. Download and install DVDShrink. Get it here: dvdshrink.org  Do NOT download DVDShrink from any other site. The software is free and always has been free. Don’t ever pay for it.

2. Load the DVD that you want to copy. Basically that means to put it in the DVD burner in your computer. Don’t play it. If your DVD player starts up, close it down.

3. Open DVDShrink. This is what you will see:
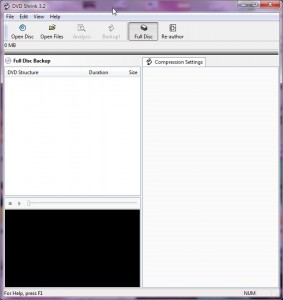
Photo of DVDShrink Menus   1
DVDShrink has a very clean, simple layout.


2. With the DVD movie in your DVD burner, click the Open Disk button. DVDShrink will automatically find your DVD burner and it will already know the movie’s title. Here’s what you’ll see next:
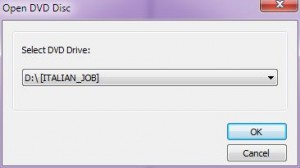
Photo of DVDShrink Menus   2
Most DVD drives are D;/ but yours may be different. Regardless, click OK if this is the movie you want to copy.


3. DVDShrink then analyzes the movie. You can see a preview while it works or turn the preview off, no matter.
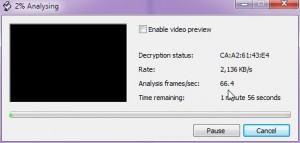
Photo of DVDShrink Menus   3
This process takes a few minutes so grab a coffee or check your email.


4. Once DVDShrink has finished its analysis, you have some decisions to make.
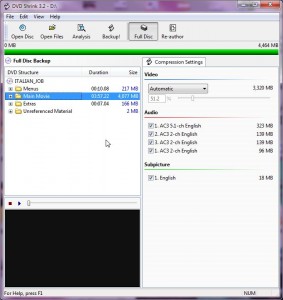
Photo of DVDShrink Menus   4
Here is your movie, broken up into bits and pieces.


Usually there are other languages in the right panel, Spanish and French, for example. Un-check the languages that you don’t want on your new DVD. Each time you un-select a language, the more room for picture you have on the disk. Here’s the explanation for that:

TIP: DVDs, the non-BluRay ones that you buy in the store, are normally around ten gigabytes in size. They are burned onto DVD stock that has dual-layers which simply means that they hold more stuff. The normal blank DVDs that you buy usually only allow 4.7 gigabytes of storage. Here’s where the word shrink comes in. DVDShrink takes the full movie on the original DVD and shrinks it down to a size that fits your blank 4.7 gigabyte DVD. See the green line at the top of the photo above? That means that the full movie can fit on a normal DVD blank. Farther down, look for the box with 51.2 % in it. DVDShrink has made the movie about half the size it was before. Any time you uncheck something, there is less material to put on the disk so the video quality can be improved.

What does this mean to you? Simply that the video on your copy will not be a crisp and clear as it is on the original. Most people won’t notice the difference. All we are saying is don’t expect a perfect duplicate. (You can get dual-layer blanks but they are very expensive. 4.7 gigabyte blanks are priced at 100 for less than $20.00 here in Toronto. Use Verbatim brand only, preferably ones made in Japan. Don’t buy no-name disks, whatever you do.)

5. You can choose to not burn the Extras or extra languages which makes the video quality better. Don’t worry too much about this since the extra quality is minimal at best. Once you are ready, click the Backup! icon at the top. The backing up process takes a while, depending on the speed of your computer. DVDShrink will store the files it creates on your C:/ drive using the name of the movie to identify them.

6. When the software has finished, you can burn the files to a DVD and play them on any DVD player you own or on any computer. If you have Nero Burning Rom installed on your computer, DVDShrink will burn the DVD to a blank disk for you. You have to take the movie DVD out then insert a blank DVD, obviously. If you don’t have Nero on your computer, we will show you how to burn this DVD using Burnaware. That’s for next time. Stay tuned.

Thanks for reading! Questions or comments are welcome. You can also ask questions on our Facebook page. Here is the link: Computers Made Simple on Facebook 

______________________________________________________

Here’s a link that might help us if you are interested in hosting your own blog with Fatcow Hosting. We’ve signed up to become an affiliate and we make a bit of money if you sign up for hosting via this link: FatCow Hosting Thanks!


DVD Authoring with DVD Flick

Instead of watching a video file on your computer, you might want to see it on the big TV screen in your living room or family room. While you could hook up your computer to your HDTV, it’s sometimes easier to simply pop a disk into your DVD player. How do you get a video file from your computer onto a DVD disk that you can watch on any tabletop DVD player? Here’s how we do it:

NOTE: You need a DVD burner for this project. Virtually every computer, whether it’s a laptop or a desktop, comes with a burner. If not, you can pick up an external USB burner for under $40.00.

1. Download and install DVD Flick. It’s free, don’t worry.

Photo of DVD Flick Authoring     1
Free and fast, DVD Flick is open source. An excellent product.


2. When DVD Flick is ready to go, find the video file that you want to make into a DVD and open it, either drag it into the DVD Flick interface or use the Add button on the GUI. DVD Flick will work with just about any video file, even home movies that you shoot with your camcorder or digicam.

Photo of DVD Flick Authoring     2
Click Add title and find the video file on your computer.


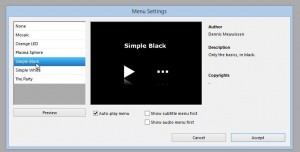
3. DVD authoring means that you’re taking a plain video file that you watch on your computer using VLC Media Player or Windows Media Player, etc., then adding a clickable menu that looks almost the same as a DVD that you buy in a store and burning it to a writable DVD disk. This final product can be played in any tabletop DVD player as well as in any DVD player in any computer, Mac/Linux or Windows. That means that you have to tell DVD Flick which menu style you want to use. Click Menu Settings to see the choices and make your decision:

DVD Flick Authoring     3
We like the Simple Black option.


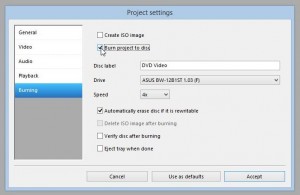
4. You have to set some parameters for DVD Flick. Click on Project Settings to see this:

Photo of DVD Flick Authoring     4
Click on the Burning tab and choose ‘Burn project to disk’, type the name you want to see on the menu, but leave Speed at 4. You’ll get a better disk that way. 


5. If you’re going to burn a few copies of the same disk, name your project and save it. That way you can burn the same video at some later date without having to do everything again.

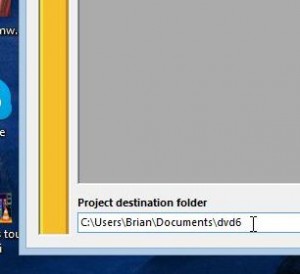
6. Once you’ve got everything set, you have to tell DVD Flick where to save the temporary files it creates in order to make your DVD. Basically, it takes your video file and converts it into a package, according to the parameters you’ve just set, then burns the whole thing to a blank, writable DVD disk. Once you make sure the DVD works, you can go back and delete the files but, for now, look down on the bottom left of the GUI. DVD Flick saves the first DVD you make in a folder named ‘dvd’, usually in your Documents folder. You can either name each folder with the name of the video or add a number at the end of ‘dvd’ as we have here:

Photo of DVD Flick Authoring     6
We’ve burned six separate DVDs, as you can see.


That’s pretty much all you have to do. When you’re ready, click ‘Create DVD’ up at the top, after making sure you have a blank DVD disk in the burner.

NOTE: We have wondered how many videos we can put on one DVD. The answer doesn’t seem to be out there but we’ve figured out that if you use a time limit of about an hour and a half, you’ll be fine. If the video you are burning isn’t great quality to begin with, it is possible to get a couple of full-length movies on one DVD. If you’re burning home movies, you can create separate menu titles for each one.

Lastly, this process is NOT for ripping a DVD that you have purchased. DVD ripping (copying) is not the same as authoring. We use DVD Shrink for ripping. It’s free and we may write about it at some point later on.

Thanks for reading! Questions or comments are welcome. You can also ask questions on our Facebook page. Here is the link: Computers Made Simple on Facebook 

_______________________________________________

Here’s a link that might help us if you are interested in hosting your own blog with Fatcow Hosting. We’ve signed up to become an affiliate and we make a bit of money if you sign up for hosting via this link: FatCow Hosting Thanks!
How to Change a Facebook Video Thumbnail

We don’t upload many videos to Facebook but some of our friends do. Facebook chooses a default thumbnail for your video but here’s how you can choose your own.

1. Find the video on your timeline and click on its title.

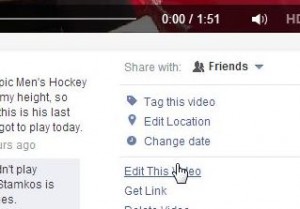
2. After the video page loads, click on ‘Edit This Video’. Like this:

Photo of Facebook Edit Video
Find the video on your timeline then click the title to bring up this page. Click Edit Video.


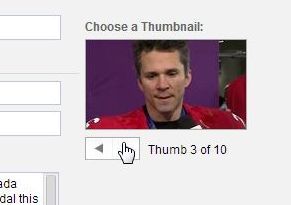
3. The Edit Video page comes up which allows you to tag people in it, change the title, etc. You can also choose the thumbnail that your friends see on their page. Click through the choices, we had 10 available, until you find the one you want. Your choices are limited, probably it depends on how long the video is, but you should be able to find one that suits.

Photo of Change Facebook Video Thumbnail
Scroll through the choices for the thumbnail that your friends will see.


4. Don’t forget to click ‘Save’ before you exit the page.

Photo of Click Save
Click Save


That’s it! It seems simple now but it’s not exactly intuitive, is it? If you have problems with anything else on Facebook, let us know.

Thanks for reading! Questions or comments are welcome. You can also ask questions on our Facebook page. Here is the link: Computers Made Simple on Facebook 

__________________________________________

Here’s a link that might help us if you are interested in hosting your own blog with Fatcow Hosting. We’ve signed up to become an affiliate and we make a bit of money if you sign up for hosting via this link: FatCow Hosting Thanks!
 

How to Spot a Forum Spammer

One of the biggest threats to any forum or website is spam. There are thousands of people from all over the world whose sole job is to find unprotected sites with the aim of spamming them. We use Akismet on this site but we can’t protect our new forum this way. Here’s how we keep the forum free from spam.

First off, here’s a link to our forum: GTWorld.ca One of the games we play is the Gran Turismo series and this forum is purely about that. As you will see, we’ve set up a two-step registration process. First, a forum administrator must approve all new registrants. Second, anyone who wants to join the forum must send an email containing their Playstation Network ID in it. We get an email when there is a registration request. We then head to the forum to check. Here’s what we see:

Photo of Inactive Users/New Registrants
New registrants are classed as ‘inactive users’ until we approve them.


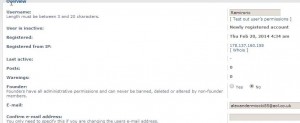
If we click on the username, this is what we see next:

Photo of Inactive Users/New Registrants 2
The username and email are there. Let’s see if the email address is from a spammer. Highlight it and click copy.


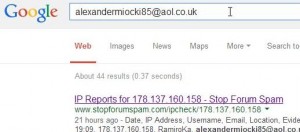
The email address sounds legitimate. Why do we suspect that it isn’t? Because we have not received the user’s PSN name in an email, that’s the first clue. We copy and paste the email address into Google. Like this:

Photo of Spammer Revealed
If the email address has been used before, we’ll find that out here on Google.


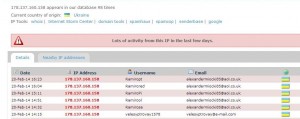
We’re in luck. This email seems to be quite popular on the most popular spam checking site, stopforumspam.com. This is the report we get when we click on the first link:

Photo of Spammer Identified
Yay! We’ve identified our new registrant as a spammer. Into the trash bin he goes.


Even though the email says that the user is from the United Kingdom, this site tells us that he is really from the Ukraine. That in itself is an important piece of information. Now, if you think that this process is a waste of time, we have to say that we get multiple spam registrants every day. If we gave these people access to our forum, it would be full of spam in a very short time. We think it’s worth it.

Thanks for reading! Questions or comments are welcome. You can also ask questions on our Facebook page. Here is the link: Computers Made Simple on Facebook 

____________________________________________

Here’s a link that might help us if you are interested in hosting your own blog with Fatcow Hosting. We’ve signed up to become an affiliate and we make a bit of money if you sign up for hosting via this link: FatCow Hosting Thanks!


New Email Threat – Don’t Open Emails from Efax

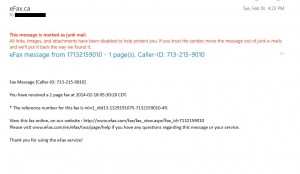
We’ve noticed a new email threat, this one involving a notice from Efax which tells you that a new fax has arrived. In the email there is a link, supposedly to the fax, which the sender expects you to click. If you do happen to click the link, you’re taken to a completely different site, not the Efax site that is indicated in the link. At that point you might download the file, a zip file which has ‘pdf’ in the name. In that zip file is a virus and/or malware which will most likely install a keylogger or other spyware on your computer. This is what the email looks like:

Photo of Email from Efax
No matter how real this looks, the email is NOT from Efax.


If you were to hover your cursor over the link, shown here in black, you would see another URL down at the bottom left. Here is where the link actually leads:

Photo of Email Fax Real Address
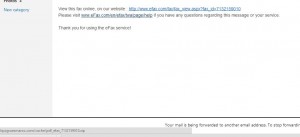
Although the link says it leads to Efax.com it doesn’t. Down on the bottom left you’ll see ‘maroc.com’ and a zip file. Whatever you do, don’t click on that link!


Now, Efax is a real company. We’ve used them in the past and they’re handy if you don’t have a fax machine or, in our case, when your telephone system does not support a fax machine. (VOIP lines do not support faxing.) If you were to check the apparent address of origin by hovering your cursor over the email in your inbox, you’d see this:

Photo of Efax Address of Origin
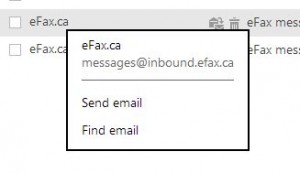
This looks like the email is from Efax.ca. It isn’t.


It’s only when we look at the message source (right click the email in the inbox before you open it and choose ‘view message source’), that we see where the email really originated. Here’s what we found:

Photo of Spam Email Source
The sender is actually ‘host.informationoutput.com’. They have faked the origin ‘inbound.efax.ca’.


To sum all of this up, here’s what we’ve got: An email that appears to be from Efax.ca, but isn’t. A link that appears to lead to Efax.com, but doesn’t. Finally we have a fax that isn’t a fax, it’s a zip file full of malware/spyware or a virus. Dangerous stuff, right? Our feeling is that you’d really have to go out of your way to get infected this way but people actually do get hit every day. We’d suggest reading this post a few times. All of the information you need to figure out if an email is legitimate is here. Feel free to share it with friends and family.

This post is about one email. Believe us when we say that we receive many such phishing emails every week. They might appear be from Efax, a bank, a government agency or a company that you may or may not have dealt with in the past. They all have one thing in common. If you don’t catch them and happen to click on the link, you’ll be in trouble. Be careful out there, OK?

Thanks for reading! Questions or comments are welcome. You can also ask questions on our Facebook page. Here is the link: Computers Made Simple on Facebook 

_________________________________________

Here’s a link that might help us if you are interested in hosting your own blog with Fatcow Hosting. We’ve signed up to become an affiliate and we make a bit of money if you sign up for hosting via this link: FatCow Hosting Thanks!


a little bit of hi-tech, a little bit of common sense and a lot of fun