Dress Up Your Desktop – Safely!

Did you know that Microsoft offers many different desktop motifs that you can use to change the look of your desktop? Did you know that these themes are free? Well they are. Read on.

TIP TIP TIP (Read carefully): Only download themes and wallpaper from well-known and trusted sites. Many malware sites advertise ‘free wallpaper’ but what you are actually downloading is much more than a simple photo. The download installs malware on your computer which is difficult or impossible to remove. You’ve been warned.

Commonly known as ‘wallpaper’,  there are many different kinds of profiles that you can use to dressup the look of your desktop. These profiles go one step beyond simple wallpaper. Some of them change the way your program windows look, others change your cursor while others can change the default notification sounds. Here’s how to get them:

1. Right click anywhere on your desktop and choose Personalize.
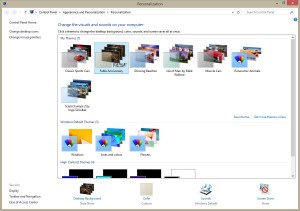
Photo of Windows Personalize menu
Here are all of your installed themes. If you need more, click ‘Get more themes online’.

2. In the window that opens, look through the standard profiles that are already installed on your computer. If none of them seem interesting, look for the words ‘Get more themes online’.

3. A new window on the Microsoft website will show up in your browser which will list many different themes, more than you can possibly use. They’re all free and totally safe to download and install.

4. Use the menu on the left side of the Microsoft page, find some interesting ones then click download. Once the file has downloaded, click on it and the theme will install itself automatically.
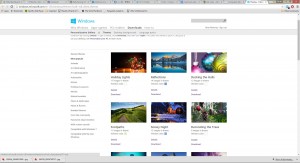
Photo of Themes Online
There are many different themes here. We’re sure you’ll be able to find some that will interest you.

5. Once the theme has been installed, it will appear in the original menu, the one you get when you choose Personalize when you right click your desktop. Click on any of the ones there and it will automatically replace your current theme.

Tip: Note that some Windows computers with the basic version of Windows 7 cannot use these themes. You cannot use any wallpaper or theme on these computers.

Tip: While you can use any photo as simple wallpaper, these themes are more detailed. They change more than the look of your desktop. If you don’t like the one you’ve got, you can change it. There are lots of choices.

That’s it for today, thanks for reading! Comments and questions are welcome but  Likes on our Facebook page get immediate attention.  Here’s the link: Computers Made Simple on Facebook 

Windows 10 – First Impressions

Interested in Windows 10? Hate Windows 8? We were in the same boat so we  headed over HERE , downloaded the Windows 10 preview and installed it on an older laptop. Wow! Are we glad we did!  Here’s what we think of it so far.

Background: Our older Lenovo laptop gave up the ghost recently. It wouldn’t boot into Windows 7 no matter what we did to try and fix it. Since we’d done a full back-up on it very recently, we decided that it would be the perfect guinea pig for Windows 10.

In the past, Microsoft has warned us against installing a new O/S (operating system) on an older computer. We were very thankful that this wasn’t the case on our older Lenovo. There was never a mention or warning that there might not be enough CPU power or RAM, normally the two main problems when upgrading. Thankfully, Windows 10 installed perfectly and has run smoothly since.

TIP: In order to install Windows 10 from the file that you download from Microsoft, you have to burn the iso file to a DVD. That’s the easiest and simplest way although you can use a flash drive. The flash drive process is more complicated and involves other software so, for now, burn the iso to a DVD using Burnaware, the free software that we recommend highly. (Make sure you get the FREE version, it works perfectly.)

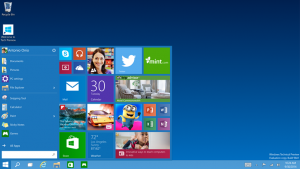
Photo of Windows 10 desktop
See the start button on the left? It’s a window now but it’s there. Phew! Thanks Microsoft!

First Impressions of Windows 10

The biggest and most lasting impression is that Windows 10 is NOT Windows 8. That comforting impression cheers us up every time we start using it. An O/S shouldn’t get in the way of your work. It should run in the background and, simply, allow you to get things done, whether those things are for work or pleasure. No one needs an O/S that tries to be something else. That’s what Windows 8 tried to be. We’re not sure exactly what it was masquerading as but, trust us, it wasn’t pretty.

Windows 10 is much like Windows 7 except it’s faster, faster in just about every way we can think of. Booting up is quick, so quick that we originally thought that we were missing something, that the version we had wasn’t the full one. Turns out we were wrong. Microsoft has somehow managed to streamline the boot process to a level that we haven’t seen in years.

Everything is where it should be. There’s the Start menu, the desktop, familiar icons across the bottom of the screen…it’s all there. No weird looking screen with a jumble of unknown icons blocking your path to productivity. That in itself is very calming. We know that Windows 7 can’t last forever but if we were faced with Windows 8 as the only alternative, we’d nurse Windows 7 along for years. No need to now. Windows 10 is here!

Wait…if you can

If you’re in the market for a new computer, see if you can wait until the public release of Windows 10. This is mainly to save you some money. If you get a laptop or desktop now with Windows 8, you’ll have to spring for a copy of Windows 10 when it comes out. If you can wait until closer to the release date, you can almost always get a very substantial discount on the upgrade. You’ll be offered that discount by Microsoft when you purchase a qualifying PC within weeks of the Windows 10 release date. It’s been that way in the past and we don’t see Microsoft changing this.

If you can’t wait, don’t worry. Virtually any laptop or PC you buy now will run Windows 10. Just make sure you get at least 4 gigs of ram and a dual or quad core CPU. Both of these are pretty much standard now except for the very lowest priced laptops or refurbished PCs. Our Lenovo was over two years old and runs Windows 10 just fine.

Remember that the version of Windows 10 that we have installed is NOT a permanent version of the O/S. It will expire at some point. Because of that, don’t install this on your main computer. Either get another hard drive or use a spare PC/laptop, not your everyday computer. That’s partially because it will expire but also because this is a beta or trial version, not the final retail one. It might crash, taking all of your personal files with it. We’ve found it to be very stable but you never know what might happen in the future.

We loved Windows 7, hated Windows 8 with a passion but, right now anyway, we think that Windows 10 will surpass Windows 7 in popularity. It’s that good. We’ll post more details on it as time goes by.

That’s it for today, thanks for reading! Comments and questions are welcome but  Likes on our Facebook page get immediate attention.  Here’s the link: Computers Made Simple on Facebook 
 

WeChat – Change your phone number and email

We were stumped for quite a while when we were trying to change our WeChat phone number. Yes, sometimes things confuse us too. WeChat doesn’t make this simple, that’s for sure, but you can do it. Here are some things you need before you begin:

1. To change the telephone number that is linked to WeChat, you must have an email account linked to the app.

2. To change the email account that is linked to WeChat, you must have a verified telephone number associated with it.

Why? Think of this whole thing as a lifeline. If you lose your password, you’re locked out of your account until you can recover it. Unless you have a verified number and/or email account linked to WeChat, they can’t send you instructions to reset your password. WeChat protects you from your own mistakes, more or less.

Of the two, WeChat prefers to use your phone number but an verified email account will work too. Let’s change our phone number first:

1. Make sure that you have a verified email account that is linked to WeChat. (Read 1 and 2 above to find out why.)

2. Here’s the path you need: Open WeChat, press Me, press Settings, press My Account, press Phone Number.

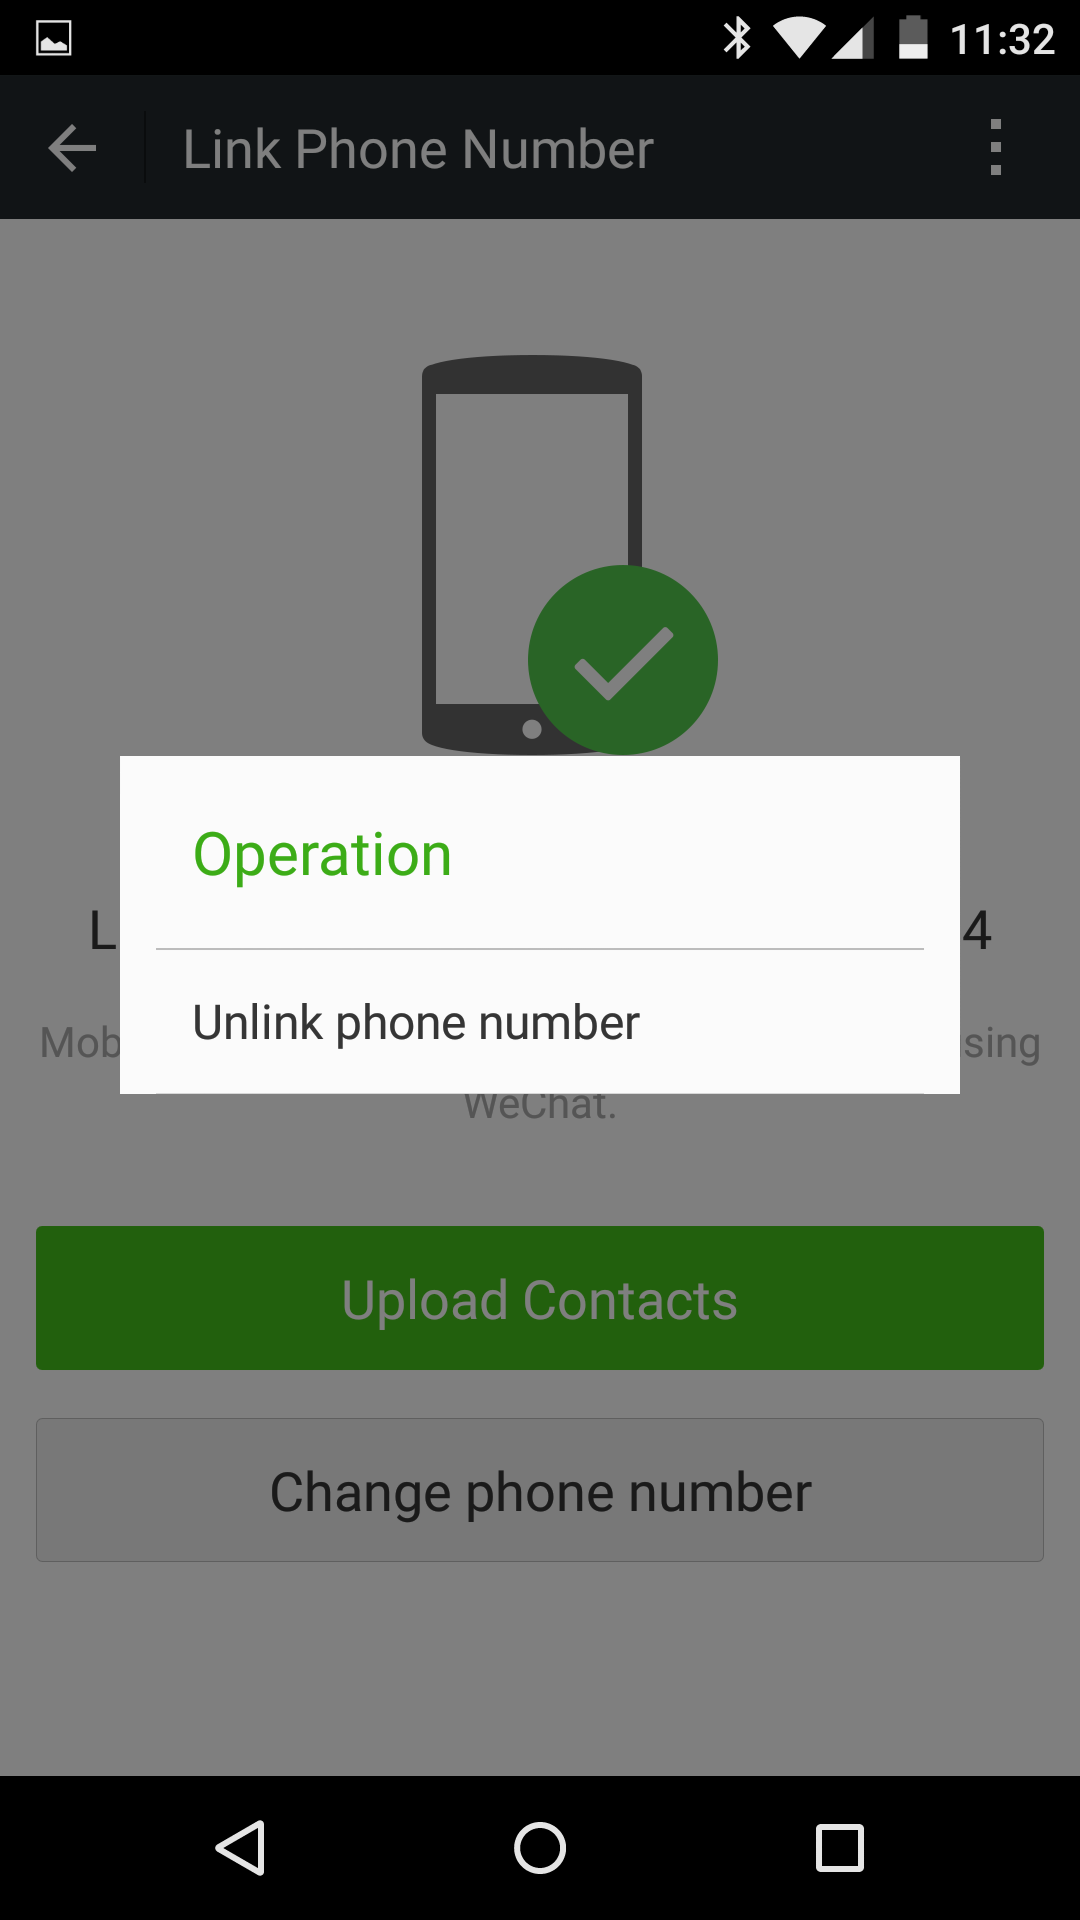
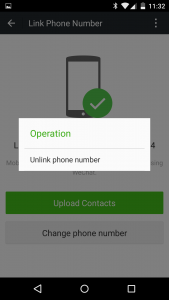
3. Obviously, you have to have a phone number linked to your WeChat account to change, right? Look for the three vertical dots up on the top right. Press them then choose Unlink Phone Number. The three vertical dots are shown here:

Photo of WeChat2
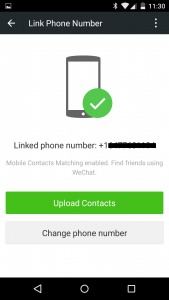
This window shows you two things, only one of which works as it should.

The photo above is confusing. It looks like you can change your phone number by pressing on ‘Change phone number’. You can’t. Until WeChat changes the wording on this window, users will be frustrated by it. The solution? Press the three vertical buttons on the top:

Photo of WeChat 4
You have to unlink your old number before you can link your new one.

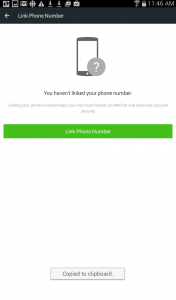
4. Once you have unlinked your current number, go through the same series of choices until you get to link your new number. Make sure your phone is on and able to receive test messages. Here are the steps using screen caps:

Photo of WeChat 6
Now your old number is unlinked, press Link Phone Number to use your new one.


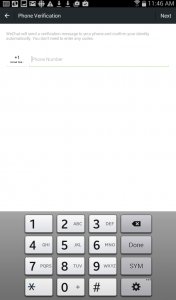
Photo of WeChat 7
Type in your new number, no spaces necessary, then press Next.
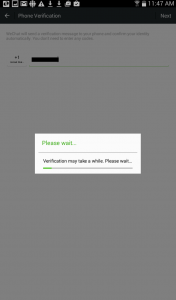
Photo of WeChat 8
This won’t take long, just a few seconds or so.


You’re waiting for a four digit code to be sent from WeChat to the phone number that you just entered. Once you get it, enter it into the next screen:

Photo of WeChat 9
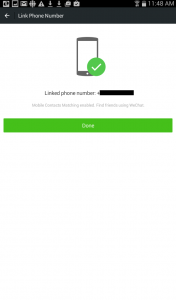
Enter the numbers then press Next.
Photo of WeChat 10
Done, done and done.

5. The process for changing your linked email account is similar. Same process, unlink your current account then link your new one.

Note: If the text message solution doesn’t work, WeChat will call you with the verification numbers. It will be an computer calling you so get your crayon ready to jot the number down.

We hope this instructional solves your problems. If not, let us know. Comments and questions are welcome but  Likes on our Facebook page get immediate attention.  Here’s the link: Computers Made Simple on Facebook 
Thanks for reading!

WeChat – Back up your chats or lose them

We love WeChat. Many of our readers like it too. Our WeChat posts are almost as popular as our Facebook posts. For that reason, here’s a tip for the holiday season: Back up your chat history.

This is the time of year when many of us get new mobile devices as gifts. Sales of tablets and smartphones peak at this time of the  year, at least in the western world. While WeChat automatically backs up your contact list, it doesn’t save any of your chat history. If you sign into your WeChat account from a new phone or mobile device, your contacts are there but your chats aren’t. Here’s how to temporarily save your chat history to the WeChat servers. Once you do that, you can restore the saved history to your new phone.

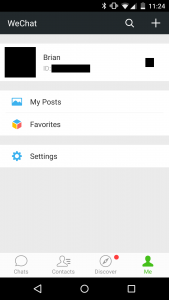
1. Head to Settings on your Me menu:

Photo of WeChat Chat History Backup
Head to your WeChat account and click Me in the lower right hand corner. Click Settings when you see this.

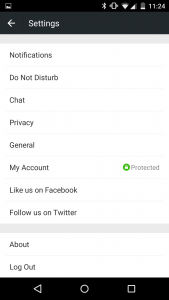
2. Look for the word Chat in your Settings and press it:

Photo of WeChat Chat History   2
To backup your chats, press Chat.

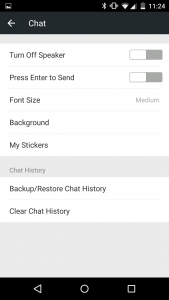
3. Under Chat History, we’re going to Backup/Restore Chat History. Backup first from this device then Restore on your new device.

Photo of WeChat Chat History   3
Back up now, Restore later.

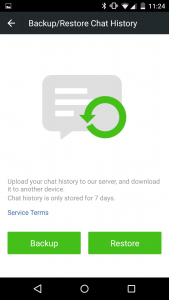
4. If you’ve got your new device all set up, click Backup. This whole process is temporary, right? Seven days is the limit.

Photo of WeChat Chat History   4
Make sure you’re on WiFi and your battery is full then press Backup.

5. Once you’ve backed up your chats, sign into your account on your new device and go through the same steps shown here, except choose Restore instead of Backup. Depending on how large your chat record is, this whole thing could take some time. Make sure you’re on WiFi and that your battery is well charged or you’re plugged into a power outlet before you begin. If your phone dies in the middle of all of this or if you lose your connection, things will get screwed up. Prepare everything using your common sense and you’re all set.

Comments and questions are welcome but  Likes on our Facebook page get immediate attention.  Here’s the link: Computers Made Simple on Facebook 


Instagram Friend of Follow – Beating the follow/unfollowers

If you use Instagram, you know that many people follow you then, almost instantly, unfollow you. It seems that the principle here is to get you to follow them, then they unfollow you a bit later on, leaving you stranded. We’ve noticed lately that many start-up businesses do the same thing, it’s not just individual users. Here’s how we get rid of those tricksters once and for all.

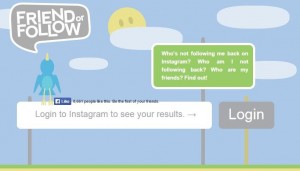
1. Head over to insta.friendorfollow.com   . If you have Instagram open on your computer, all you have to do is press the login button. Otherwise you have to enter your Instagram information. It’s safe, don’t worry about your security with Friend or Follow.

Photo of Friend or Follow Main Page
Click on the link and this is where you’ll end up.

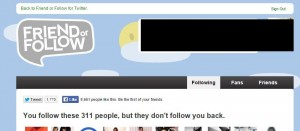
2. Once you are officially inside the site, you’ll see three tabs across the top of the page. One tab shows Instagram users who you follow but do not follow  you back. The next tab shows you who follows you but you don’t follow them back. The third tab show users who follow you and you follow back.

Photo of Friend or Follow Three Tabs
Here’s all you need to trim the deadwood from your follow list.

3. The most recent additions are at the top. Assuming that you’ve been using Instagram for a while, you’ve got a fair number of accounts that you follow. Your oldest follows are at the bottom. You can’t organize any of these lists of users any other way.

4. If someone has recently followed you and has tricked you into following them, they will be on the first tab, right up in the top left corner. If you hover your mouse over their icon, their mini-profile will appear. You can either unfollow them from there or you can click on their username and check out their posts. Then you can unfollow them from that page if their photo mix doesn’t meet with your approval.

Photo of Friend or Follow Mouse Hover
Hover your mouse over any profile icon and a small mini-profile pops up. You can unfollow directly from it.

We’ve found that Instagram users play this game far more than people on Twitter. On Twitter, your followers generally stick around forever. If they don’t, there is a separate friendorfollow site for Twitter. It works the same way so there’s no need for a separate post, at least not anytime soon.

We’re winding down for the holidays but we’ll be checking for comments every day. There may be a few posts before we take a break, we’re not sure. Regardless, we love to hear from our readers. Comments and questions are welcome but  Likes on our Facebook page get immediate attention.  Here’s the link: Computers Made Simple on Facebook 
Thanks for reading!


a little bit of hi-tech, a little bit of common sense and a lot of fun