Tag Archives: WordPress

How to Create Your Dot Com Dream – Part 4

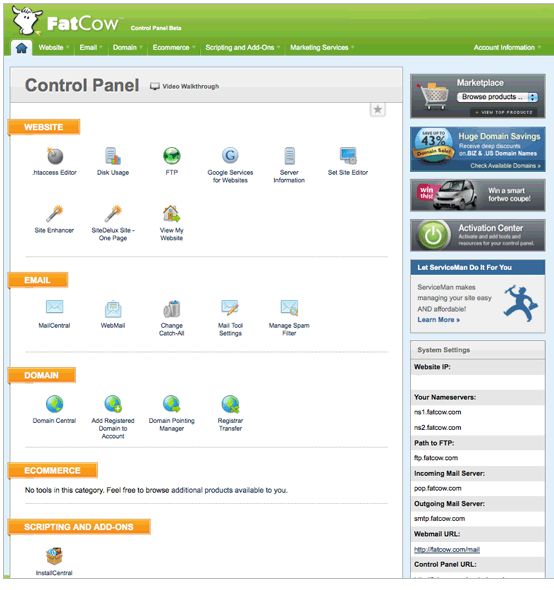
By now you are familiar with terms such as domain names, hosting, servers and CPanel. It’s time to actually create some content for your site. At this point, you’ve got two paths to follow. We’re here to help you figure out which path to take.

WordPress or HTML? 

These days, millions upon millions of people and companies depend on WordPress to sculpt their websites, including Computers Made Simple. On the other hand, millions of other sites use HTML for theirs. What’s the difference between the two? We’ll outline some of the details of each, giving you some pros and cons which might help you make your decision.

HTML? What’s that? 

HTML is Hyper Text Markup Language, the basis of pretty much everything on the Internet. WordPress itself uses HTML but in a more user-friendly format. Remember the placeholder that you made for your new site? If you read our post on how to actually create that document, you may have noticed that it was made up of two things. The first was the thing you actually wanted to say, the second was the various brackets and shortforms that encode the content. When you click on a link on a webpage, there is a particular format for that link, one that resembles ‘code’. That code is HTML.

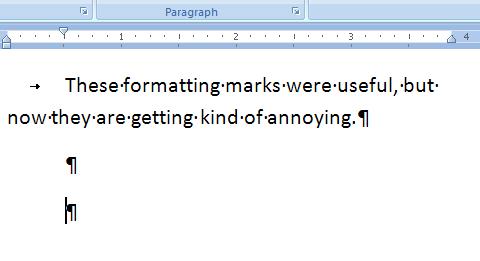
Think of it this way. In any document created with a word processor, let’s use Word as an example, everything you type is formatted by Word to reflect the look that you want. There are headlines, indents, underlines, different colors for text, spacing and so on. How does Word accomplish all this? Well, Word uses codes that change plain text into a nicely crafted document. Those codes are carried around with the file wherever it goes. When you open a Word document, Word decodes these formatting marks and shows you the content, just as the original creator wanted it to look. Do you see the codes? No, but you could by choosing the View option,  ‘show formatting’. This is what it looks like in Word:

Photo of Word Codes
Quite a mess isn’t it?


HTML is much the same. Every web page, including this one, has a completely different look when you see the stuff behind the scenes. In order to create a website using HTML, you would have to code everything yourself in a text editor such as Notepad or Notepad + or, better yet, use an HTML editor. The HTML editor would look and feel much like Word. You type everything in, tell the editor how you want it to look and your webpage comes out looking wonderful, more or less. If you know what you’re doing, things look OK. If not, things look pretty bad.

Here are the pros and cons of HTML

Pros: Pages load very quickly. There is no strain on the server, no databases are running in the background, etc. Done well, you can creatre beautiful websites using relatively simple tools. Notepad and Notepad + are free and there are a few decent HTML editors that are free, as well.

Cons: HTML has a steep learning curve. Coding is totally different from anything else you’ve ever done, unless you are a computer programmer, of course. Coding is not intuitive. Things don’t make sense sometimes, they are quite arbitrary and/or obscure. Bad HTML is very obvious, far worse than a bad WordPress site, if there is such a thing. All HTML is written on your computer then uploaded to your site using FTP. For us, this is a huge problem. More on that when we discuss WordPress.

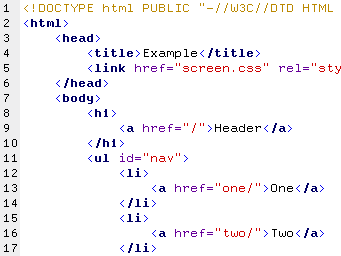
Here’s an example of relatively simple HTML coding:

Photo of HTML coding
If you think you can learn coding like this then maybe HTML is for you.


WordPress

It’s hard to describe what WordPress actually does but we’ll give it a shot. As we’re writing this, for example, we are working inside our WordPress installation, typing content just as we would compose an email. We add photos, change the way words look, add highlights, etc. Everything we do is can be described as WYSIWYG (what you see is what you get). Once we have everything looking the way we want it to, we hit the Publish button and our wonderful words and photos are added to the site, quick as a wink…sort of. If we want to change something, we simply edit a post.

Yes, WordPress uses HTML but it’s all behind the scenes. Once you get used to using it, there are some things that you can manipulate using HTML but even that is done inside WordPress. We can edit pages from anywhere in the world on any computer that has Internet access, all we need is the logon credentials. There’s nothing to install on any computer, you just need a browser and a connection to the Internet. How’s that for portability?

We’ve written many posts on WordPress; how to install it, how to change things in it, etc. Besides our site, there are thousands of other sites full of WordPress tips and tricks. You’ll never be lost when you need help with something. Here are the pros and cons as we see them.

Photo of WordPress Logo
You can’t go wrong by basing your site on WordPress.

Pros: 

WordPress is free, that’s a good place to start. Editing is all done via the Internet. Aside from the initial install, there is nothing to upload. Updates are all handled from the WordPress dashboard. Virtually everything about WordPress can be adjusted, changed, made to look different or streamlined. In many cases, you may not even know that you are on a WordPress site. For each installation, different users can supply content. Each user can be given a different role, not everyone has to be an administrator. With thousands of plugins, WordPress can be tuned and refined in an almost infinite variety of ways. With just as many themes, WordPress sites don’t have to be clones of one another, each can have its own distinctive look and feel. WordPress is very secure. With an installation base numbering in the millions, WordPress isn’t going anywhere soon. It will be with us for the long run.

Cons: 

The initial installation may seem tricky or confusing but, with help, just about anyone can manage. We’ve written all about the process so don’t think you’re alone with this. WordPress can and does slow down your site. While HTML is much faster, at least as far as loading times go, content creation takes much longer. Some parts of WordPress are difficult to change. Until you get used to navigating your way around the dashboard, you will probably feel very frustrated but, remember this, all it takes is time. There are many helper sites that will make your learning curve a bit less steep.

Conclusion: 

We don’t think that there’s much of an argument here. WordPress is our choice, hands down. If you’ve got lots of time to learn a new skill, sure, go for HTML. You’ll always have the feeling that you’ve created your site from scratch, that it’s very unique, that it’s your work of art. If you want to get a site up and running quickly, with scads of support and documentation, all for free, then we would strongly suggest WordPress.

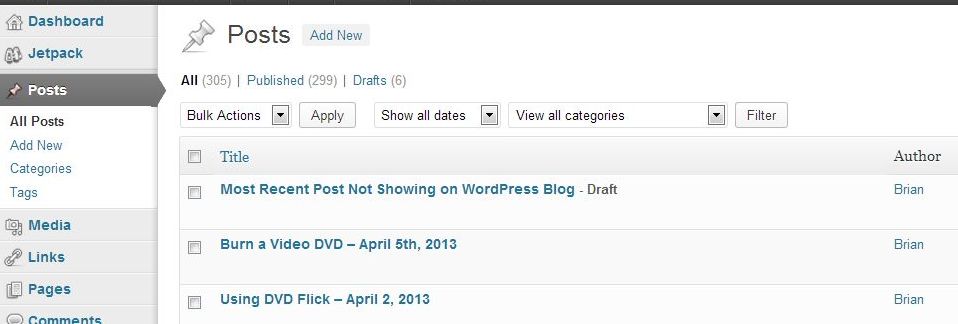
Thanks for reading! If we’ve missed something or if you just want to ask a question or suggest something, use the comment form below. We never reveal your email address, by the way. For quicker access, why not Like us on Facebook? Here is the link: Computers Made Simple on Facebook 


How to Lock Down Your WordPress Installation

WordPress is the most popular blogging platform in the world, by far. It has become so pervasive on the Internet that you probably might not recognize that you’re actually on a site that uses WordPress. We’ve already covered the installation and several other aspects of handling WordPress and its seemingly endless array of plugins and features. Here are ten steps you should take to lock down your WordPress site.

Photo of WordPress logos
WordPress sites often don’t look like WordPress sites.


Popularity breeds contempt, as they say, and WordPress is certainly popular. Hackers and spammers all over the world make it a point to attack sites that use WordPress, hoping to take advantage of new webmasters. Once these folks find a hole, they will exploit it as much as they can, often taking over the site while the owner is not even aware of it.

Step One: Get rid of the user name ‘admin’.

Every WordPress site defaults to the main user being named admin. Even with a secure password, leaving that username in place means that a hacker already has 50% of what he needs to access your site. Add another user, keeping in mind Step Two coming up, and make that user admin. At that point you can delete the original username ‘admin’. Hint: You need to assign the admin role to another user before you can delete the user named admin.

Step Two: Name the user with admin rights something other than any user who can post.

If you post under the name Jane Doe, don’t assign admin right to  that user (usually you). When someone reads your posts, they could assume that Jane Doe is the admin. As in step one, if Jane Doe has admin rights, they already have half of what they need to gain access to your site. Change the admin user name to something completely different, something that can’t been found on your site.

Step Three: Keep your WordPress installation up to date.

This goes without saying but we’re saying it anyway. WordPress is constantly being updated, with security loopholes constantly repaired and additional features added. Make sure you keep your installation fresh by updating it whenever WordPress prompts you to do it. We use the automatic update and the whole process takes about a minute. Make sure you do the same.

Step Four: Keep your plugins up to date. 

Update notifications are right in front of you as soon as you log in to your site. These include updates for WordPress as well as the various plugins you use. Make sure you keep everything up to date, including those plugins. Once an exploit has been uncovered, plugin creators change the bits and pieces that make up the software and then release an update. WordPress tells you instantly when an update is available so there’s no reason not to take a moment and update everything.

Step Five: Use Akismet to filter spam. 

Akismet is free and using it is a no-brainer. We get thousands of spam comments every day here on Computers Made Simple. If it wasn’t for Akismet our site would be a mess of ridiculous comments that would steer users away from our site. We’ve covered installation of Akismet before in our WordPress installation series.

Step Six: Make sure all comments must be approved by your admin user. 

As with the use of Akismet, this goes without saying. If a spammer’s comment is missed by Akismet, and that happens frequently, you must make sure that you can report it as spam before that comment shows up below a post. We all know that some sites, actually some big name sites, don’t filter out these comments but make sure that you do. Any savvy reader will be able to spot a spammer’s comment and will naturally think less of your efforts. To them, it might seem that you want these spam comments visible, as if your site was more popular than it actually is. Don’t fall into that trap. Change your discussion settings and moderate all comments.

Step Seven: Don’t inhibit comments. 

We had a spammer attack our site a few weeks back. Every day we’d get twenty or thirty comments that Akismet was missing for some reason. To us, the comments were obviously spam but to Akismet, they seemed legitimate. What to do in this situation? We thought that adding a captcha (Completely Automated Public Tuning test to tell Computers and Humans Apart, believe it or not) device to our site. You’ve all seen them, the little photos of pictures and/or numbers that you have to type in to prove you’re human. Well, we tried but the results didn’t work out well at all. For the duration of the ‘attack’, we simply marked those comments as spam and, over time, Akismet either recognized them as such or the company which was commenting gave up the battle.

Please Note: If you want to comment on our site, all you have to do is give us an email, a name and a comment. The email is never published, it doesn’t even have to be a real one. The only reason we ask for it is to make sure you get our reply to your comment, not to spam you. We don’t even really see your email, except when we reply. At that point a WordPress plugin sends our reply to you automatically.

Step Eight: Use one admin, no more. 

Even if you assign user accounts to other writers/posters, don’t assign anyone else the admin position. Anyone with the admin designation can change any setting in WordPress, even to the point of locking you out of your own site. Don’t do it. Keep the admin rights and keep your site safe.

Step Nine: Don’t let anyone access your site for whatever reason. 

Again, this is from personal experience. We purchased a theme and, after installation, found that there was one setting that was causing us problems. After a few emails back and forth with the theme creator, he suggested that we give him our password and let him see if he could fix it. Our warning beacons went off immediately. Yours should too. Let’s say we did allow this person to access the site then changed the password immediately afterwards. In case you didn’t already know this, all WordPress installations are made up of a vast array of php scripts that work behind the scenes, controlling every part of your website. Unless you are a very smart programmer, you would never know what this person might have changed deep inside your WordPress installation. No matter how innocent a request for access is, don’t do it. If something needs to be fixed, there are hundreds of very helpful people and sites out there to assist you.

Step Ten: Take control of your own site and your own destiny. 

WordPress is complicated, we all know that, but it’s not rocket science. If you’re in the blogging game, you have to expect some confusion and you have to allow some time for learning about things other than what you’re blogging about. We are assuming, of course, that you own your own domain name and are using a hosting site for your WordPress installation. None of the steps above apply to bloggers using a community blogging site, but if you’re reading this, you probably already know that. Take the plunge, buy a domain and get a cheap hosting account. There are vast amounts of WordPress resources out there to help you along the way. Good luck!

Finally, we’re not WordPress experts in any sense of the word. We get things done and we have always learned to do things by actually doing them, after reading up on the topic, of course. The worst thing that could happen is that your site might be down for a bit. Hopefully, your frequent readers will realize that glitches happen and will come back another time.

Thanks for reading! Comments and questions are welcome. Like us on Facebook and you’ll get a direct path to us for relatively instant updates and solutions: Computers Made Simple on Facebook 

A Short Post About WordPress

If you have a WordPress site, and millions of people do, you should make sure that you backup your database on a regular basis. If you post every day, you should do this at least once a week. The frequency depends on you. How important is your work? How many posts do you want to lose?

TIP: In case you didn’t know, all of your posts are NOT in your wp_content folder. Your precious posts, all of your hard work, are in the MySql database. If you backup your WordPress installation or copy a few folders to your computer, you will still lose your posts if disaster strikes. Keep that in mind.

Yesterday, a backup from our hosting company, Fatcow by name, saved our bacon. We’d gone ahead and tried to move this site to another hosting account, still with Fatcow, but managed to screw it up totally. By late yesterday afternoon, most of our posts were either missing completely or were cut off in the middle. This morning we imported a database backup from two days ago and, thank goodness, everything is back to normal. Yes, we lost one post but that’s better than losing over 300, isn’t it?

How do you backup your database? It’s relatively simple but it depends on which software your hosting company is using. Fatcow uses vDeck. We’re used to CPanel but vDeck isn’t that much different. Each ‘panel’, no matter which one your hosting company uses, has full instructions for each type of job you need to do.

When you are backing up your database, don’t depend solely on a WordPress plugin. We’d been trusting a plugin for about six months, only to find that it was emailing us empty attachments that were useless when we attempted to restore our database. If a plugin works for you, fine, but perform your own backup on a regular basis.

After you create these backups using the automatic tools that your host makes available from your account, make sure you make copies of them. We use Dropbox but it’s a good idea to put them on a flashdrive as well. We’d recommend keeping three or four backups on hand at any one time.

That’s it for this post. Here’s a shot of vDeck so you can see what you’re into with FatCow:

Photo of vDeck Control Panel
Point and click is pretty much what you’ve got here.


Thanks for reading! Why not Like our page on Facebook and keep up on all of the action here? We’d love to have you as a fan! Computers Made Simple on Facebook

Protect Your WordPress Site

Here’s a quick and dirty way to keep your WordPress site safer from hackers. While you may never be able to fully protect your site, take our advice and perform these steps now. Hackers are very good at what they do but the harder it is to break into your site, the safer you are.

Everyone knows that the default user for every WordPress site has the username admin. With the username and the proper password, anyone can gain access to any WordPress site. Do you see the shortcomings of using the default name for the primary WordPress user? If you leave that name in place, hackers already have 50% of what they need to control your site. Here’s how to protect yourself:

1. Open your WordPress site by logging in with the current admin username and password. When you install WordPress, you are assigned a fairly decent password. We’d suggest making that password a bit tougher but the standard one is not too bad. Whatever you do, change your admin password on a regular basis.

2. Once you’re in, look for the word ‘Users’ on the left pane:

Photo of WordPress Security   1
Users, click on All.


3. On the default menu, there is only the ‘admin’ user. That user has full admin privileges. That’s not what we want. We want to remove the admin user or take away their roles. In the following menu, there are two users:

Photo of WordPress Security  2
Hover over the word ‘admin’ and select Edit.


4. Once we click Edit, we can change the role of the admin. In the previous photo, you can see that you can also Delete that user but, remember this, you can only do that if you have another user that you have assigned the role of admin to. Makes sense, right? You can’t administer a WordPress site with an admin to do it. For now, this photo shows what we want to do. Later on we will delete this ‘admin’ user, after we have assigned the role to another user.

Photo of WordPress Security  3
We want to choose ‘No role for this site’ for the user named admin.


5. Once you set that menu to ‘No role for this site’, make sure you scroll down to the bottom and click ‘Update User’:

Photo of WordPress Security  5
Update user or your work is for nothing.


TIP: For extra security, don’t assign usernames that are actually the names of the users. If, for instance, you assign the admin role to a person whose real name is Bronwyn, don’t use Bronwyn’s real name. Choose something like Lana or Ralph or a set of numbers. Whatever you do, don’t allow hackers to guess the username. Why? As we said before, if they know the username, they are halfway there to getting access to your site. No matter how much time they spend trying to figure out your password, they’ll spend the same or more time figuring out the admin’s username. Please keep that in mind when you’re setting up or changing your WordPress site.

6. We figure that you’ll know how to add another user and assign them the admin role so no need to confuse the issue. Once you set another user as admin, you are free to delete the original ‘admin’. For your own security, WordPress will not let you delete the default admin unless you have assigned that role to another user. Don’t worry, they think of just about everything.

That’s it for today. Hackers are actively targeting WordPress sites. Keep yours as secure as you can.

Thanks for reading!

Most Recent Post Not Showing on WordPress Blog

If you run a blog on WordPress, it’s common for the latest post to show at the top of the page. Our last post, the one about burning DVDs with Burnaware, wasn’t doing that. Here’s how we solved our particular problem. Remember that WordPress is a fairly complicated blog engine and, as they say, your mileage may vary. What worked for us may not work for you.

The clue to the solution lay on our Posts page, the WordPress page that lists all posts in chronological order. The current cover post was the one previous to our latest post. On our Posts page, the latest post was at the top. For some reason, that post had a ‘Purge from Cache’ notice on it. It was the only post that had this notice on it so we figured that this had something to do with the problem. Turns out we were right. Once we purged that post from our WordPress cache, it became the cover post on our main page. Here are some screenshots that will help you solve this problem:

Photo of WordPress Latest Post  1
This is the Posts page. The ‘Purge from Cache’ notice is missing but this is where you’d see it.


If you hover your mouse just below the post’s title, this menu comes up. You can purge the post from here or later on after you are editing it.

Photo of WordPress Latest Post  2
You can purge the page from here or after you click Edit.


Photo of WordPress Latest Post  3
Click Edit and this will allow you to purge the post another way.


Once you get to the Edit page, look on the right to see this:

Photo of WordPress Latest Post  4
Another place to purge the page from the WordPress cache.


We feel that this problem is sometimes linked to the theme you are using but even that may be related to the page cache. WordPress suggests to install the same theme again or to install a different theme. We think that doing so clears the page cache and the problem is solved that way, too. We’d suggest purging your cache first. There’s less chance of an error, in our opinion, and it’s a whole lot simpler.

Thanks for reading!