Category Archives: Windows Live Movie Maker

Rotate Video in Windows Movie Maker

Yesterday we shot a video on our new Nexus 4. It was our first on our new toy and, alas, the video was sideways. We know now to shoot with the device held horizontally instead of upright. This mistake made us think about a way to rotate the video. Rotation is easy to do with a photo but can it be done on a video, essentially a string of photos? Well, the short answer is yes. The long answer is there are at least two ways to do it, one complicated and one simple. We’ll do the simple way, thank you very much! Here’s the quick and easy way to rotate a video using Windows Movie Maker (WMM).

1. Unless you are still using Windows Vista, you have to download and install WMM separately. Here is the link:  Download Windows Movie Maker Download the version that is correct for you and install it.

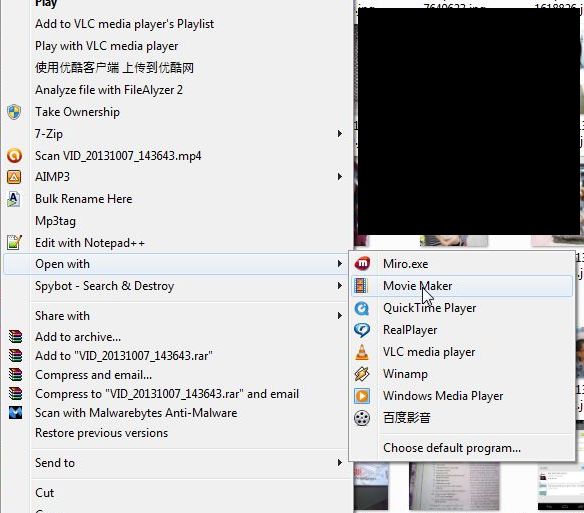
2. Once WMM is installed, you can right click the video that you want rotated and choose ‘open with’ then ‘Movie Maker’, like this:

Photo of Rotate Video    1
Right click the video, choose open with movie maker.

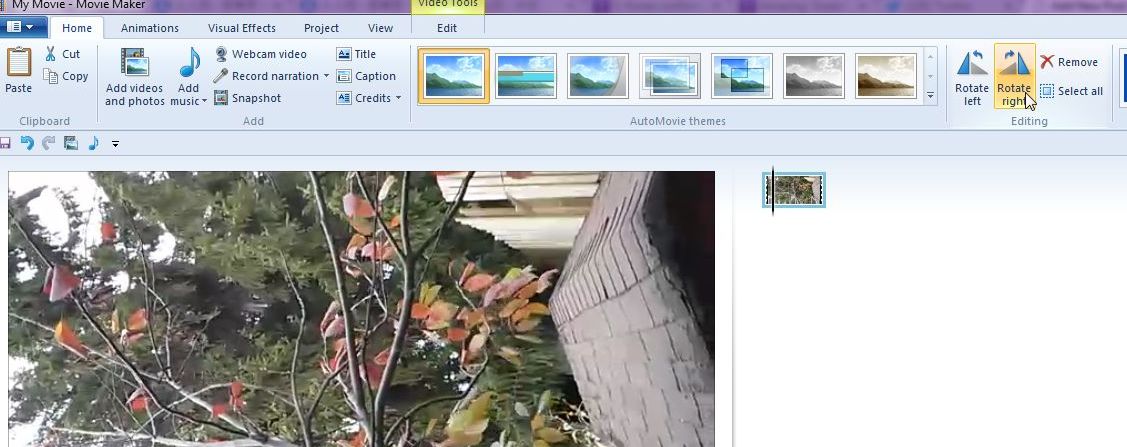
3. Once the video has loaded, look up at the top when you are in the Home view. On the right side, just past the horizon icons, you’ll see Rotate left or Rotate right. Choose the one you want. We wanted to use the Rotate right setting:

Photo of Rotate Video    2
Rotate right, that’s the one we used.

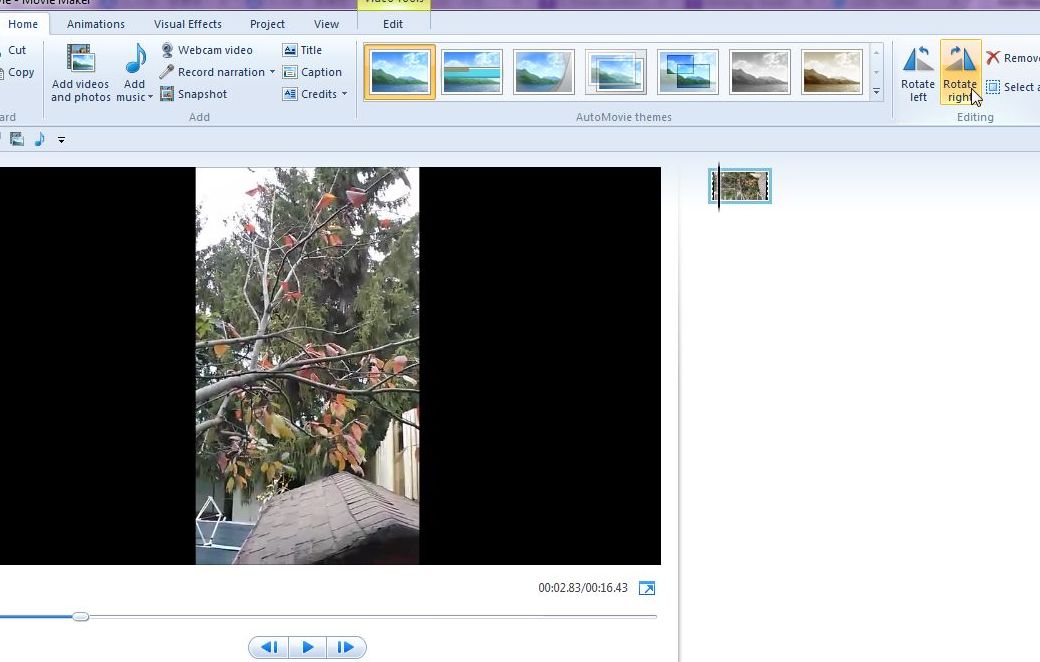
4. Once the movie has been rotated, your view will change with the video now looking the way it should:

Photo of Rotate Video    3
Everything looks normal. Yay!

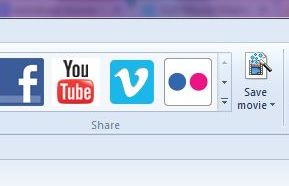
5. Once you have rotated the video, you can decide if you want to edit it or save it. If you simply save it, nothing will be changed except that the video will now play upright, not horizontally. If you don’t want to edit it, look up on the far right for the words ‘Save Movie’:

Photo of Rotate Video 4
Read number 6 before you click ‘Save movie’.

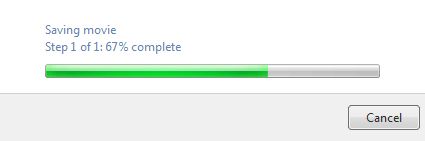
6. Click Save, name the movie something other than ‘My Movie’ but something different than the original, at least if you save it in the same spot. Why? Because if you happened to make a mistake, the original will still be there, safe and untouched. If you keep the same name, WMM will overwrite the original and you won’t be able to undo anything. The save process will take a few moments, depending on the length of your video. Here’s what you see:

Photo of Rotate Video  8
For a long video, go make a coffee.

Now that was easy, wasn’t it? Just so you know, rotation is not the only thing you can do with WMM. Even though it is free, there are many things you can do to enhance your video creations. There’s really no need to pay for a video editor. If you’re putting videos up on Youtube, don’t even think about using their editor or capture. Make your video using your webcam and then edit it, even if it’s just adding titles and credits, with WMM. Your fans will appreciate your effort. Better videos mean more fans, right?

Thanks for reading. Like us on Facebook and we’ll like you! Computers Made Simple on Facebook 


DVD Covers – Create your own for free

We’ve shown you how to create DVD movies and DVD slideshows in our last two posts. Since many of the DVDs that you create will be gifts, why not dress them up with an attractive cover?

DVD cases, at least the basic plastic ones, are about five inches by five inches. This refers to the size of the image that you’d want to create. For the front cover, a combination of words and images would work well and for the back cover, perhaps some notes or a dedication would be better. Either way, the covers are easy to create.

Here’s how we prepared a cover in Word. Setting the margins to leave a five by five square in the middle of the page works best. We used a top and bottom margin of three inches and one and a half inch on the left margin, two inches on the right. Then we chose to show a grid so we would know what our actual working space was. Here’s how it looked in Word:

DVD Cover
Use the Custom Margin setting.


Arrange the photos in the square and dress them up a bit using the menus in Word. Here are a couple of the settings that you can use:

cover 3

DVD Cover  2
Choose the borders and other effects in this menu.


DVD Cover  3
Place each image with this menu.


There are almost an infinite set of choices for your covers in Word. We’ve given you some ideas about the basics but you’re on your own as far as finalizing everything else. Once you have the photos set up, type in the words and print it up. Remember to leave a bit of wiggle room around the edge for cropping after you print. Keep your words away from the edge as much as you can. Our five by five dimensions are approximate, right?

If you’ve created a DVD movie or copied a movie that you own, you can download cover art from the IMDB site, for example. Original movie posters abound on the Internet. Save the image to your computer, open it in Irfanview and adjust the size until one of the dimensions is about five inches. Since photos aren’t ever square, use your discretion as to which dimension you set to five inches. In our experience, setting the height to five inches is usually best, leaving the width to be settled according to the height you choose. You must preserve the aspect ratio in order for the image to look normal. Here are the menus you need when you’re editing a photo in Irfanview:

DVD Covers 4
You want to resize the image.


DVD Covers 5
Set the new height (usually) to 5 inches and make sure you select Preserve Aspect Ratio (Proportional) in order for the width to look appropriate. If you set the height, the width is set automatically.

That’s about it, folks. Create the DVD using Windows DVD Maker, then use Word and/or Irfanview to create the cover. If you take your time, you’ll be able to come up with very professional results. If you have the program already, use Photoshop or GIMP to do the same thing. Most people have Word already, that’s why we chose it.

Thanks for reading! We love to hear your comments so don’t be shy, say something down below.

Free Slideshow Software

Slideshow 01
The splash screen for Windows DVD Maker.

We’ve all seen those magical slideshows before, right? Ken Burns has done whole movies using them. Baseball and the American Civil War came to life by using a relatively simple slideshow technique. Now, if you’re using Windows 7, you can release your inner Ken Burns by creating your own slideshow, complete with music accompaniment. Here’s how:

1. Most versions of Windows 7 and one version of Windows Vista, come with Windows DVD Maker. We mentioned this software in our last post, describing how to create DVD movies using AVI files. Here is that post: Making Movies using Windows DVD Maker  . The same software will also create a cool slideshow. You can either insert a blank writeable DVD or go to All Programs and run the program from there. Here is the first menu you see:

Slideshow 1
This time we are going to add photos (pictures) to the DVD menu.


2. You can  drag and drop photos into the blank space or use the standard Window’s browse menu. We dragged a series of photos from a folder into the open space in the window. Here’s what we ended up with:

Slideshow
Select the photos one by one holding the CTRL key down, then drag them all to the window.


3. Once the photos are in place inside the software, they are in a folder that Windows uses to create the DVD slideshow. Double click on the folder on the menu, the one that reads Slide show (? photos), and you will be able to rearrange them in the order that you want. If you do this beforehand, it’s probably easier but feel free to experiment. Drag the first photo to the first space and continue on through your photos. There is room on the DVD for a lot of photos, probably 140 or more, so if you want a specific order for them, it will take time. Here’s what the menu arrangement menu looks like:

Slideshow 02
Drag the photos up or down the line to arrange them.


4. Once the photos are arranged, click next and continue to design your slideshow. On the main menu, look to the right side and experiment with the different menu styles by clicking on any that look interesting. This sets up the menu or splash screen that you’ll see when the DVD first opens. There are lots of good ones so scroll through them all. Here’s what you’ll see:

Slideshow 03
Menu styles are on the right.


5. There are other parameters that you can set for the slideshow. On the top of the menu above, you’ll note where to change the Menu text, customize the menu or adjust the slideshow itself. The following photos show some of these settings:

Slideshow 06
Add a title, change the names of the buttons and add notes.


Slideshow 07
Add music, change the interval between slides and use different transitions.


The tools in the menu above are quite powerful for such a simple program. You can add music to fit the length of the slideshow, change the length of time each photo is on the screen; you can even change the way slides are presented in sequence. Once you’ve got some settings arranged, press the preview button and you’ll be able to run through the slideshow in test mode to see if everything works the way you want it to. If not, go back and change things again.

If you aren’t ready to burn the slideshow now, make sure you save the project for another time. If you are ready to record it to a DVD, simply press the burn button on the main screen.

TIP: Besides making video DVDs and slideshow DVDs, Windows DVD Maker will let you make multimedia DVDs as well. Add photos and slides to the same project and WDM will sort it all out and come up with an amazing DVD that will amaze your audience. You can record a narration track and add it to the slideshow, too. Use your own creativity to explore this free software.

Thanks for reading! We hope you enjoyed our last two posts. We also hope you will create wonderful DVDs for your friends and families, just in time for the holidays.


Windows Live Movie Maker – How to split audio from video

The problem: my digital camera records video in the MP4 format. Because of that, I can’t split the audio from the video in most video editing programs. I use Windows Live Movie Maker most of the time and this free program doesn’t offer splitting audio from video anyway. The video is in high definition and looks great but today I had to shoot a scene where only the audio could be used.

The solution: This is a multi-step process. Here’s how I edited the whole thing to create a movie using only the audio from the original shoot.

1. Edit the video (sound and all) in Windows Live Movie Maker, removing all the extra sections. Make sure you remove everything you don’t need. WLMM will edit MP4s but it outputs the file as a WMV file, which isn’t a problem.

2. Take the completed WMV file and convert it to a WMA audio file in Format Factory. Format Factory is available here: http://www.formatoz.com/ (you can use any converter you want, obviously, but I like Format Factory.)

3. Open WLMM again and put in the visuals that you want to use, could be video or photographs.   Try to make sure it is the same length as the audio track you have created in the previous step. I used a series of photos to create the video portion.

4. Add the ‘music’ (the WMA file that you created with Format Factory)  that you created in step 2. It could be music or spoken word, doesn’t matter. Your timeline will have to be adjusted to make the audio match the photos/video but that’s easy.

5. Save your video as normal and WLMM will put the two together in the final WMV that it creates.


That’s it! It took me a few hours to figure this out but now I know how to do it. So do you!

Thanks for reading.