Category Archives: Cloud Storage

Download Your Facebook Albums with O Drive

O Drive is a new offering from www.odrive.com . Through a comment on one of our posts, this one, we found odrive to be an easy way to download your own Facebook photos. Easy is good, free is good and odrive is both. We have reservations about it, however, and we’ll highlight those later on.

NOTE: 

1. Odrive does NOT download your friend’s photo albums in Facebook, just your own. If you want to save someone else’s albums on Facebook, you’ll have to use one of our other suggestions.

2. Odrive will download all of your photo albums including the ‘My Photos’ and ‘Photos of You’ albums as well as those albums that you’ve named yourself. Keep in mind that the Photos of You album is comprised of photos that are posted by other people, ones that you are tagged in, right?

Odrive is an app that you download to your computer, it’s not a cloud storage site like Dropbox, at least as far as we can see. Think of it as a linking service, one that syncs the items to which you allow it access. Your Facebook albums are still on Facebook’s servers but now, using odrive, they can also be on your computer. Let’s say you want to delete some photos from Facebook but you also want to save copies of those photos on your computer after you delete them. Instead of saving them one by one, it’s easy to download them all at once with odrive. Here’s how:

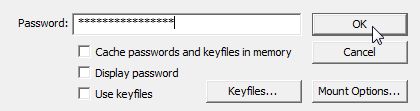
Once odrive is installed, choose Facebook from the dropdown list of apps it can access, enter your username and password, click yes to allow odrive to access certain parts of your information and you’re done. Click on the various folders that appear on your computer and odrive will sync your pics with the Facebook servers. Depending on how many photos you have online, this could take a while.

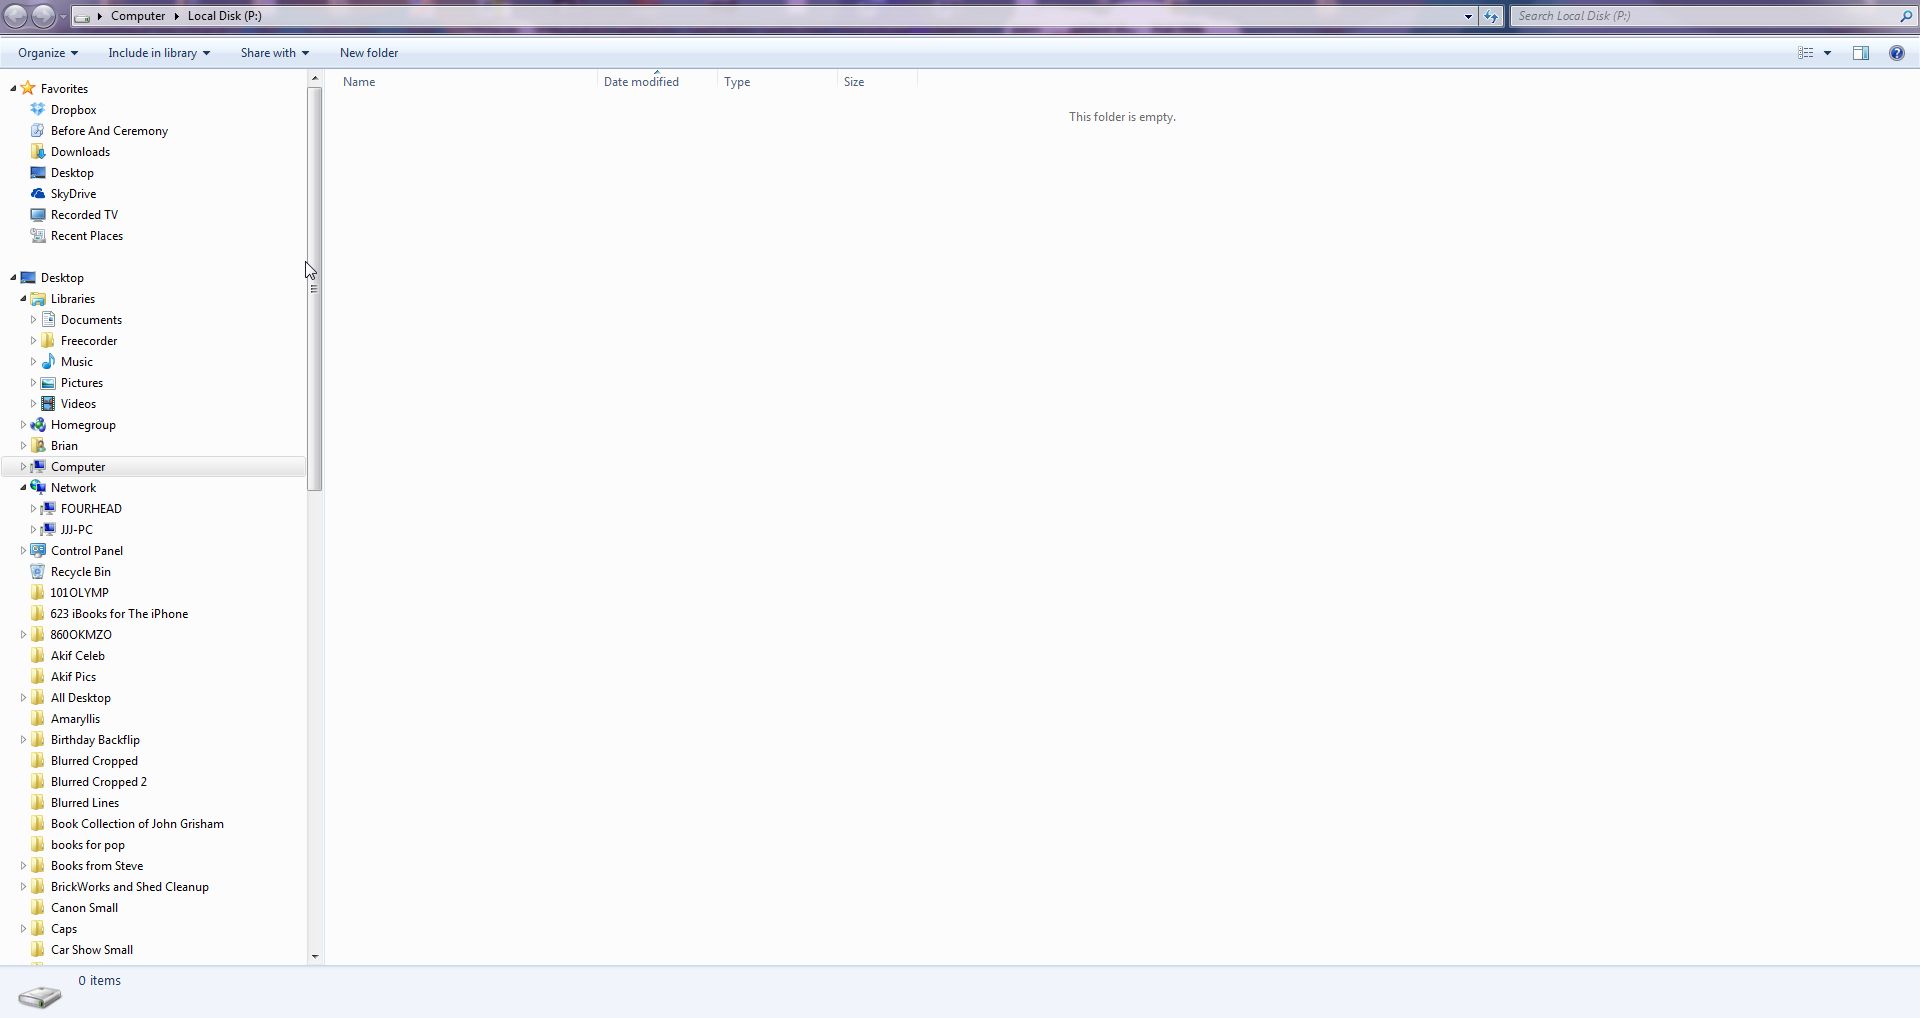
In your Facebook folder that appears in odrive, find the album that you want to delete. Double click the folder to open it, wait for all of the photos to sync (you’ll know a photo is synced because it will have a blue check mark on it.) Once all the photos have check marks, go back to the list of albums, right click the one you want to delete and choose ‘Copy’. Then, ‘Paste’ that album onto your desktop, for instance, or into a folder that is separate from odrive’s folders. Once you do that, the photos are in three places; on the Facebook servers, in your odrive folder AND on your desktop.

Go back to Facebook and delete the album. Once you do that, the photos in that album are, theoretically, only on your desktop. Keep in mind that Facebook keeps copies of everything you post on your profile. Remember that and choose your actions accordingly. Pretty much everything you do on Facebook will be there for a very long time, even if you delete it.

TIP: We repeat: since odrive syncs everything on its own, you will want to copy and paste the album folders to another location on your computer. If you delete a photo from the Facebook site, it will disappear from your odrive folder the next time the syncing process occurs. Keep this in mind.

Odrive can, if you let it, sync  more than your Facebook photo albums. Right now they list Google Drive, Dropbox, OneDrive, Gmail, etc. Here’s a screencap of the apps odrive can sync now:

Photo of odrive syncable apps.
Right now there seem to be 10 storage apps that can be synced with odrive. Which ones you choose to use are up to you.

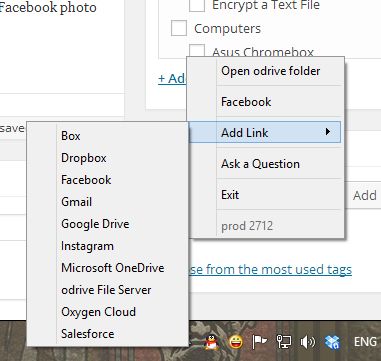
Remember that these cloud storage folders will show up on your computer should you allow odrive to access them. Consider the gigabytes of information that will be sucked from the cloud and shot into your odrive folders. Dropbox alone is up to two gigabytes of data, Gmail can be almost unlimited, OneDrive and Google Drive too. Does it really make sense to have everything in two places? While odrive only syncs folders that you click on, the possibility still exists for massive data duplication in the cloud and on your computer.

On a similar note, how secure is the data on your own computer? If you lose your laptop and you’ve synced even one of these cloud apps, everything that was up in the void is now on your computer, accessible to anyone who has access to your computer. You’ve probably read our previous posts on cloud storage security and how we feel about its security. Microsoft, for one, is well-known for snooping into your data that is stored in its OneDrive as well as doing the same thing in your email. If you give odrive access to these and other online storage folders, not only do you have to worry about how private this stuff is online but also about the consequences of someone else gaining access to your computer. Of the two, as long as your important data is encrypted in the cloud using your own encryption system, we think you’re safer leaving things in the cloud rather than having that data in two separate locations.

We found odrive to be fast, easy to use and useful for one thing, downloading your own Facebook albums. To that extent we recommend it. We would suggest changing your password once your albums are downloaded and stored in a separate folder on your computer. Doing this, odrive becomes a single-use tool. Just make sure you’ve synced all of the photo folders before you change your password. You’re on your own as far as using it to sync your cloud folders. We don’t recommend that but if you can see a reason where this syncing would be helpful, go ahead.

Thanks for reading! Comments and questions are welcome. If you’ve used odrive, please share your experiences with our readers. Use the comment form below or ‘Like’ our Facebook page and comment there. Here is the link: Computers Made Simple on Facebook.


Encrypting Your Stuff – Create a TrueCrypt container for DropBox Part Two

This is the last post on encryption for a while. Today we’re going to show you how to lock up your DropBox storage folder, both online and on your computer.

(In case you don’t know about DropBox, you should really check it out. We’ve written several posts on this free and very cool service so search our site or head over here and sign up for your free 2 gigs of space. Here’s how DropBox works:  Post 1  Post 2   We’ve also written about how Dropbox can ‘save your bacon’. It really can! Here’s  a link to that post: How DropBox can Save Your Bacon)

Photo of Dropbox
DropBox – Make sure you encrypt your stuff.

In spite of what DropBox says about its encryption and the safety of your files in its Cloud, don’t believe it. At the drop of a hat, DropBox will open up your private files to anyone who asks. Anyone with a badge that is. What’s the problem with that? We’re all for law and order but we don’t think anyone should be able to go through your personal files without you knowing about it. Even if no one in authority has an interest in your stuff, the employees of DropBox can and do sift through your files on a regular basis. Microsoft does this too, this kind of thing is not limited to DropBox. Let’s just say that everyone does the same thing.

Once you’re clear on that, here’s how to keep your information private. You made an encrypted container right? We showed you how to do that in our last post. Here’s the link in case you missed it: Encrypting Your Stuff – Create a TrueCrypt container for DropBox. You should make more than one container. Instead of putting everything in one locked volume, consider making several. Let’s say you make one for passwords, one for personal photos, one for videos, one for financial information, etc. That way, you don’t have to upload a massive folder every time you do some work on the things in that folder. We’ll explain that next.

DropBox keeps your stuff online AND on your computer(s). The beauty of DropBox is that you can access your material from any computer anywhere in the world. Sometimes you will access your online folder using a browser. Other times, when you’re on one of your own computers, you will access your stuff in the folder that is on your hard drive. DropBox automatically syncs that folder every time you go online. If you access your folder in a browser, DropBox syncs any changes that you made with the folder that’s on all or any of your computers the next time you go online. You don’t have to worry about any of this, it’s all done automatically.

All you have to do is make sure that your encrypted containers/volumes/folders are in the DropBox folder on your computer. As soon as you put the encrypted volumes there, DropBox syncs everything automatically, any time there are changes. It really is that simple.

Knowing all of this, you’ll probably agree that this is the best way to hide your personal information online and on your own computer(s). If your house is broken into or if you lose your laptop, anyone can access that information if it’s not encrypted. Don’t wait for that to happen, do it now! Don’t keep the TrueCrypt password on your computers, that’s kind of obvious but we thought we’d mention it.

Photo of Encryption poster
Not just your email. Encrypt everything!

TIP: Use several small containers instead of one large one. That makes syncing much faster. As mentioned above, encrypt a few 10 MB containers and label them accordingly. If you do need a larger container for a video, for example, you probably won’t change it too much so syncing time won’t be an issue.

That’s it for now. If you have questions, comments, suggestions, please let us know.

Thanks for reading! Why not Like us on Facebook? Here’s the link: Computers Made Simple on Facebook 


Encrypting Your Stuff – Create a TrueCrypt container for DropBox

In our last post we talked about containers. If you think about a container as a large box that you put things in, you’ll have the right idea. Today, let’s lock that box up tight using TrueCrypt.

We’ve written about TrueCrypt before but it’s certainly worth another post. First, it’s free and, second, it’s the easiest encryption tool we’ve ever used. Download it here: TrueCrypt

Point A. TrueCrypt can be installed on your computer or you can run it from a folder on your desktop (or anywhere else for that matter). It’s self-contained, in other words, able to run without being installed on your computer.

Tip: You can carry a copy of TrueCrypt around on a flash drive with your container. You would use TrueCrypt to open the container, interact with the contents then lock it up again.

Point B. Basically, you will create a folder, name it, encrypt it and use a password to lock it. TrueCrypt is very simple to use but we’ll run through the steps using screen captures, just so you don’t screw things up. In reality, the only thing you have to worry about is forgetting your password. If you do, everything in the encrypted folder is lost for good. That’s how powerful TrueCrypt is.

Here we go:

1.

Photo of TrueCrypt Container   1
The TrueCrypt opening menu. You want to click on ‘Create Volume’.


2. TrueCrypt has a few options to choose from but we want to do the simplest set-up here.

Photo of TrueCrypt Container   2
Choose the first one, ‘Create an encrypted file container.’


3. Again, stick with the simplest volume (container):

Photo of TrueCrypt Container   3
We just want a Standard TrueCrypt volume here, nothing fancy.

4. The next menu is a bit confusing. Take a look:

Photo of TrueCrypt Container   4
This is the most confusing part. Read our description of this menu.

This menu seems to be asking you to choose a file/container, as if you have already created one. You haven’t created one yet but you will now. Don’t type anything in the space, just click the ‘Select File’ button. When the file menu opens, navigate to your Desktop. You can put the new file anywhere but we find it easier if it’s right in front of us, right there on our desktop. Read the warning! Do not choose an existing file. TrueCrypt will delete it and create a new file using the same name. Repeat, do NOT choose an existing file. Read step 5. 

5. After you have navigated to your desktop, your next job is to type a name  in the slot. You could name your new file Mary, Joe, Sparky, whatever you want. You can simply use a name or a number or an obscure combination of letters and numbers, it doesn’t matter. We would suggest, however, using a name and a file type. Why? We want a file type because someone who is looking for a hidden file would probably not look for a photo or video file, right? That’s why we named our file, ‘summertime.avi’. It’s not really an ‘avi’ file, though. It can’t be opened by any program other than TrueCrypt.

Photo of TrueCrypt Container   5
We chose to use ‘avi’ as the file type but you can use .txt or .docx or .dll, whatever.

5. Once you click Save, TrueCrypt knows that the file it creates will be named, in our case, summertime.avi. Next, TrueCrypt will ask you what kind of encryption algorithm you want to use. Go with the defaults here unless you know what you’re doing.

Photo of TrueCrypt Container   6
Go with the flow, use the default settings here.

6. How big should your container be? Only you know that. For our example, we set it to 1 gigabyte in size.

Photo of TrueCrypt Container   7
Don’t make it too small, use a decent size.

7. Next comes the password. Use a good one. Make sure you don’t forget it. Read the tips that TrueCrypt gives here. You can always change the password later on, no worries.

Photo of TrueCrypt Container   8
A good password is vital.

8. If your password is too short, TrueCrypt warns you about it.

Photo of TrueCrypt Container   9
Danger Will Robinson!

9. Now comes the fun part. You’ll never see this anywhere else. You are now creating the encryption key as you move your mouse over this menu box. Take your time and do what the instructions tell you. Once you’re bored of darting back and forth, click Format and TrueCrypt will create the volume/container for you.

Photo of TrueCrypt menu
Move your mouse up and down, around and around, back and forth.

10. This is what you should see next:

Photo of TrueCrypt Container   10
Success! If you don’t see this, you screwed up somewhere but we think you’ll be fine.

11. OK, you’ve created the container. It’s sitting on your desktop waiting to be used. How do you open it?

Photo of TrueCrypt Container   11
There is our ‘summertime.avi’ file on the desktop.

Well, you won’t open that file with anything but TrueCrypt.

12. Using the same technique as before, navigate to the file on your desktop. What you want to do now is to tell TrueCrypt to ‘mount’ the container you just created. (Container, volume, file, all the same thing.)

Photo of TrueCrypt Container   12
When you get to the file, click Mount to open it.

13. TrueCrypt will ask for your password. Again, don’t forget it.

Photo of TrueCrypt Container   13
Don’t ‘Cache passwords and keyfiles in memory’ OK?

14. Click OK and the file is shown in the TrueCrypt window:


Photo of TrueCrypt Container   14
There is ‘summertime’avi’ waiting to be opened. Double click on it now.

15. You’ve managed to create an encrypted container that is locked with a strong password. Now it’s time to fill it with your stuff:

Photo of TrueCrypt Container   15
Drag and drop files into this folder/container/volume up to the limit of room it has in it.

16. When you have finished adding files, make sure you click Dismount All before  you close TrueCrypt. You mount the volume, enter the password, add or look at the files in it, then close the folder then dismount it in TrueCrypt. Don’t forget the last part.


This is a long post, next time we’ll explain the DropBox part of it. Thanks for sticking with us so far!


Encrypting Your Stuff – Zip or Container?

Warning: Lots of discussion in this post but we think it’s worth the time it takes to read it. These are the basics of encryption, things you should know. (But dull, unfortunately!)

Encryption week continues, this time with a discussion of a containers versus zip files and encryption in general. Here are some definitions with explanations:

1. If you use a password to log on to your computer, you can’t say that your computer is encrypted. Yes, it is locked but it’s not necessarily encrypted.

2. You can lock your computer with a password and encrypt the hard drive. That’s not difficult to do, Windows can do this by itself, but you run the risk of losing ALL your data if something screws up. With Windows, that is a distinct possibility.

3. If you encrypt something, you have to use a password. That may seem obvious but this site is for beginners, right? Go back and read number one then read this one again. Passwords don’t automatically mean something is encrypted but everything that is encrypted requires a password.

4. You can have a zip file that is not encrypted. Almost all zip files don’t require a password. If you’re confused about what a zip file is, think of a suitcase. You can pile socks, T-shirts,hats, gloves, etc.,  into that suitcase, packed as tightly as possible. The suitcase goes on the plane/train/car with you. When you get to your destination, you usually unpack that suitcase. The things that were in it can then be put into drawers, on to hangers, and so on. A zip file is a suitcase. It’s smaller than the original file but everything is still there, nothing has been removed. To use the stuff inside a zip file, you have to unpack it.

Photo of Zips and Containers   1
A zip file icon.

5. Whether a zip file is password protected or not, you need a program to unzip it. Windows can do this on its own, as long as the zip file is just that, a zip. (There are other types of ‘compressed archive’ files but, for now, we’ll deal only with zips.)

6. A container is more like your house. Your house has a lock on the door, a container has a password, same thing. Your password protected computer could be termed a container. In our world, containers are much larger than zip files.

Photo of Zips and Containers   2
An encrypted container can be put on a flash drive.

7. An encrypted container is something like a glass house where the windows are actually mirrors or they are smeared with petroleum jelly. You might be able to see inside but you can’t see what’s there. If you have the key to the lock, you can see everything. Without the key, no such luck.

Tip: A container can be a file or a folder but it could also be an encrypted flash drive or hard drive. In this post and in the future posts on encryption, we are discussing files and folders, not flash drives.

8. Using a program such as Notepad, you are able to look into any computer file. If you open a .jpg file, you’d be able to read the file header and know it was a .jpg. You wouldn’t be able to see the picture itself but you would know what type of file it is. If you open an encrypted file or folder in Notepad, everything inside it is illegible, nothing can be interpreted. Once the file or folder is unlocked, however, everything inside it becomes readable.

9. Nuts and bolts now. Use a zip file to send to someone via email. Use an encrypted zip file to protect passwords, personal documents, financial data from anyone who might intercept that file, on a flash drive or external hard drive, for instance. Use an encrypted container to store your files on your computer and online, in the Cloud. If you keep a copy of the container on your computer, you can simply upload it again and again, replacing the online one with the new, updated one.


Now you know a bit more about zip files and encrypted containers. In our next post we’ll show you how to encrypt a container using TrueCrypt. Finally, you may be asking yourself, “Why should I even bother to encrypt my stuff?” Here’s why.

Anything you put into an online storage facility, whether it is DropBox or Microsoft’s SkyDrive, is open to viewing by employees of that facility. If you think that these companies don’t go through your stuff, you’re mistaken. They do sift through your stuff on a regular basis. Your own and other government officials go through your files too but that’s not the point of our articles. We’re here to help you keep your personal data safe. 

Thanks for reading! How about heading over to our Facebook page and clicking Like? Sounds like a good idea to us! Here’s the link:  Computers Made Simple on Facebook

Protect Your Privacy with TrueCrypt – Part 3


In our last post, we created an encrypted volume using Truecrypt. This volume could be thought of as a folder but it’s a bit more than that. If you think of this thing that you created as a separate drive on your computer, you will have a better picture of what it really is. When you add a new hard drive to your computer, you have to mount it before you can use it. Before you can use your newly created folder, you also have to mount it. Using Truecrypt, we’ll show you how to mount the new volume in order to make use of it. 1. The new volume (folder) should be on your desktop. It may or may not have a three digit file-type  designation, depending on how you chose to name it. If you didn’t use a three letter name, such as .avi or .mp3, Windows will not use an icon to give you an idea of what it thinks it is. Here’s what our volume looks like:

Photo of Truecrypt   folder
Windows knows there is something there, it just doesn’t know what.

Just a simple, generic page icon. Windows does not associate a program with this volume/folder. You can’t double-click it to open it, right? Don’t forget that. Open Truecrypt now.   2. When Truecrypt is open, you’ll see this screen:

Photo of Truecrypt   opening menu
You are looking for ‘Select File’ then ‘Mount’.

This is a standard Windows dialogue/menu, nothing different from most other programs. You open the program first, then use it to open a file that it can handle. Click on Select File, find the volume that you created then click Open to go back to the menu shown below.   3. Here is what you should see next :

Photo of Truecrypt  menu
The path to the file is there in the window and a drive letter may or may not be highlighted in blue.

You will see a number of drive letters in this menu, everything from G to Z. Choose a letter that isn’t currently being used by your computer. You’re pretty safe with anything past O or P. We have chosen T for this drive. Click on the word ‘Mount’ on the lower left of the menu.   4. Make sure you have the password that you used to create this volume. Truecrypt will prompt you for the password:

Photo of Truecrypt password menu.
Type in the password that you used to create this volume.

If you forget your password, there is nothing that you can do to retrieve it. Whatever volume you created is lost for good. Don’t lose your password. You’ve been warned.   5. Once you enter the correct password, Truecrypt will mount the volume. In other words, it will allow you to access it. It’s not open yet but it is accessible. This is what you should have on your screen now:

Photo of mounted Truecrypt   drive.
There it is by the letter T. Note the size difference of the folder.

This drive is now accessible in two different ways. You can either double-click it now on the Truecrypt  menu or navigate to it through Windows Explorer. In our case, it is listed as ‘Local Disk T’. Once you open the drive/volume/folder, drag and drop something into it. We chose to keep our encrypted text password document in ours. In this way, our passwords are protected by two walls, one through Notepad ++’s encryption and the other through Truecrypt ‘s. TIP: After you put the files into this volume/folder/drive, make sure that you dismount it before you close down Truecrypt. The process is this: Mount the drive, add or subtract files into it, dismount it. You can’t open the volume without mounting it and you should not close it without dismounting it. This is the only way that Truecrypt can guarantee to keep its contents safe. Two long and fairly convoluted posts, right? Keeping your data safe isn’t simple but we feel that using Truecrypt doesn’t require much tech savvy. If you follow our simple step-by-step instructions, you’ll be fine. What’s next? Moving this folder around inside of Dropbox. One more post on this topic and we’re done. Thanks for reading!