Category Archives: Cut the Cable

Get Netflix on HDTV – Part 2

Connecting Everything Together

Part one of this two-part series is here: Get Netflix on HDTV – Part 1  Once you’ve got all the bits and pieces, here’s how to get everything working as a unit.

1. Most devices connect to your router then to the Internet automatically. Find the settings menu on your HDTV or smart device then look for the word ‘Network’. If you are using a wired connection, Ethernet to be exact, every device will be able to connect automatically. We have yet to see anything that won’t connect on its own. Your router is already set to allow new connections, don’t worry about that.

2. If you’re using a WiFi connection (wireless), you will have to identify the network and enter the key. The key is what protects your WiFi network from intruders, sometimes called neighbors, who might want to steal your signal and use your Internet connection for themselves. Some devices have a remote which you can use as a keypad while others have you use the up/down/left/right keys to ‘type’ in the letters and numbers. If your device uses Bluetooth, we’d advise you to get a basic keyboard for this. Still other devices link up with your mobile device, Samsung for instance, which makes entering data much easier.

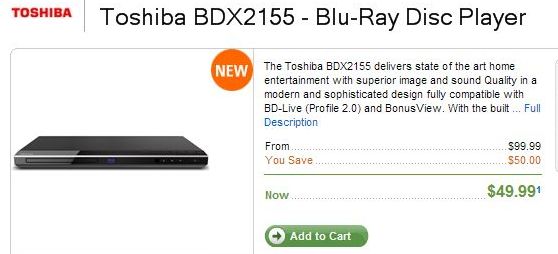
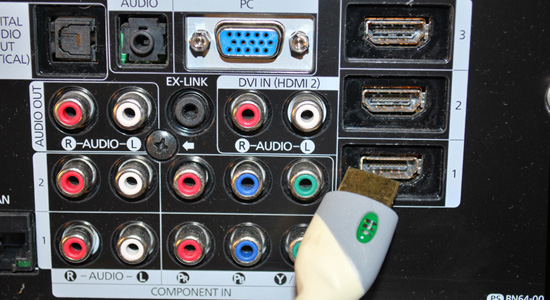
3. If you have connected an Ethernet cable directly to your HDTV, you’re all set. If you have a separate device, you must connect that device to the HDTV via a single HDMI cable. These usually come with the TV or with the device but sometimes you have to buy one separately. They go for less than ten dollars around Toronto so don’t go forking out fifty bucks for one. No matter what Monster Cable tells you, their equipment is no better than anyone else’s.

4. Your HDTV might have different HDMI inputs. Some of ours have four separate ones so grab your owner’s manual and figure out how to choose which input is which and how to switch from one to another. One the TV in our ‘man cave’, we have a BluRay DVD player, our PS3 and our Xbox-360 all connected through separate HDMI inputs. No need to unplug one then plug in another, we just switch between them with our remote. This is what your HDTV might look like from the back:

Photo of HDMI Inputs
This set has three HDMI inputs.


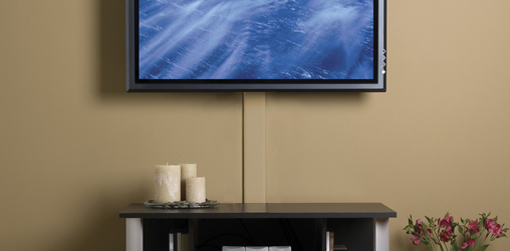
5. If you’re worried about the mess from all of the cables, head to your local big box hardware store and look for cable ‘hiders’. These are usually flat, two-piece plastic strips that stick to your wall with two sided tape or screws. The base goes on the wall then the cables are arranged on it and the top section snaps on, effectively hiding everything behind it. The surface can be painted the same color as the wall. Here’s an example for you:

Photo of Hide Ugly TV Wires
Neat and tidy, isn’t it?


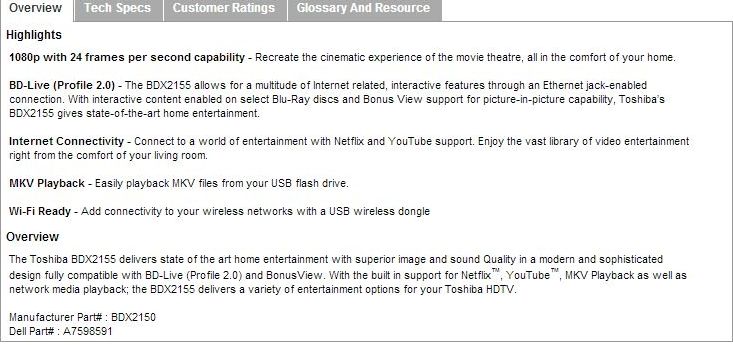
6. Once you can connect to the Internet, you often have to update the software on your device(s) to bring them up to the current version. This might take some time but it’s normal. On other devices, the PS3 for instance, you will have to sign in to the Playstation store and download the ‘app’ that will run Netflix. It’s all free, don’t worry. Your owner’s manual will explain it all. 

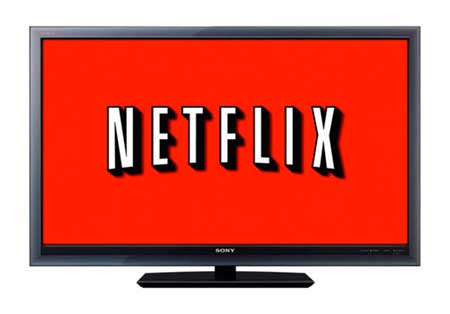
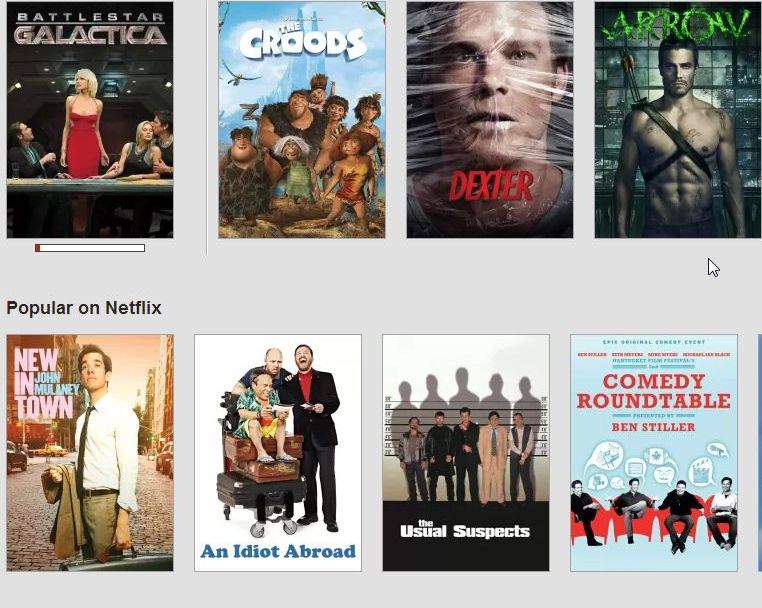
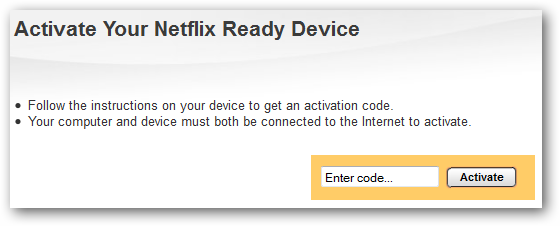
7. Finally, remember that Netflix account that you signed up for on your computer? Go back to it, sign in and see what you have to do to register your device. Everything that you use to stream Netflix, except a computer, will require registration. Bring up the Netflix menu on your HDTV or smart device then write down the code, go back to your computer and enter it. Here’s what you’ll see on your screen:

photo of Enter Netflix Code
Get the code from your device then enter it on your computer.


That’s about it really. You may run into some little problems here and there but you’ve got ample resources to help you. Your owner’s manual is great for troubleshooting. The manufacturer’s of your device probably had a PDF manual that you can download plus Netflix has excellent support pages. If your device can stream Netflix, they have information on it, that’s for sure. Finally, ask us! Ask us in a comment or on our Facebook page if you have a problem.  Here is the link:Computers Made Simple on Facebook.  Thanks for reading!


Get Netflix on HDTV – Part 1

Photo of Netflix logo.
We love Netflix! Cheap, efficient with something for everyone.


Netflix works well on your computer or mobile device but it really shines when you can watch it on a large screen HDTV. Here’s what you need to do exactly that:

1. A fast Internet connection. Minimum speed for HD viewing seems to be 4-5 Mbps. It’s possible to stream Netflix with slightly slower speeds but we guess there would be lots of buffering while you watch.

2. Either a ‘smart’ HDTV or a device that will make your TV smarter. Smart, in this case, refers to the ability to use Internet apps, one of which is Netflix. Some HDTVs are already smart in that they can connect directly to the Internet, either through an Ethernet cable or through WiFi. There are many smart devices that you can use including any modern game console, a host of Blu-Ray DVD players, gadgets such as Google Chromecast and stand-alone boxes such as Apple TV. All of these devices connect to the Internet then stream content through an HDMI cable to your HDTV.

3. A Netflix account. This is obvious, isn’t it? Netflix offers a free trial month but you still have to have an account. Sign up online, enter your credit card information and start watching. Why do you have to sign up with a credit card? Simply to make the transition from your free trial month to your monthly subscription as smooth as possible. You won’t have any problem cancelling your subscription before your trial is over so don’t worry about this part of it.

4. Before you sign up for Netflix, try watching some videos on Youtube. Once you can do that, then it’s obvious that all of your connections are working. Some Youtube videos are in HD, most aren’t. Both Netflix and Youtube, among others, will adjust their streaming to match your connection speed. What does that mean? Basically that the image you see on your HDTV will vary in quality depending on the speed of your Internet. We just switched from DSL to cable and the difference is obvious. We thought the image looked great with DSL but there is no comparison to how it looks with cable Internet. Our cable is nine times faster than our old DSL, by the way.

Devices: In step number two we mentioned that you need a smart HDTV or some type of smart device. Here’s an example of a smart device at a very reasonable price:

Photo of Smart Toshiba Blu-Ray Player
On sale for under $50.00, this Toshiba Blu-Ray player is all you need to stream Netflix.


The price of these devices is low. We picked up a Samsung Blu-Ray player for $35.00 from Walmart a couple of years ago. It works perfectly for Netflix, Youtube as well as the various premium sports networks that we subscribe to. We recently bought an Apple TV unit which allows us to stream downloaded movies from any computer that runs iTunes. The interface on Apple TV is superior to the one on the Samsung but that’s neither here nor there. All you have to care about is the image on your HDTV screen and both will output the same quality picture through the HDMI cable. (HDMI streams both picture and sound so there is no need of any other messy cables in your living or family room.)

Here are the specs you should look for in a smart device:

Photo of Toshiba Smart Device Specs
The numbers won’t mean much to you but read the Overview. Make sure you see Netflix and/or Youtube.


Wired or WiFi?

We don’t want this to get too technical but we should address the wired or WiFi question before you get too far into this. Some TVs and some devices have WiFi capability. WiFi is wireless, of course, and the streaming signals go through the air from your router to the TV/device. That signal is often trying to travel through walls, floors, ceilings, glass, etc. Sometimes it works, sometimes it doesn’t, sometimes it works with less efficiency, you get the idea.

In order for you to use a WiFi TV or device, it must be ‘802.11n’ capable. This is often shortened simply to ‘N’. There are three WiFi protocols that are in popular use these days. Old units run B or G while new, fast devices run N. You want N. Both your router and your streaming device must be N capable. There are workarounds to this but they only make things more complicated. Virtually every streaming device that you buy now uses N but, and this is a big but, your router may not be able to stream out N signals. 

In our opinion, a wired connection is almost always best if it can be arranged. If not, an N protocol streaming setup will work just about as well. If running an Ethernet cable from your router to your HDTV or smart device is impossible, you have to use WiFi, obviously.

TIP: If you are using a game console for streaming, please note that the Sony PS3 is not N capable while the X-Box 360 is. The Wii is not even HD so ignore that one completely. Furthermore, Netflix is free on the PS3 but not on the X-box. Sony does not require a premium membership to use Netflix while Microsoft does. We suggest looking at the PS3 or the new PS4 if you’re looking for a single device that does everything. They will play Blu-Ray DVDs, stream Netflix and Youtube as well as providing you and your family with a seemingly endless array of video game fun. More people buy PS3s to watch Netflix than any other device.

That’s it for now. We’ve given you the basics in this post. Now it’s up to you to set yourself up with the right equipment for the job. With Netflix and the other streaming apps out there, you are in control, not your cable or satellite company. Instead of offering you hundreds of channels full of ads, Netflix and the others simply provide hundreds of choices of movies, ad-free TV shows, videos and sports from all over the world.

Stay tuned for part 2, coming up next. Ask us in a comment or on our Facebook page if you have a problem.  Here is the link:Computers Made Simple on Facebook.  Thanks for reading!

________________________________________________________

Here’s a link that might help us if you are interested in hosting your own blog with Fatcow Hosting. We’ve signed up to become an affiliate and we make a bit of money if you sign up for hosting via this link: FatCow Hosting Thanks!


Watch TV On Your Computer

Wouldn’t it be nice to be able to record your favorite TV shows so you can watch them when you want to? Sure, you can use the DVR that your cable or satellite company provides but that costs money every month. Here’s how you can do it for free, the only cost is the TV tuner card for your computer. Here’s how we do it:

1. Head over to Hauppauge Computer Works Click on the Products at the top and check out their selection of tuners. Some fit inside your desktop, some connect via USB and others sit beside your dekstop or laptop, something like a game console. This is the card that we have in one of our desktop computers:

Photo of Hauppauge 2250
This card has two tuners. We can record one show while watching another. Or record two shows at the same time.


2. If you have a laptop or if you don’t want to open your dekstop, Hauppauge also makes USB tuners. Here is what one of these looks like:

Photo of Hauppauge USB
These work fairly well but ours got very hot. After a year or so it stopped working.

Watch out for these USB tuners. What you gain in ease of use, you lose in reliability. We strongly recommend a tuner card that fits inside a desktop.


3. Every tuner comes with a complete set of software. TV tuner software consists of two things. First, you have a driver, the thing that Windows uses to interact with your card. The second bit of software is the interface, the thing that you use to watch and record television. Hauppauge uses a product called ‘WinTV’ but some tuners will work with other TV software. We’ve found WinTV to work perfectly well and the only reason you might want to use something else is because you aren’t using Windows. MythTV is popular with Linux and, from what we hear, it’s a magnificent, free program.

4. Depending on whether you bought a card that fits in your desktop or a USB that plugs into a free slot, make sure you read the installation manual before you go ahead and install the software. Some USB products ask you to install the software first, then plug in the product. Read the ‘Getting Started’ booklet before you begin.

5. While these tuners work with regular subscription cable TV, we use ours with a very basic OTA (over the air) antenna. The antenna is connected to the tuner with RG9 coaxial wire, the same wire that your cable or satellite company uses. We’re in Toronto so our antenna faces south and brings in about twenty-five crystal clear HDTV channels. We also get a few SD (standard definition) channels, ones that are not available by subscription. One of these, named AntennaTV, broadcasts retro shows from the early days of television. Take a look at their site to see what you’re missing: AntennaTV site

6. When you’re ready to get going, your tuner software will automatically search for all of the channels available from your antenna. It lists them one by one as they are tuned, finally giving you a total number. If you know there are more available, you could try to adjust the direction your antenna is facing. Even a few inches one way or the other can make a difference. Be patient, it’s all worth it.

7. Here is a shot of the tuner interface:

Photo of WinTV Screen
Everything is controlled from this screen.

The GUI has buttons across the bottom that you’ll gradually get used to using. From left to right: settings, OSD (on screen display), file open (to play a pre-recorded video file), snapshot, closed caption. Yes, you can turn down the sound and read the words on the screen. To the right are the normal DVR or VCR controls that you should be very familiar with. The red button on the left is for instant recordings but you can also schedule WinTV to record by itself automatically. Set up the timer, tell it how long you want to record any channel and you’re set. Just remember to leave your computer running. WinTV does not have to be on to record but your computer does.

Finally, remember that the recordings that you make take up a lot of room. A few hours of HDTV can easily gobble up thirty gigabytes of disk space. Because of this, we use a three gigabyte drive on the computer that uses the TV tuner card. On top of that we watch the shows then delete them as soon as we can. If we want to archive the recordings, we will convert them to a format that retains the quality but takes up far less room on our hard drive. MKV is the format we use.

Thanks for reading! We have lots of fun with our OTA/tuner card setup and hope that you will soon do the same. Questions or comments are welcome. You can also ask questions on our Facebook page. Here is the link: Computers Made Simple on Facebook 

_________________________________________

Here’s a link that might help us if you are interested in hosting your own blog with Fatcow Hosting. We’ve signed up to become an affiliate and we make a bit of money if you sign up for hosting via this link: FatCow Hosting Thanks!


Alternatives to Cable TV

We’re all about saving money here on Computers Made Simple. Although we haven’t had any cable or satellite TV for years, we are still able to watch just about anything we want, when we want. Here’s how we do it:

1. OTA (over the air) TV – Every new HDTV comes with what they call an ATSC tuner. All this means to you is that you can hook up a basic antenna to the TV and receive at least a few channels, all for free. We are in Canada, Toronto to be specific, so we have a wide choice of absolutely free OTA television. Your total channel selection may vary but we get at least twenty-five HDTV stations plus some incidental SD (standard definition) ones. The best part of this is that the HDTV channels are much crisper than what we would get if we paid for cable. Why? Because your cable company compresses the HDTV channels that it receives by satellite and OTA antenna before they send them off to you. The definition of the free OTA reception will astound you.

Photo of Basic HDTV Antenna
A basic antenna like this will give you many free Over The Air TV channels in full High Definition.


2. Netflix/Hulu etc. – If you have a reasonably fast Internet connection and a decent usage cap, let’s say something around 200 to 300 gigabytes a month, you can access more streaming movies and TV than you can watch in a lifetime.  We’ve had Netflix for years and love it. It’s cheap, $7.99 a month, and provides complete TV series plus its own home-made content. Indeed, some of the Netflix creations are just as popular as those put out by the larger cable producers, HBO for instance. Hulu isn’t available here in Canada, not without a VPN anyway, but it and other providers offer very popular content too. Most recent DVD players and some HDTVs have the ability to stream all of these providers and more. As well, the Play Station game consoles and Apple TV are capable of supplying the HDTV content to your HDTV.

Photo of Netflix Streaming
For $7.99 a month, Netflix streams thousands of movies and TV shows.


3. Sports Subscriptions – Every major league sport offers a premium subscription package which allows you to watch virtually every game in their respective seasons. From hockey to baseball to soccer and basketball, you can get your fill of game play for around $100.00 per year. We subscribe to the Major League Baseball package and we get all pre-season games plus the full regular season and playoffs. On top of that, we can watch any game at a time that suits us, not only when it’s on live. Many of you spend that much per month to see a few games per month.  The package is a fantastic deal compared to regular cable, at least in our opinion.

Photo of NHL Sports Package
Costs are low for full season entertainment.

4. Network Streaming – Except in some cases, the Olympics being one, all the major networks stream their own shows from their respective sites. Yes, you have to watch ads but you get complete episodes without resorting to illegal torrents or any number of foreign sites that stream these shows as well. In the case of the Olympics, NBC has chosen to lock-out non-cable viewers. In Canada, the CBC streams live and recorded Olympic content to anyone, as long as they are in Canada, that is.

5. Alternative Streaming Sites – Every now and then we find something that we want to watch but can’t find coverage through any of our regular sources. In those cases, we turn to the darker side of the Internet and watch the event on one of the many streaming sites that are out there. Unless you have a good ad blocker as well as an excellent anti-virus app, we wouldn’t recommend this. We also won’t suggest any sites since many have adult ads and pop-ups. The option is there if you want to pursue it but be careful.

6. TV Capture Cards – Your new HDTV is great for OTA viewing but sometimes you might want to have access to a DVR (digital video recorder). For that, we suggest one the many Hauppauge tuner cards for your computer. We have used Hauppauge products for years. Our latest card has two tuners and can record either two shows at the same time or one while you watch something else. Pricing varies but everything you need is in the box. Additionally, if you have am HDTV somewhere else in your home, you can stream content from your computer using an Xbox 360 game console or several other types of hardware.

Photo of Apple TV
This little puck is amazing. Price can be under $100.00 by times and the selection of streaming apps is huge.

The options are out there. You don’t have to pay through the nose for entertainment, no matter what your cable company says. There are alternatives, some free, some very low cost.

Thanks for reading! For updates on all of our posts, like us on Facebook and ask there. Here is the link: Computers Made Simple on Facebook 

___________________________________________

Here’s a link that might help us if you are interested in hosting your own blog with Fatcow Hosting. We’ve signed up to become an affiliate and we make a bit of money if you sign up for hosting via this link: FatCow Hosting Thanks!


Cut the Cable! – Money saving tips for everyone

We encountered a scenario yesterday that we didn’t think was unique, a situation that many empty-nesters find themselves in all over Canada and the U.S. We spoke to someone who is slowly retiring, he’s down to a day a week now and works solely to keep his additional health benefits. In Canada, just so you know, basic healthcare is free but does not include private or semi-private rooms, dental care or prescriptions. In this case prescriptions aren’t a concern since they’re free for seniors anyway. Faced with a fixed income, many people are looking for ways to lower their monthly bills. Cutting the cable is where we can offer some help.

Current Costs: 

We’ll work on a figure of $150.00 a month for a cable TV package that includes Internet, TV and cell phone. On top of that, there is a charge for a landline and long distance calls from another company. That amounts to about $60.00 a month with the ability to call anywhere in the U.S. or Canada at no extra charge. Total then is approximately $210 a month.

Needs: 

Bob, not his real name, doesn’t use his home phone (landline) very much at all. The possibility exists to dispose of that charge completely, leaving the long distance charges to be transferred to his cell phone plan.

As far as entertainment goes, Bob really only watches sports on his TV, despite having the normal 500 channels available to him. His sport is basketball and he probably watches thirty games a month during the NBA season.

The Internet is almost not part of the equation, at this point anyway, since Bob’s needs for bandwidth are very small. Email, sharing photos and Skype are about all he does on his iPad. Our plans will certainly change this usage but it will be worth it.

Options: 

As we see it, there are a few ways we could go here but we’ll stick to one for now. The toughest item might just be the TV package but we’re fairly sure that Bob could get by using the Internet for news and entertainment in lieu of the hefty monthly charge from the cable company.
Solutions: 

An Internet/home phone package that includes unlimited Internet usage plus unlimited long distance in North America, complete with premium features can be had for about $85.00 a month from a small but very reputable Canadian company. There would be some extra costs in setting things up, items such as a modem, shipping and an activation fee. Let’s put a figure of $200.00 on this. That figure is on the very high side, by the way, but we don’t want to low-ball anyone on this. (We should point out that a 300 gigabyte a month plan would be about $12.00 less every month but, for now, we’ll use the figure for unlimited Internet usage.)

Teksavvy phone package
$23 a month for a full-featured home phone package.


Teksavvy Internet Package
Unlimited High Speed Internet for $45.00 a month.

As far as entertainment goes, there are Netflix and the various sports packages available, all able to be streamed to HDTVs or mobile devices. Netflix is $7.99 a month while NBA League Pass is only $80.00 for the full season. All the major sports have packages such as this. Not only can you see your home team in action but you can follow any team around the league. Divided by twelve, even the most expensive package is only $10.00 a month. On top of that, we’d suggest a VPN account in order to access the American version of Netflix as well as to defeat the blackouts that prevail in professional sports. An account with the VPN that we use is only $4.99 a month.

Lastly, Bob uses his cell phone a fair bit. He travels frequently to the States however so we’re looking at a plan that would allow him unlimited roaming in the U.S. We’ve found one that includes everything for $55.00 a month. Everything in this case is unlimited data (to a 5 gigabyte limit before speed limitations set in), unlimited text and talk across Canada and the U.S. Add a new phone to that and you’re looking at $80.00 a month for the first year, $55.00 a month thereafter.


Photo of Netflix
Netflix, NBA League Pass, they’re all out there for not too much money.


Totalling It Up: 

Let’s add it all up: (Costs are for the first year, everything would be lower after that since we’ve built the extras into the monthly fee)

Internet and home phone: $85.00/month

Entertainment: $33.00/month including two sports full season packages.

Apple TV: Required to stream the Internet entertainment to Bob’s HDTV, $10.00/month for the first year, free after that.

Cell phone: $80/month for the first year, $55/month after that.

Total: $208.00 for the first year, $163 afterwards. Take out one of the sports packages and the price drops a bit to around $150.00 per month for a saving of $60.00 a month from what Bob is currently spending. The plus side is that he would be getting substantially more for less, except for the cable TV channel assortment.

Once Bob pays for the hardware and miscellaneous expenses, the monthly price would be substantially less than what he’s paying now. On top of that, dropping the home phone would lower the monthly tag even more. Whether or not you see yourself in this picture, we hope we’ve shown you that there are options open to you. You don’t have to be tied to your cable or phone company. Cutting the cable can put some money back in your wallet . Depending on where you live, there are probably many more options out there than you realize.

Thanks for reading! As always, if you need help, ask us. Use the comment section below or head over and check out our Facebook page. Here is the link: Computers Made Simple on Facebook  Keep up to date on our posts and occasional tips and tricks.


_____________________________________

Here’s a link that might help us if you are interested in hosting your own blog with Fatcow Hosting. We’ve signed up to become an affiliate and we make a bit of money if you sign up for hosting via this link: FatCow Hosting Thanks!