Category Archives: Audacity

Editing an MP3

Today, we’re going to edit an MP3. We’ll take a long MP3 and edit out one part of it. The original sound comes from a Youtube video. That video is about 14 minutes long but we only need to save a small portion. Here’s how we did it.

1. Here’s a link to the video. It’s quite funny, at least one part of it:

Wits: Paul F. Tompkins and Aimee Mann


2. Using Offliberty, we saved the sound portion of the video as an MP3. Here is the link that tells you how to do that:

Use Offliberty to Download Music for Free 


3. Once the MP3 was downloaded, we opened Audacity, the free and fantastic sound recording/editing program. We have mentioned Audacity many times. Here’s a link to one of our posts about it: Recording LPs to Digital  The program is available here:   Audacity


4. Once Audacity was up and running, we then opened the MP3 file that we had just saved from Offliberty.

Photo of Clip 1
Here is the MP3 open in Audacity.


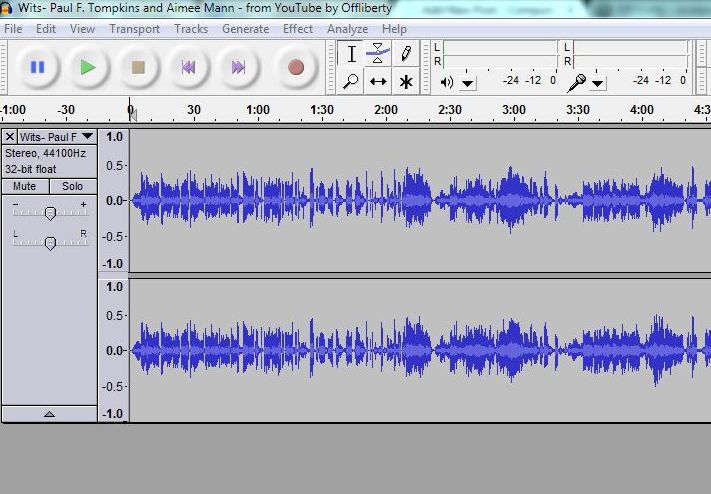
The buttons above the blue squiggly lines control the playback and recording of the open file. This particular file is 14 minutes long, more or less. We know that the part we want to clip out starts at the 8 minute mark. We grabbed the line that you see on the 0 in the photo above and dragged it over to the 8 minute mark.

5.

Photo of Clip 2
Here is the cursor sitting at the 8 minute mark.

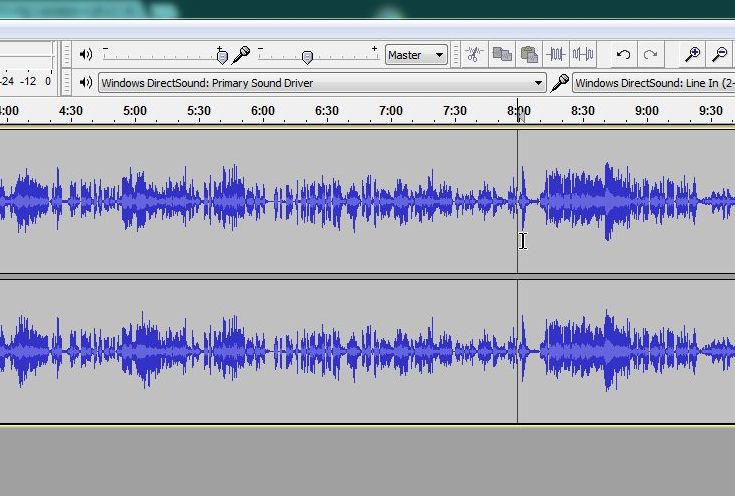
Once the cursor was sitting at the 8 minute point, we played the track and noticed when the part that we wanted was finished.  At this point, all we were interested in was cutting out the bulk of the sound that we didn’t need. No sense in fine tuning just yet. Why? Because this is a long clip. In order for Audacity to show the whole thing, the blue lines are very compressed. Once we cut out the part we want, with some extra bits at the front and back, you’ll see what we mean.

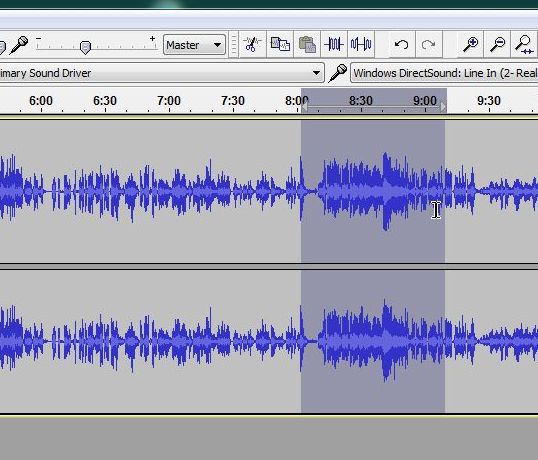
6. Once you have the parameters of the clip you need, in other words the start and finish points, hover your mouse on the start line until you see the icon of a hand with a pointing finger, then drag the hand across the screen until you hit the end point. Here is the icon you want to see:

Photo of the hand icon.
The hand icon.


Here is the section that we want after we highlighted it::

Photo of Edited Section Highlighted
The highlighted section is that part that we want to cut and save.


7. After you highlight the section, find the word Edit on the top menu of Audacity and click it. You will want to Cut the section out of the full 14 minute sound clip. Here’s what you want:

Photo of Audacity menu
Cut the section out. This puts it into your clipboard in Windows and holds it there.


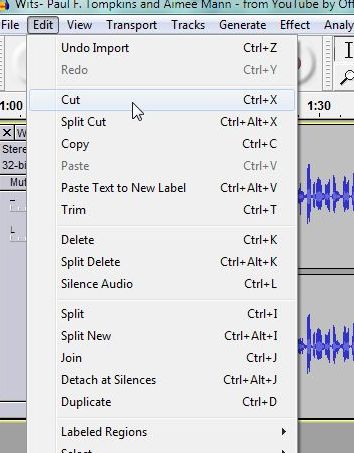
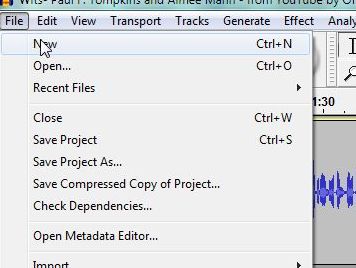
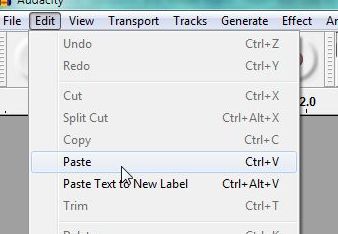
8. Once you click on the word Cut, Audacity cuts the selected section out of the full sound bite and holds it in memory until you paste it into a new Audacity file. Go up to the top and choose File, then New. A fresh new Audacity window will open up. Go up to the top again, click on Edit and choose Paste. Here are the two menus:

Photo of Clip 6
File then choose New.


Photo of Clip 7
Edit then Paste to put the section that you cut out into the new window.


9. Now for the fine tuning. We still want a little bit of room before the sound we like, then a little bit after. Here’s how the section looks in Audacity:

Photo of sound bit in Audacity
See how the blue lines are spread out more?


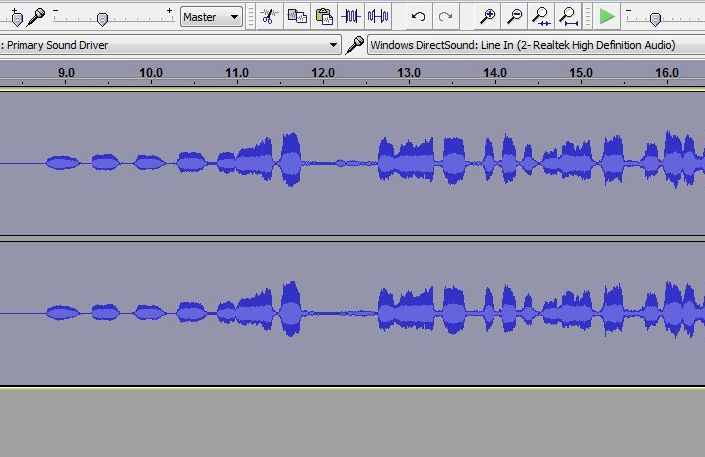
Since this section is only about a minute long, Audacity can spread it out farther across your screen, making it look far less compressed. The three or four bits at the start are actual words that Tompkins is singing.

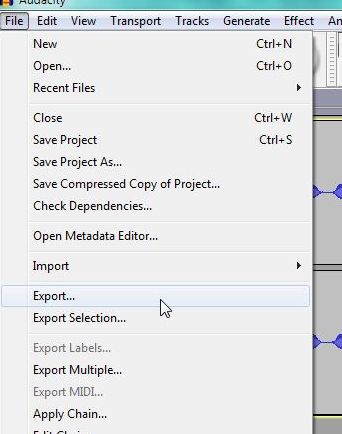
10. Using the same technique are we did before, we cut out any extraneous bits that we don’t want at the beginning and end of the clip. Next, we will export that section as another MP3, a much smaller file than the original. Go up to File then Export. Like this:

Photo of Audacity Menu
We want to Export the section as an MP3.


Photo of Audacity MP3 save.
Save the file under another name, or add ‘edited’ to the end.


Photo of Clip 13
Edit the Metadata


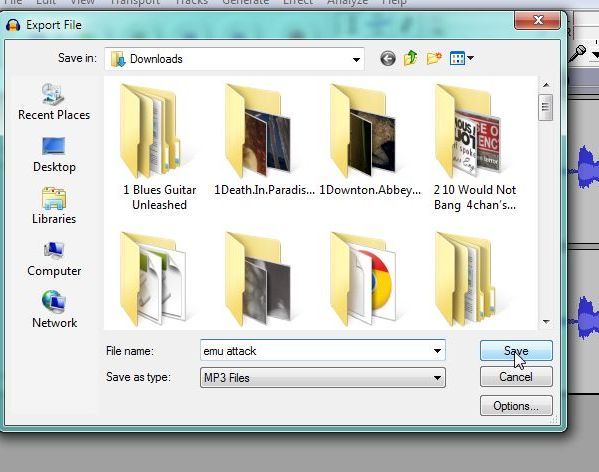
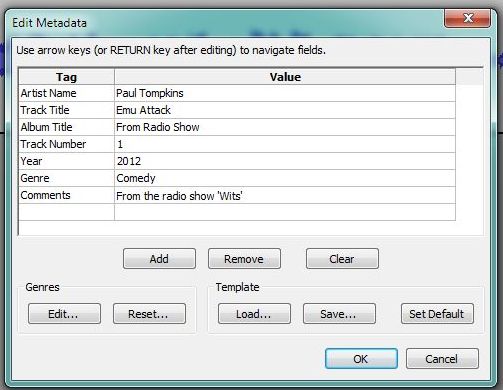
The final menu lets you put in your own Metadata, the information that you see on the screen of your player or stereo system when you play the particular file. In this case, we made up our own description for the clip. Click OK and you’re done.


That’s it! You can use this technique to edit out bits of family movies, podcasts, basically any and all kinds of sound bits and pieces. Once you do one editing job, you’ll find the next one much smoother. Let us know if you have problems. OK?

Thanks for reading!

Recording LPs to Digital


LPs or long playing records have been around for decades, probably over 60 years. Records themselves date back to the ’20s I guess, maybe even prior to that. The really old ones were 78s and very low fidelity. 78 means that the records spun around at 78 revolutions per minute. The later version, the LPS, spin at 33 1/3 RPM and can be considered high fidelity.  Even though most artists release their material on CDs now, we still say that they are releasing a record as opposed to CD. Some very cool artists are releasing their material on LPs as well as on CDs. A tour through any upscale stereo shop will include at least a few turntables on display. Last week I saw a magnificent $13,000 turntable at Bay Bloor Audio here in Toronto.

Playing an LP is a bit cumbersome, seeing as how you have to have the turntable, an amp and speakers. Since you can’t take your LP music out for a walk or a drive, most of us are recording our LPs to our computers, converting them from analog to digital using Audacity. Here’s how I do it.

Download Audacity and install it. Audacity is free, part of the  open-source community. Audacity is available from Source Forge here: http://audacity.sourceforge.net/ . Once you have it installed, download the MP3 encoder here: http://lame.sourceforge.net/ . The lame encoder is necessary to encode your Audacity files into MP3s. If you don’t plan on using MP3s , then it’s not necessary.

Next you need a turntable. There are all kinds of them out there, some use USB ports to get the sound from the TT(turntable) to the computer but I prefer a direct-drive Panasonic or similar unit. The USB ones are fine for a few LPs as long as you don’t really care about quality too much. Now there are some very good USB TTs but you’d have to spend a bunch of cash to get one. My Panasonic came from the local Goodwill store and cost me ten bucks. I had to change the plug end of the cord from a European prong thingy to a North American two prong plug but that was pretty easy. There are two types of older TTs; direct drive and belt drive. Direct drive means that the motor is directly connected to the platter (the flat thing that the records sit on) while belt drive units have a system of pulleys and a belt that goes all the way around the platter, using friction alone to turn it. Obviously, the belts wear out and stretch over the years. You get speed variations, known as wow and flutter, sometimes. Direct drive offers the best speed control. If you can get a DD TT, you’re all set.

My set-up routes the sound from the TT to a receiver and then to my computer. I don’t have a standalone preamp to boost the TT sound, making the receiver a necessity. The receiver has a preamp in it but I think a standalone unit would be simpler. All of the USB TTs have a preamp built into them. With my set-up, I can monitor the sound through my speakers attached to the receiver or I can monitor it through the computer which uses a different set of speakers. Regardless of how you do it, you have to be able to hear what you’re recording. There are too many variations to explain each set-up here. If you need help, make a comment with a question below or ask me on Twitter.

Fire up Audacity and set your recording levels while you’re playing an LP. Each LP is different. An AC/DC LP has different sound levels than a Glenn Gould LP, for instance. Try to get the loudest parts so they don’t peak. Just about peaking is fine but don’t let any part of your LP slip into the upper red zone. Here is a screenshot:

Showing the red recording levels.
The red to the right of the L and R should be near the far right but not right to the end.

Once you have all of this set, start recording on Audacity then start your LP. There will be some blank space at the start but you can edit that out later on. Now, do you leave the spaces between each song in or do you record each song separately? Complete album sides are nice but so are singles, you can work that out on your own. If you are going to work on the sound that you have just recorded, save the file as an Audacity file as opposed to exporting it to another format.

If your LP is a bit dirty or scratched, you will most likely have to remove some noise. If you don’t want to adjust your MP3 player all the time, you will want to normalize or make all of your recordings the same level. Audacity is free but that doesn’t mean that it is simple. You can do simple things with it or some very complicated things with it. If you want a perfect recording, you can adjust and tweak to your heart’s content. This guide isn’t a complete how-to by any means. You’ll have to figure out what parts of Audacity that you want to use and get it working on your own set-up. There is a very handy guide here: http://audacity.sourceforge.net/help/documentation

Good luck! There are simple units that will do all of this automatically but, you know what they say, you get what you pay for. Give me a good, used turntable and Audacity and I bet my LPs will sound better than yours. Take the time to do it right.

Thanks for reading!