
Here’s how to post and adjust your photos on Instagram. All of the information here is directly from the Instagram app, none of what you see is from a third-party source. We advise you to stay away from any third-party apps, we call them ‘helper’ apps. Instagram is secure and very well known. Any helper apps cannot be guaranteed as safe so stay away from them. Here we go:
1. Posting a photo on Instagram can be as easy as opening up the app, pressing the camera icon, snapping a photo then clicking the blue arrow. You don’t even have to put any words on your photo. Simple, yes. Fun, no. Let’s use Instagram’s own tools to make your photo pop out from the rest.
2. Start on the main Instagram screen:
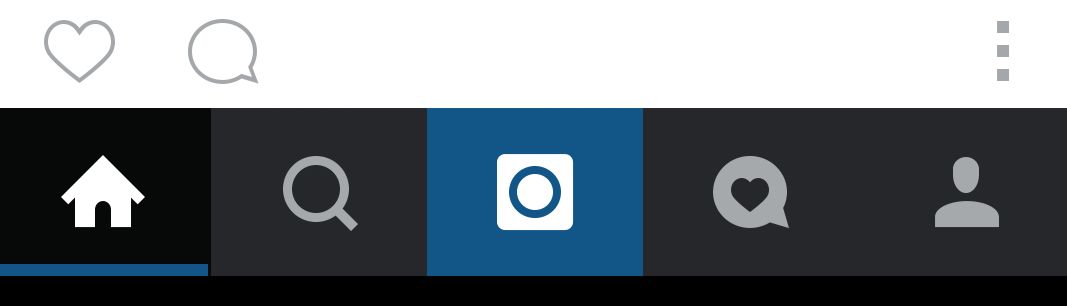
3. You’ll figure the icons out sooner or later but, for now, we’re looking at the middle one, the one that loosely resembles a camera. Press it. This is what comes next:

4. Instagram wants to know where your photo will originate. Is it from your photo gallery? Is it something you’re going to take right now or is it a video? If you have a selection of photos to choose from, press Gallery. If you want to snap a photo now, press Photo.
5. Once your photo is on the screen, the first thing you might want to do is ‘crop’ it. There’s a bit of a snag here so read this carefully. If you choose a photo from your gallery, you can easily crop it (make it smaller, essentially zoom in on it) simply by putting two fingers on the screen and separating them. The photo will expand beyond the frame. You can then move the center of interest around until you get what you want. You can’t do this with a photo that you shoot within Instagram. For that, you have to crop the photo before you take it. Do the same thing, put two fingers in the middle of the screen then pull them apart to zoom in on whatever it is you’re shooting. Remember that the image you get that way won’t be as crystal clear as the full original. That’s because you’re making the pixels bigger, you’re not really zooming in as you would with a lens with optical zoom.
6. Once the image size is set, move on to the filters. Press the blue arrow at the top, it points to the right, to proceed to the filter screen.
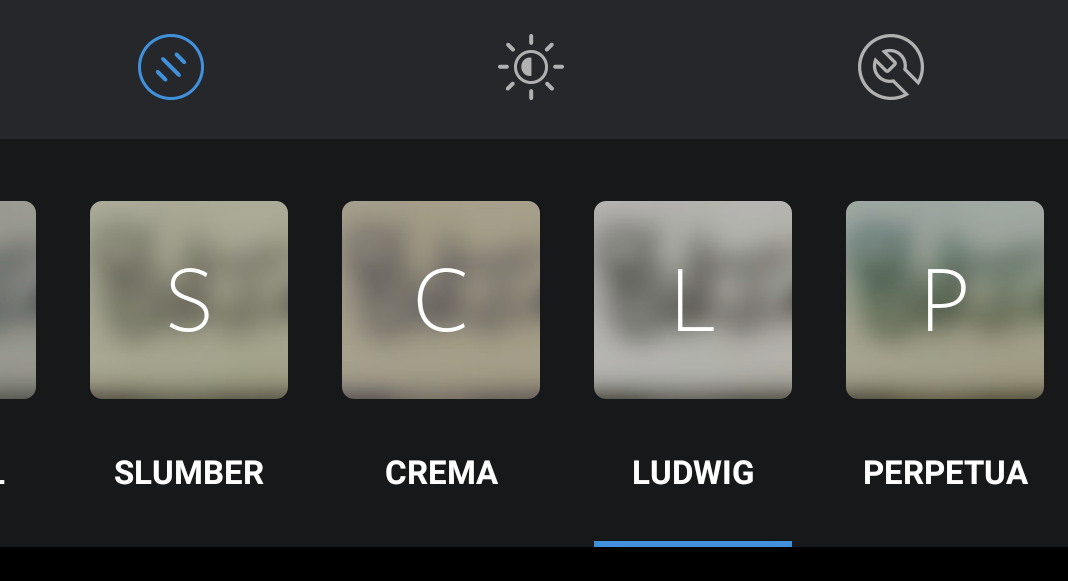
7. Pressing each main filter changes your image except the first one. That one is the #nofilter setting that we talked about last time. The rest, named Slumber, Crema, Ludwig etc., adjust the tones, color and brightness of your photo. Scroll through them by pressing the right one again and again until you find the one you want.
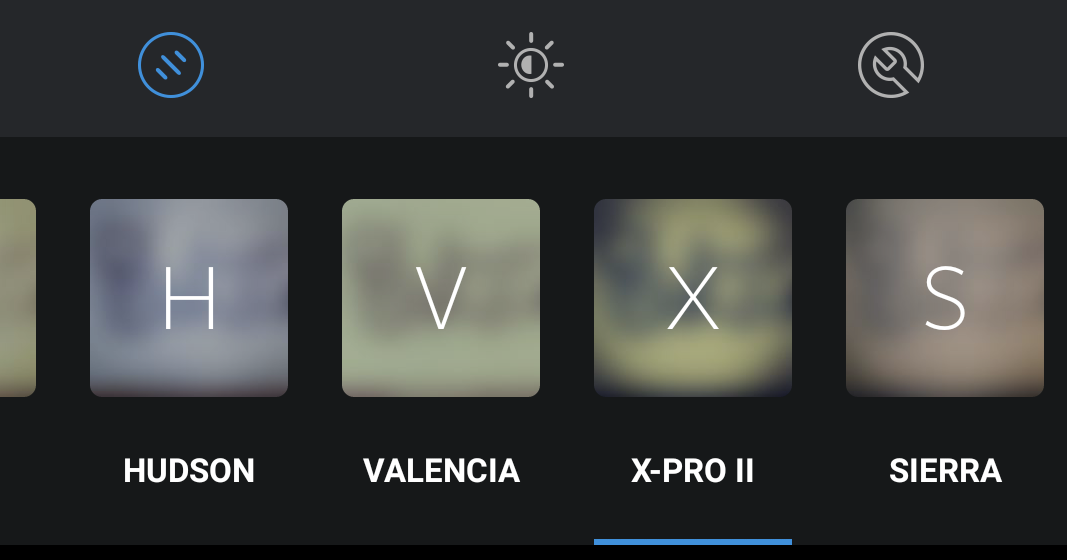
8. Once you’ve locked in on one filter, there are two more adjustments that you can make. Look for the sun icon, that adjusts the brightness of your photo, then the wrench icon. That one adjusts your chosen filter settings. It’s up to you to decide if you want to adjust things or leave them as they are. Some Instagram users spend a lot of time with this and their images reveal the care they take.
9. All done? Press the blue arrow on the top right. This will bring you to the final screen, the one that will allow you to describe your photo, explain it, make a joke, whatever suits your fancy. Use hashtags to increase your audience. If your photo has a cat in it, use the hashtag #cats so that other Instagram users will find it, if they search for #cats, that is.
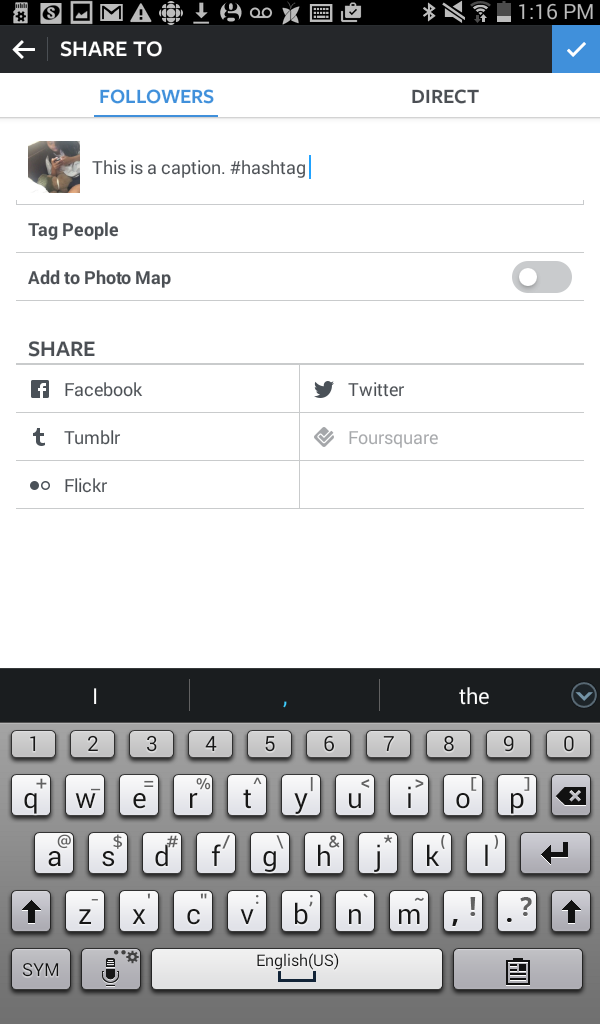
Note: You can share a photo with all of your followers or just some of them. Use the Direct menu to send your pic to any of your followers using the @ symbol then typing their name.
That’s it. Our next post will be about posting videos, finding people and some of the finer details of Instagram. Stay tuned!
Comments and questions are welcome but Likes on our Facebook page get immediate attention. Here’s the link: Computers Made Simple on Facebook . Thanks for reading!