
Last time, we learned how to get our videos ready for iTunes. Remember that iTunes can’t play every kind of video. We used Handbrake to transcode (change) the videos from one file type to the one that iTunes can play. Today, we’ll do the actual streaming.
Make sure you’ve installed iTunes, that your Apple TV is on and connected to your HDTV via the HDMI cable and you have your video(s) in a folder somewhere that you can find on your PC. Here we go:
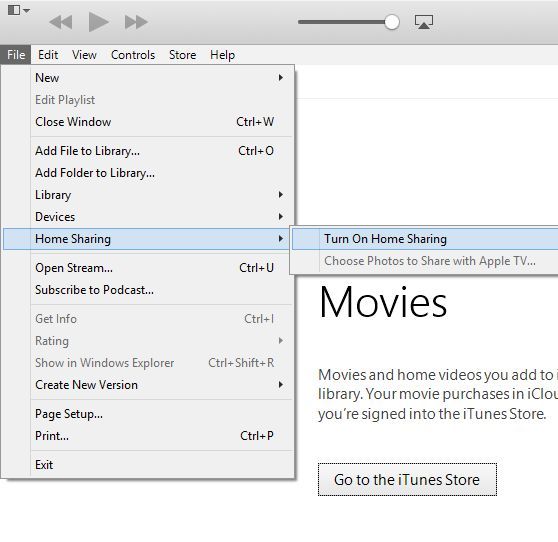
1. Open iTunes. Look for the word File on the top left. Click it then look for Home Sharing. Click it and choose Turn On Home Sharing.
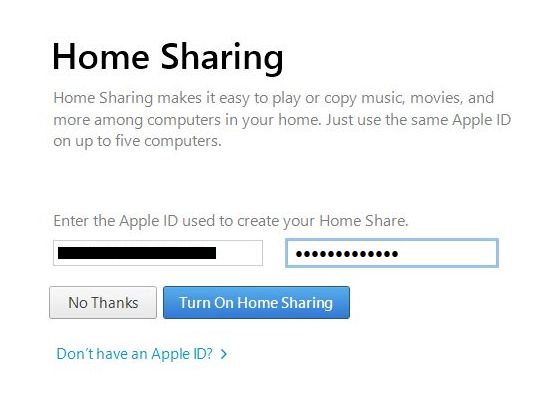
2. On the next screen that comes up, fill in your iTunes account details, just email and password. If you don’t have an iTunes account, you can register from this screen. Use a very strong password. iTunes accounts are often hacked.
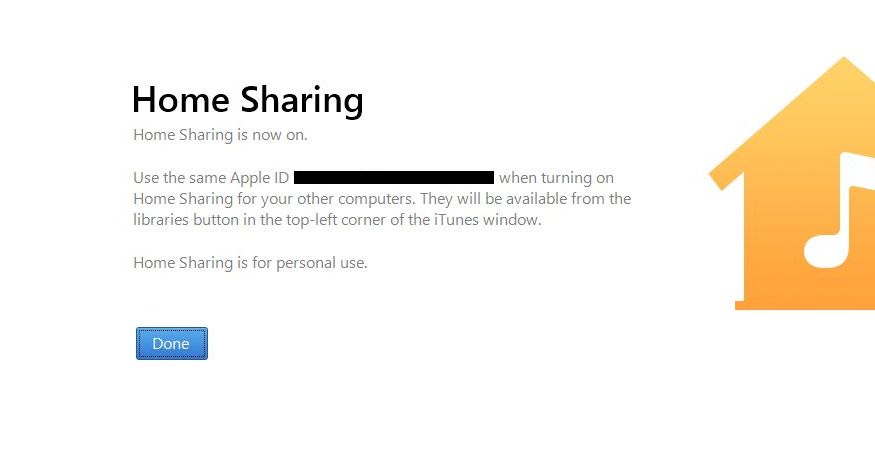
3. Once you’ve filled in your account details, click on Done.
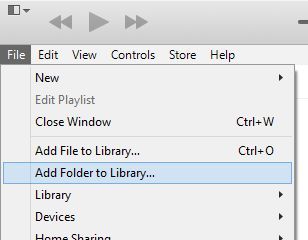
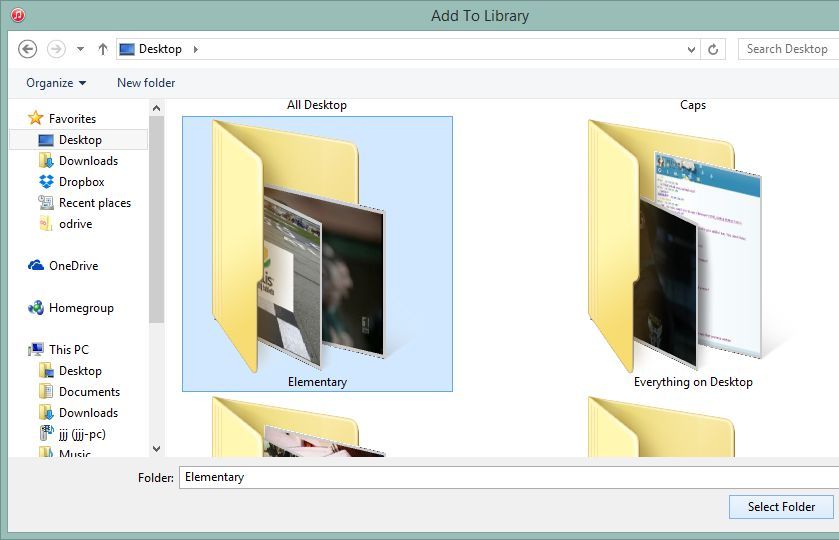
4. Next, we have to tell iTunes what we want to share with other people on our network. That’s why we suggested putting all of the videos that you want to share in one folder. If the files are all over your computer, this process doesn’t work as well. Make a new folder on your desktop, put the videos that you want to share into that folder and then tell iTunes that this is the folder you want to share. Click File then Add Folder to Library.
5. Navigate to the folder, select it and choose Select Folder.
6. You don’t have to do anything now except wait. iTunes will scan the folder and process the various files that are in it. Just watch and wait, don’t do anything until iTunes is finished.

6. You’re finished with the computer part now. Head over to your Apple TV, turn it on and get its menu up on your screen. No screenshots here so follow this carefully. Scroll over to the right and click on Settings. Scroll down to Computers and go through the Turn on Home Sharing routine using the same iTunes account and password that you used on your computer.
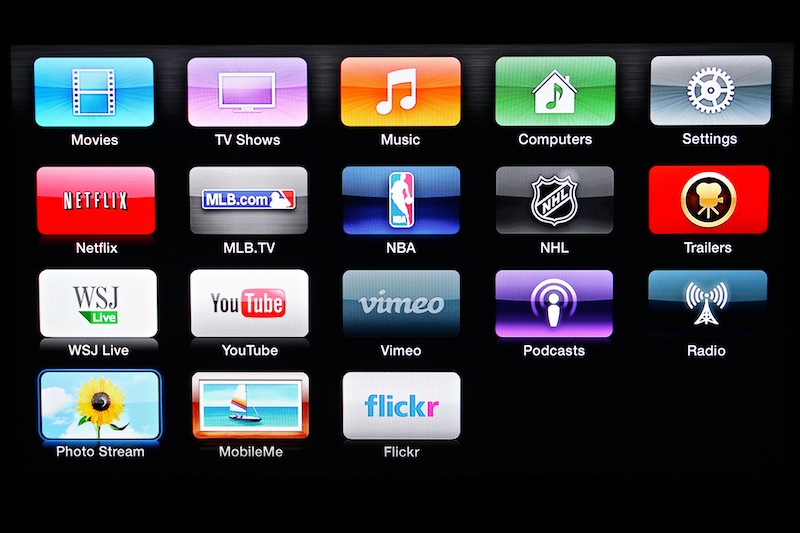
7. Back out of that screen and scroll over to the Computers icon, just to the left of Settings. If everything is working correctly, once that icon is highlighted, the various things that are in your shared folder will show up on the very top of the screen.
8. Click on Computers and then down to Home Videos. All of the videos that you have run through Handbrake should be there. Click on one and it should play. You’re done!
Troubleshooting: Sometimes Apple TV and iTunes can be finicky. When something goes wrong and you can’t see the videos that you’ve shared, turn off home sharing on your PC and then turn it on again. If that doesn’t work, turn off home sharing on your Apple TV and turn it on again. One or the other always works for us.
Tip: iTunes does not automatically share videos in your shared folder. Every time you add a new video, you have to tell iTunes that you want to share the folder…again. That’s how it works for us anyway. Your mileage may vary. If you cant find your recently added videos, tell iTunes that you want to share that folder again.
Wow, you’re done well! Pat yourself on the back and watch a video on your fancy HDTV. Enjoy!
If you have problems, feel free to ask us for help. Comments and questions are welcome but Likes on our Facebook page get immediate attention. Here’s the link: Computers Made Simple on Facebook .